This widget could not be displayed.
This widget could not be displayed.
Turn on suggestions
Auto-suggest helps you quickly narrow down your search results by suggesting possible matches as you type.
Showing results for
- English
- Other Products
- FAQ
- [Troubleshooting][xDSL] Why is my wired connection...
Options
- Subscribe to RSS Feed
- Mark as New
- Mark as Read
- Bookmark
- Subscribe
- Printer Friendly Page
- Report Inappropriate Content
Community Manager
Options
- Article History
- Subscribe to RSS Feed
- Mark as New
- Mark as Read
- Bookmark
- Subscribe
- Printer Friendly Page
- Report Inappropriate Content
on 01-29-2024 05:14 PM
[Troubleshooting][xDSL] Why is my wired connection speed slow and cannot reach the Internet speed provided by my ISP?
If you are having slowly wired speed issue, please confirm with your ISP first regarding the service plan you purchased, and then confirm the official website specifications to check the xDSL data rate support for your xDSL modem router. Please refer to the following steps to confirm the specifications of xDSL modem router on ASUS official website.
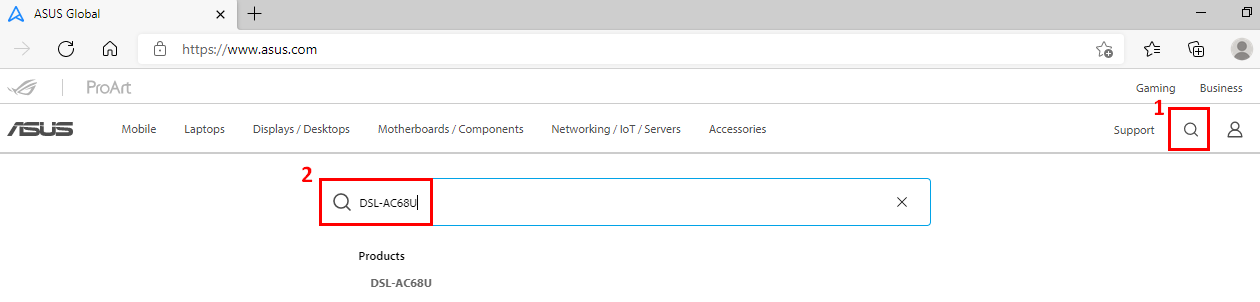
(1) You can find the information in the ASUS Global site https://www.asus.com, click search
(2) Enter the model name of your ASUS xDSL modem router then press Enter Key to search. Here we take DSL-AC68U as an example.
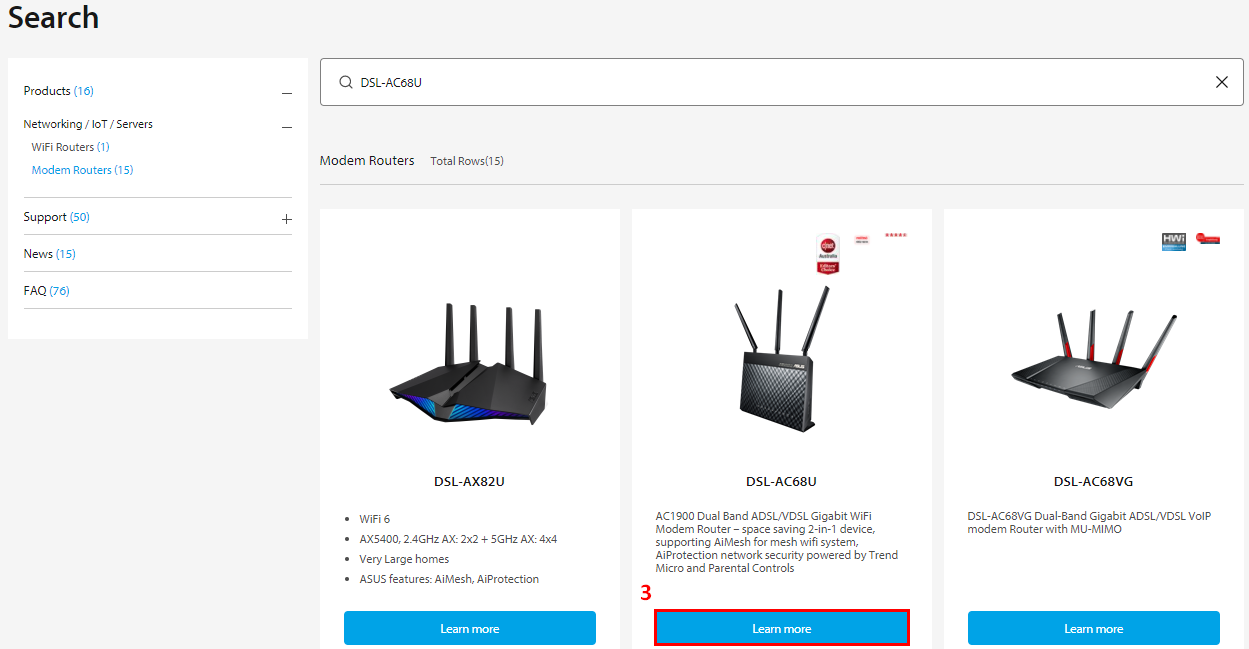
(3) Click [more] to DSL-AC68U product page.
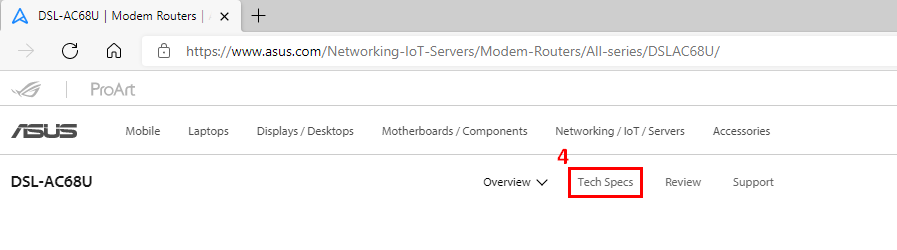
(4) Go to Tech Specs to see detail specification of DSL-AC68U.
(5) The specifications for the supported xDSL and data rate for xDSL type can be found here. The Tech Specs shows the max data rate of upstream and downstream.
Ex: DSL-AC68U

Ex: DSL-AC51

Besides confirming the specifications, please also confirm whether the specifications of the wire you are using meets the requirements.
[Specification] Why can't my router wired speed test exceed 200mbps
If the spec meet the ISP provided speed, please proceed with the below trouble shooting steps.
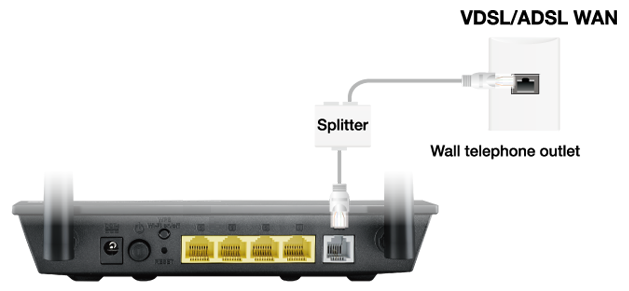
Step1. Make sure that your DSL modem router is connected correctly.
Kindly refer to the following picture to check if the power and phone cords on the DSL router to ensure they are connected correctly.
If one of the wires is not connected, please reconnect the wires.
Note: If you do not have splitter at hand, you may contact your ISP to see if they can provide. By installing the splitter, it is possible to improve the connection quality.
Step2. Update the firmware and have a reset for your xDSL modem router.
You can either perform a live update or update manually through ASUSWRT (Web GUI). Before you login to Web GUI, please have your computer cable connected to your xDSL modem router, then launch the web GUI, go to Advanced settings > Administration > Firmware Upgrade tab. Click Check to verify if the latest firmware is available.
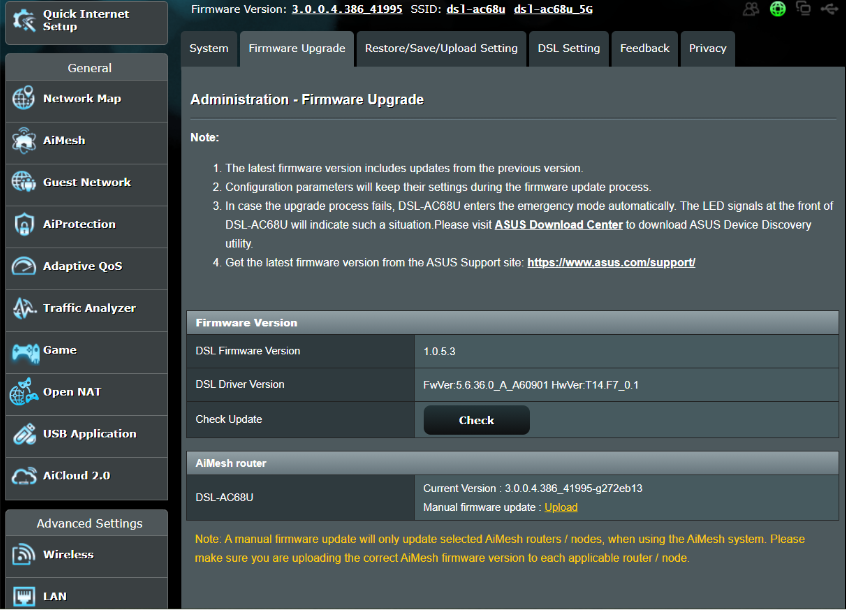
[Note] For the detail process of how to upgrade firmware, please refer to How to update the firmware of your router to the latest version ? (WebGUI)
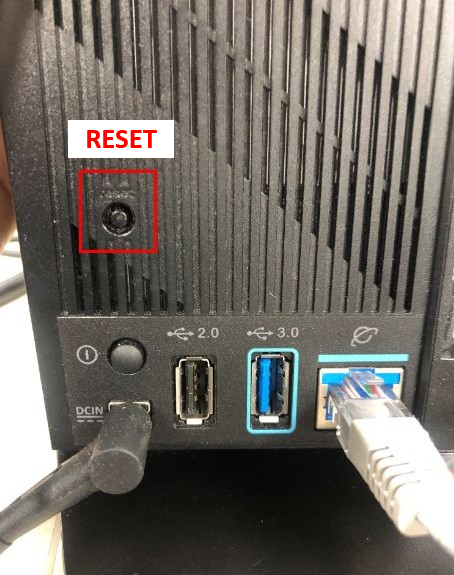
After firmware upgrade, please restore xDSL modem router to default settings
Press the RESET button around 5~10 seconds until the Power LED indicator of router starts flashing, then you could stop pressing.
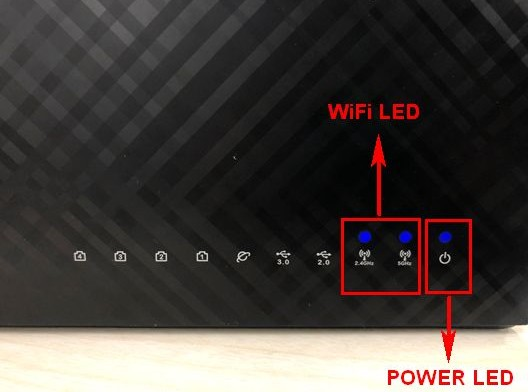
In the meantime, all the LED indicators of the router should be off. It is a normal phenomenon because the router is rebooting itself.
Wait until the Power LED indicator and Wi-Fi LED indicators are on again, you could try to enter the GUI of the router again.
Notice: After resetting the router, all the settings will be cleared and will need to be setup again by the Quick Internet Setup (QIS).
Please make sure the DSL LED indicator status began solid then start the QIS. If the DSL LED does not light up, please contact ISP to make sure the line is working normally or try to change the RJ11 cable.
When the DSL LED light up, please wire connect your computer to xDSL modem router then proceed the Quick Internet Setup (QIS). If still cannot establish DSL connection, please try to do it manually.
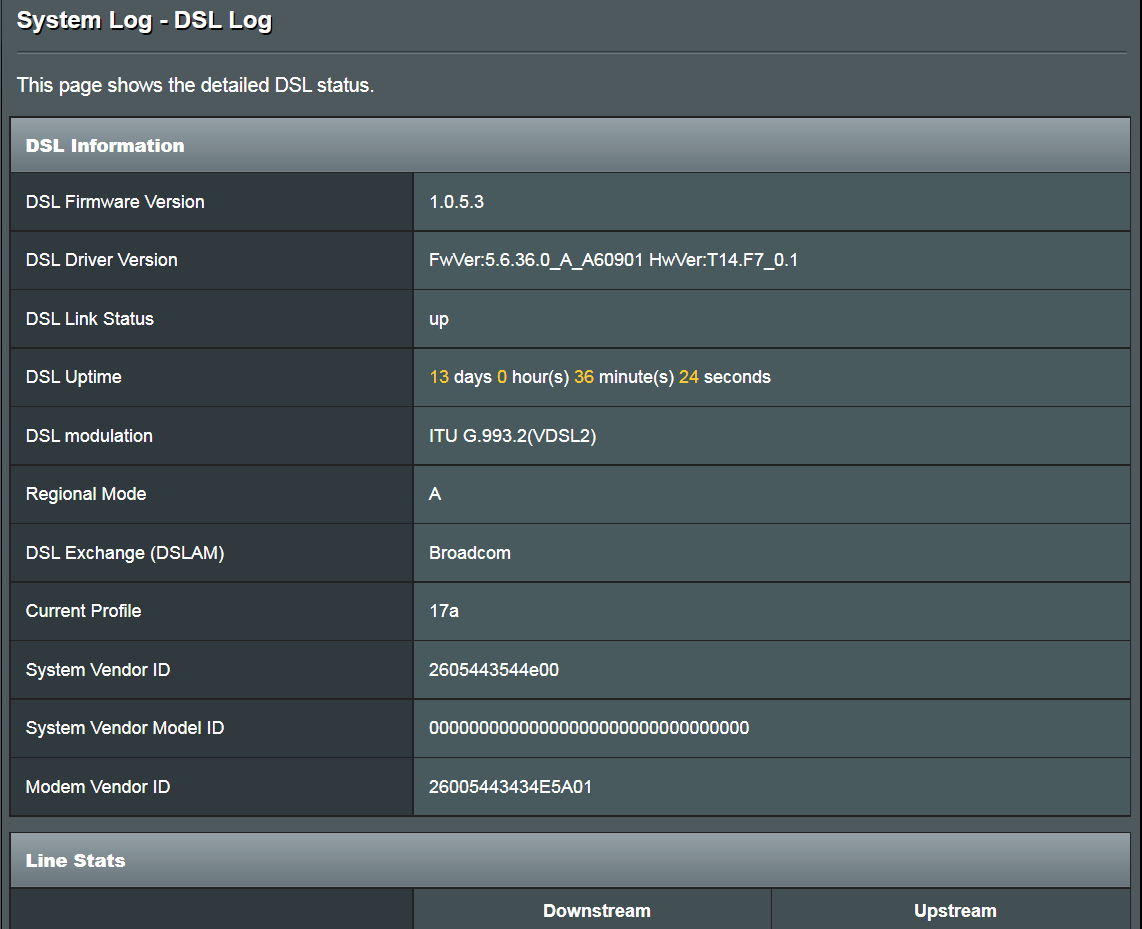
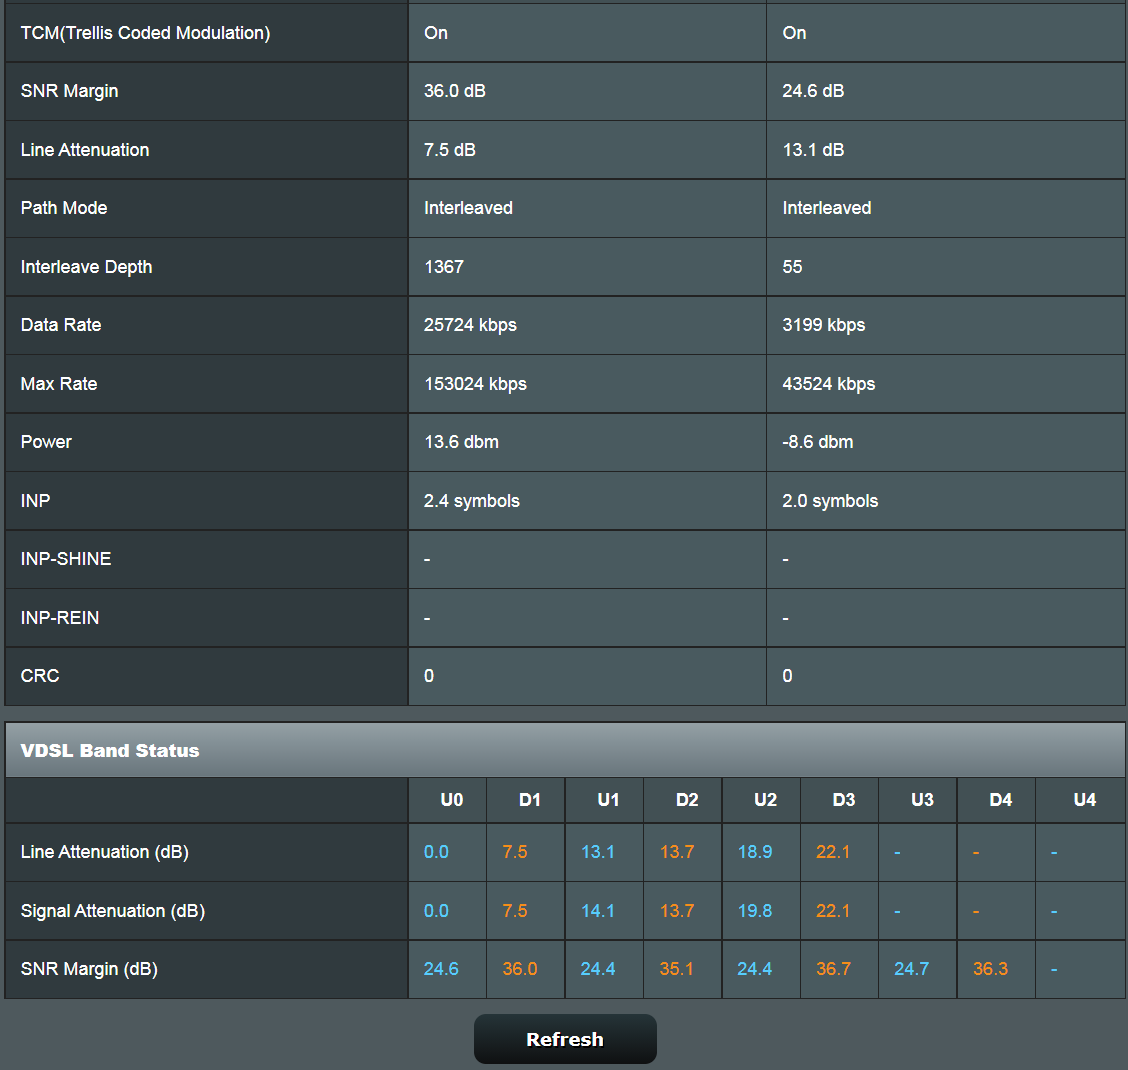
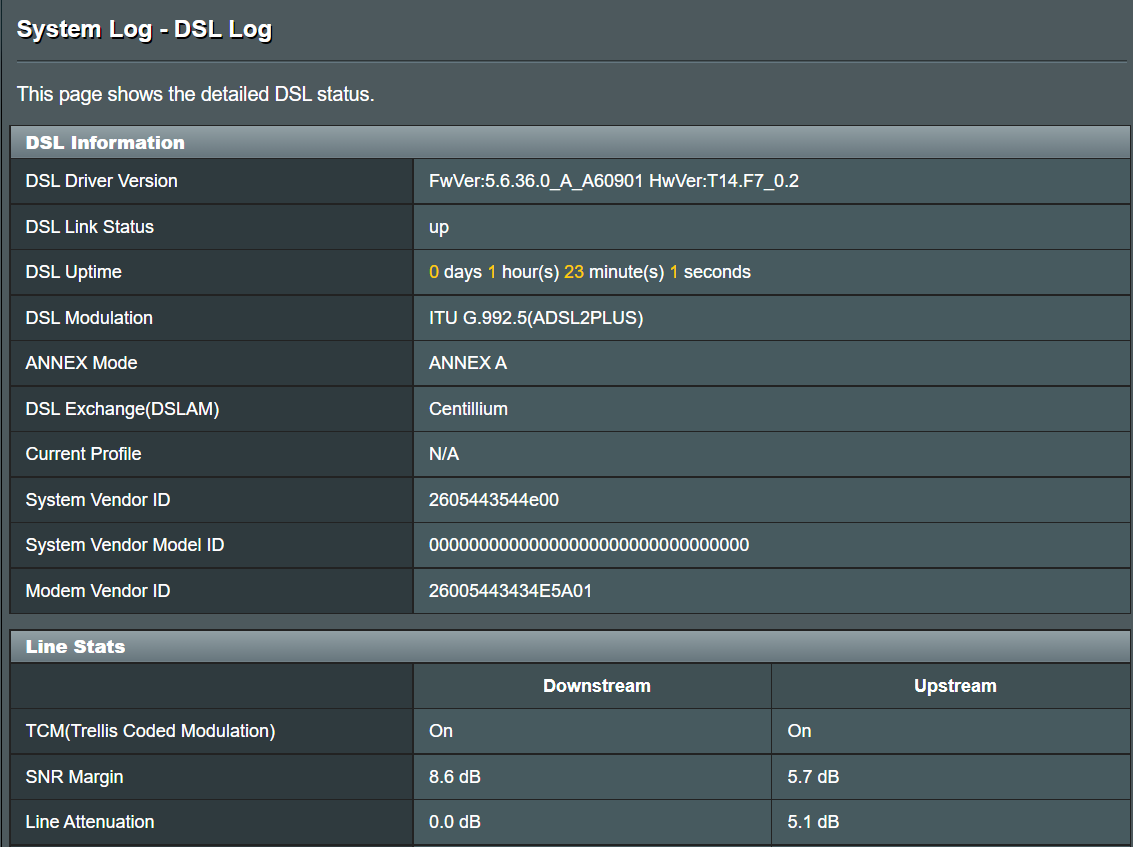
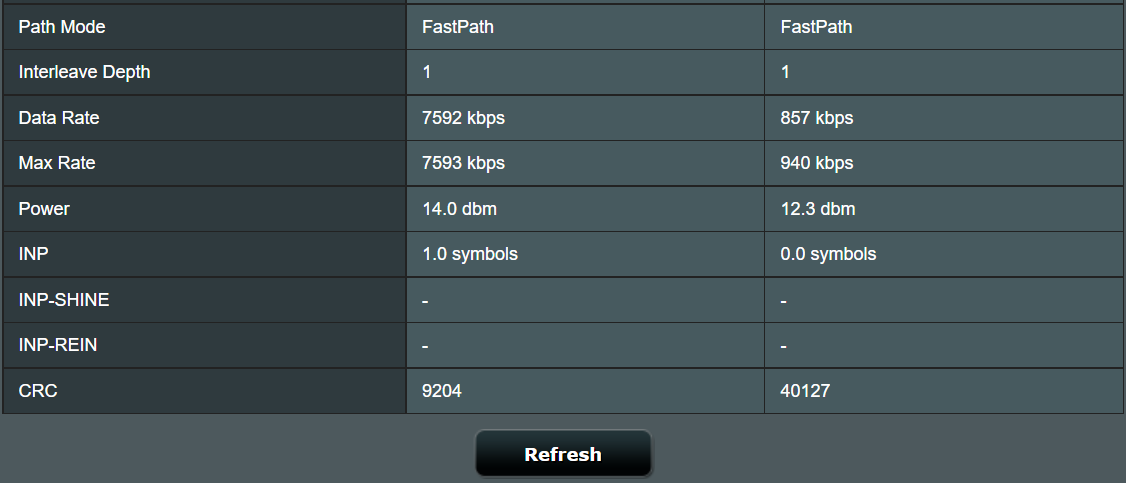
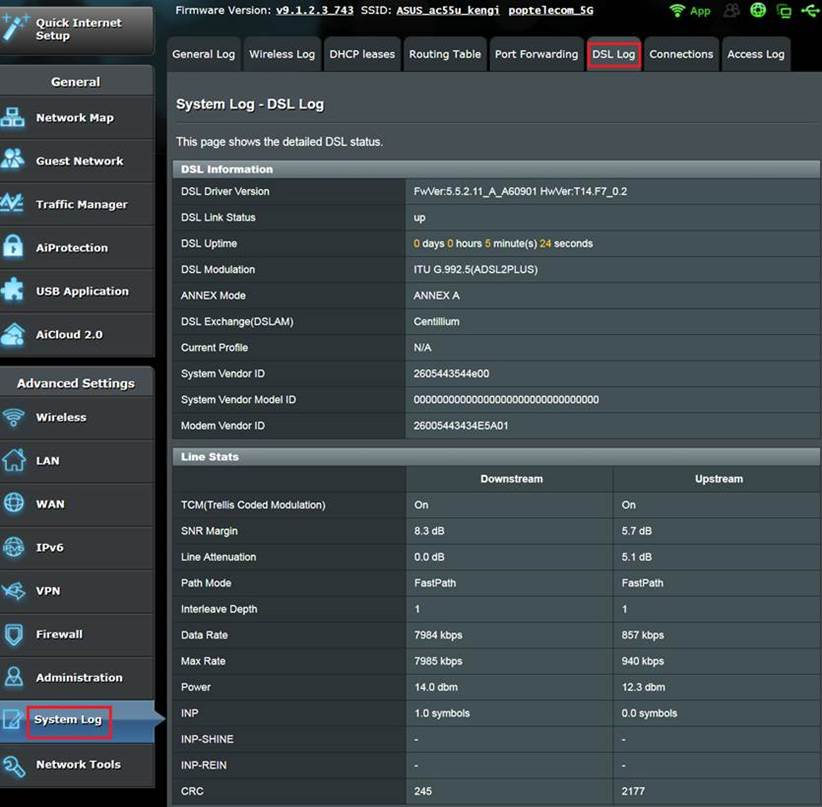
Step3. After QIS setup, you can monitor the current DSL performance from Web GUI > System log > DSL log and adjust related settings.
To monitor the current performace.
1. Data Rate Down/Up:Current real upstream and downstream data rate of your modem router.
2. Max Rate Down/Up:The maximum upstream and downstream data rate by the currently hardware (like Modem, network cables, servers) in your network environment and ISP’s.
3. Line Attenuation Down/Up:It is the distance between you and the ISP and the quality of the copper to your house. It is also measured in dBs and you can check the number on your ADSL statistics page. The closer you are to the ISP, typically the better speeds you can get. It also depends on the amount of users, who connect through the same copper. In short, the lower this number is the better. Below information is for reference.
20dB and below is outstanding
- 20dB – 30dB is excellent
- 30dB – 40dB is very good
- 40dB – 50db is OK
- 50dB and above is bad
[VDSL]
 [ADSL]
If still having slow speed issue, please try below suggestions.
1. Adjust the [Stability adjustment] to get better signals.
This item configures SNR Margin offset. If your DSL connection is unstable or is not able to establish a connection, set the value to a negative dB, for example -1dB. If the issue persist, set the value to -2dB ~ -10dB (Max. Stability). For a normal DSL connection values are 1dB ~10dB (Max. performance)
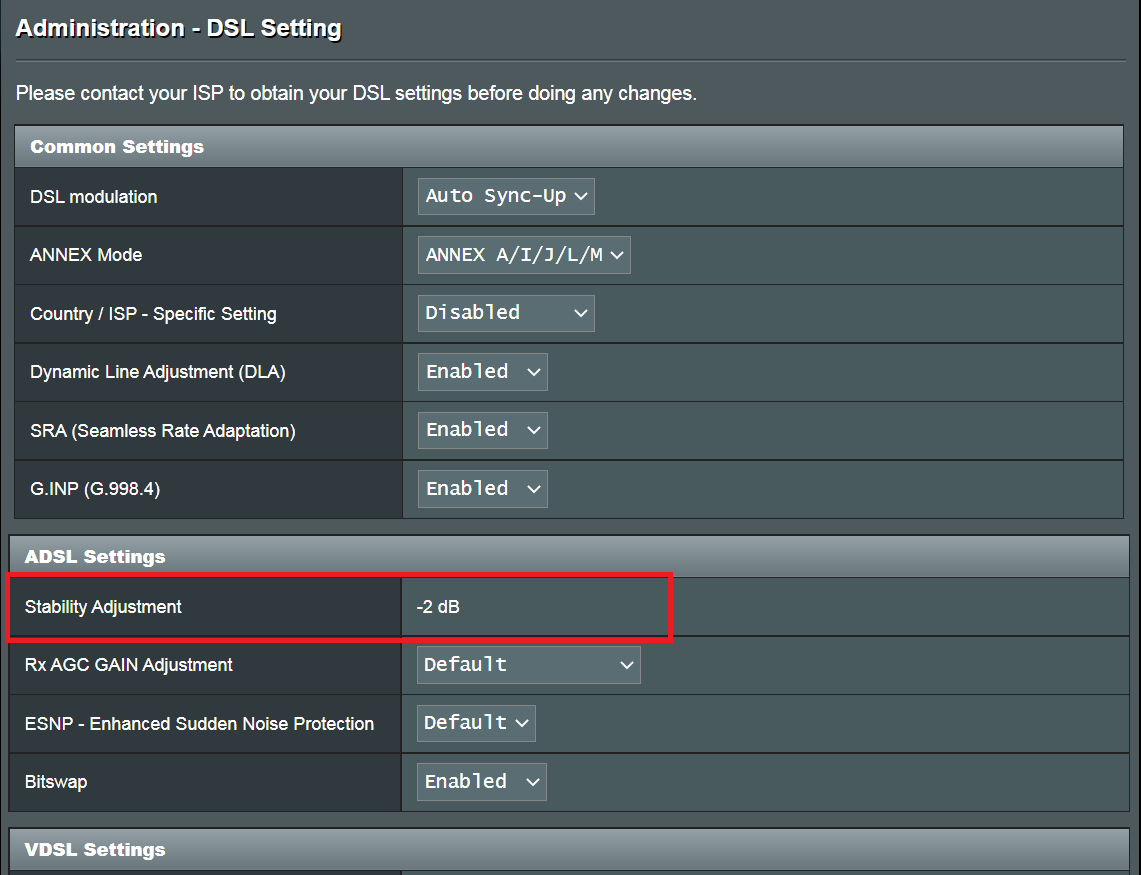
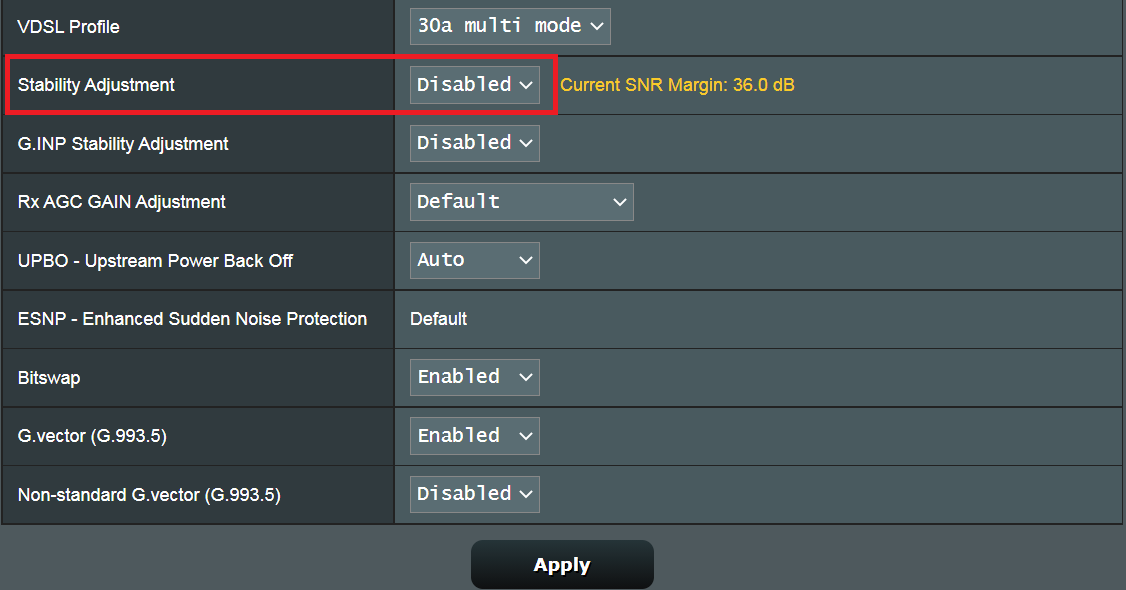
2. Adjust Rx AGC GAIN Adjustment and Seamless Rate Adaptation
Seamless Rate Adaptation. The ISP side will change the line speed according to the line condition at any time. This function can avoid disconnection and reconnection when the ISP speed changes. Enable this function for consistent data transfer rates and prevent dropping connection. However, if your network connection is stable and you notice that the uplink/downlink speed suddenly drops, you can try to turn off this function.
Rx AGC(Auto Gain Control). If tweak the [Stability Adjustment] setting still could not get desired downstream speed, then could try to set Rx AGC GAIN adjustment to [High performance mode]. However, if your connection is unstable you could try [Stable mode].

If all above does not helping and ISP confirmed the line is normal, please submit a feedback from web GUI for further troubleshooting.
Feedback steps
1) Reset to default settings, and complete the QIS.
2) Set the [DSL Modulation to [Auto sync-up].
3) Set the [Country / ISP - Specific Setting] to [Disabled].
4) Set the [Dynamic Line Adjustment (DLA)] to [Disabled].

5) Plug in a USB disk to the router.
6) Submit a Feedback form with [DSL Line / Wi-Fi Diagnostic *] option set as [xDSL line] and [Diagnostic debug log capture duration] set as the time you think the problem will occur. (e.g. [24 hours], if there is no problem during this time, you will need to do this test again.)

7) Please notify us after the feedback is sent and provide the email used for sending and the test time you set (the system will automatically send the test log to us, we collect data by email)
😎 Provide us the [DSL Log] screenshots when normal and abnormal. (in System Log -> DSL Log page, not [System Log - General Log] page).
E.g.
9). When the Diagnostic debug log capture is done (The upper right corner connection icon changes back to green ), refresh the UI page, and click the exclamation mark in the upper right corner. Then click the [Send debug log now]. (Need to insert the original USB disk.)
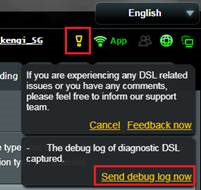
By doing so you will enter a special feedback page. Please click on the link below to save the debug log (WiFi.log.gz). Send it to us for analysis.
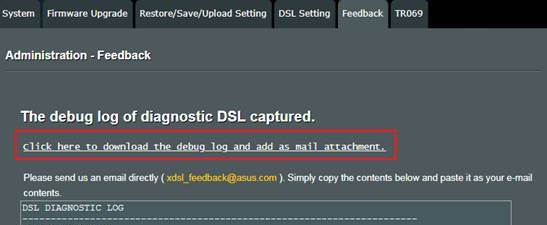
10). If the above steps cannot be performed or feedback fails to send for some reason, you can also send the log located in your USB to us via Support. (Logs will be located In USB:\asus_diagnostic\WiFi.log.gz)
11). After you send out the log and email, please contact ASUS service center to provide related information for tracking. https://www.asus.com/support/
