[ProArt Display] ASUS ProArt Creator Hub- CreationFirst-Color Correction Technology - Calibration Settings and Operation Related Instructions
[ProArt Display] ProArt Creator Hub - Introduction of display function
[ProArt Display] [MacOS version]Introduction to ProArt Calibration - Setup and operation
[ProArt Display] Introduction to ProArt Calibration - Setup and operation
[ProArt Display] ProArt Creator Hub - Introduction of display function
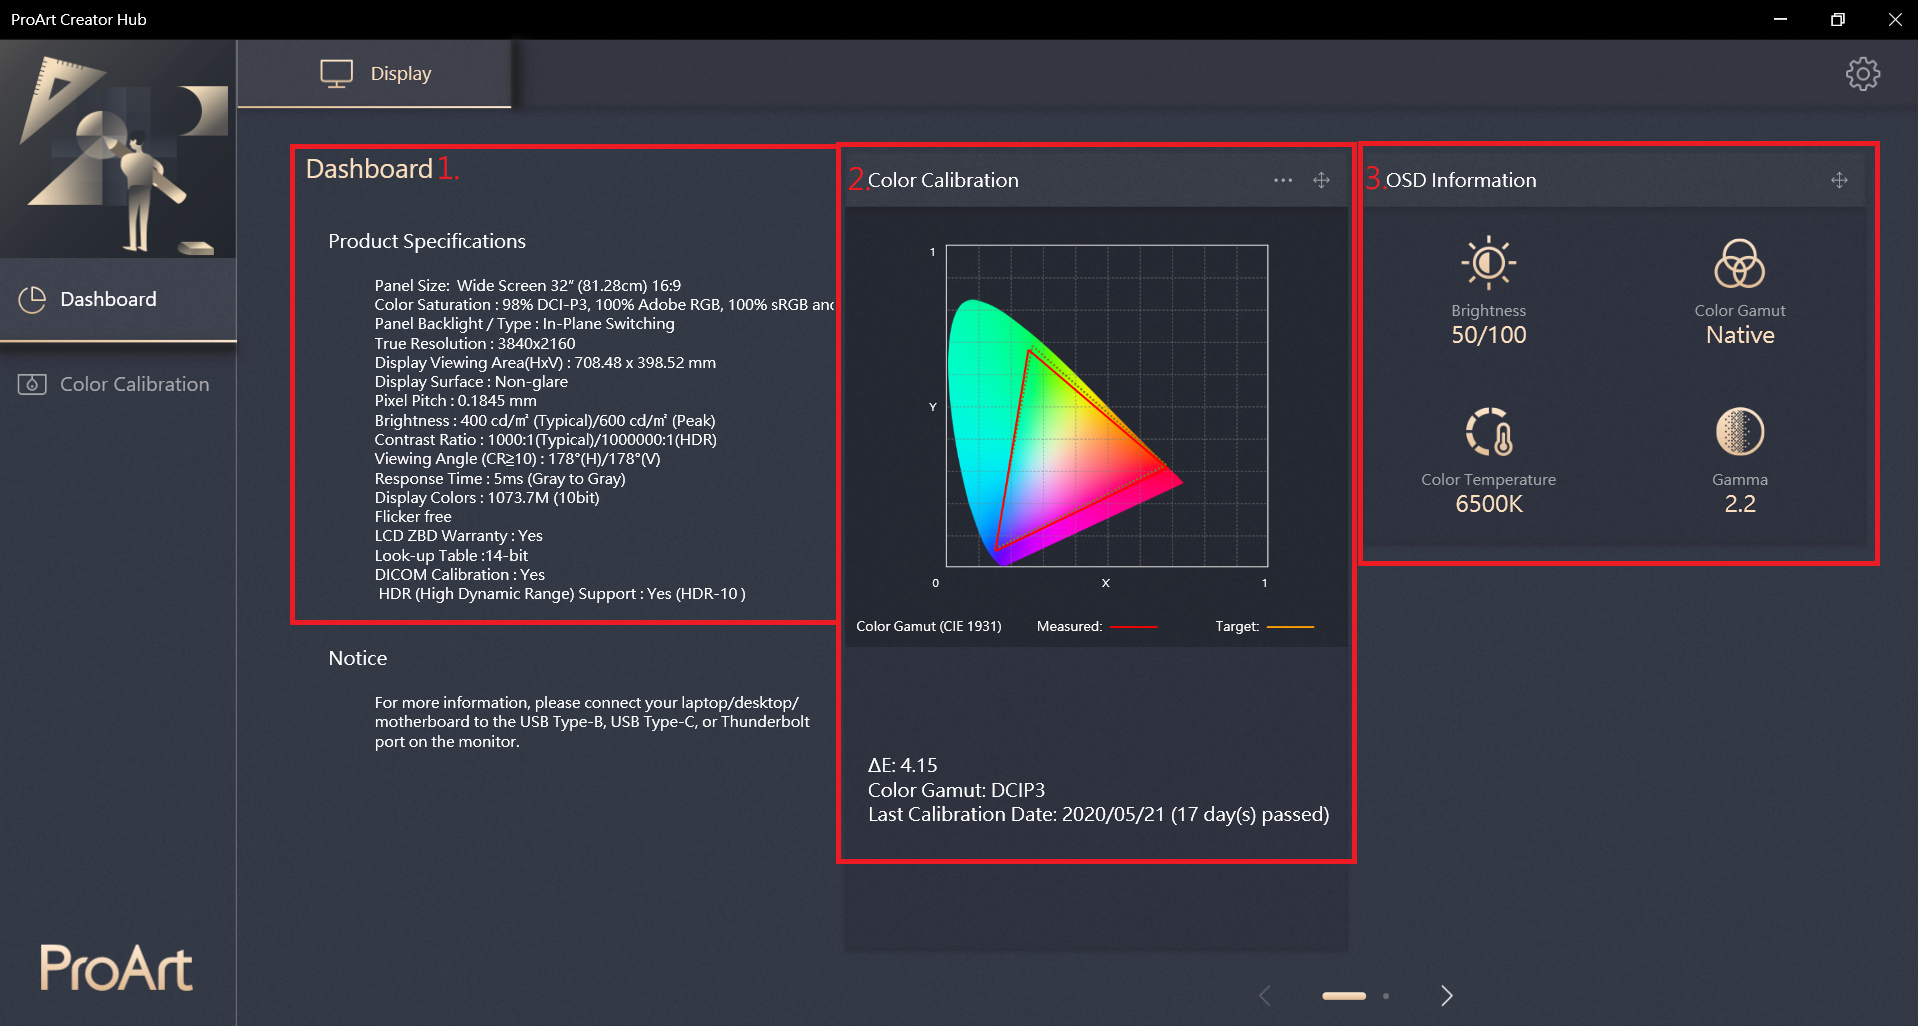
ProArt Creator Hub - Display
ProArt Creator Hub can help you check the current status of the monitor (Color gamut, Brightness, Color temperature, Gamma) and confirm product specifications.
You can use the color meter (Xrite-i1DisplayPro & i1DisplayProPlus) in Color Calibration function to calibrate the monitor.
How to connect
If you want to use ProArt Creator Hub to view monitor information and calibrate the monitor, in addition to HDMI/Displayport for transmitting images, please connect the PC and the monitor via either USB-Type B or USB-Type C cable to transfer data.
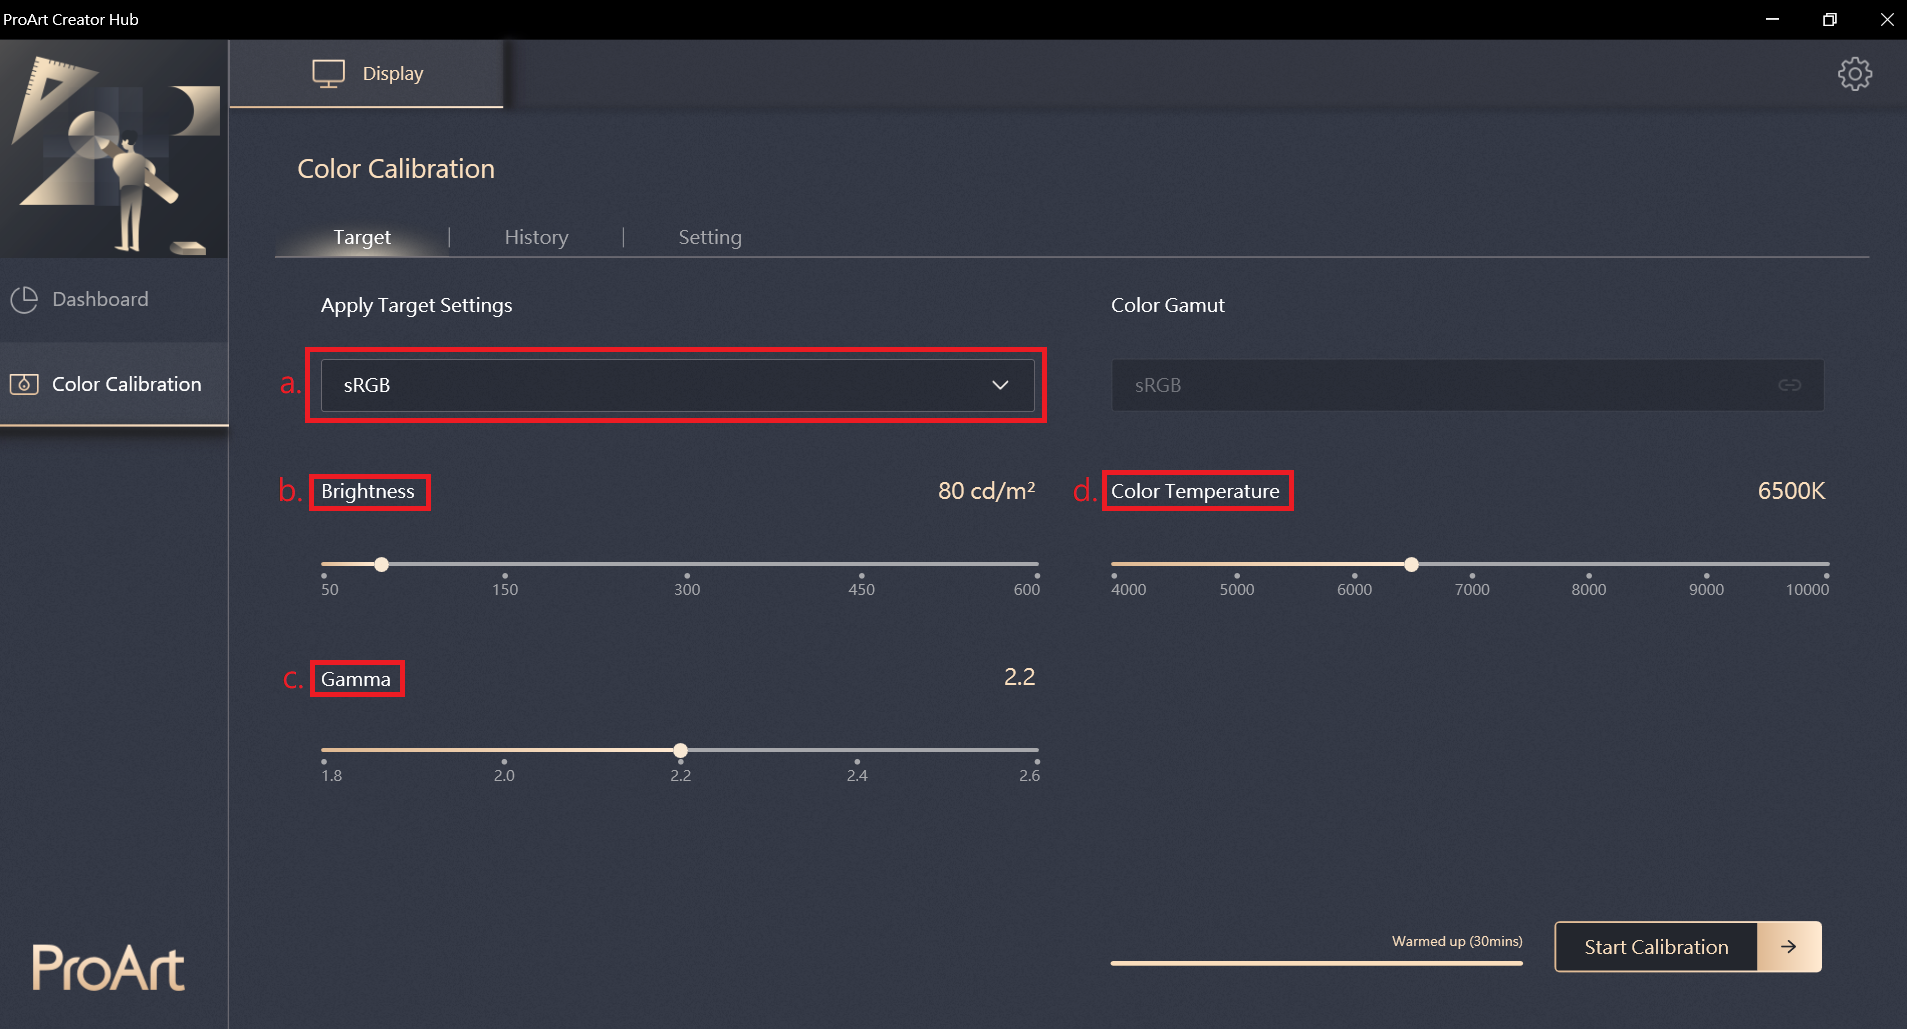
After selecting, please click [Start Calibration].
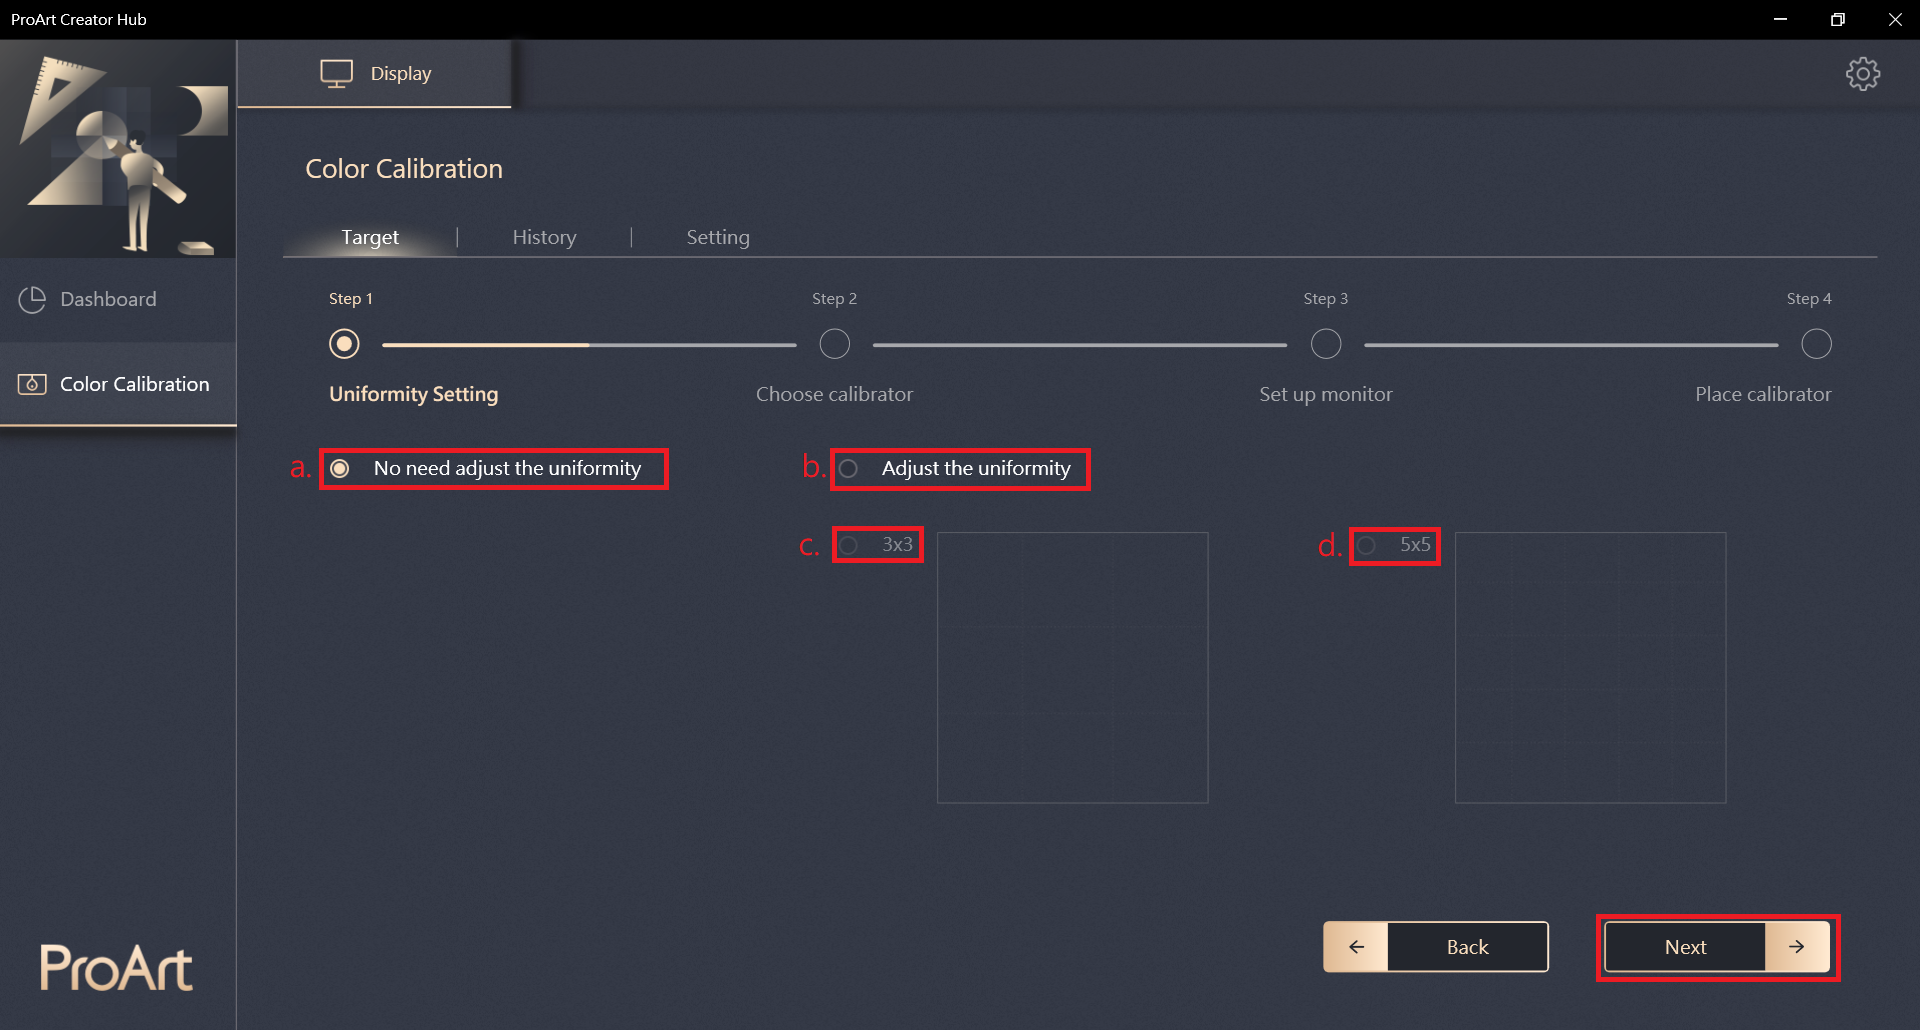
2. Choose whether to perform uniformity calibration through a. and b. options(you can choose c. 3X3 or d. 5X5). If you choose to perform uniformity calibration, uniformity adjustment goes first, and then performed color calibration.
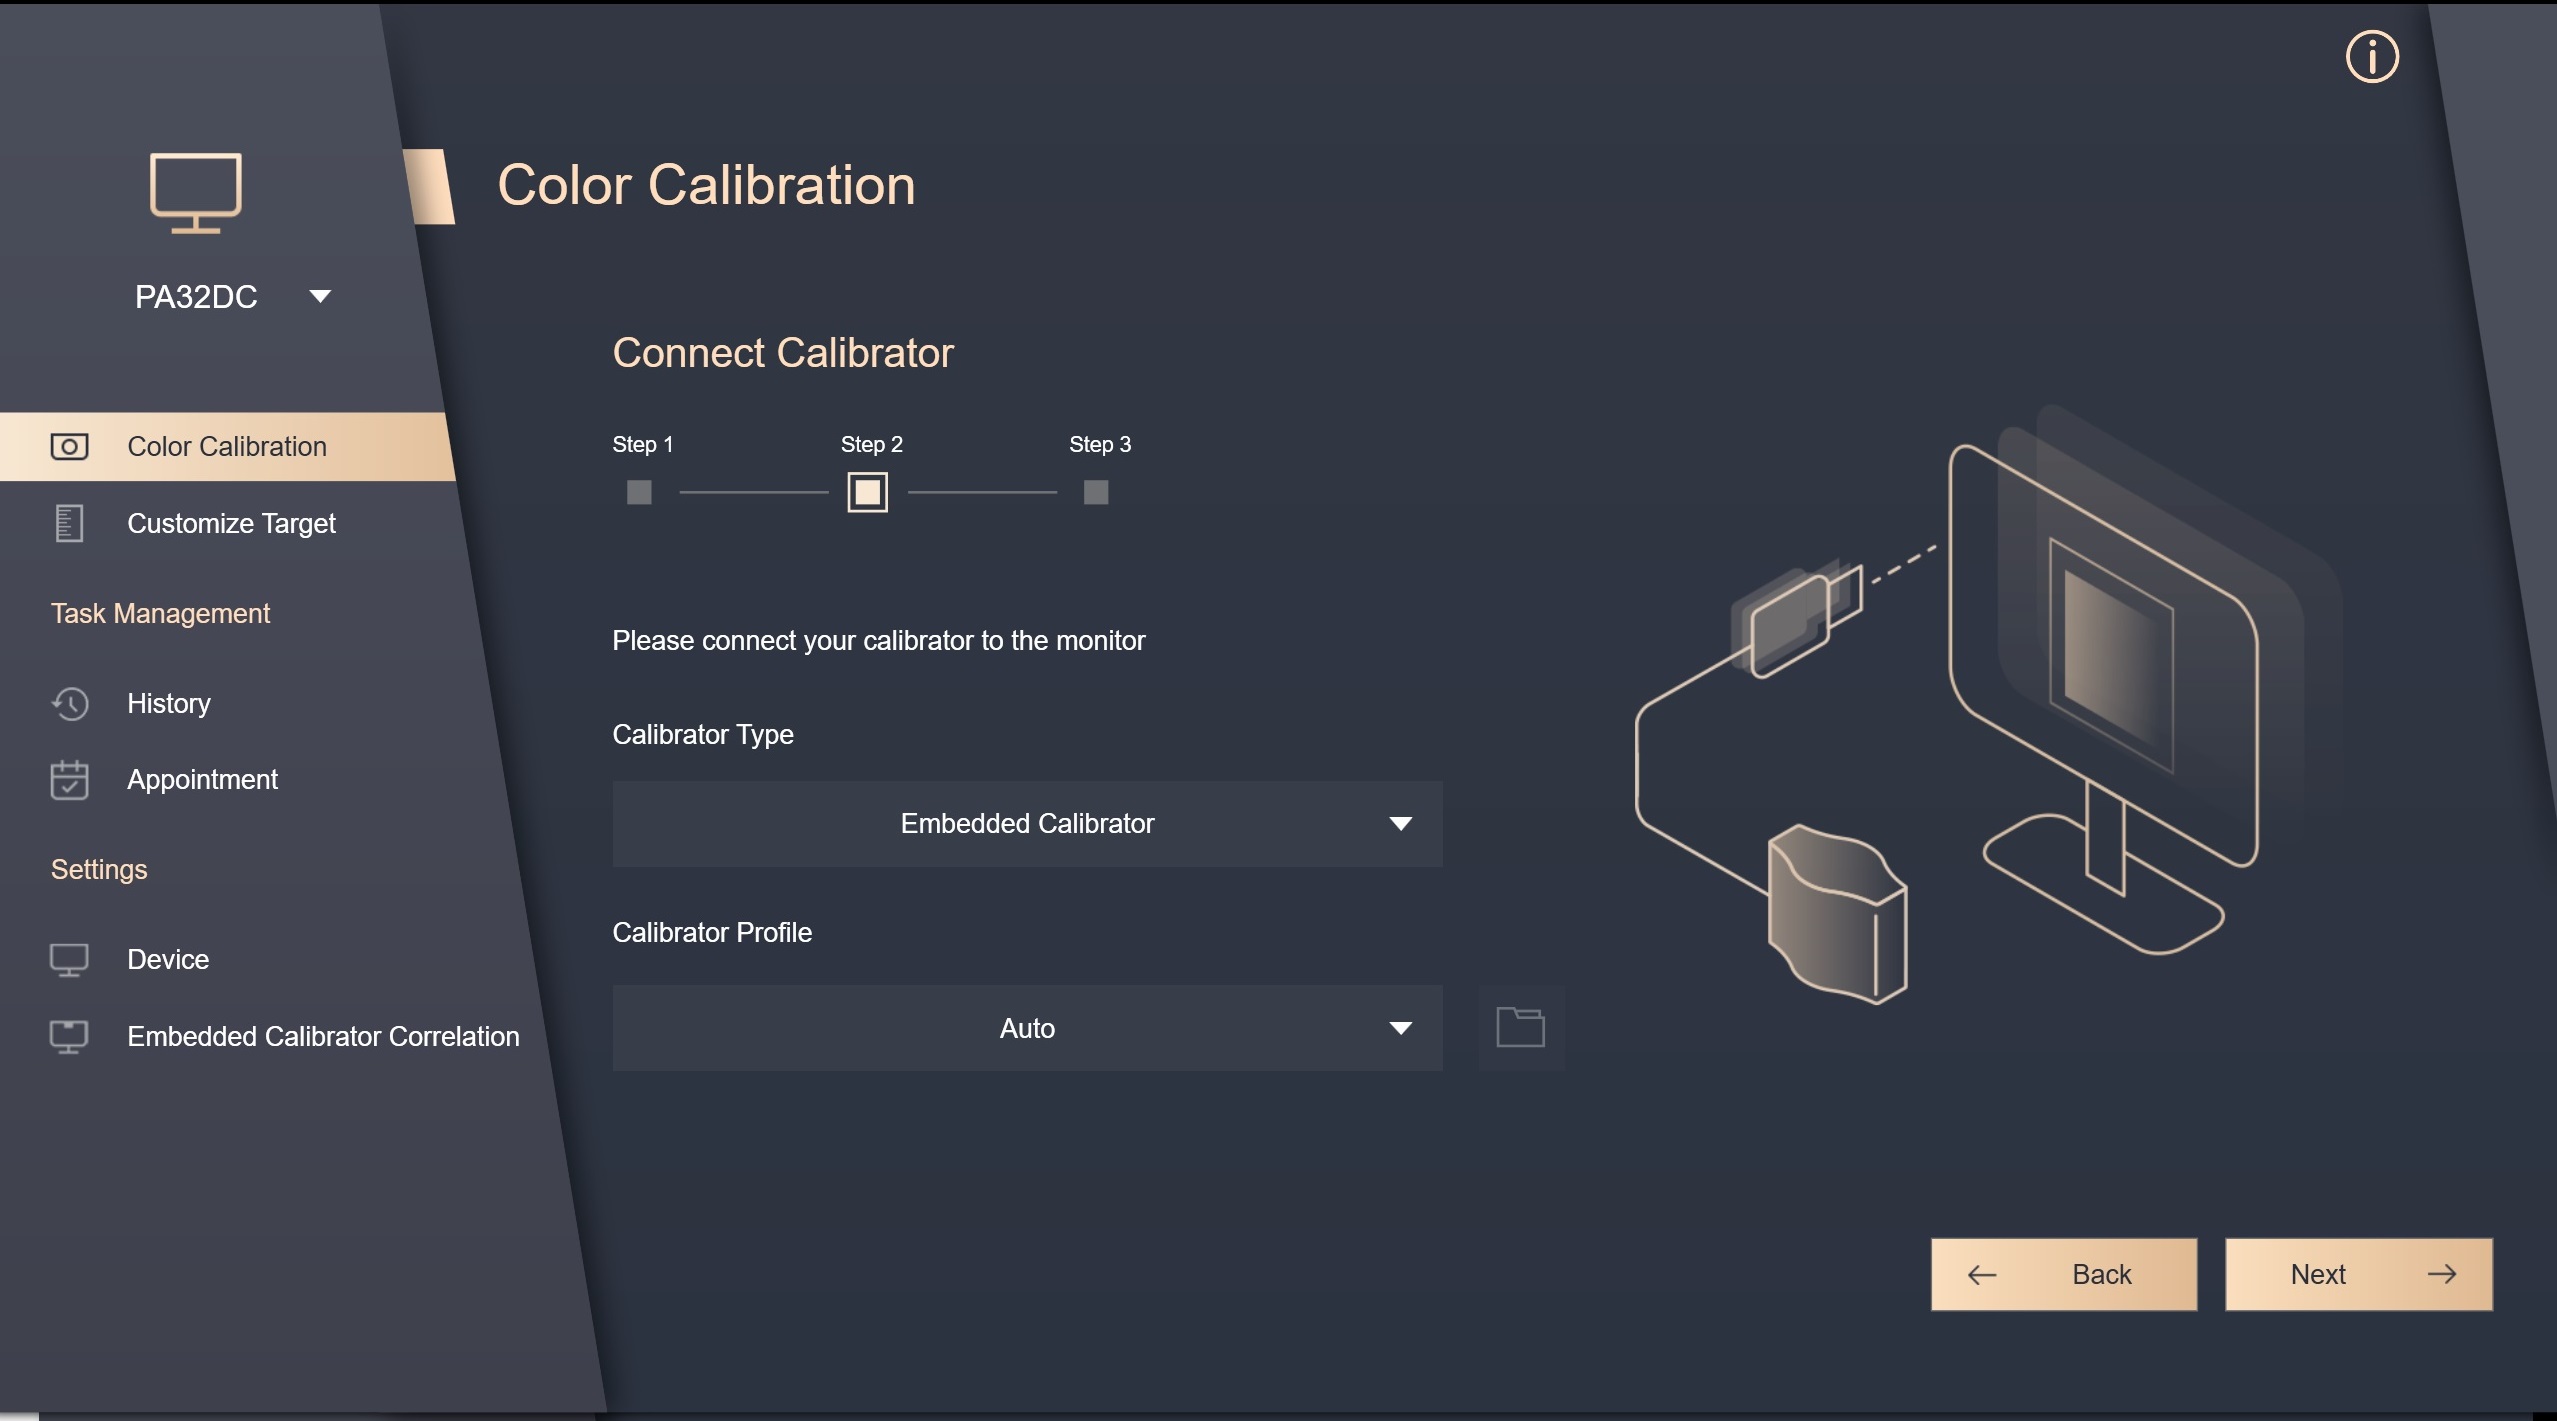
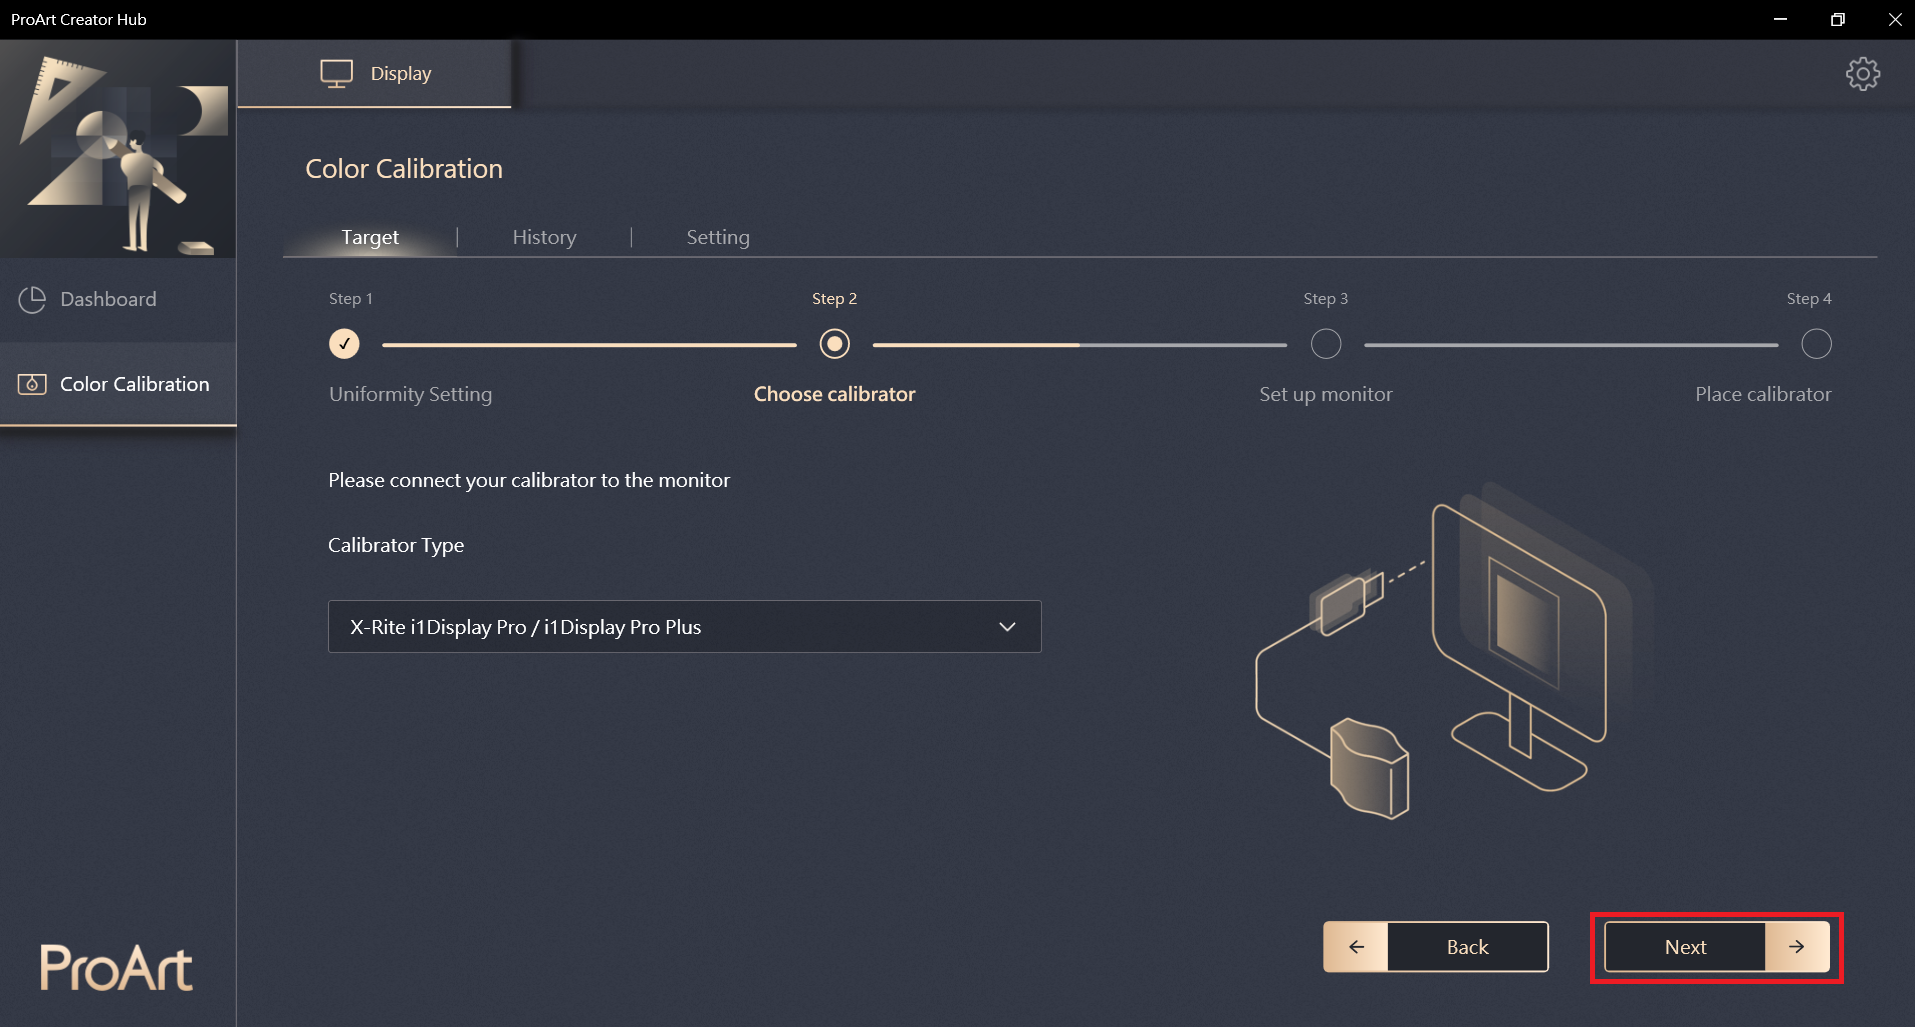
3. Make sure the calibrator is connected to the monitor,and click [Next].
4. Make sure the PC and the monitor are connected via USB-Type B or USB-Type C or Thunderbolt3 cable, and click [Next].
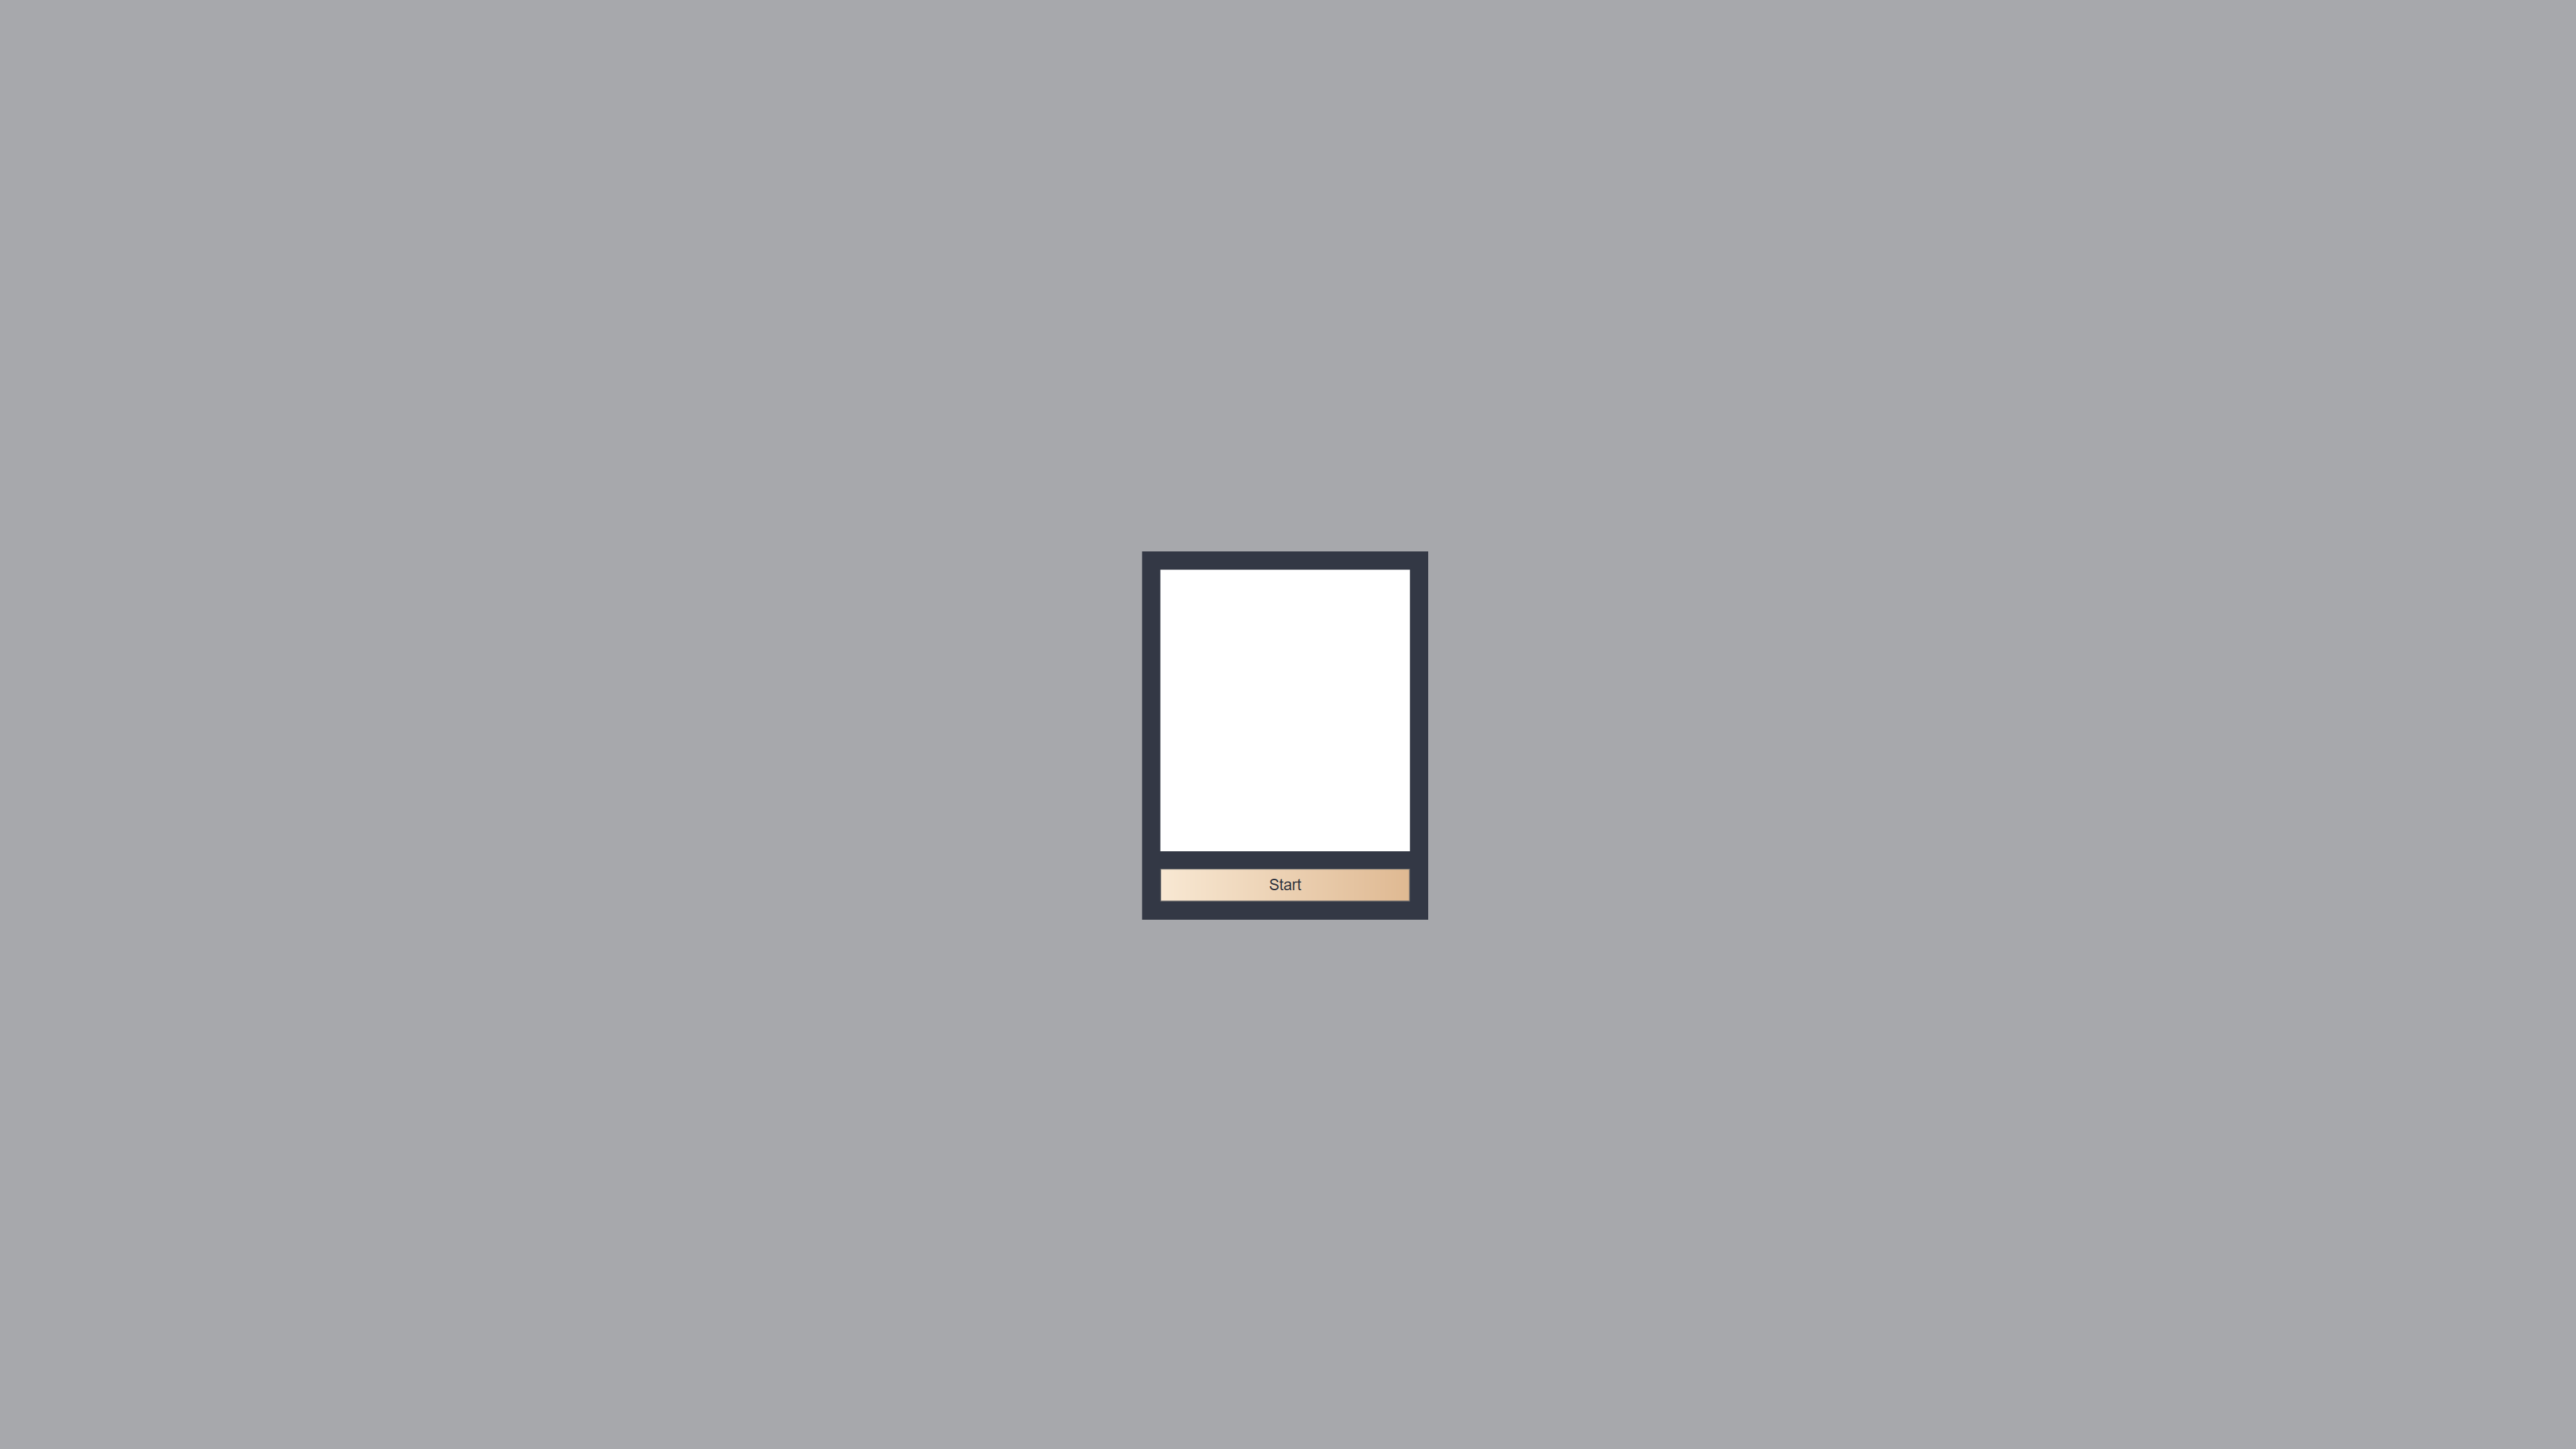
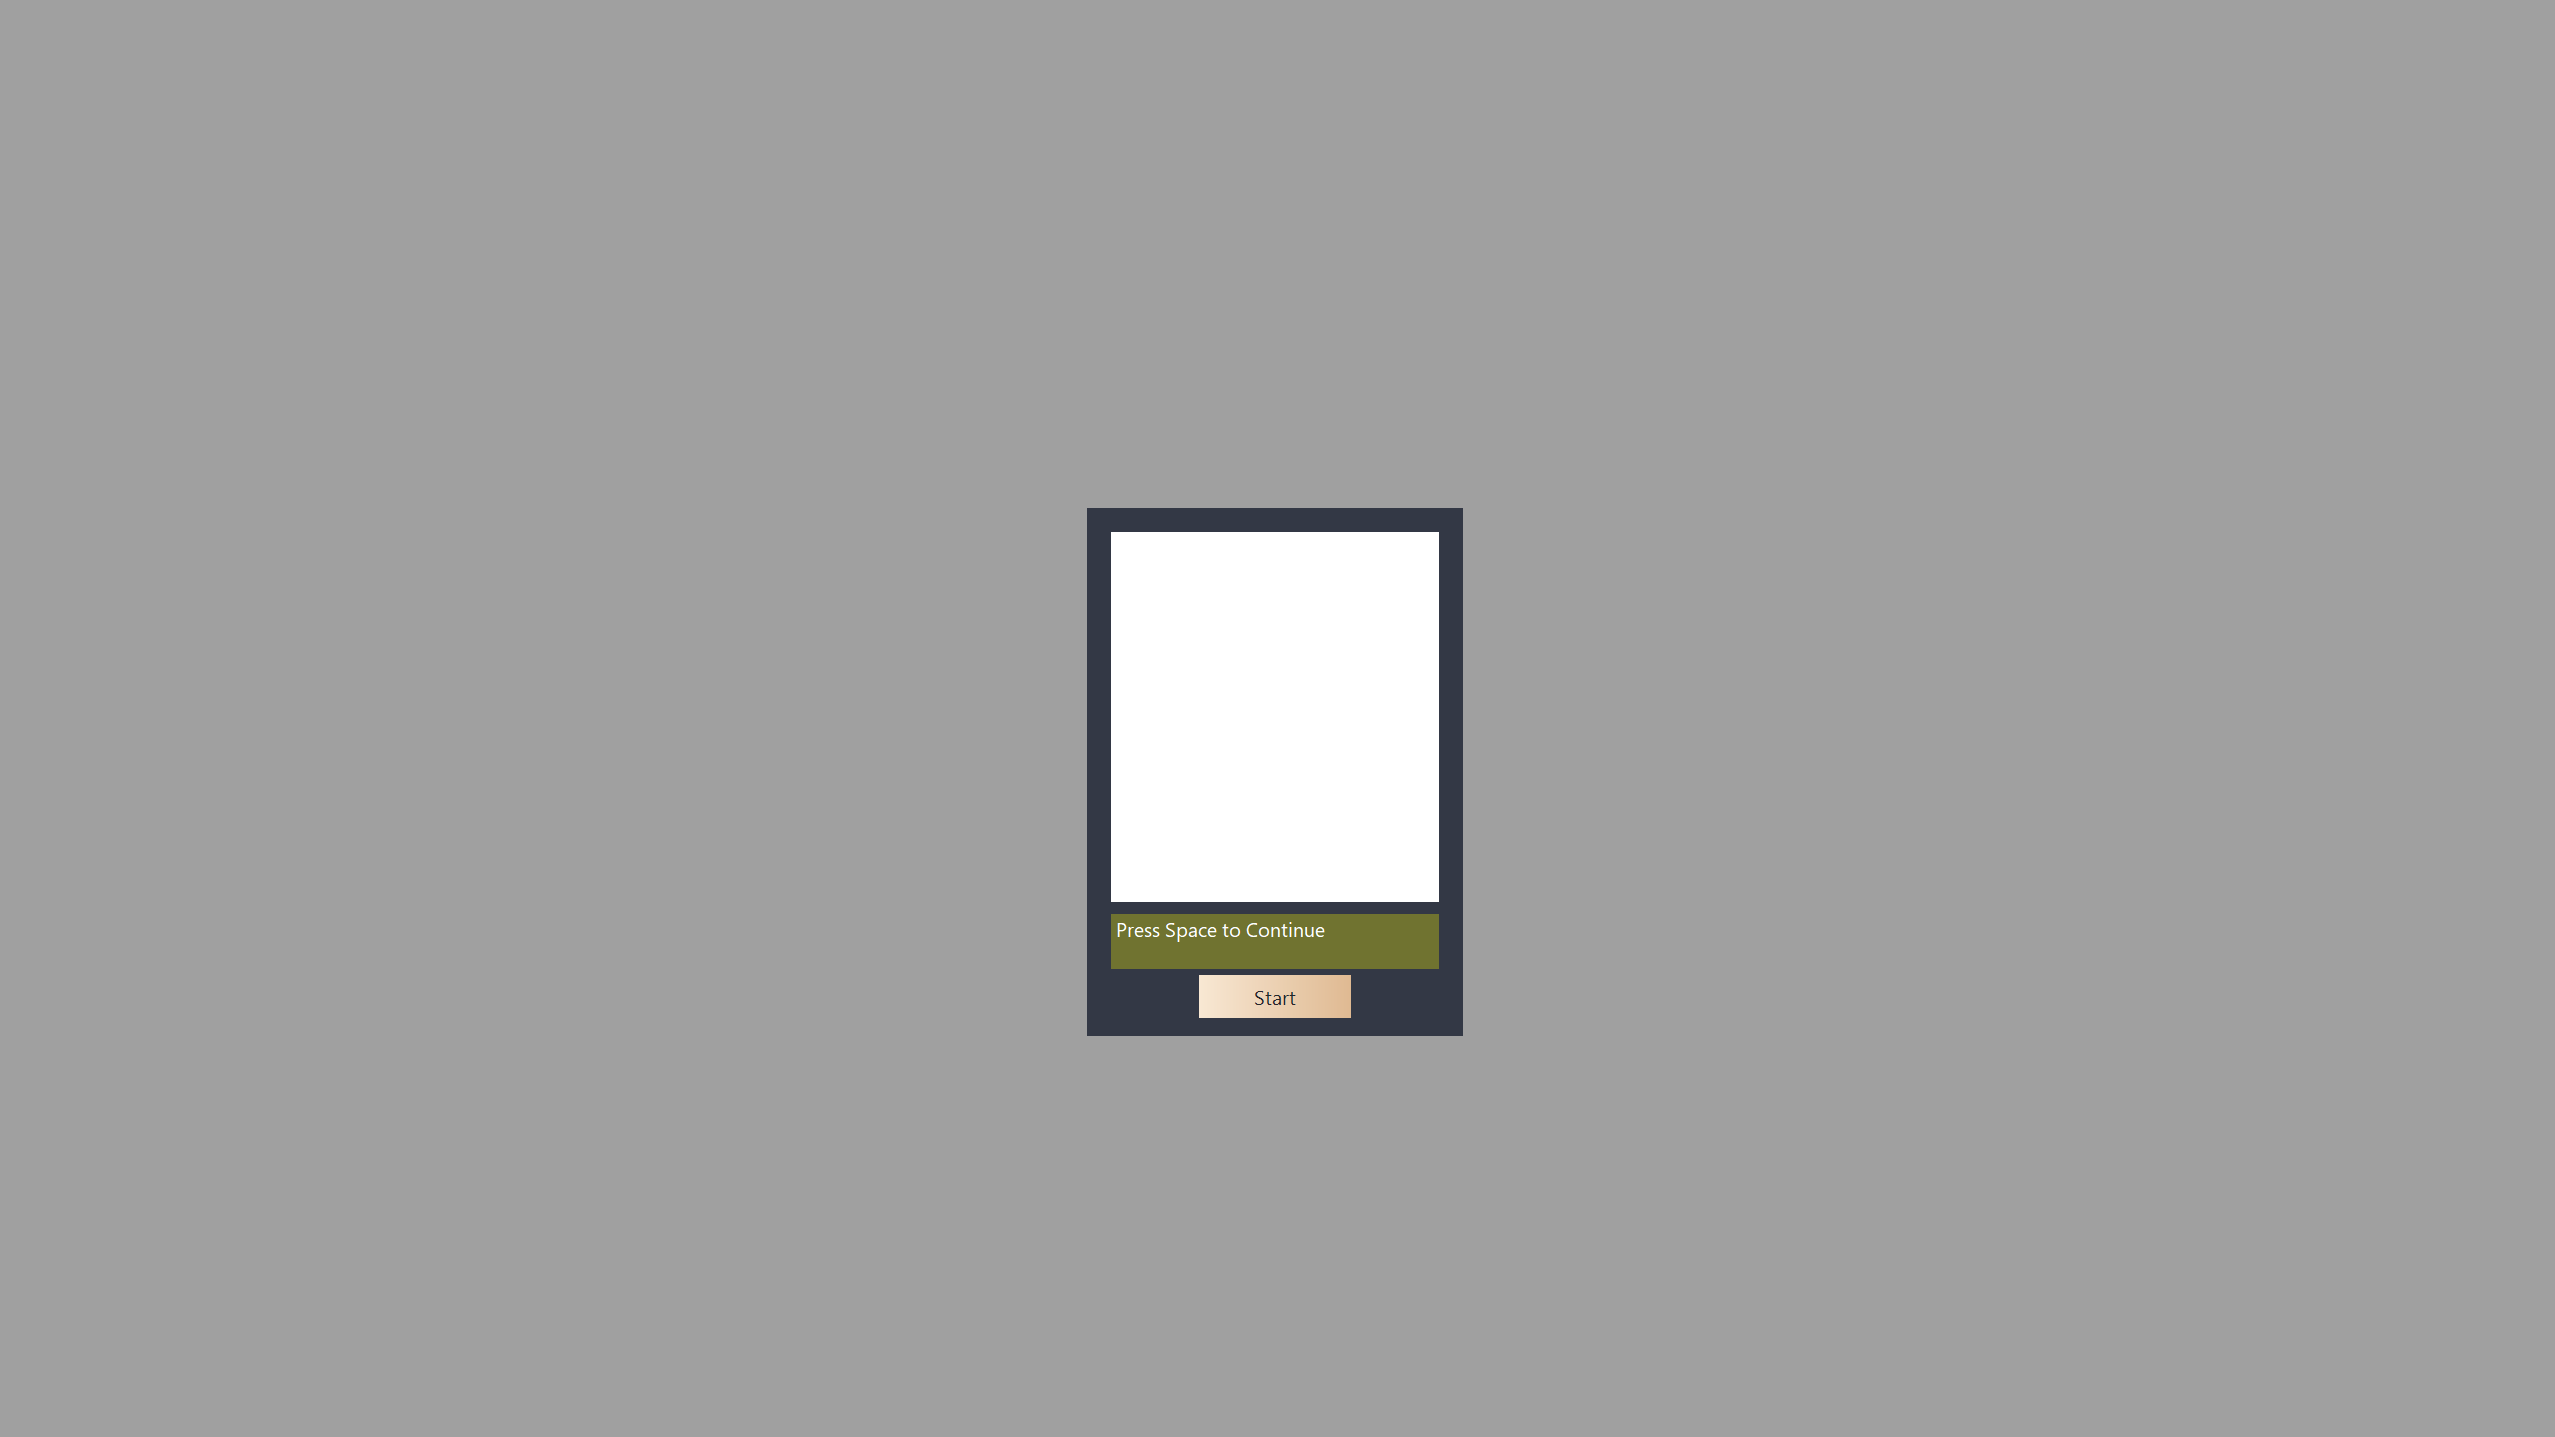
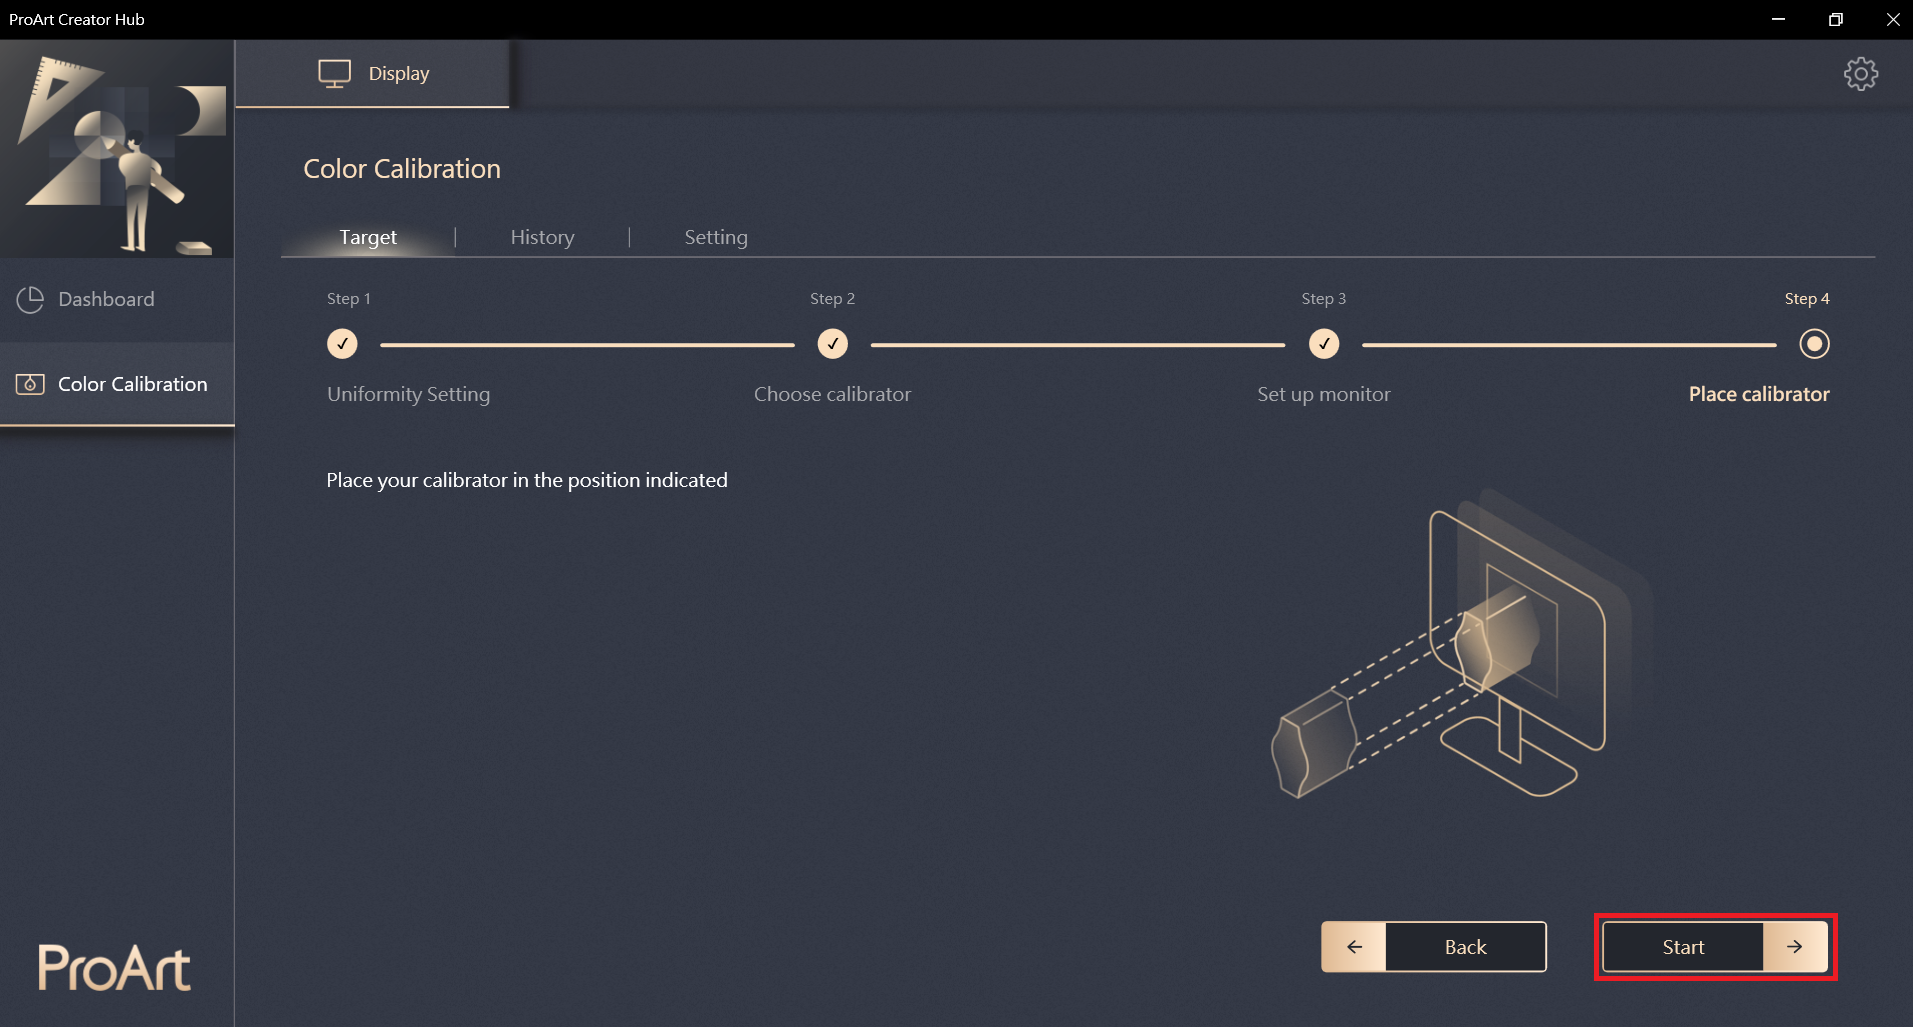
5. Click [Start] to start calibration.
Color Calibration
1. Click [Start] to start calibration.
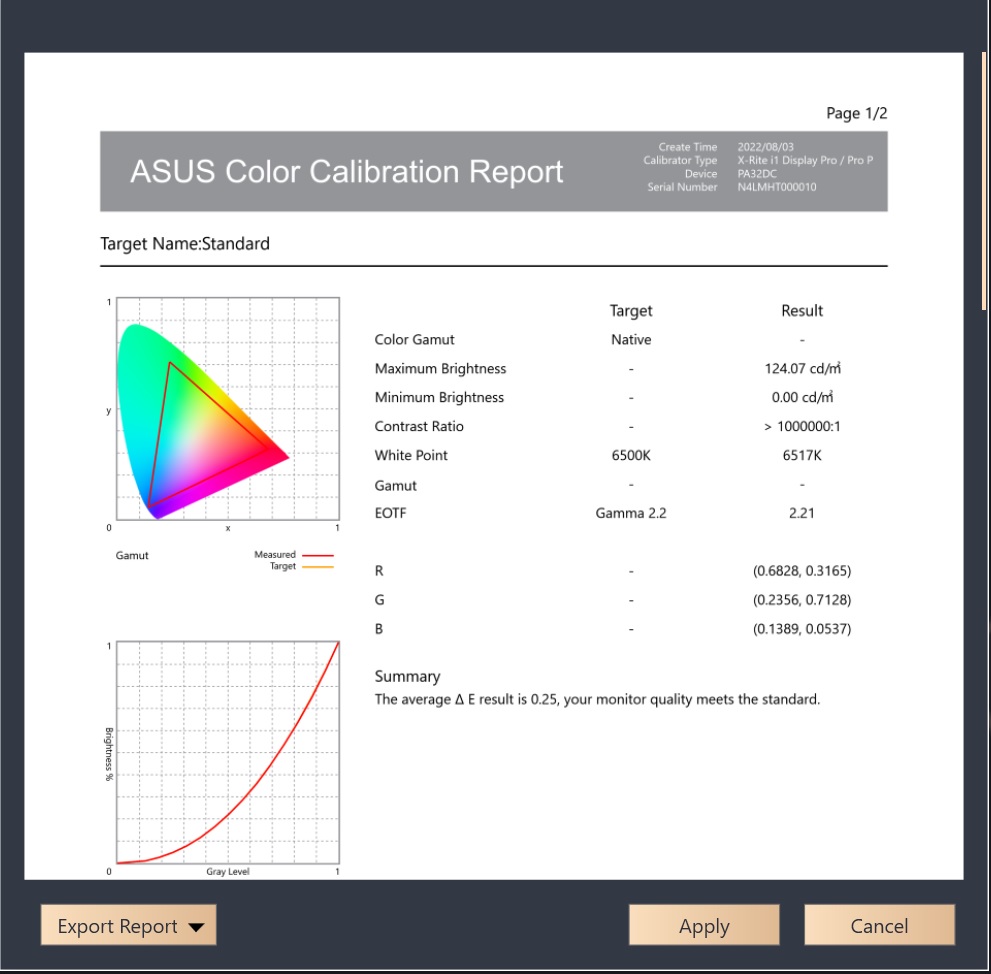
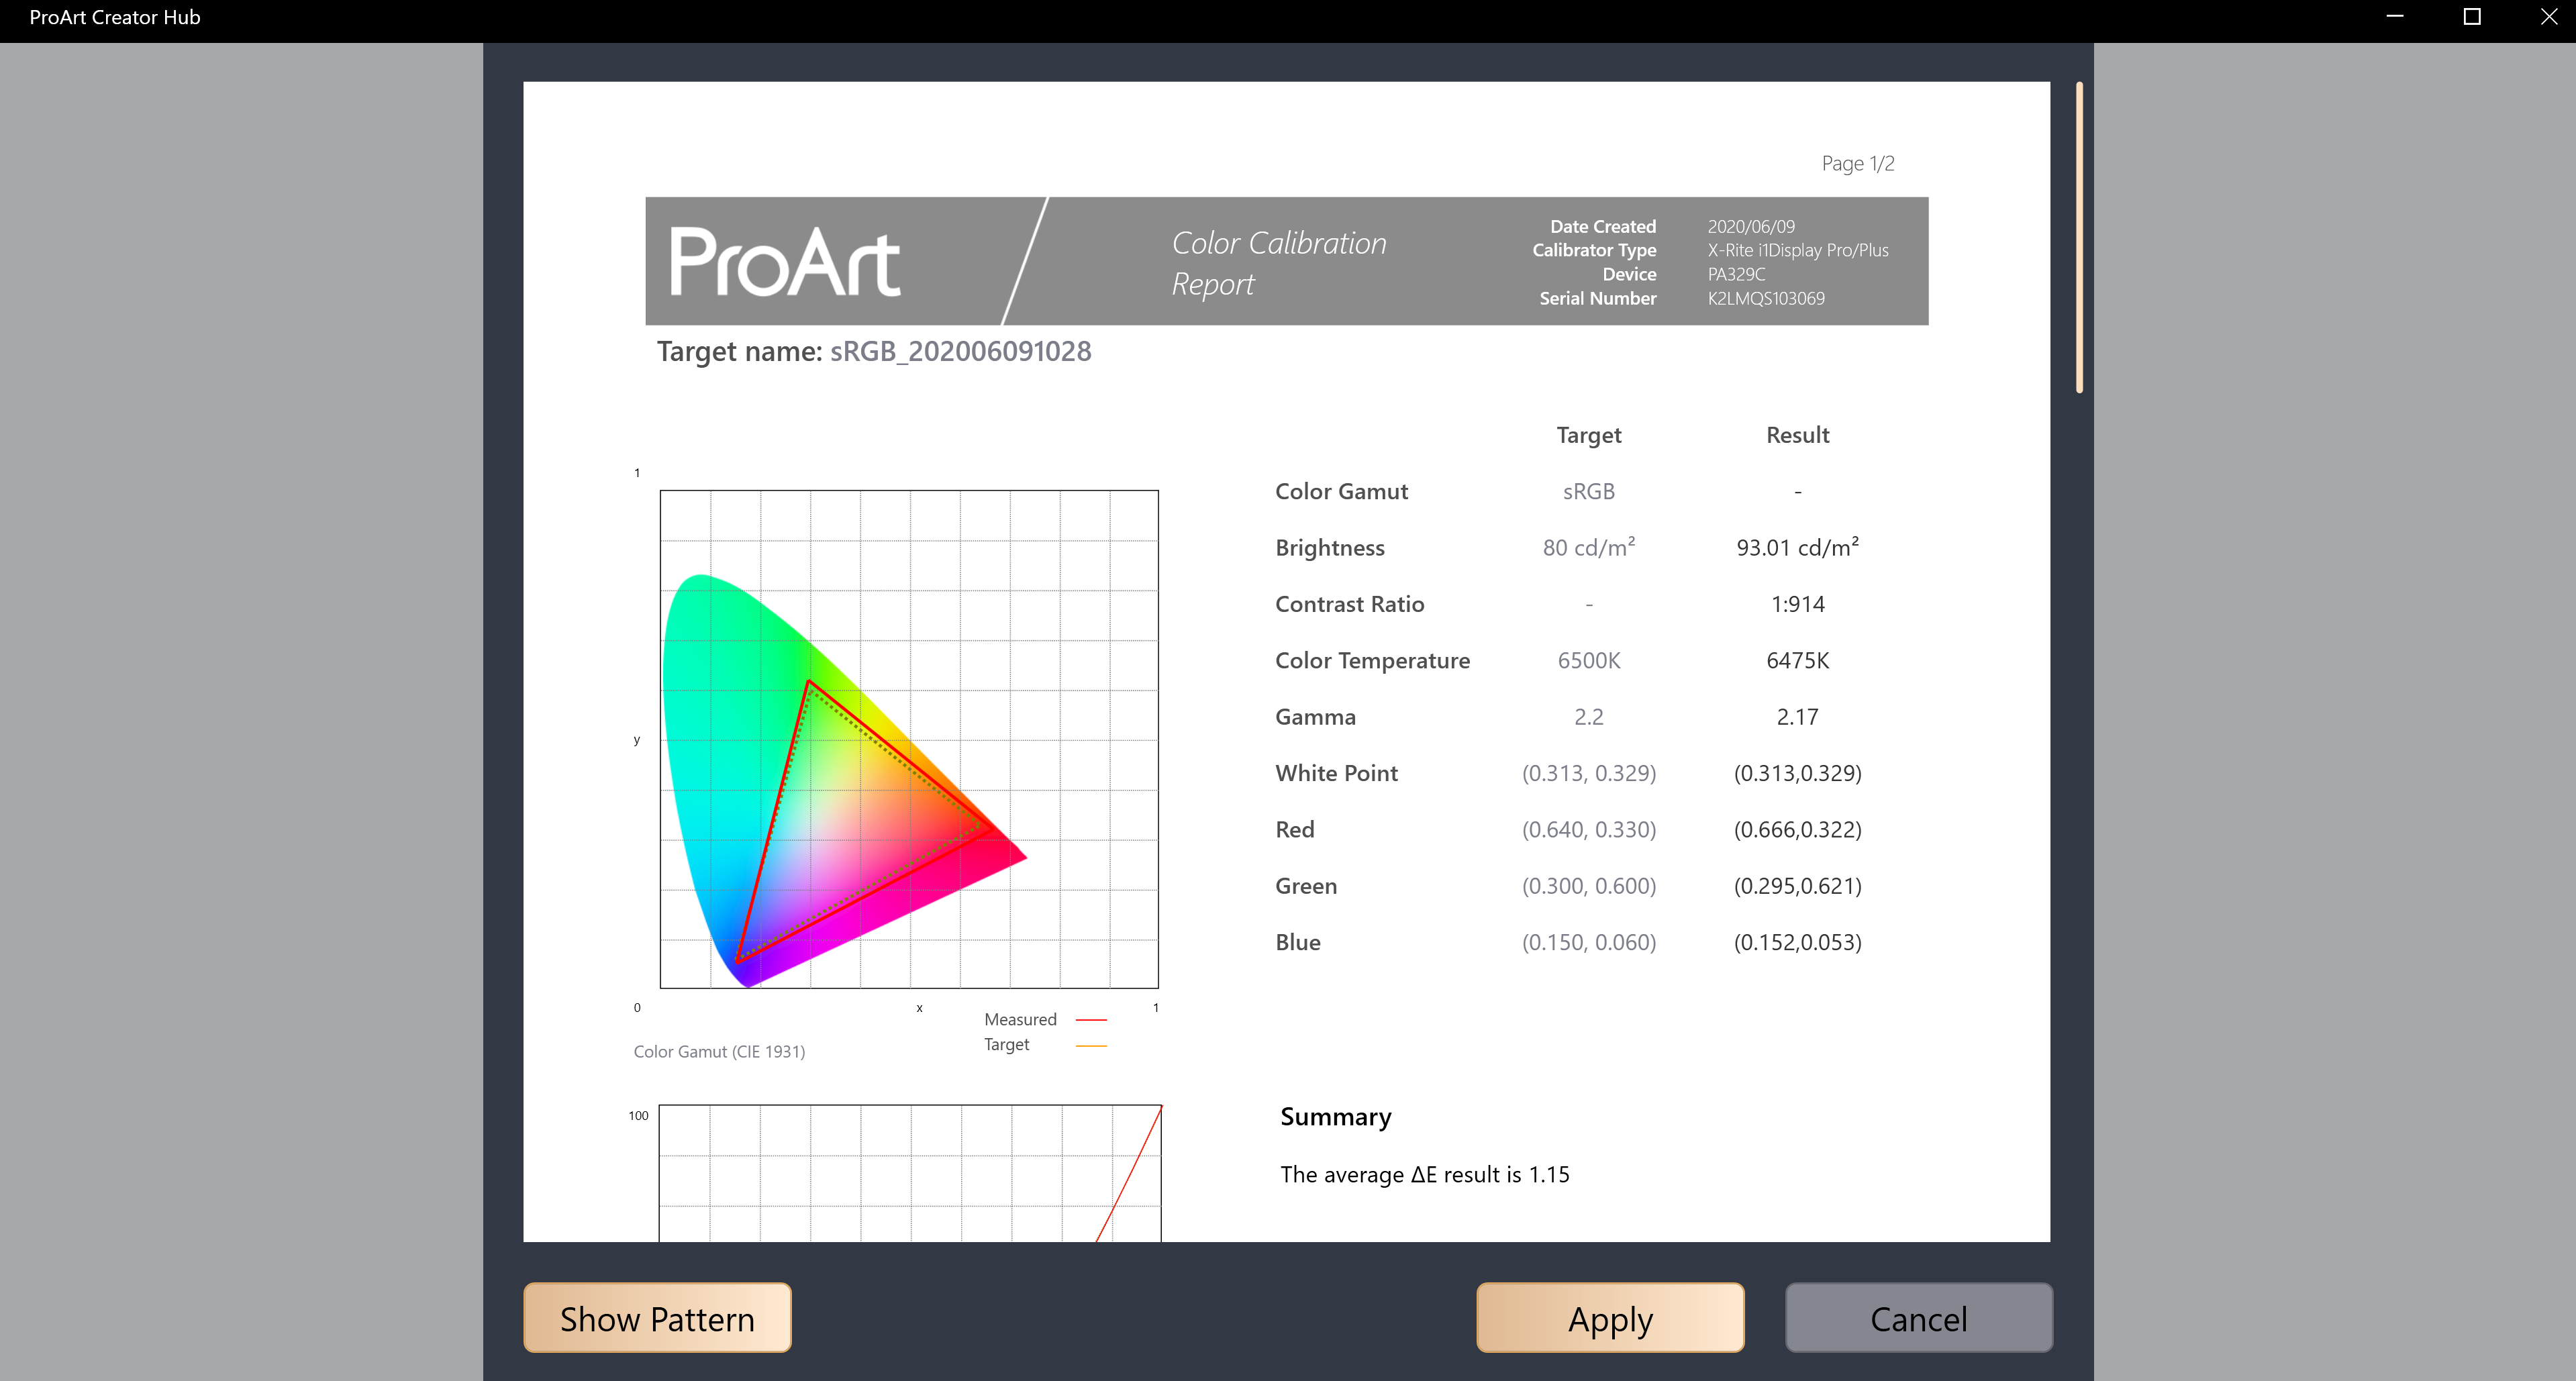
2. After the color calibration is completed, the system will generate a color calibration report. You can see the data after color calibration.
3. Click [Show Pattern]. You can check the difference before and after color calibration.
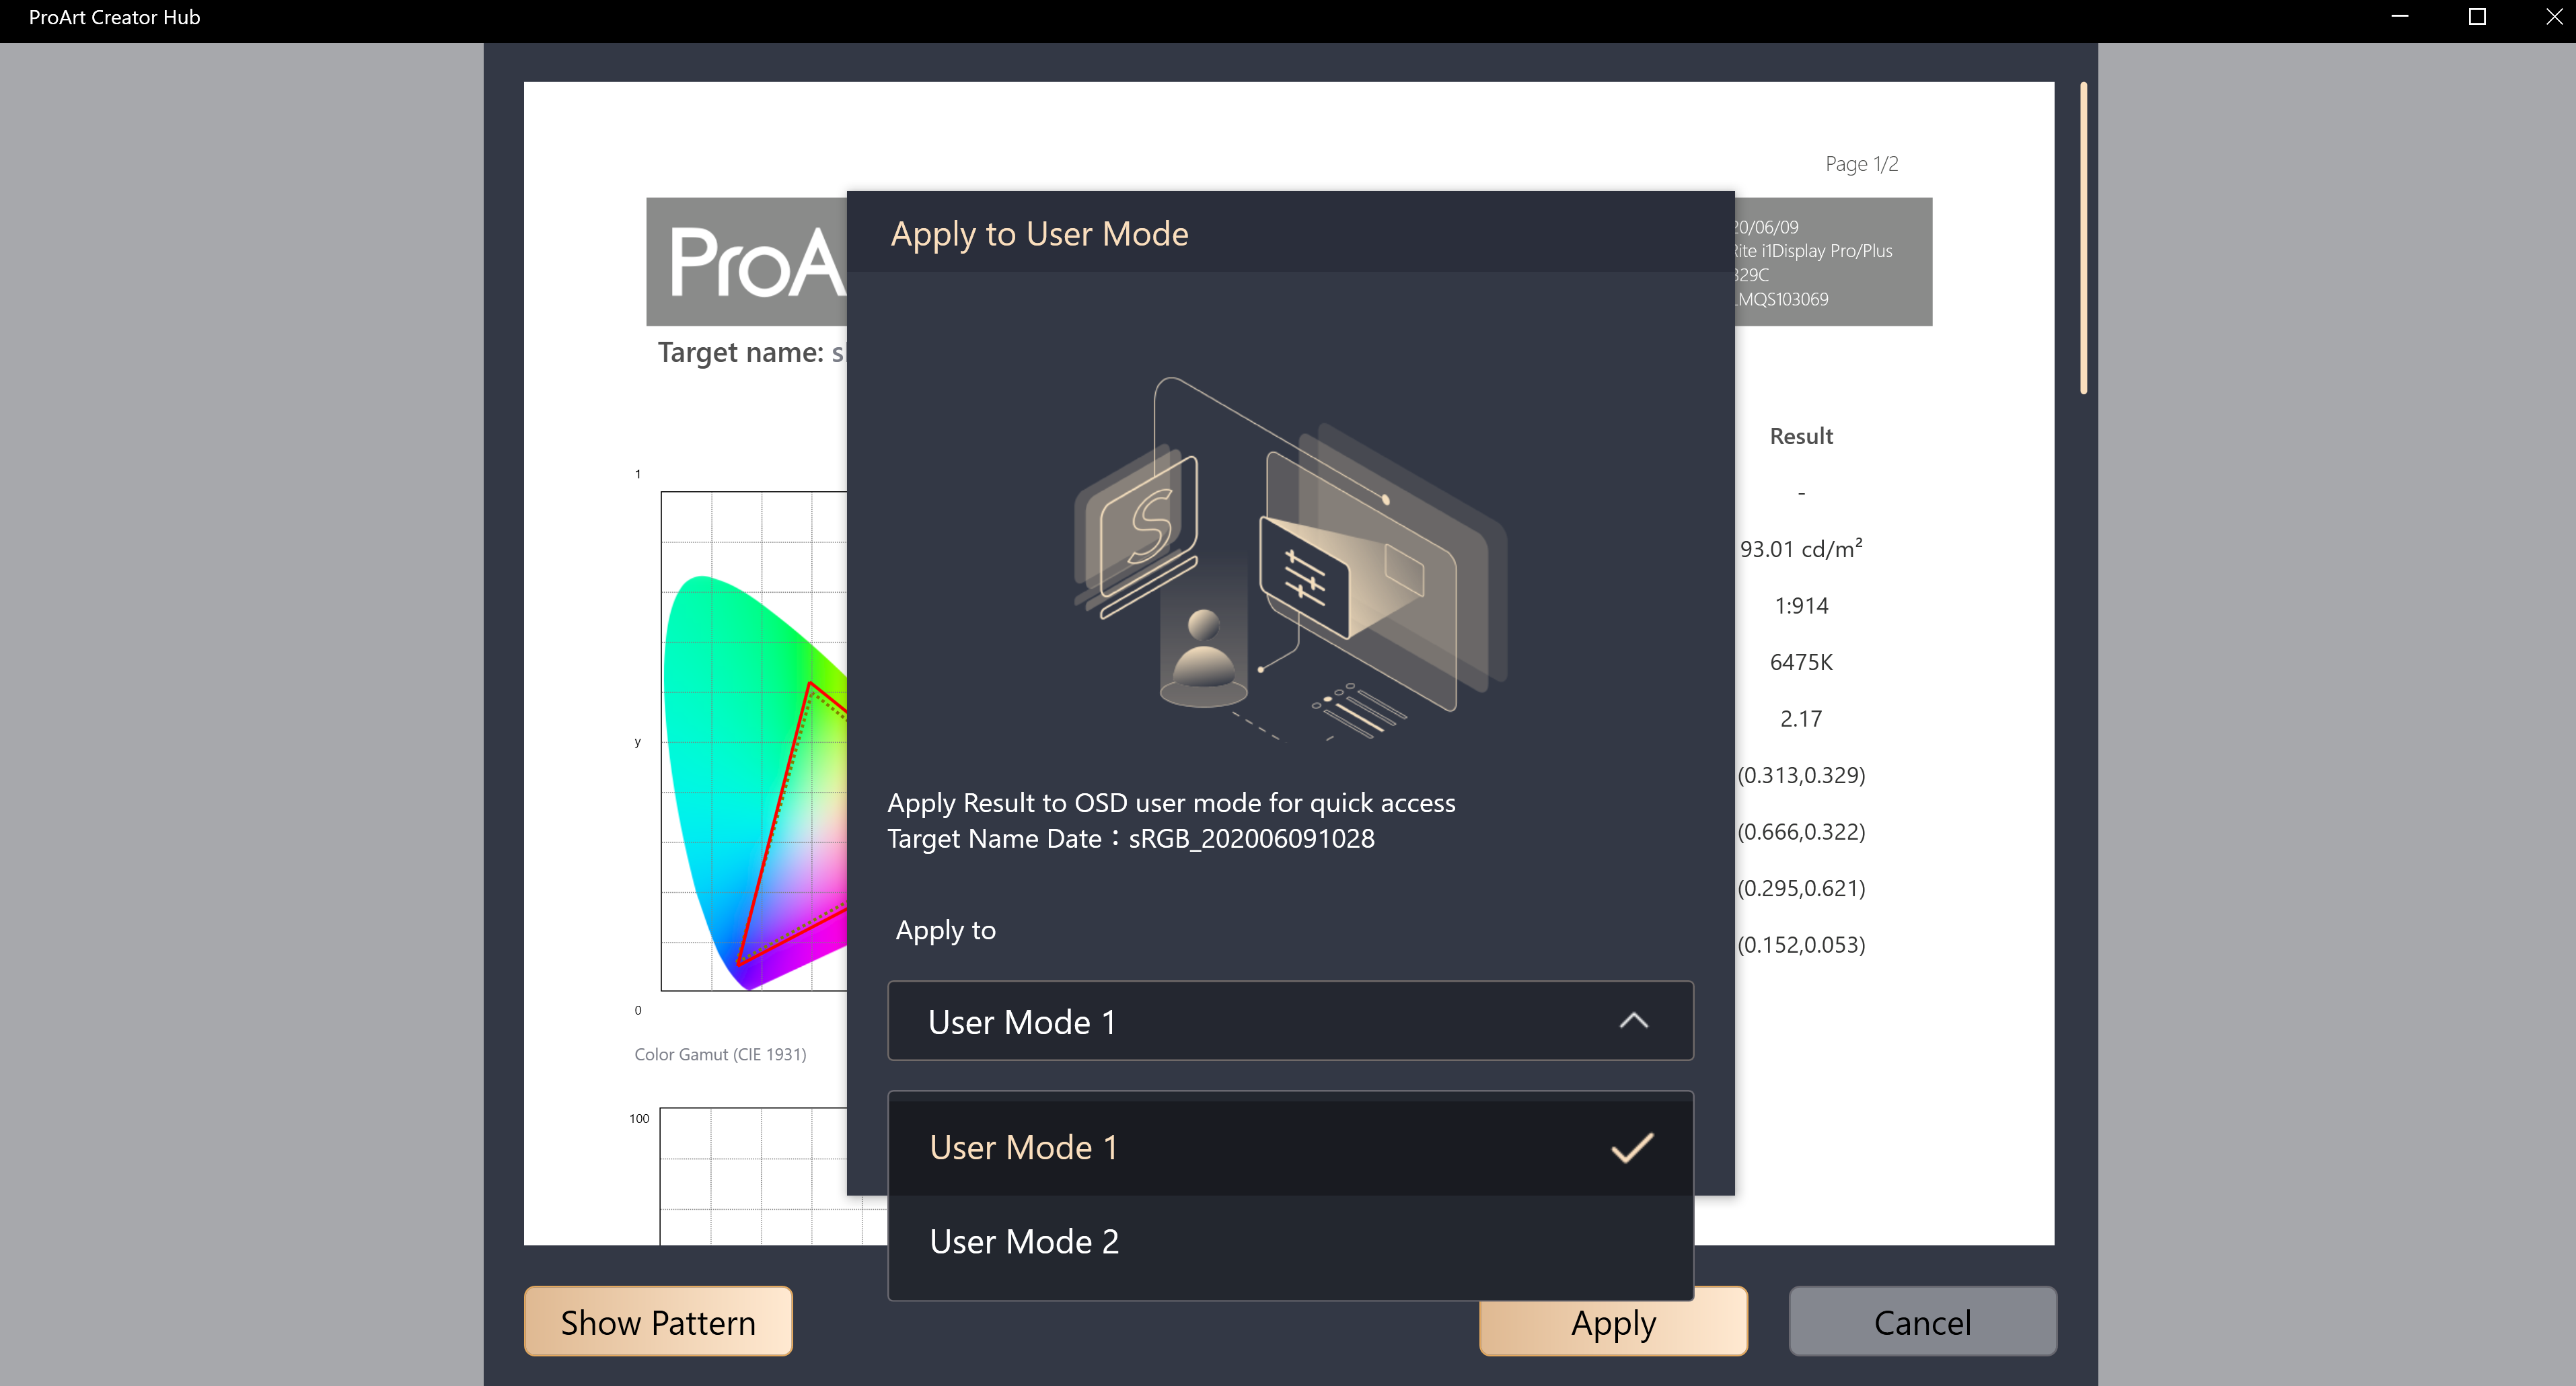
4. Click [Apply] . You can save and apply the data to User Mode 1 or User Mode 2 to complete color calibration.
Uniformity Calibration
1. Move the calibrator to the marked position and click [Start] to start the Uniformity calibration.
2. After the calibration is completed, the system will save the data to the display. Please wait 10~15 minutes for the storage to complete.
3. After saving, please move the calibrator again to the marked position and click [start] to start the Uniformity calibration.(second calibration to reconfirm, each grid only takes a few seconds)
4. After scanning, the system will automatically continue to perform color calibration.
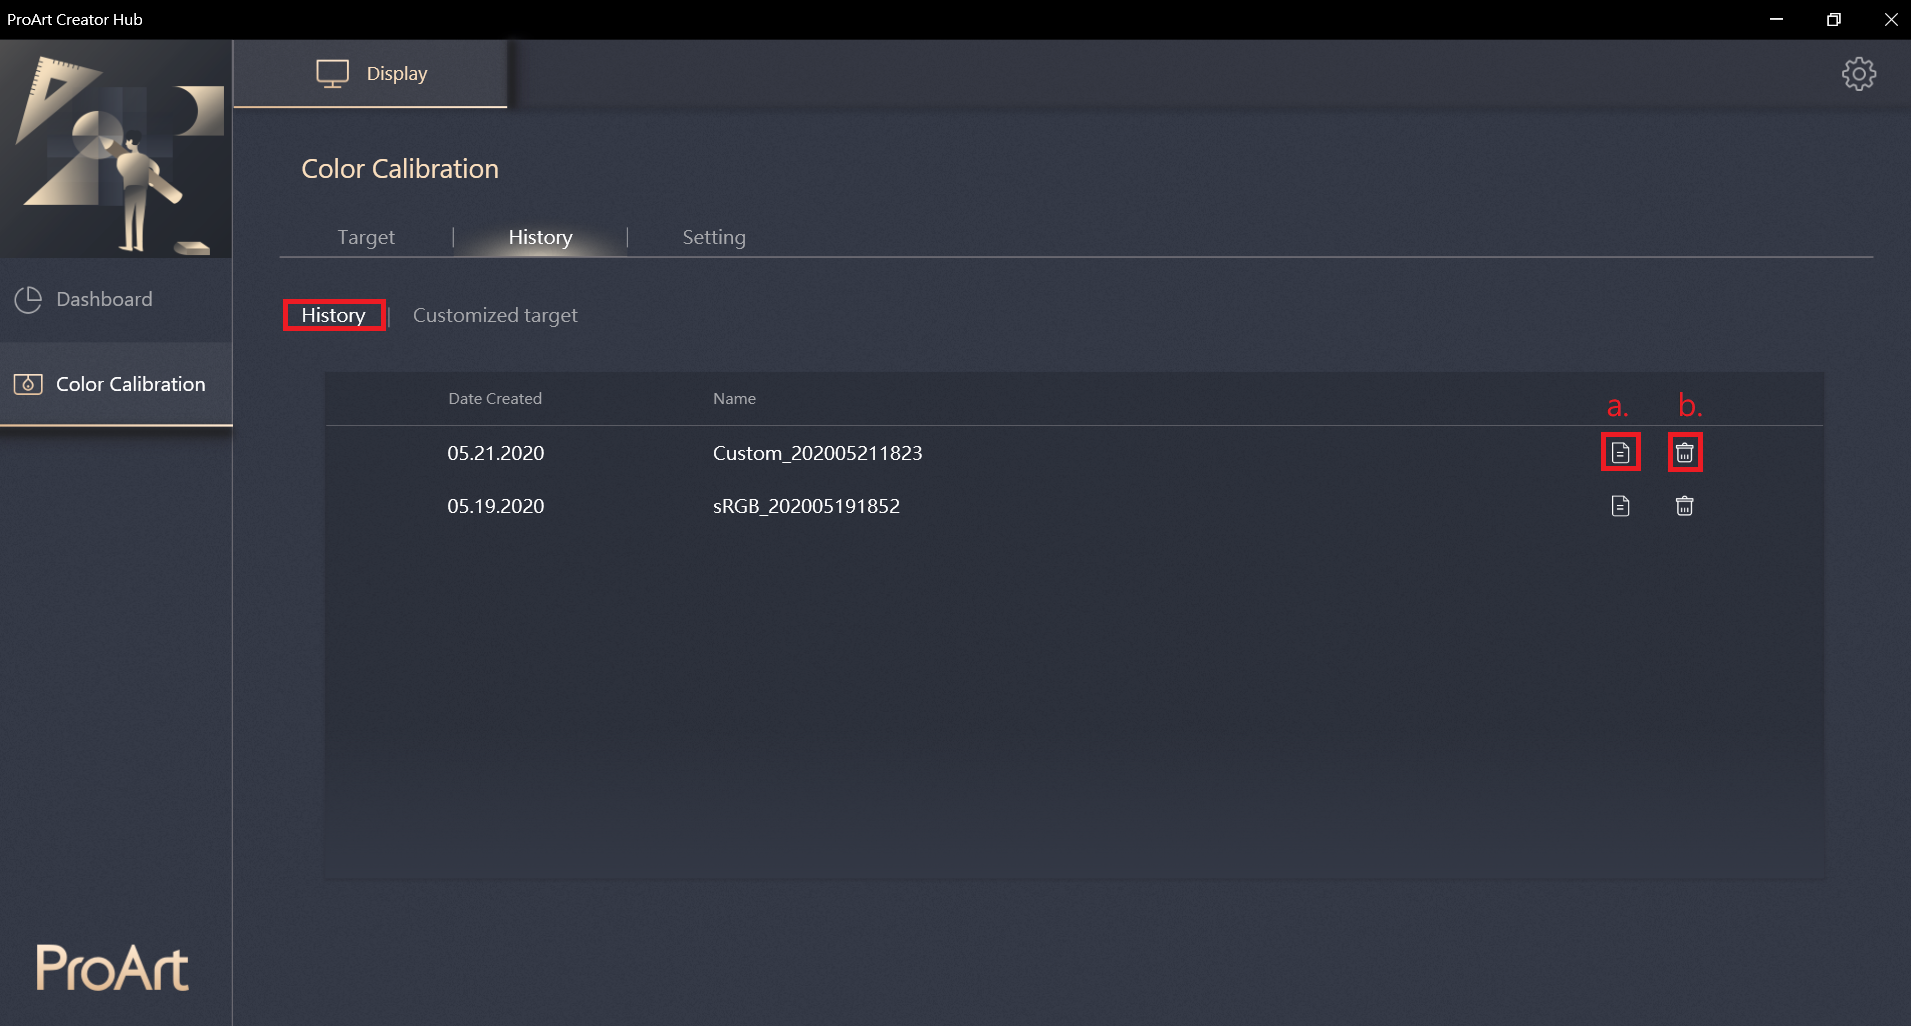
History
In the history, you can check the currently stored data.
Click a, you can confirm the color calibration report of this data.
Click b, you can delete this data.
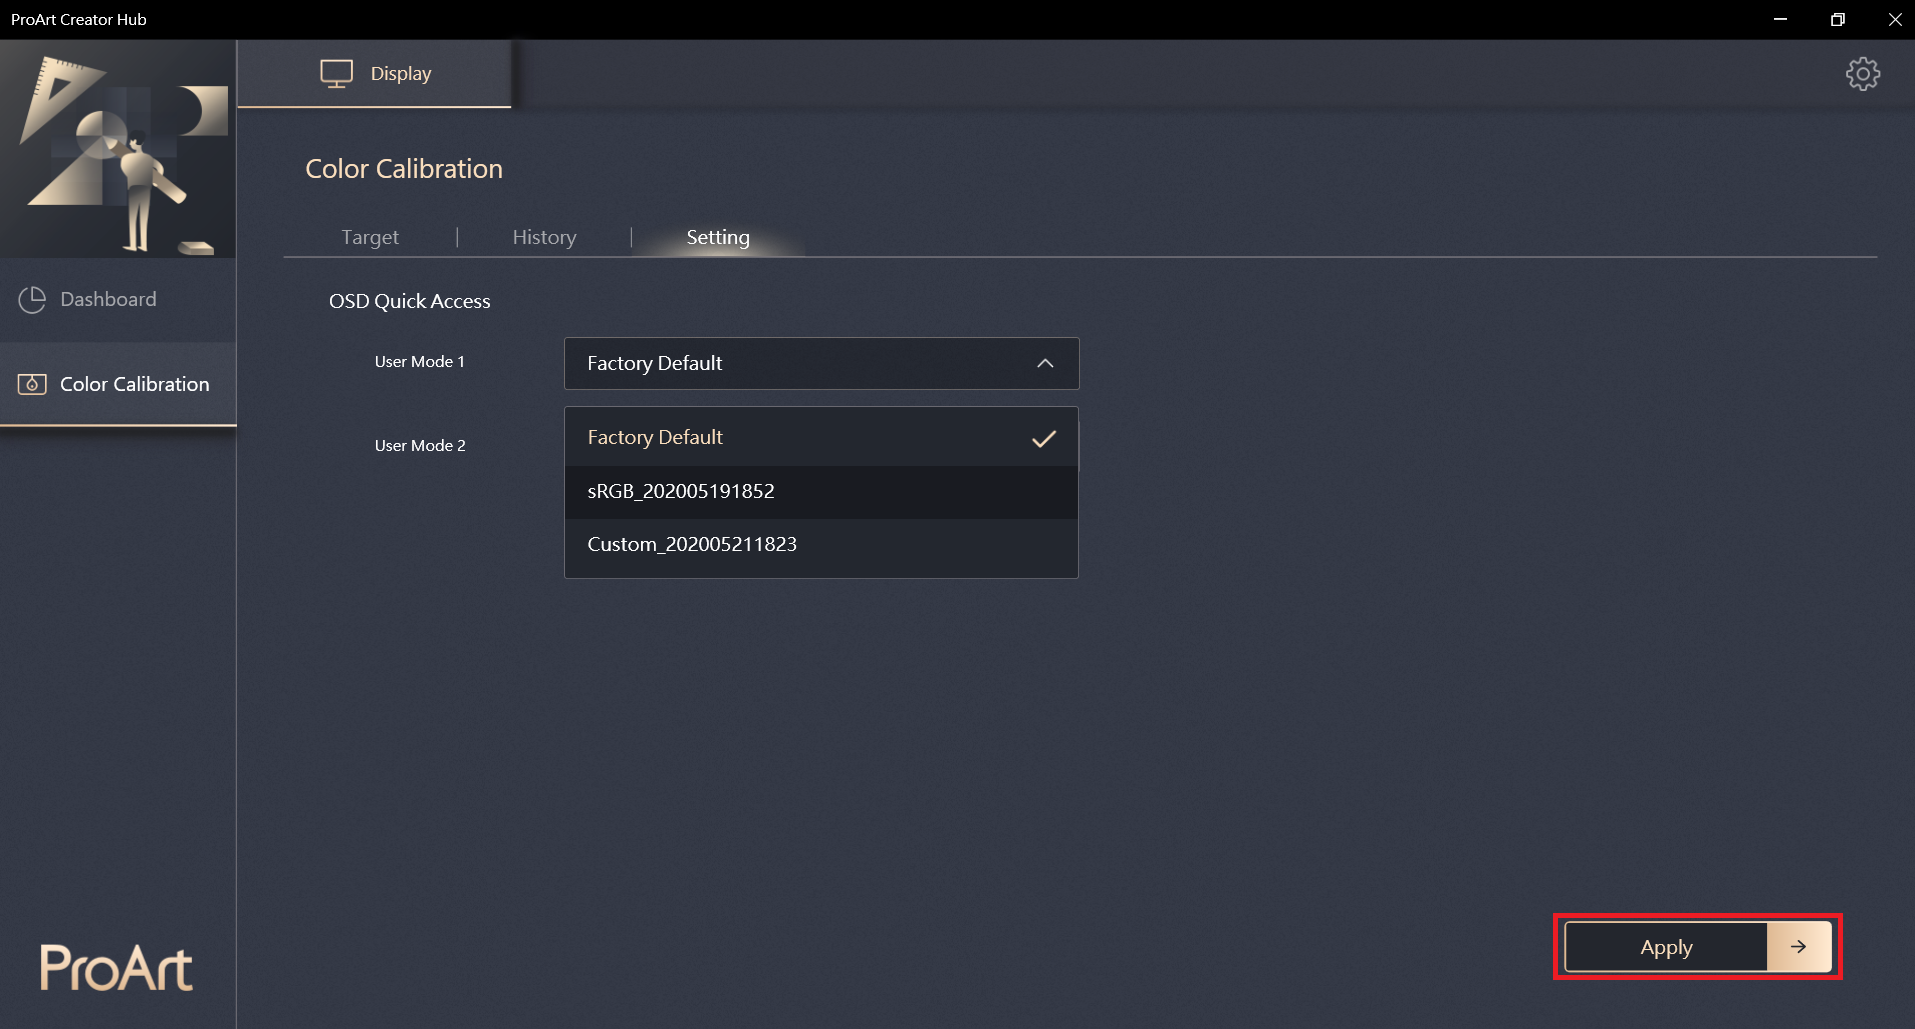
Setting
You can apply user mode 1 and user mode 2 to the currently stored calibration data in the setting.
Please click [Apply] after the selection.
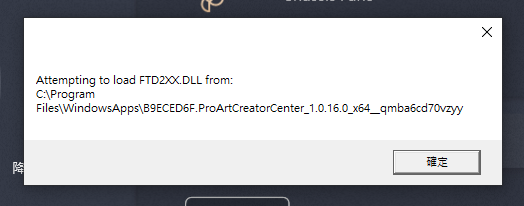
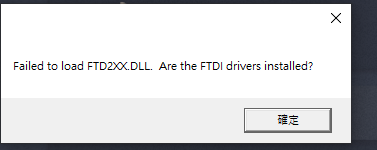
Q&A
1. How to solve the following error message when running ProArt Creator Hub? A: Please followDriver download & installation(only for PA329Q), and you can solve the problem of the error message.
[ProArt Display] [MacOS version]Introduction to ProArt Calibration - Setup and operation
ASUS ProArt Calibration
Precise, Consistent, Spectacular Colors
A calibrated and profiled display is a critical element in an efficient digital workflow for color perfectionists. However, the colors on displays decay over time so wide gamut displays are susceptible to color deviation.
ASUS now introduces a new solution- ASUS ProArt™Calibration which provides precise, consistent, and spectacular colors in the professional monitor.
Brightness and Color Consistency
ASUS ProArt Calibration saves all color parameter profiles on the IC chips within the monitor instead of the PC, so that you can connect your monitor to different devices without changing any settings or color shift. Meanwhile it also reduces the signal distortion between the IC & the display. It’s the easy way to recalibrate your display to restore your display's brightness and color consistency.
Color meter : i1DisplayPro/i1DisplayProPlus、Datacolor Spyder 5/Spyder X
Support MacOS
OS:macOS 12 (Monterey)/macOS 11 (Big Sur)
Download ASUS ProArt Calibration
How to get(ASUS ProArt Calibration)?
You can get the latest software, manuals, drivers and firmware at the ASUS Download Center.
If you need more information about ASUS Download Center,you can refer to this link.
steps:
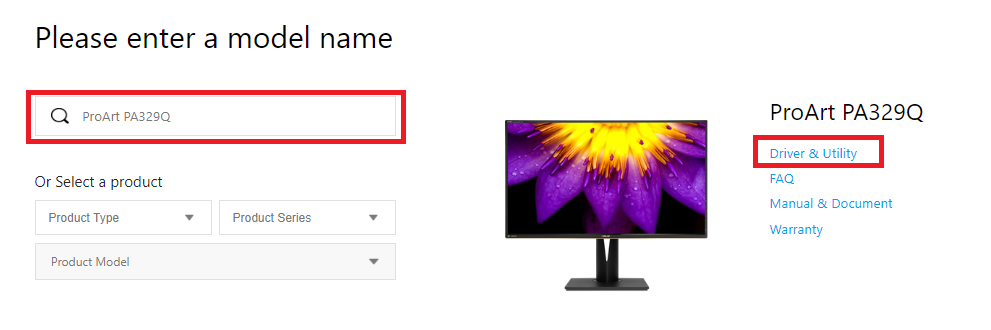
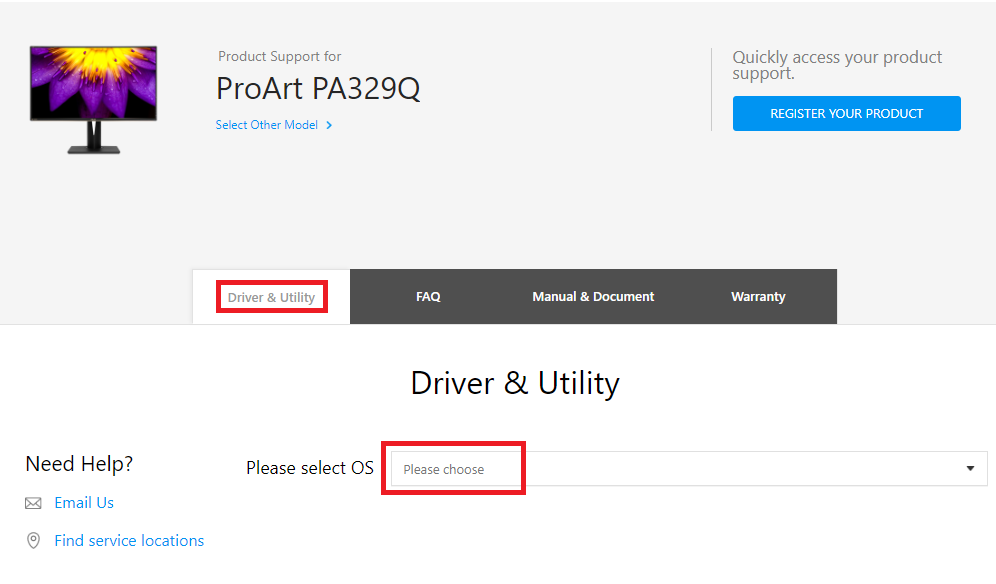
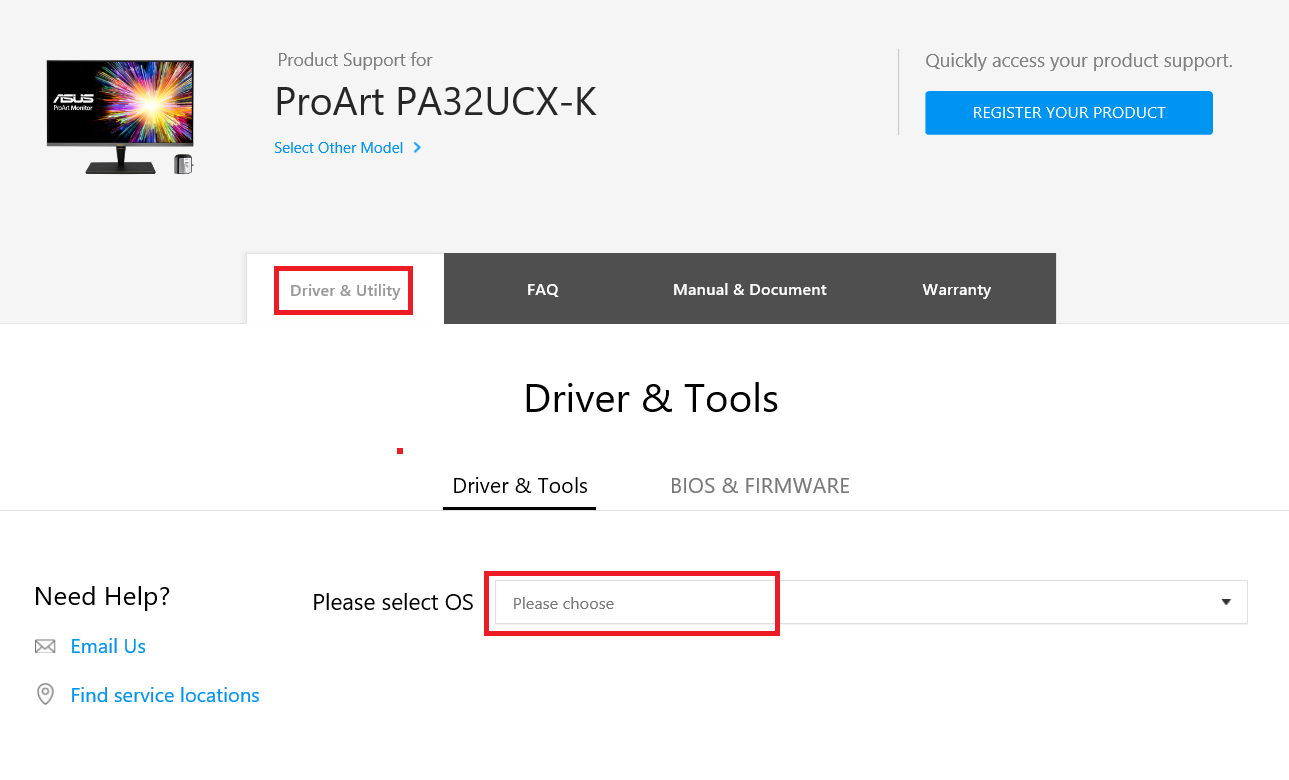
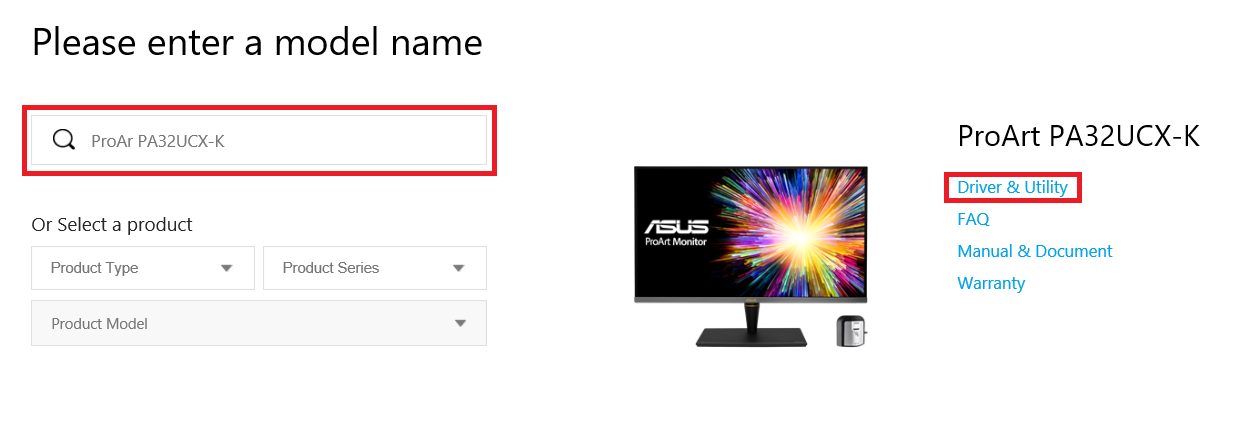
Download the latest utility corresponding to your monitor model from ASUS Download Center, enter the model-> click Driver & Utility.
(Ex: ProArt Display PA32UCX-K)
Click Driver & Utility-> Select OS.
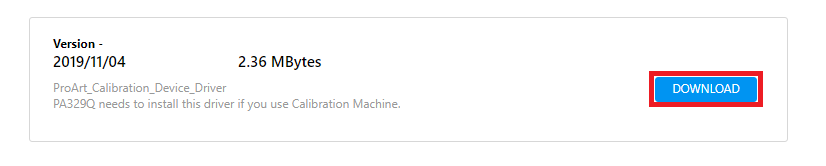
Find ASUS ProArt Calibration in Utilities category,and click DOWNLOAD to download the file.
Start ASUS ProArt Calibration
please confirm the following points:
1. Confirm that the "High Dynamic Range" option in the MacOS display settings is turned off.
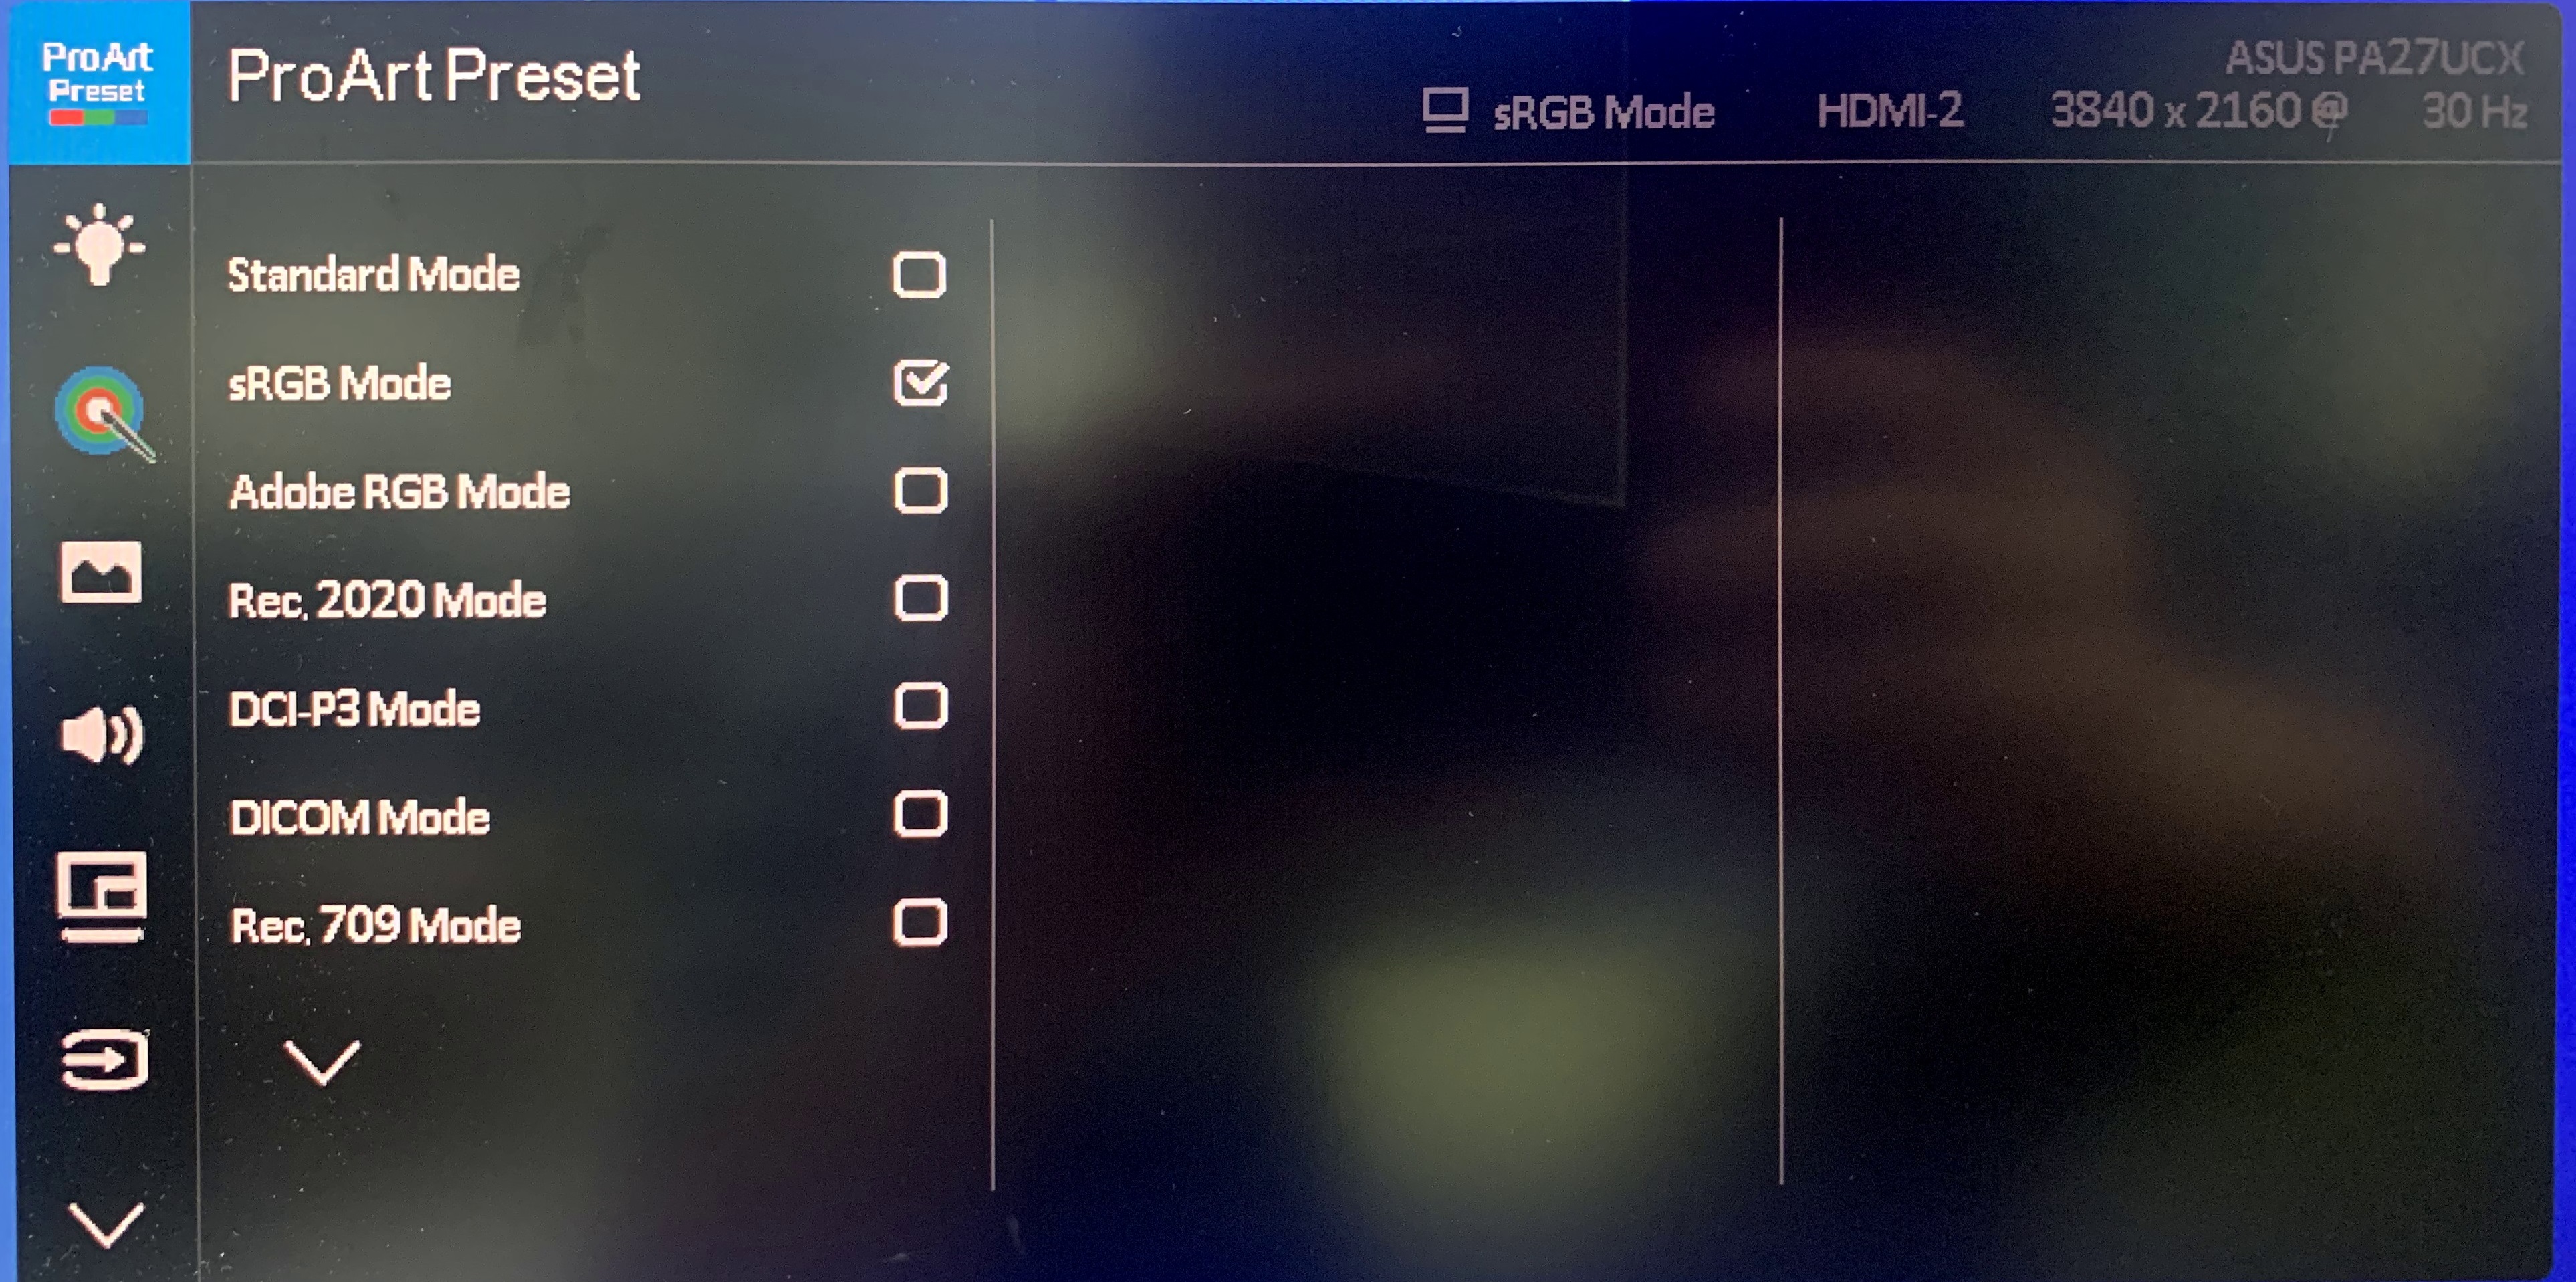
2. Confirm that the Preset mode in the OSD menu is set to a non-HDR mode (EX: standard, sRGB, DCI-P3)
3. If the model you are using is PA32UCX series/PA27UCX series/PQ22UC, please color reset the mode to be calibrated (User Mode 1 or User Mode 2) before use.
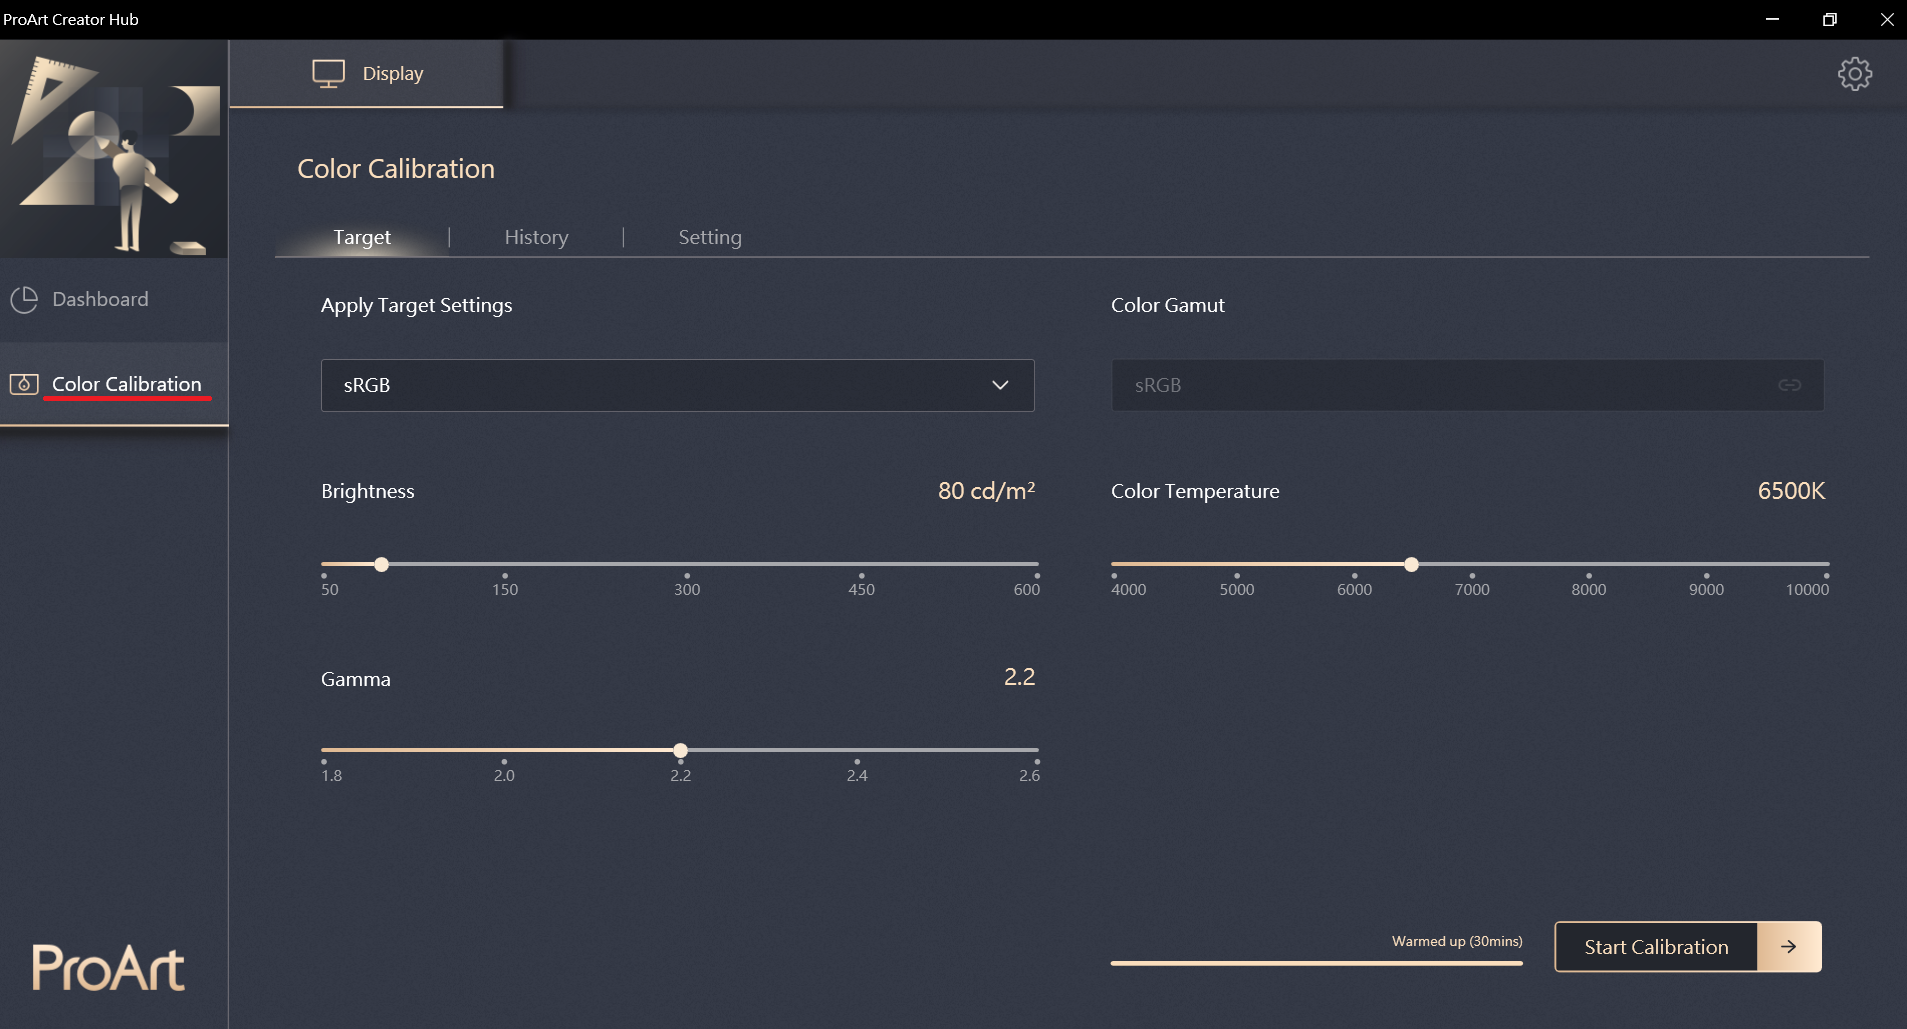
Color Calibration
Color calibration is the main function of ProArt Calibration, which can help you correct the color and uniformity of the monitor.
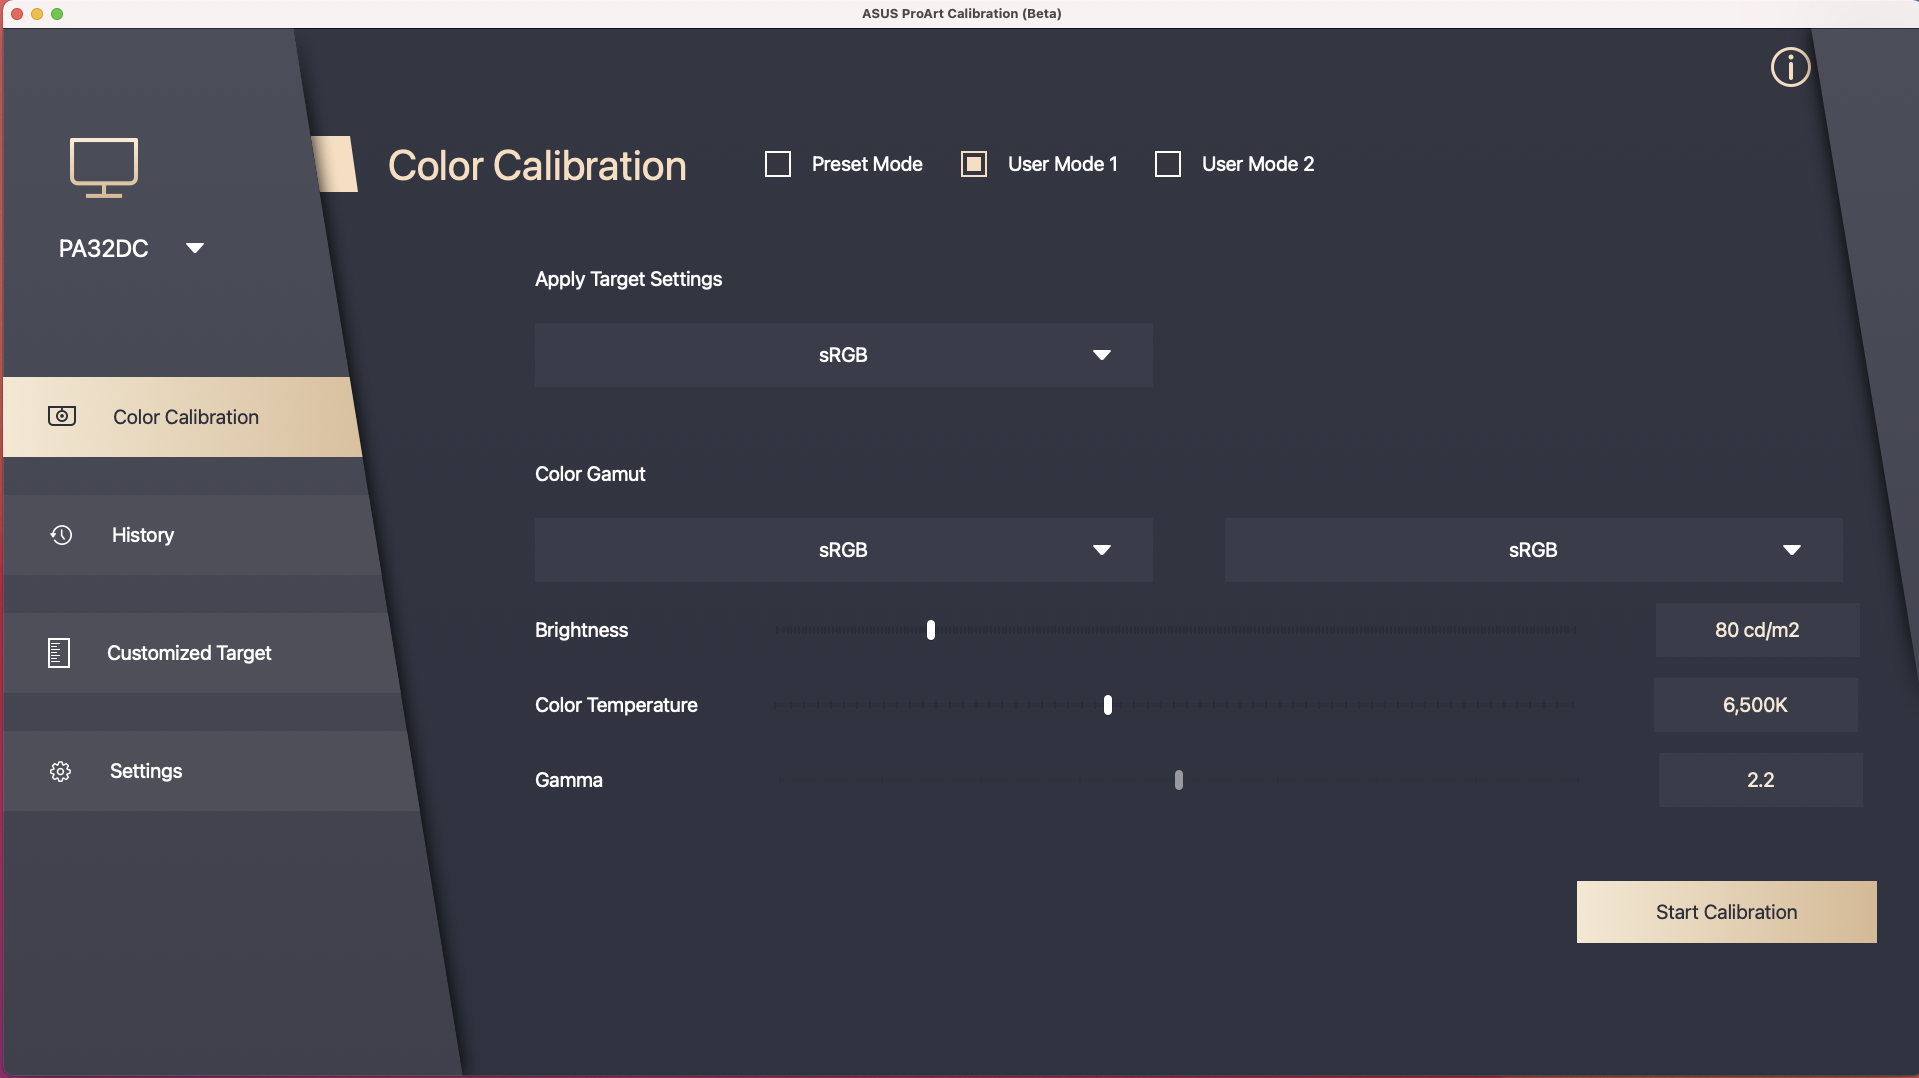
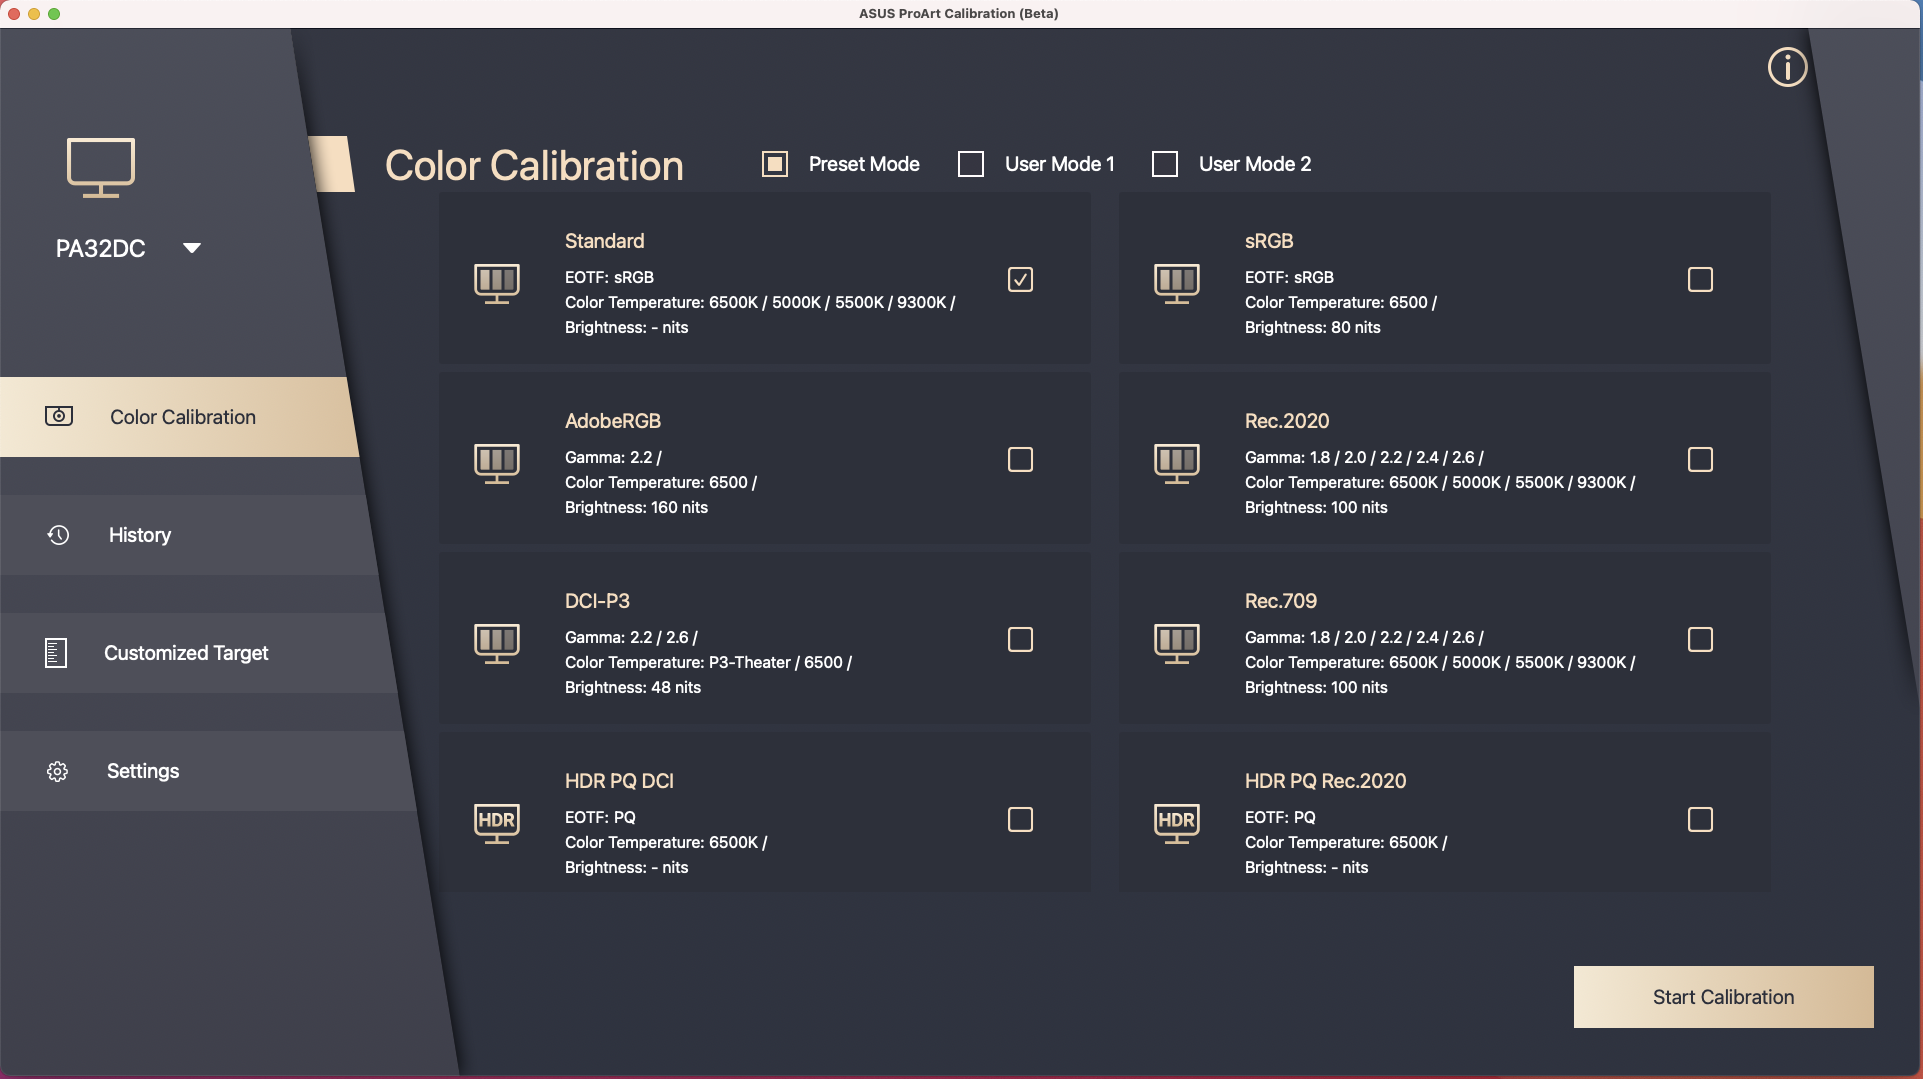
The first step in color calibration, please set the parameters you want to apply.
If your model is PA32UCG/PA32UCR/PA32DC, these models can select Preset mode to calibrate it.
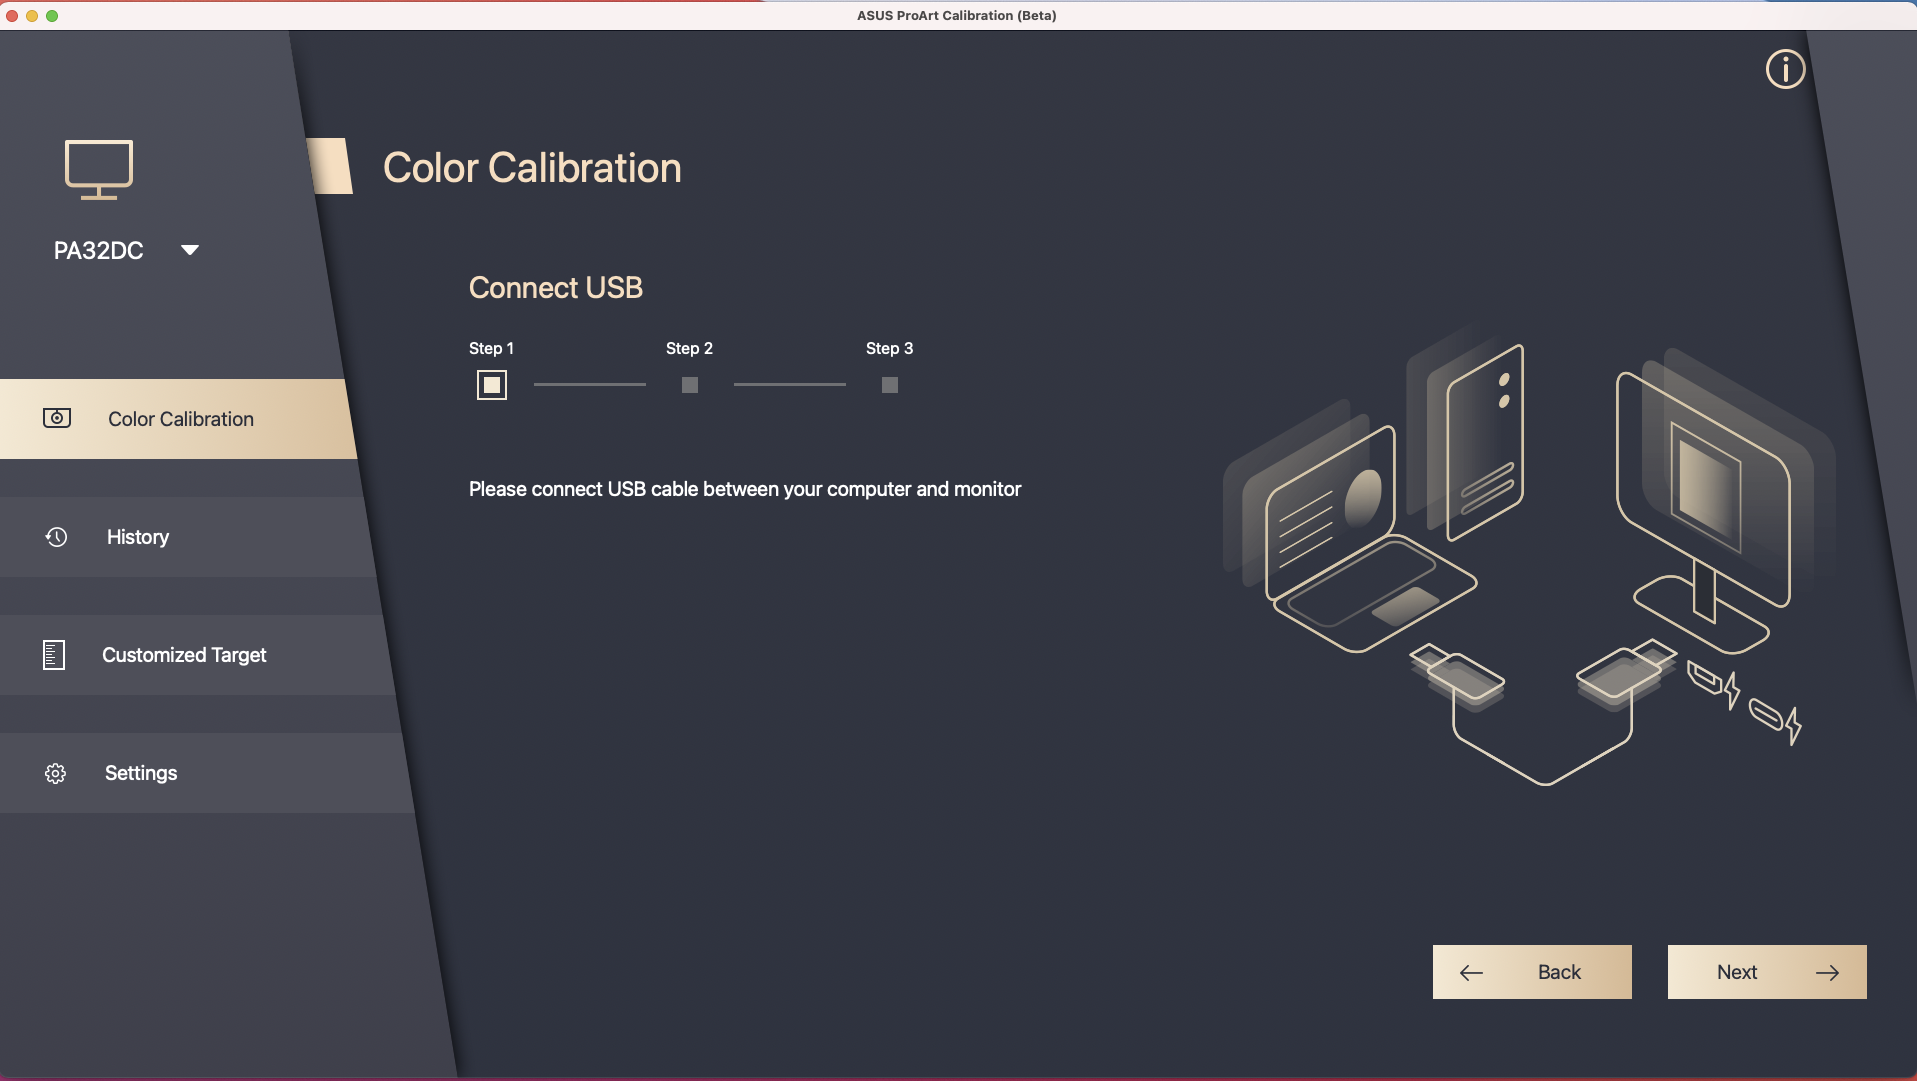
Click [Start Calibration] to do color calibration.
Make sure the USB Type-C or Thunderbolt cable is connected to your monitor.
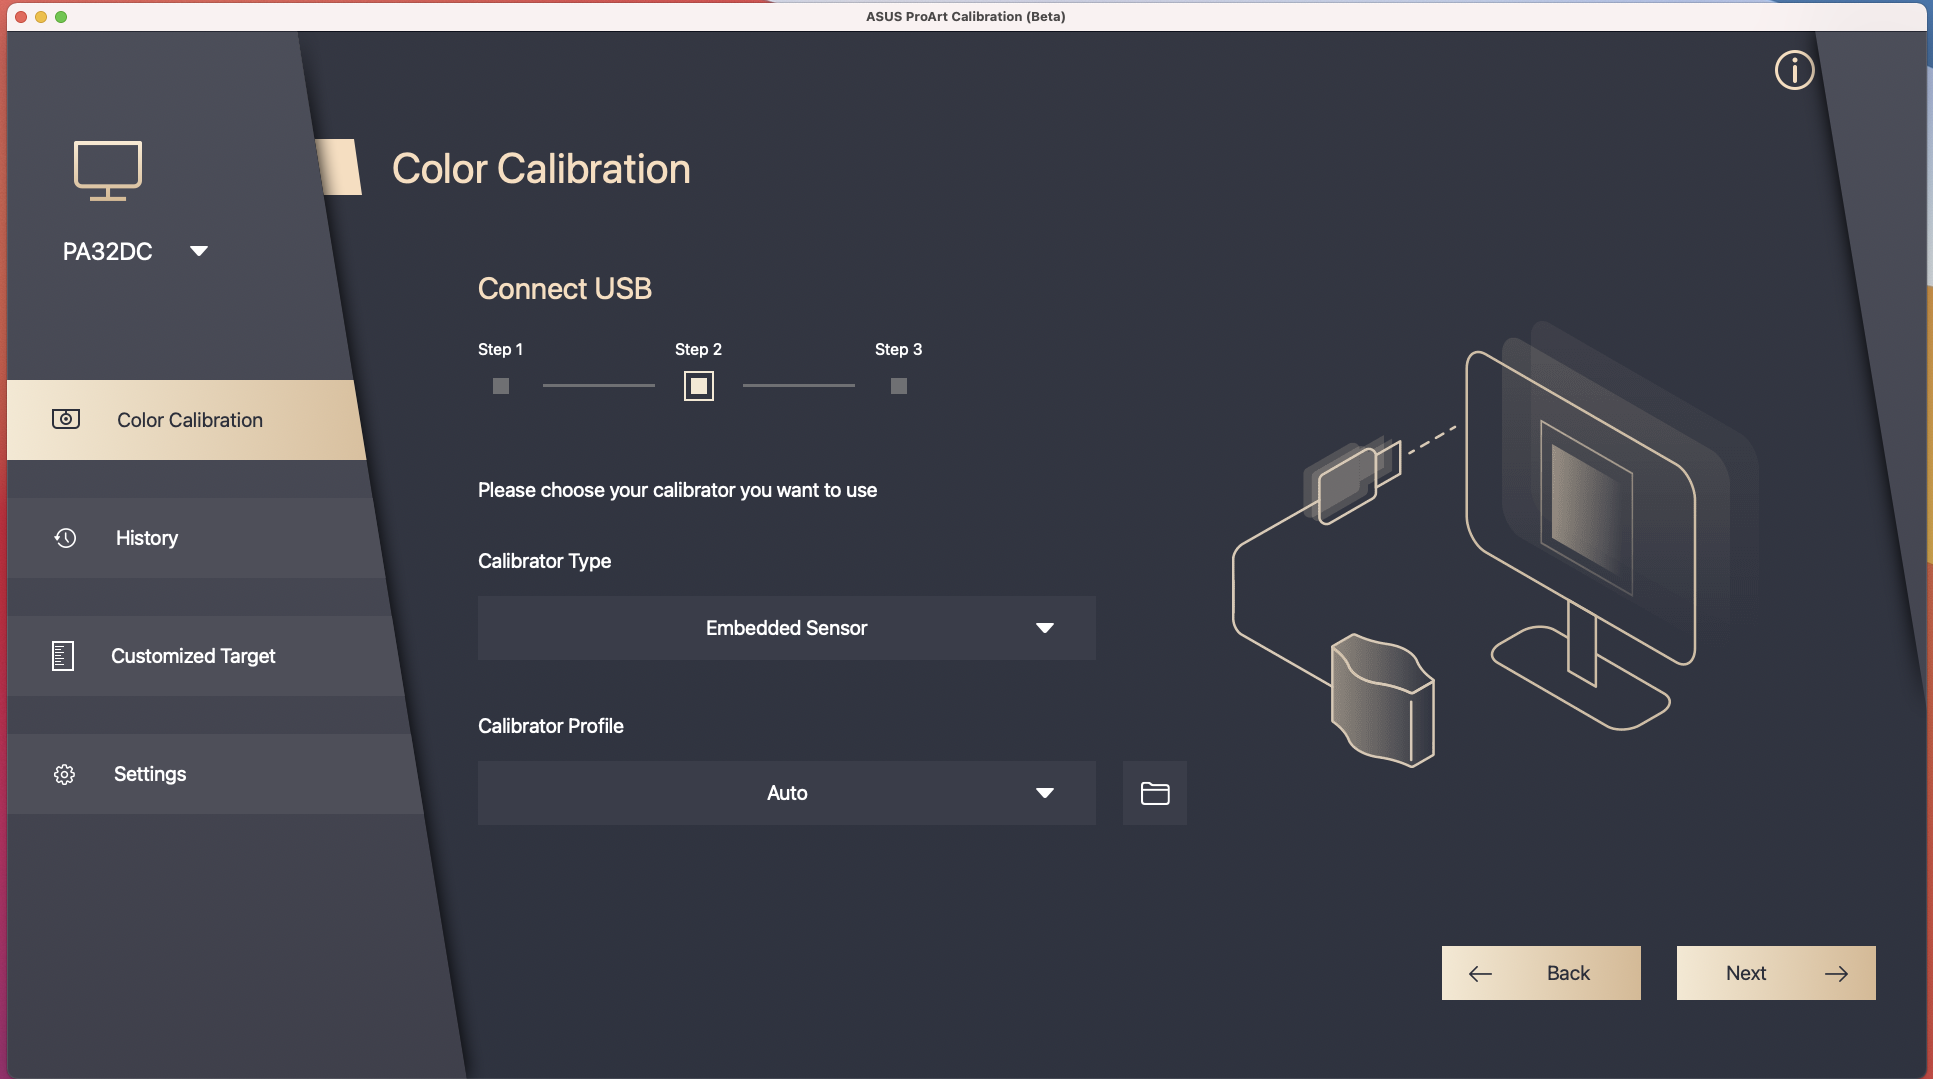
Make sure color meter is connected to your monitor,,select your color meter model and check if you need to change color meter profile(This function is only supported by i1 display pro/i1 display pro plus).
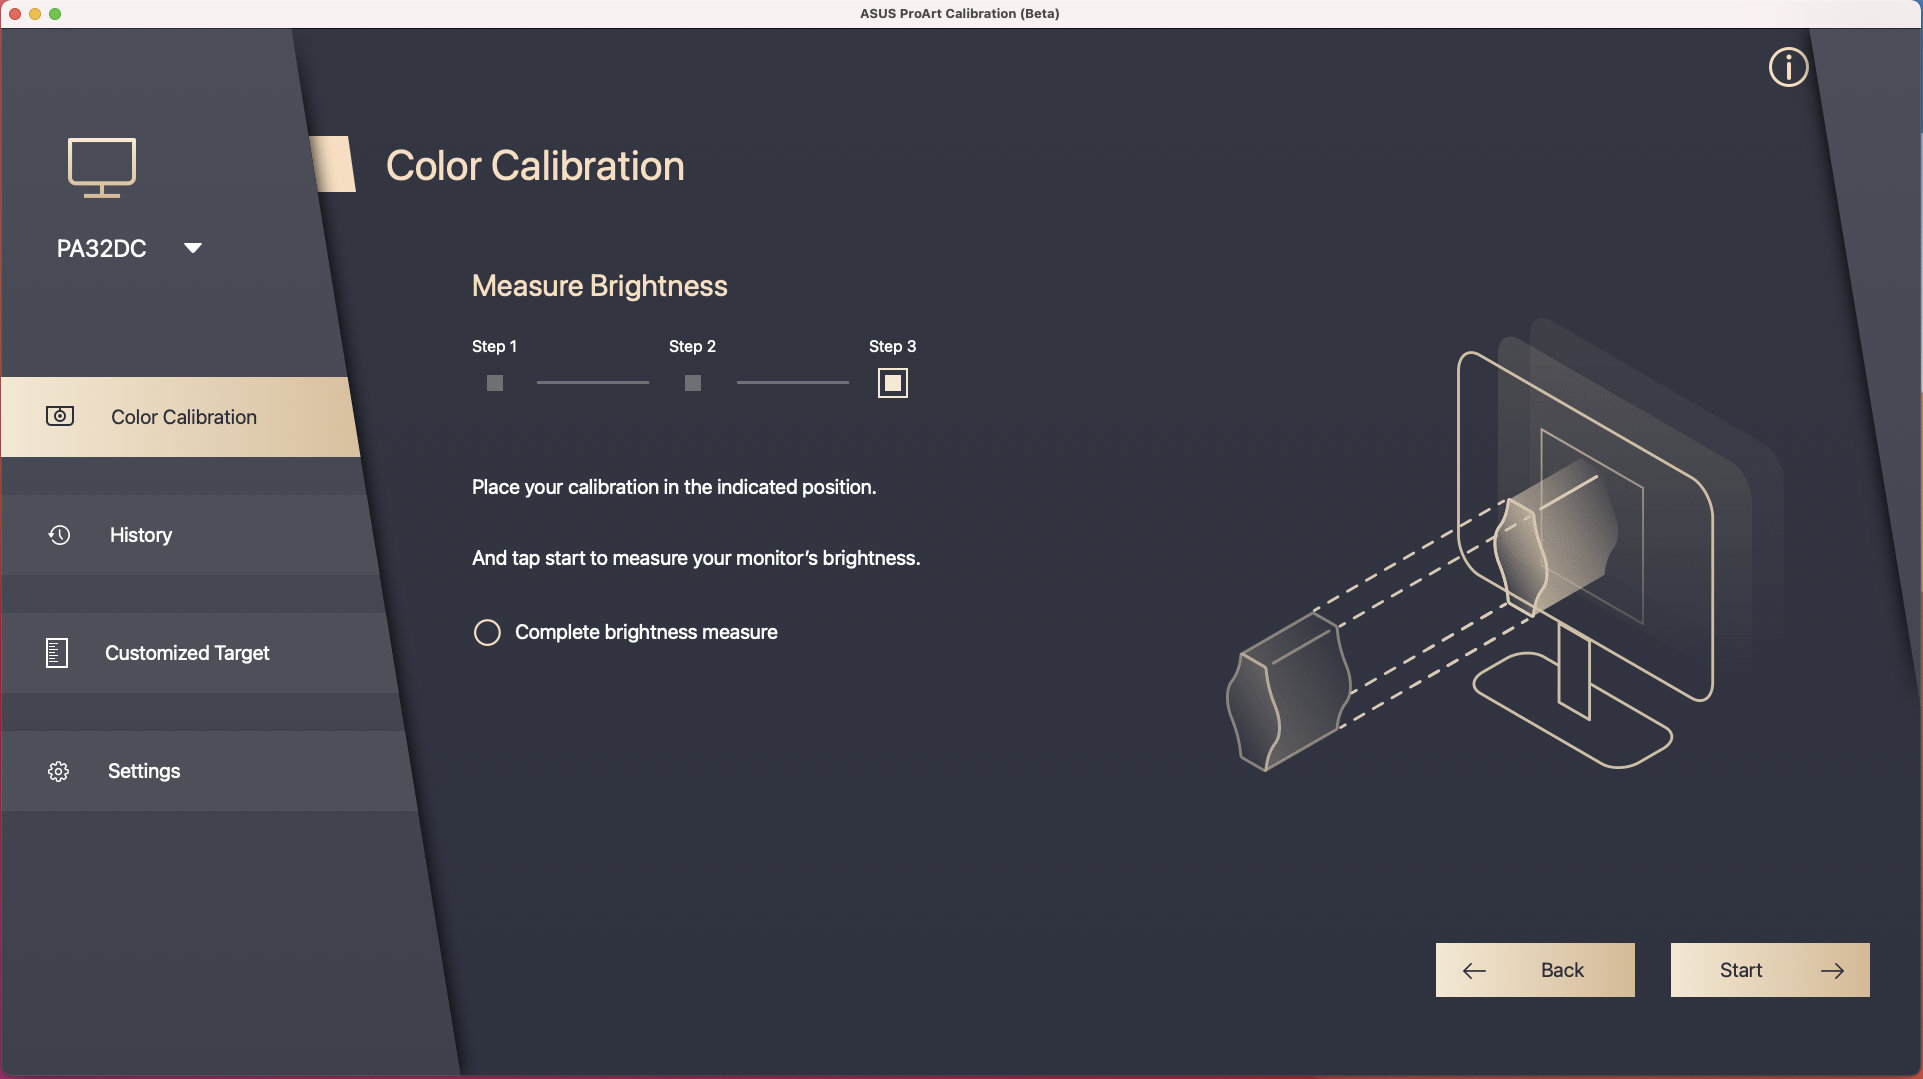
4. Click [next] to measure the brightness,please place the color meter on the marked position, and click [Start] to measure.
After the measurement is completed, it will automatically enter the next step.
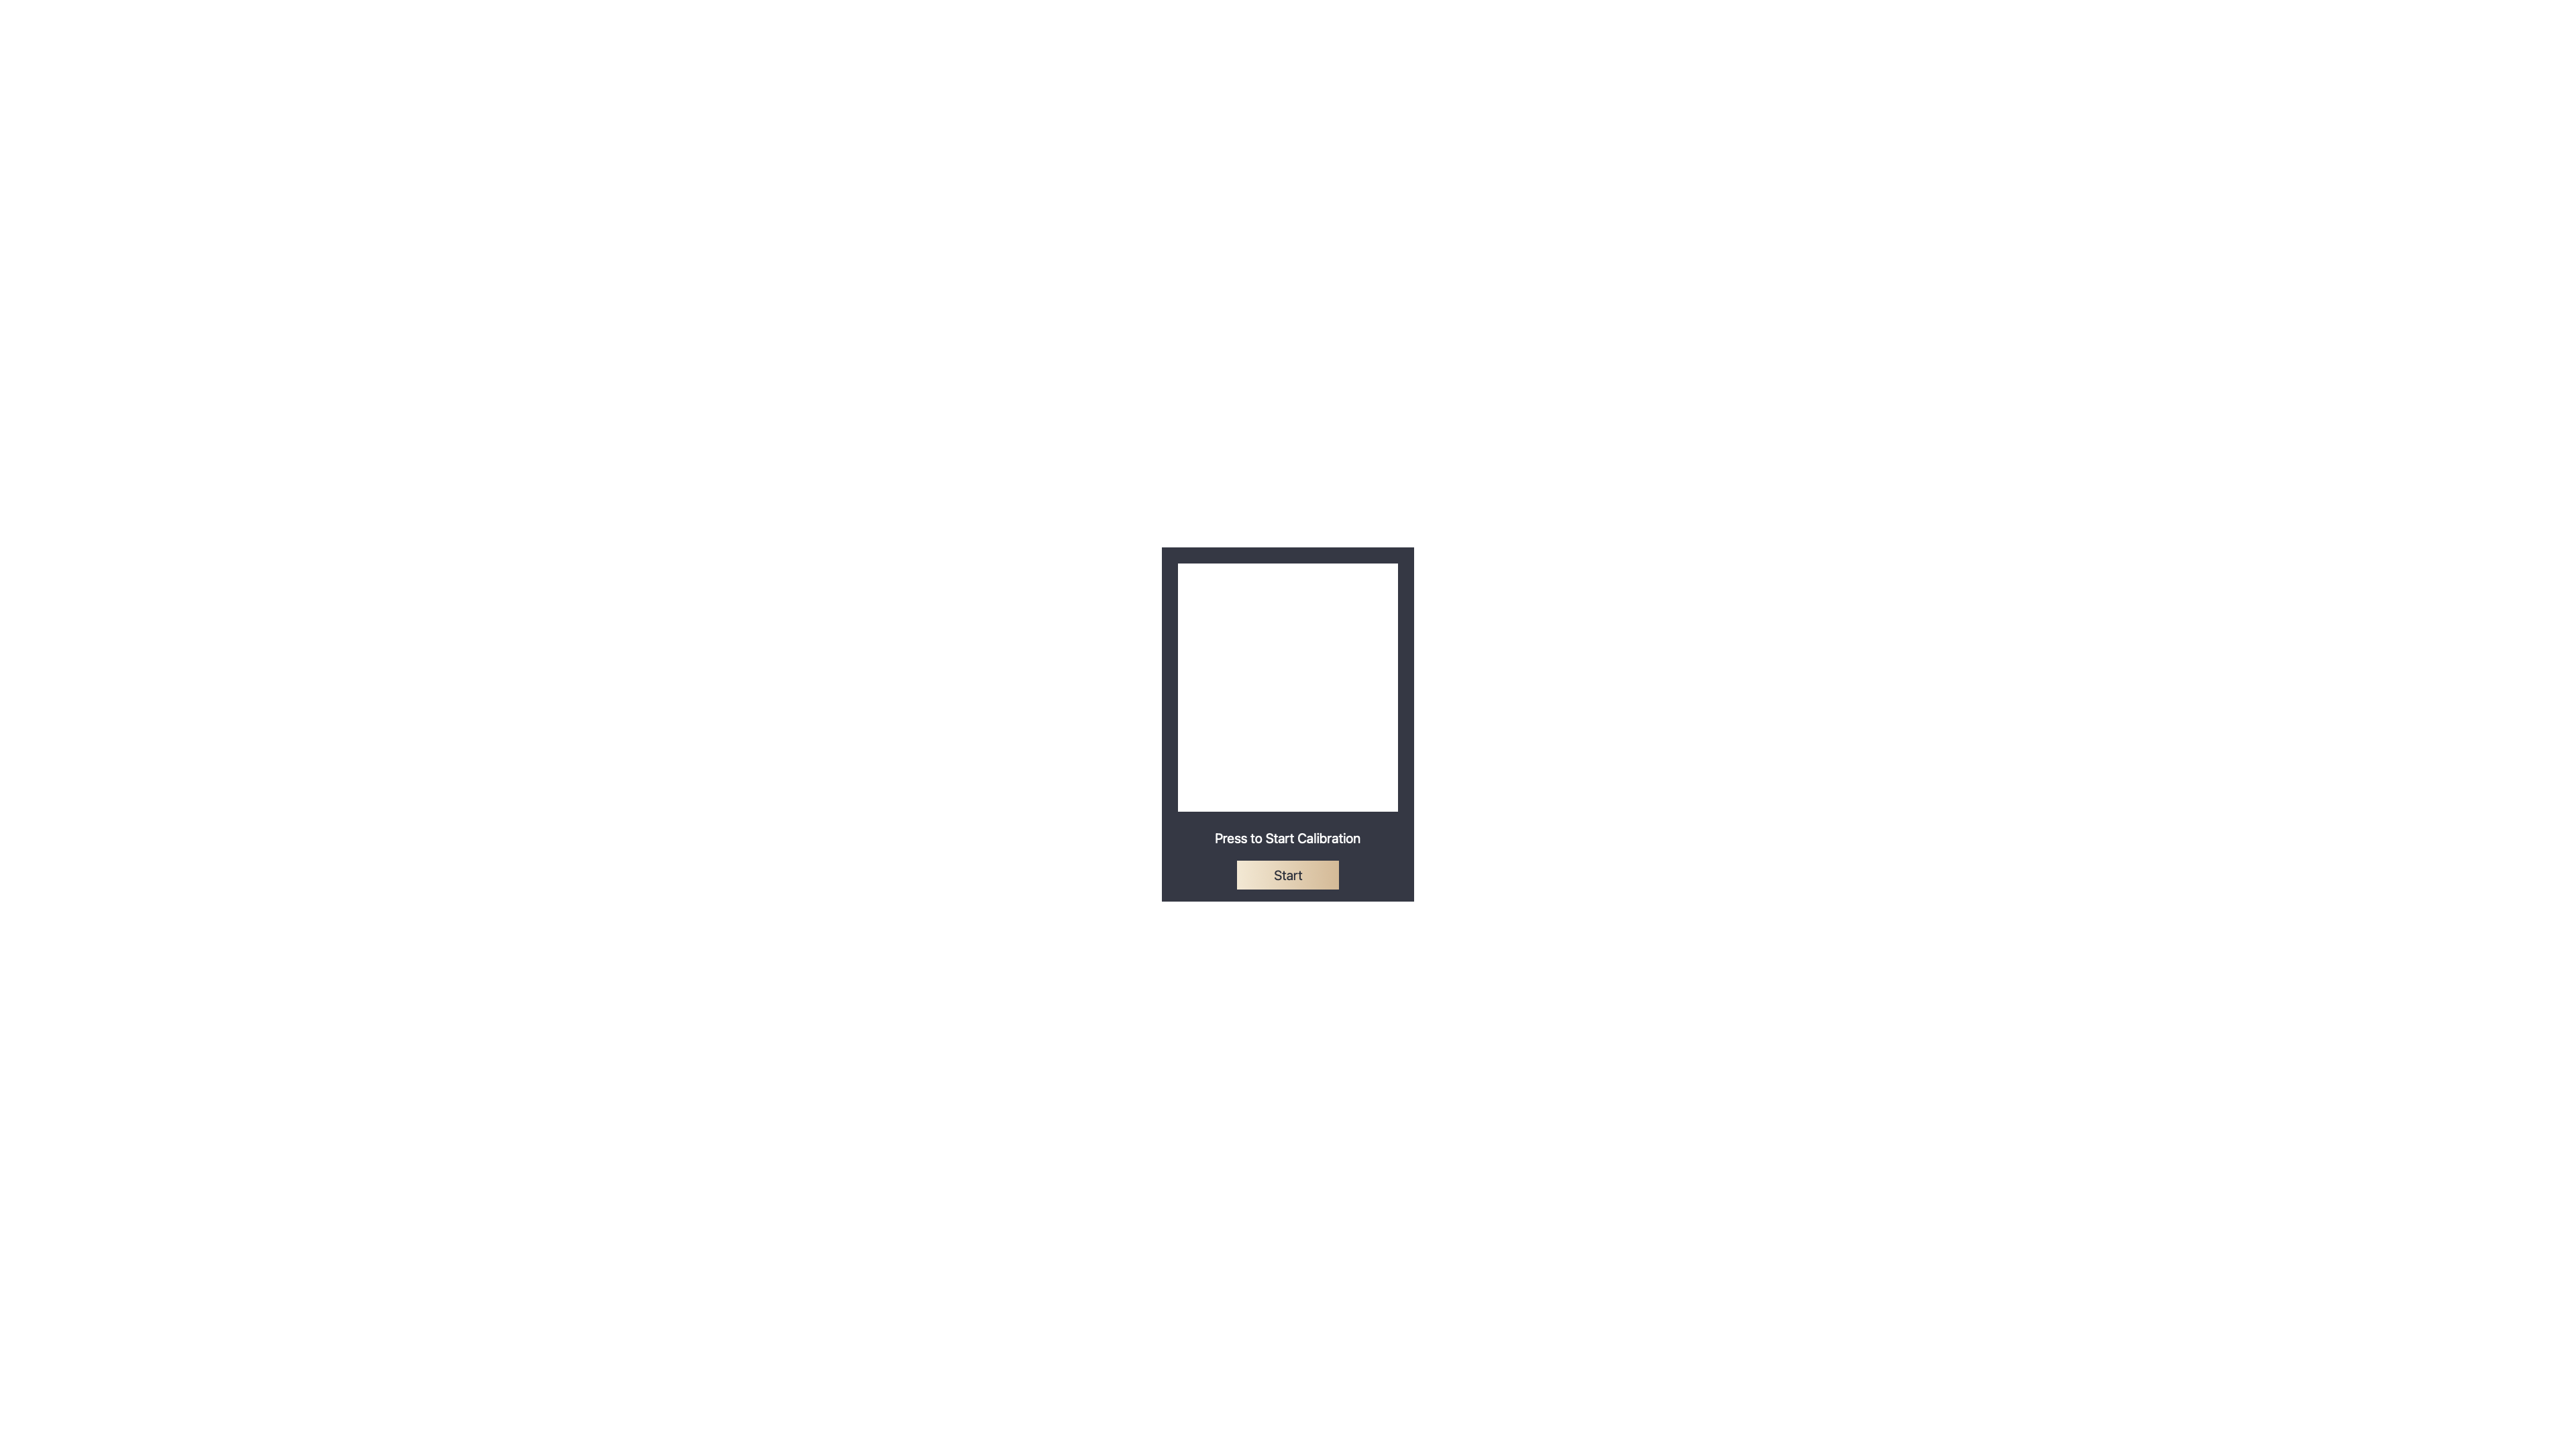
5. Press [Start] to begin color calibration.
6. . Please follow the instructions to place the color meter on the marked position, and click [Start] to complete color calibration.
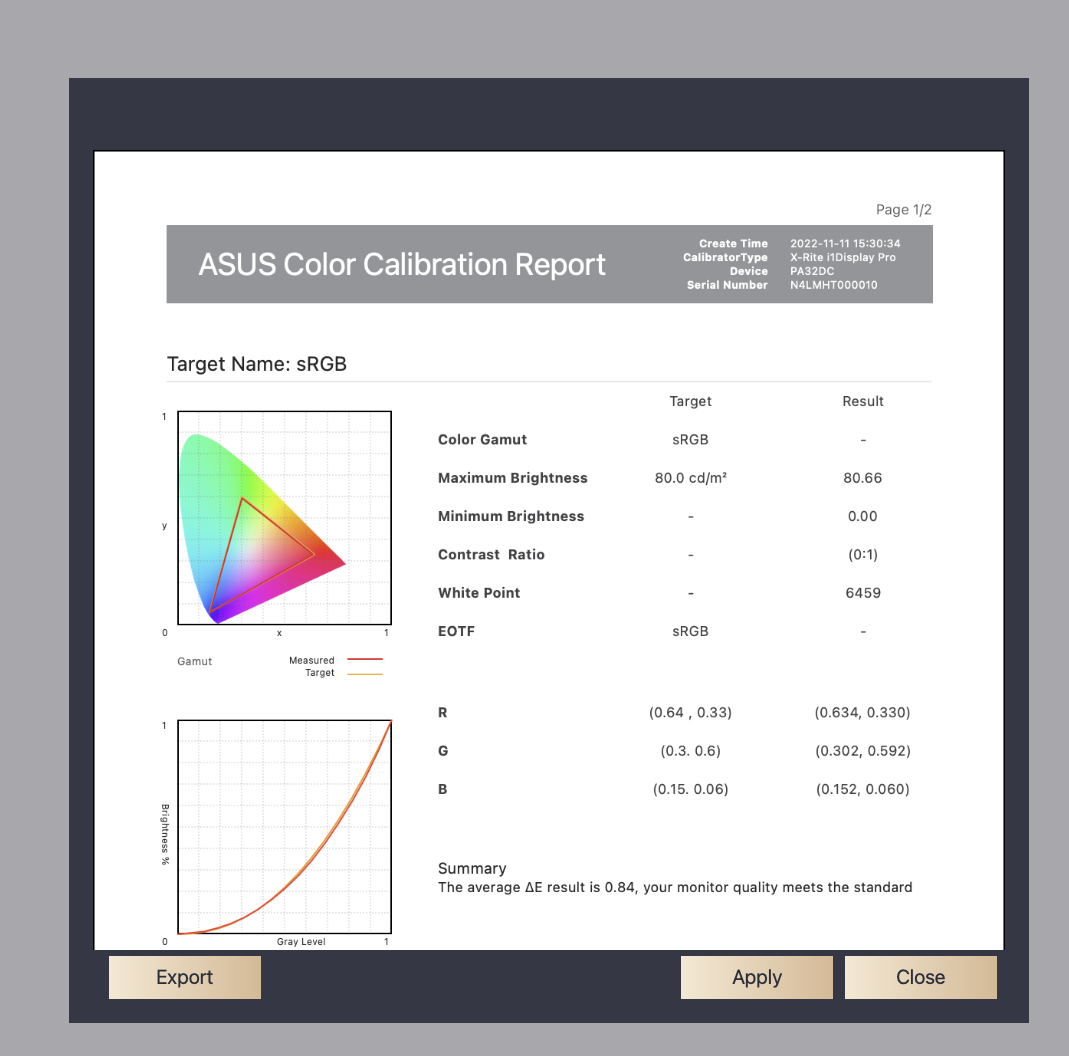
7. After the calibration is completed, the report of the calibration results will be generated. You can view the parameter values of the color calibration results in the report.You can click [Export] to save the color calibration report.
Click [Apply] to save and apply the calibration data to User Mode 1/2 or Preset Mode.
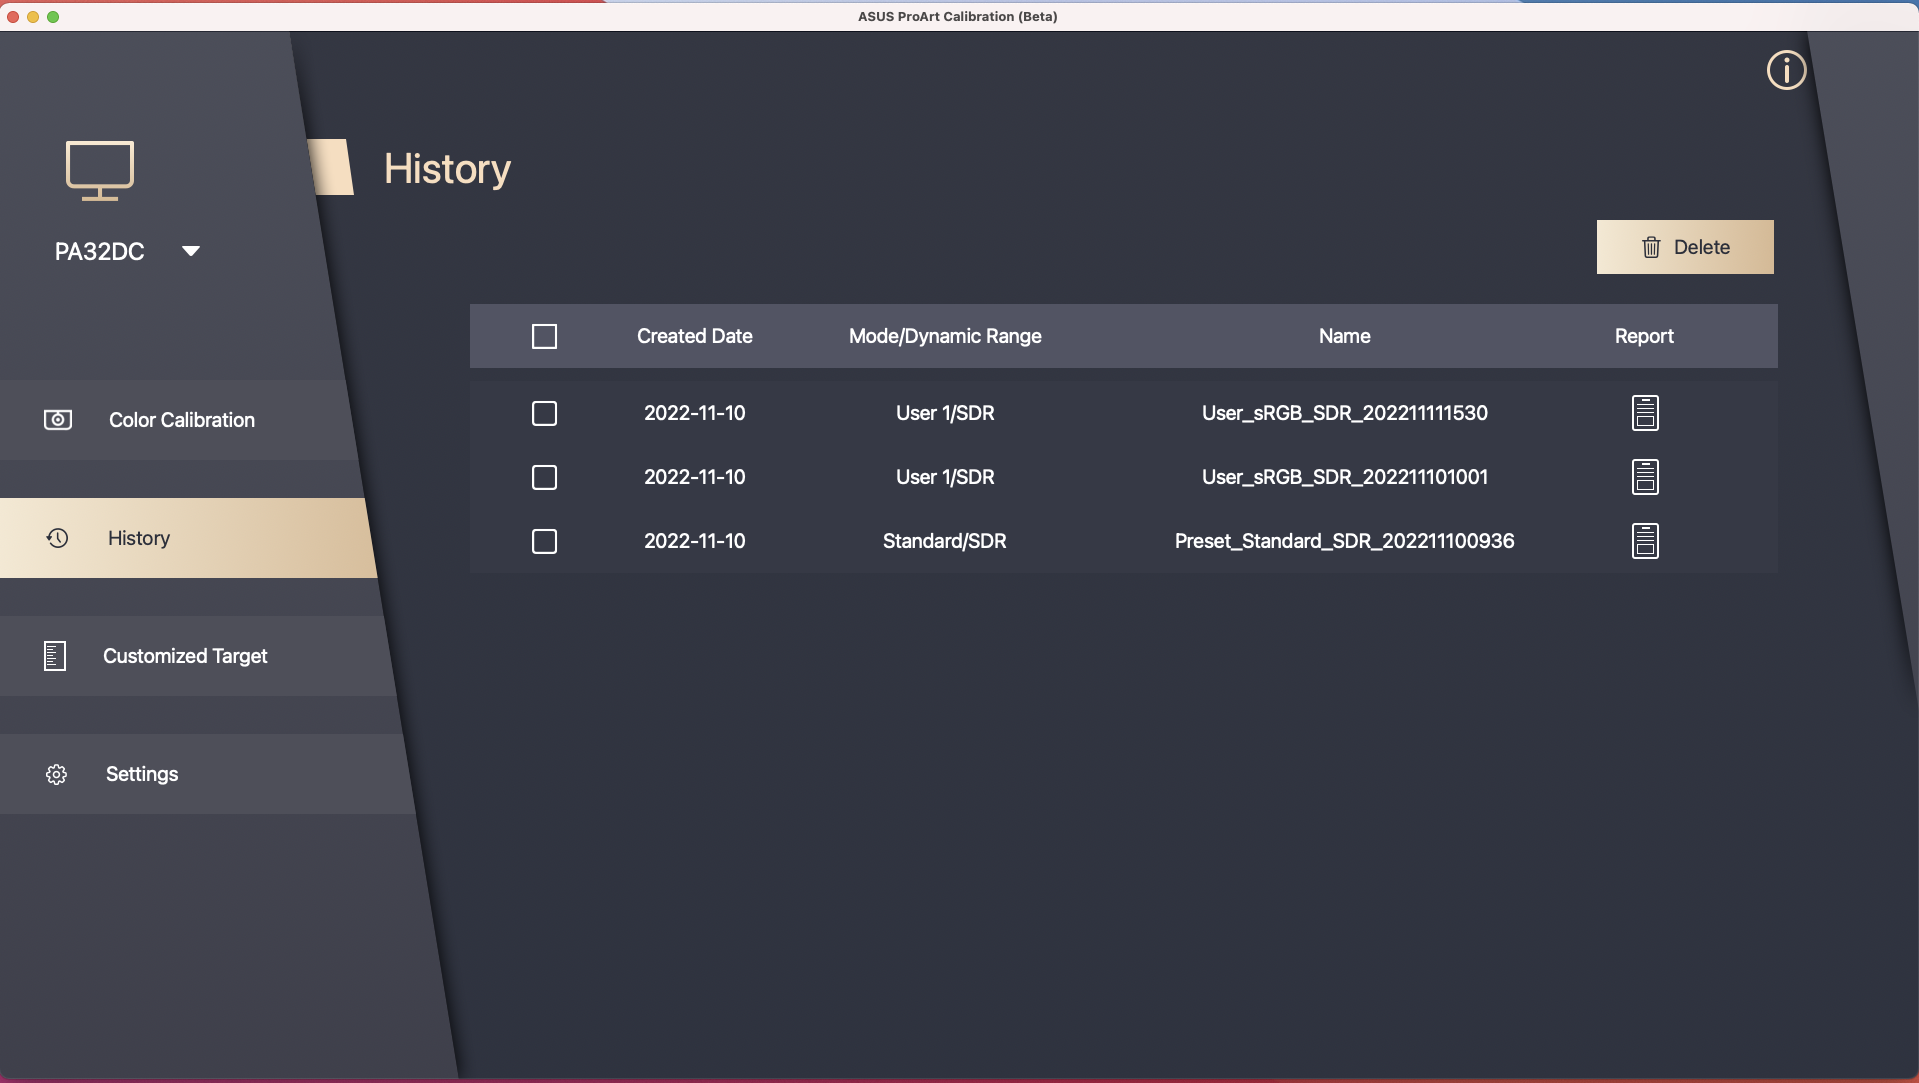
History
In History, the report data of past color calibration can be confirmed; if there is any data that does not need to be kept, you can click [Delete].
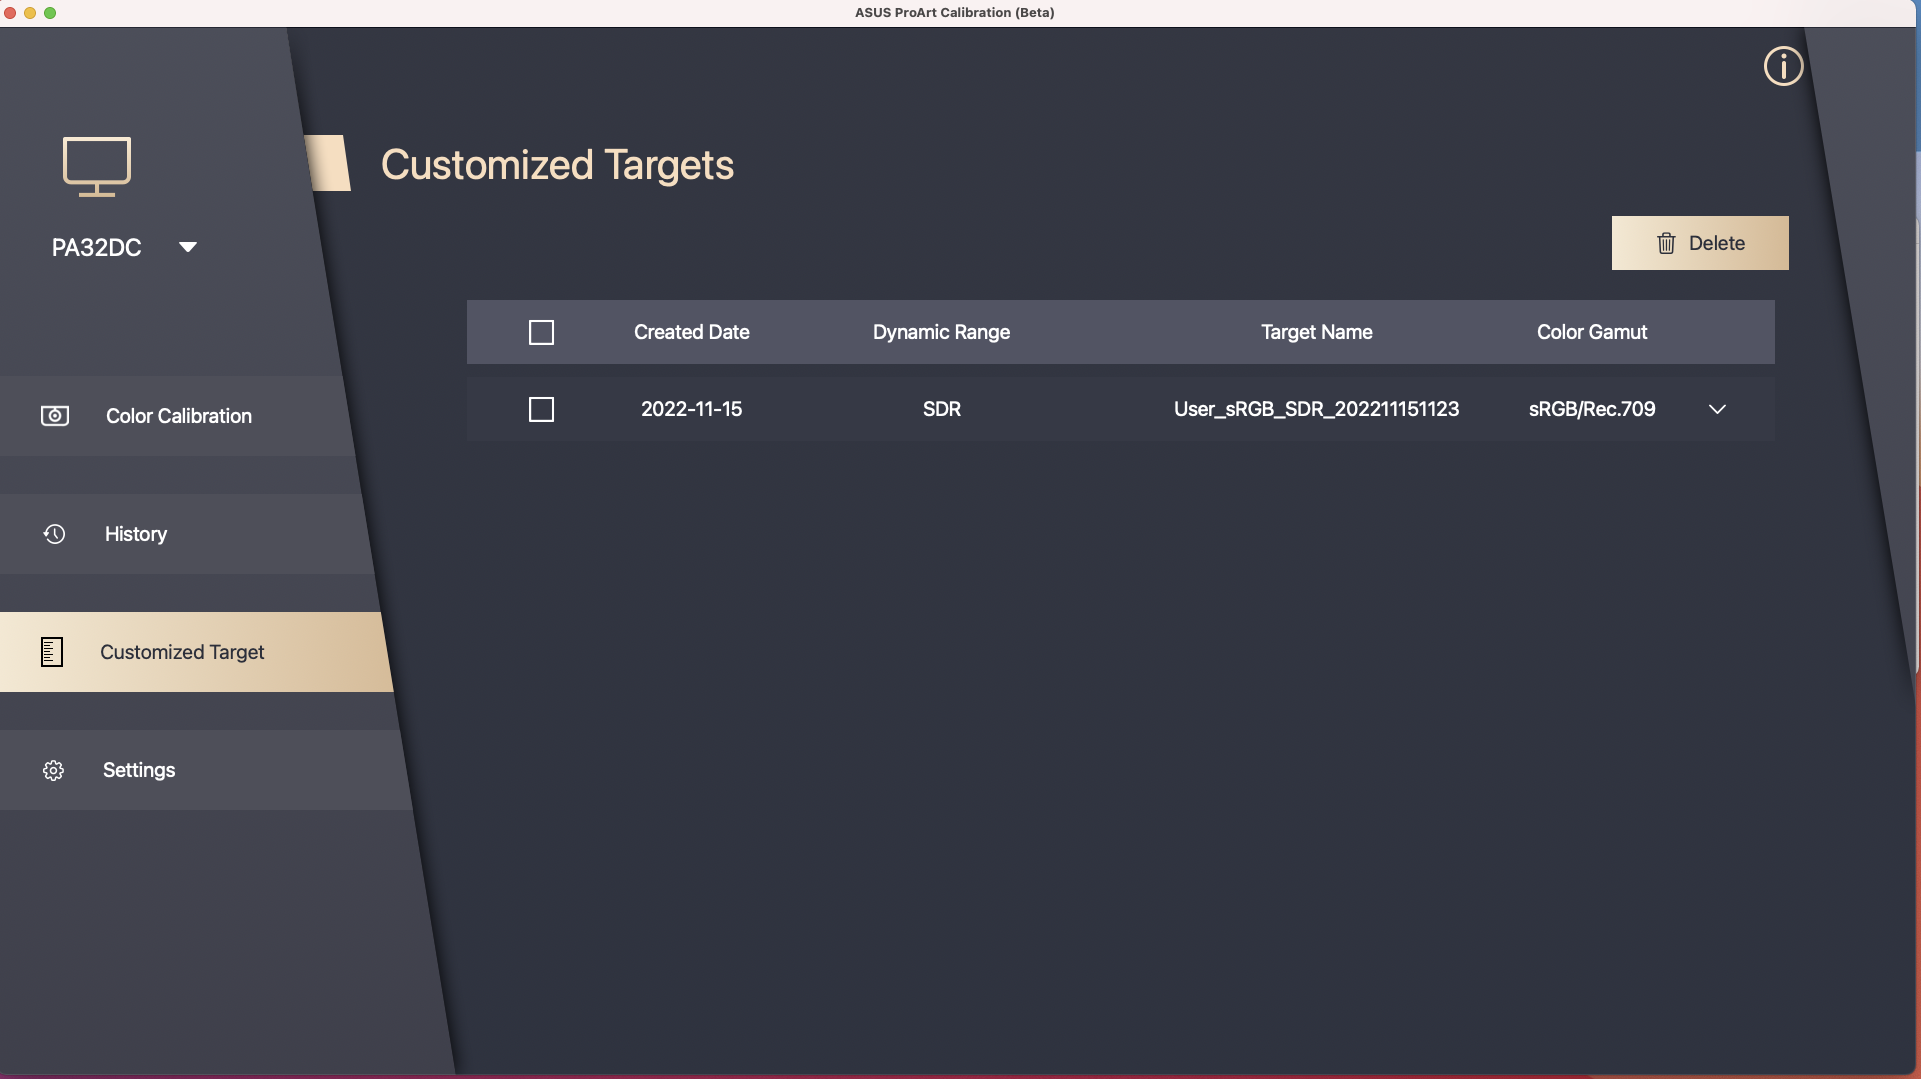
Customized Targets
In Customized Targets, the non-default (EX:sRGB) value parameters that have been set in the past can be confirmed, and can be directly applied to re-calibrate.
In the custom target, the non-default (EX:sRGB) value parameters that have been set in the past can be confirmed, and can be directly applied to re-calibrate.
[ProArt Display] Introduction to ProArt Calibration - Setup and operation
To provide you more detailed instruction, you can also click ASUS Youtube video link below to know more about How to use ASUS ProArt Calibration
A calibrated and profiled display is a critical element in an efficient digital workflow for color perfectionists. However, the colors on displays decay over time so wide gamut displays are susceptible to color deviation.
ASUS now introduces a new solution- ASUS ProArt™Calibration which provides precise, consistent, and spectacular colors in the professional monitor.
Brightness and Color Consistency
ASUS ProArt Calibration saves all color parameter profiles on the IC chips within the monitor instead of the PC, so that you can connect your monitor to different devices without changing any settings or color shift. Meanwhile it also reduces the signal distortion between the IC & the display. It’s the easy way to recalibrate your display to restore your display's brightness and color consistency.
Color meter : i1DisplayPro/i1DisplayProPlus、Datacolor Spyder 5/Spyder X、Klein K-10
System Requirements
Windows 10 64bit,Windows 11 64bit
Download ASUS ProArt Calibration 2.0
How to get(ASUS ProArt Calibration 2.0)?
You can get the latest software, manuals, drivers and firmware at the ASUS Download Center.
If you need more information about ASUS Download Center,you can refer to this link.
steps:
Download the latest utility corresponding to your monitor model from ASUS Download Center, enter the model-> click Driver & Utility.
(Ex: ProArt Display PA32UCX-K)
Click Driver & Utility-> Select OS.
Find ASUS ProArt Calibration in Utilities category,and click DOWNLOAD to download the file.
Install ASUS ProArt Calibration
*If you have installed the old version of ASUS ProArt Calibration software(v1.1x version), please uninstall the old version software first
1. Unzip the file
2. Click setup
3. Follow the instructions to complete the installation.
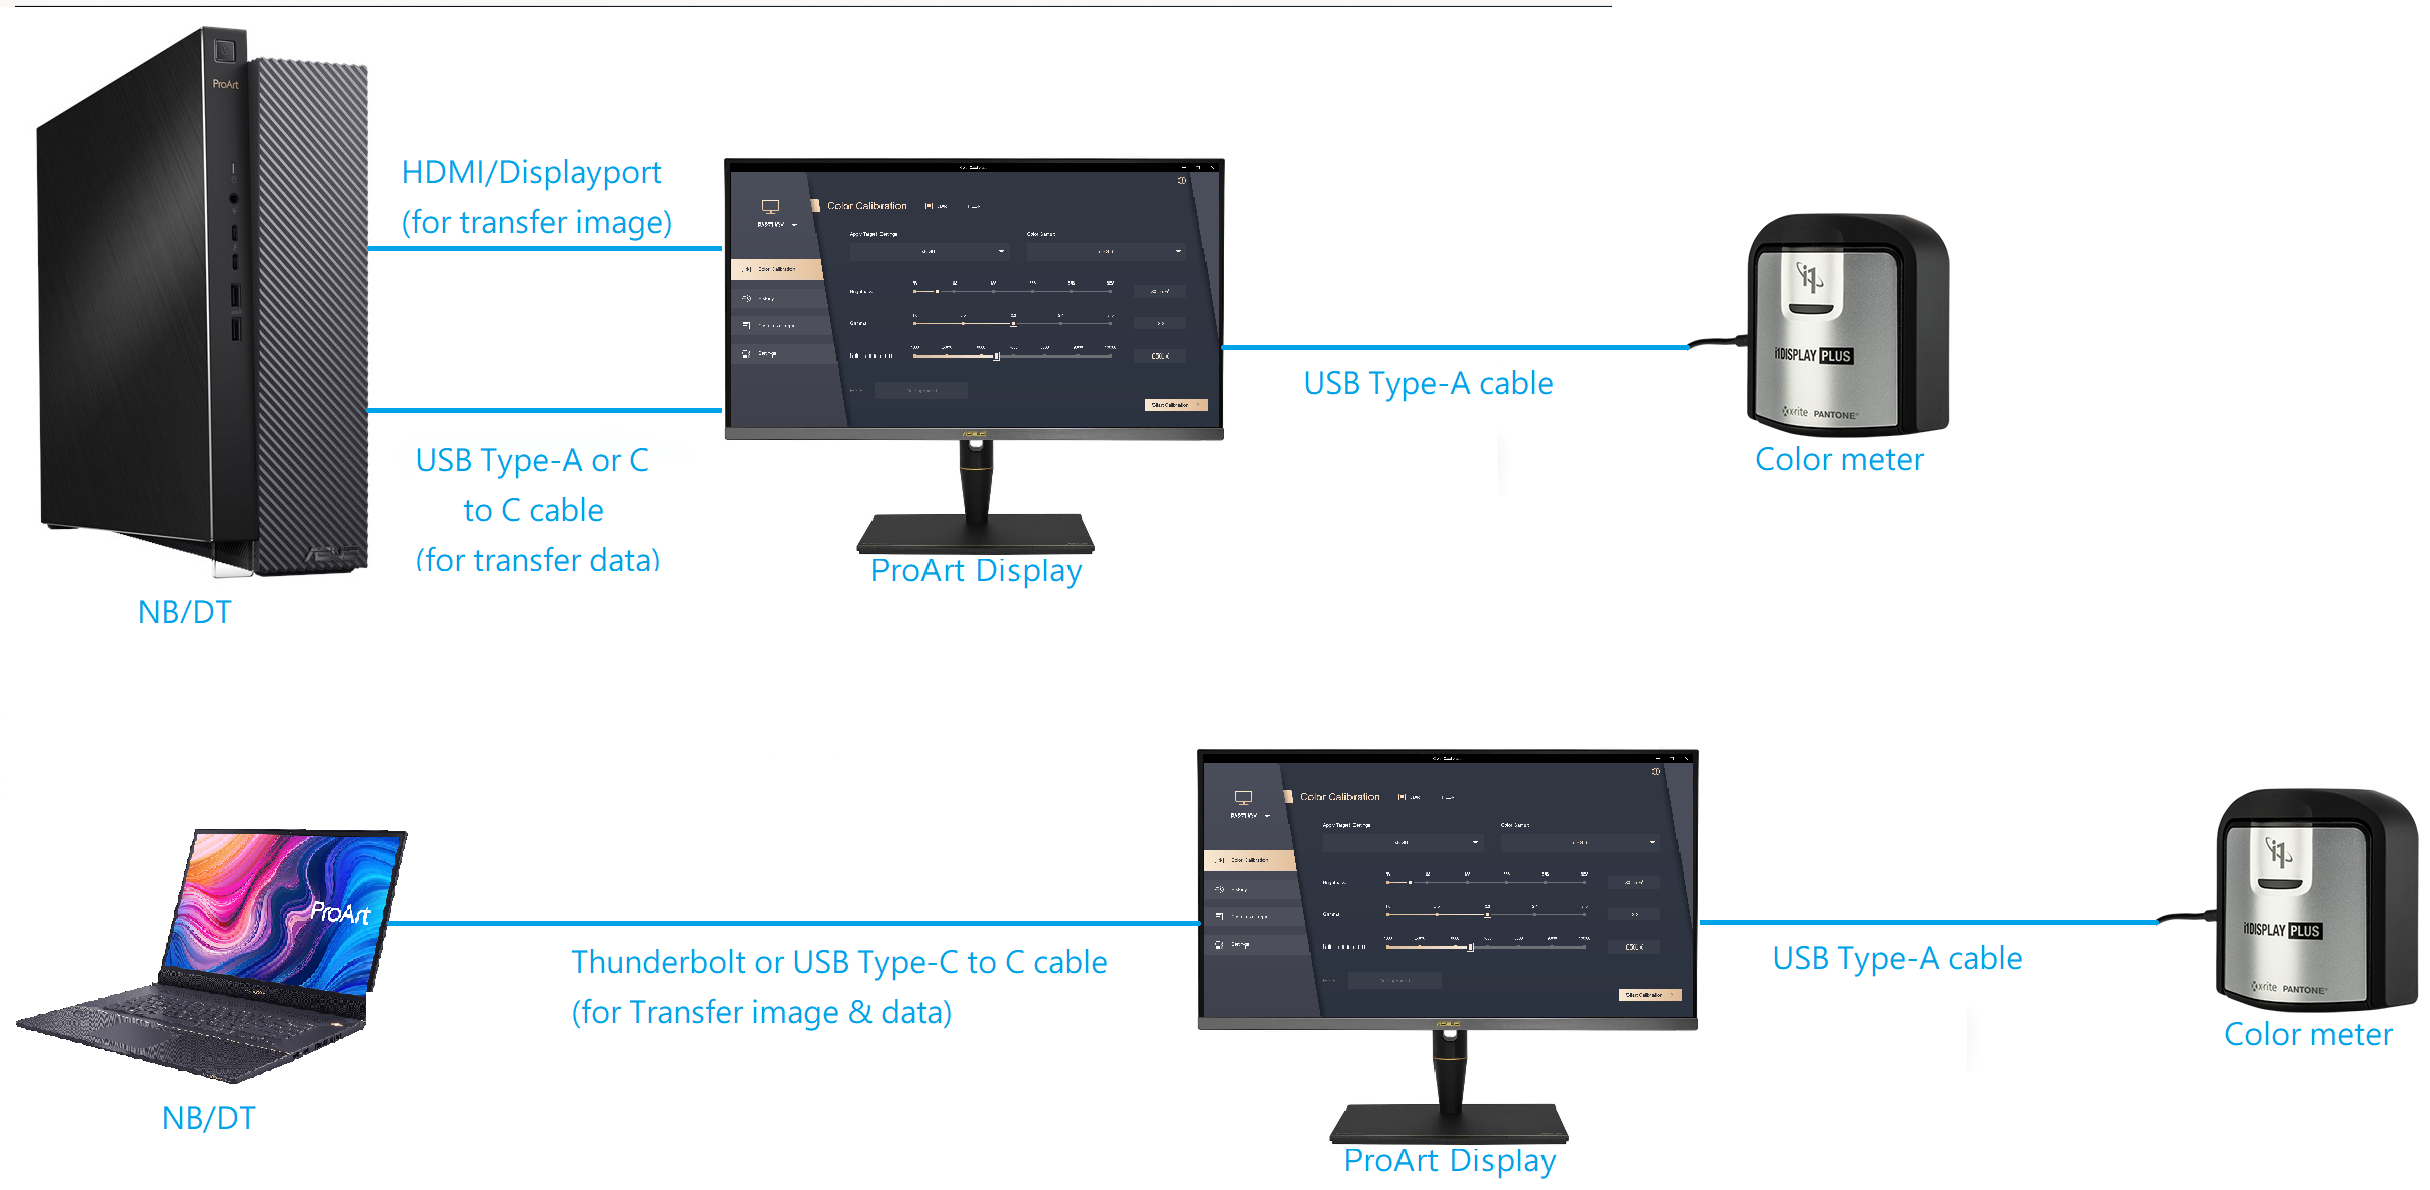
How to connect PC and display to use ASUS ProArt Calibration
If you want to run ProArt Calibration software to calibrate the monitor, you need to complete the following requirements:
1. Image transmission: HDMI/Displayport or USB-C/thunderbolt can be used
2.Data transmission: can be connected to the USB-C/thunderbolt hole of the monitor through the USB-A to C cable.
Start ASUS ProArt Calibration
After installation,double- click ASUS ProArt Calibration icon on desktop to start the application.
And please confirm the following two points:
1. Confirm that the "Use HDR" option in the Windows display settings is turned off, as shown in the figure below:
2. Confirm that the Preset mode in the OSD menu is set to a non-HDR mode (EX: standard, sRGB, DCI-P3)
3. If the model you are using is PA32UCX series/PA27UCX series/PQ22UC, please color reset the mode to be calibrated (User Mode 1 or User Mode 2) before use.
Color Calibration
Color calibration is the main function of ProArt Calibration, which can help you correct the color and uniformity of the monitor.
The first step in color calibration, please set the parameters you want to apply.
If your model is PA32UCG/PA32UCR/PA32DC, these models can select Preset mode to calibrate it.
Click [Start Calibration] to do color calibration.
2. Make sure the USB Type-C or Thunderbolt cable is connected to your monitor.
3. Make sure color meter is connected to your monitor,,select your color meter model and check if you need to change color meter profile(This function is only supported by i1 display pro/i1 display pro plus).
4. Please choose if you want to calibrate the uniformity and choose you want to use 3x3 grid or 5x5 grid for calibration.
(if you choose HDR calibration in the first step, this step will be skipped)
(If the model used is PA32DC, this model does not support the function of correcting uniformity, so this step will not be displayed)
5. Click [next] to measure the brightness,please place the color meter on the marked position, and click [Start] to measure.
After the measurement is completed, it will automatically enter the next step.
6. Press [Start] to begin color calibration.
7. Please follow the instructions to place the color meter on the marked position, and click [Start] to complete color calibration. If you choose uniformity calibration in the previous step, the uniformity calibration will execute first, and the system will inform you that you need to move the color meter to the marked position,and click [Start].
8. After the calibration is completed, the report of the calibration results will be generated. You can view the parameter values of the color calibration results in the report.You can click [Export Report] to save the color calibration report.
Click [Apply] to save and apply the calibration data to User Mode 1/2 or Preset Mode.
If in the step1, the parameters are not calibrated with the preset values but with the parameters adjusted by yourself, the customized values for this calibration can be stored in [Custom Target].
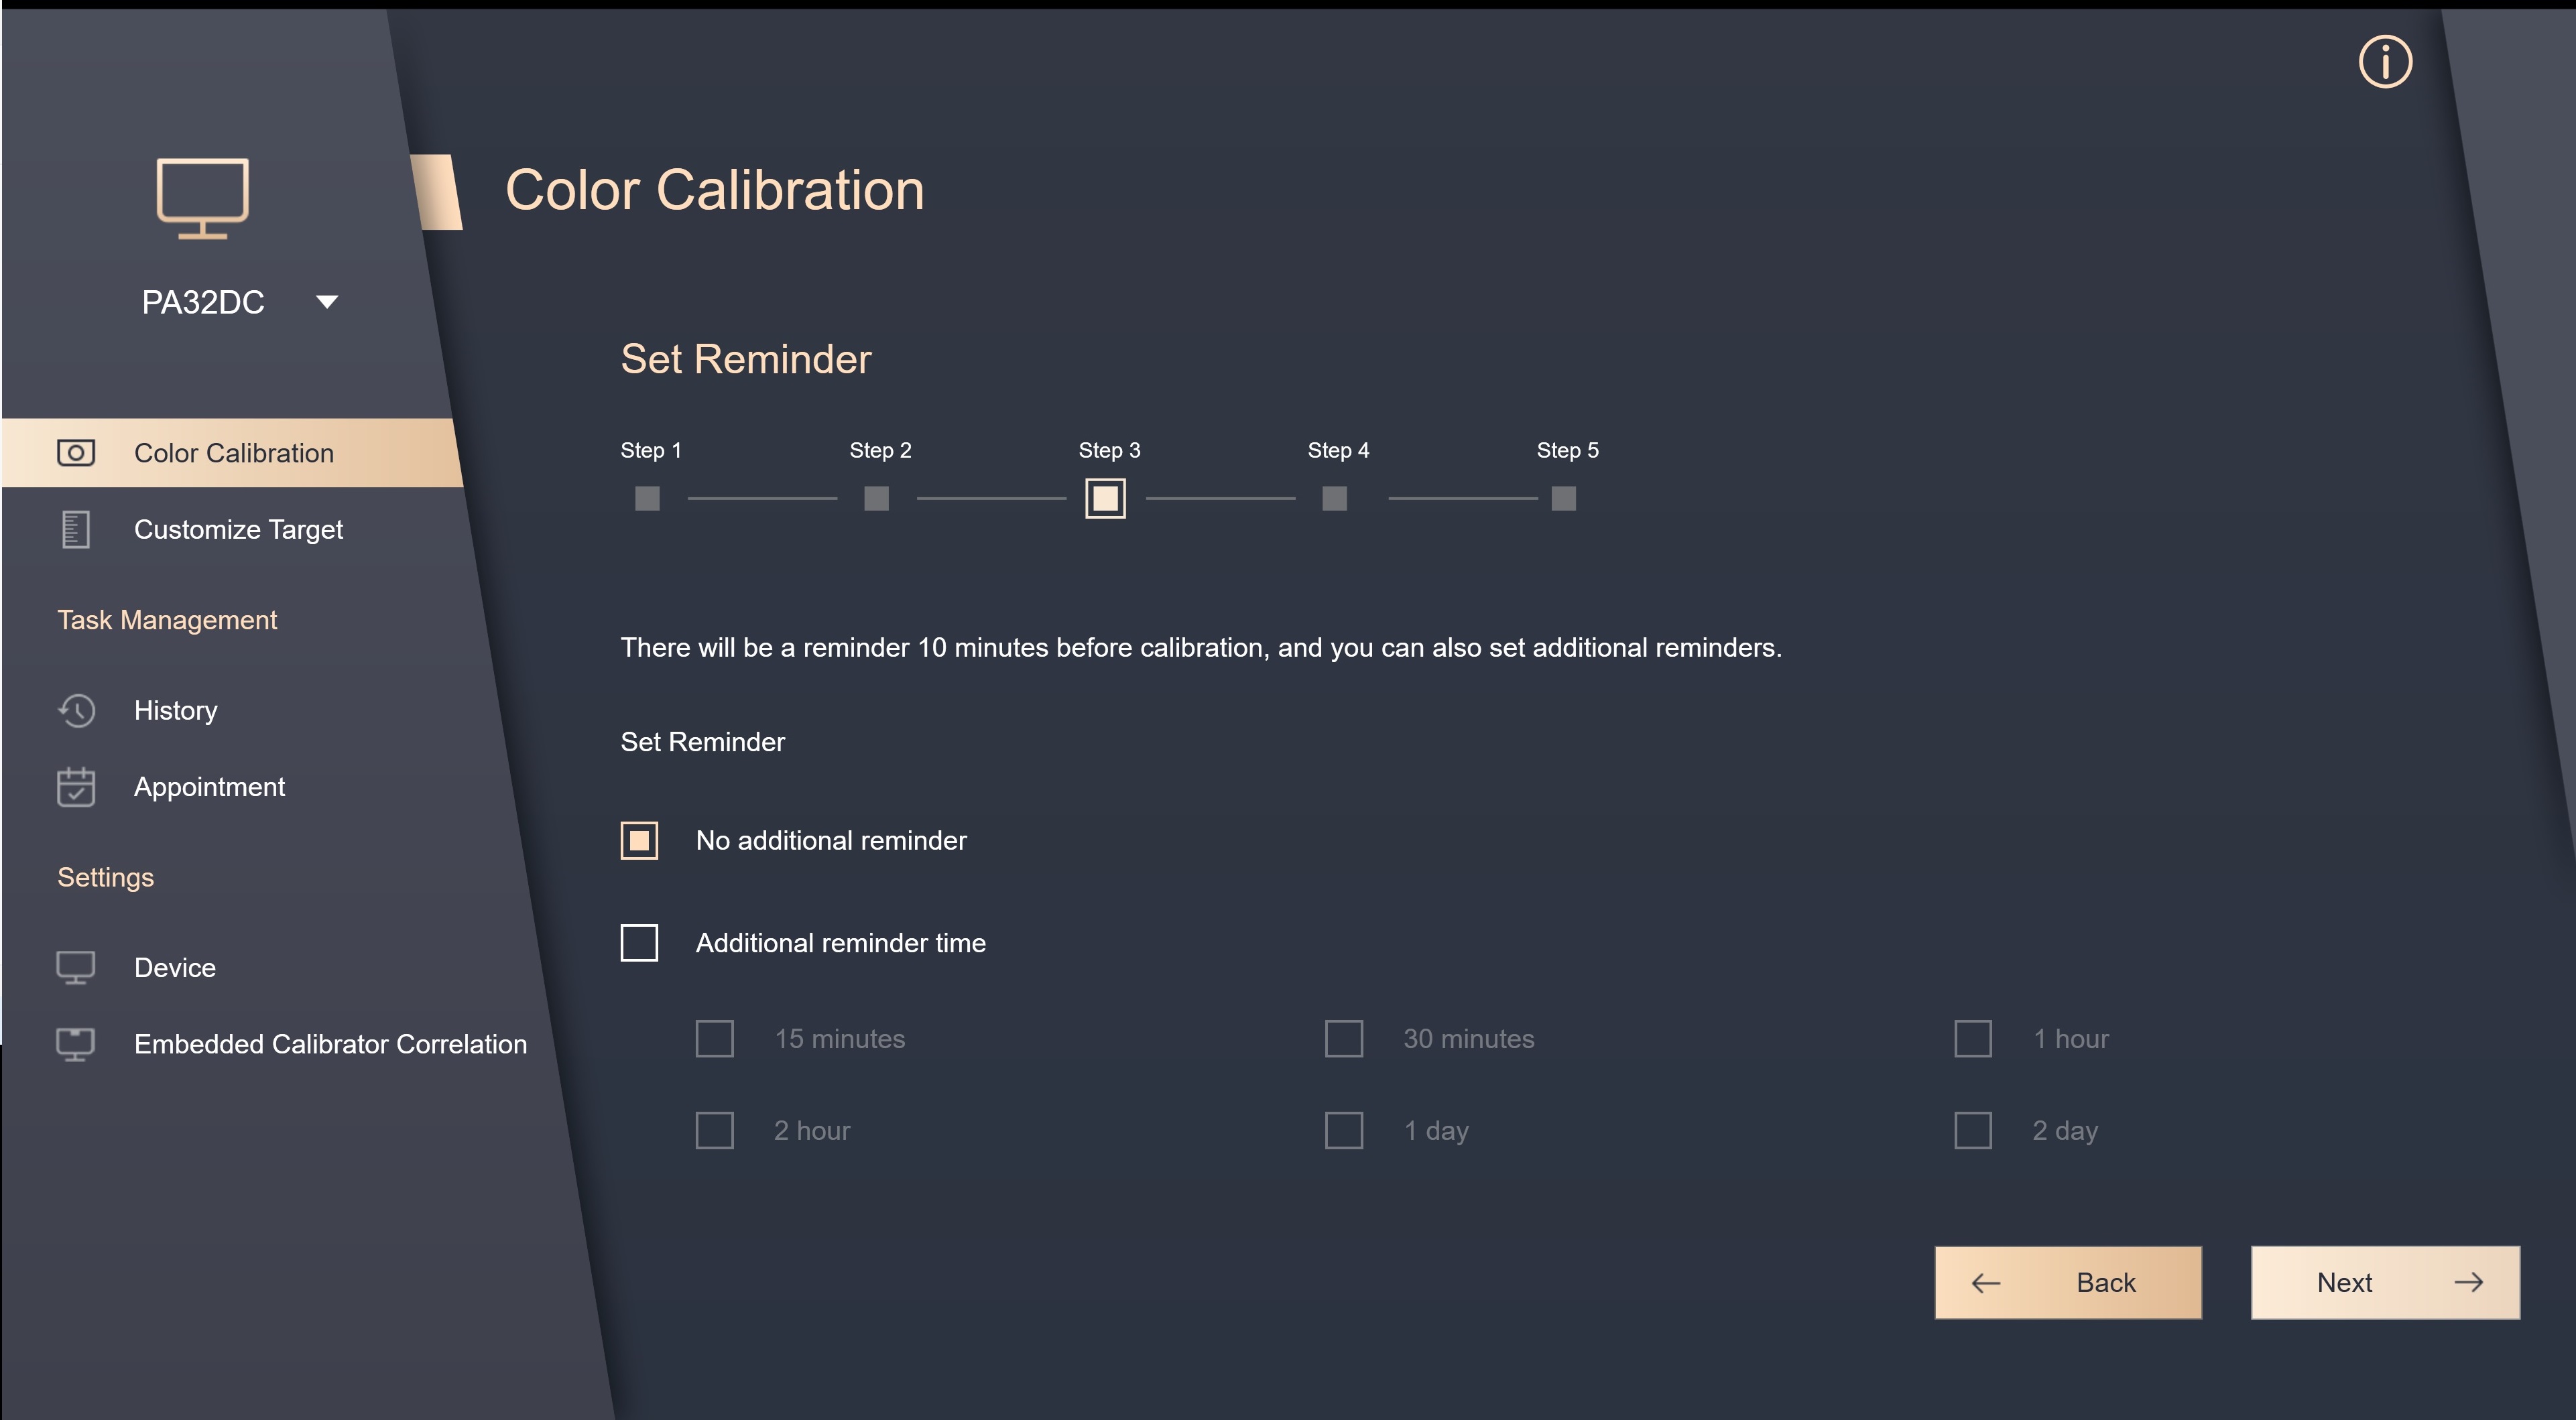
If you choose Calibration Appointments, you can begin to set when you want the scheduled calibration to occur, and whether you want to set it to repeat weekly or only once.
and can choose whether to set additional reminders before the scheduled calibration starts.
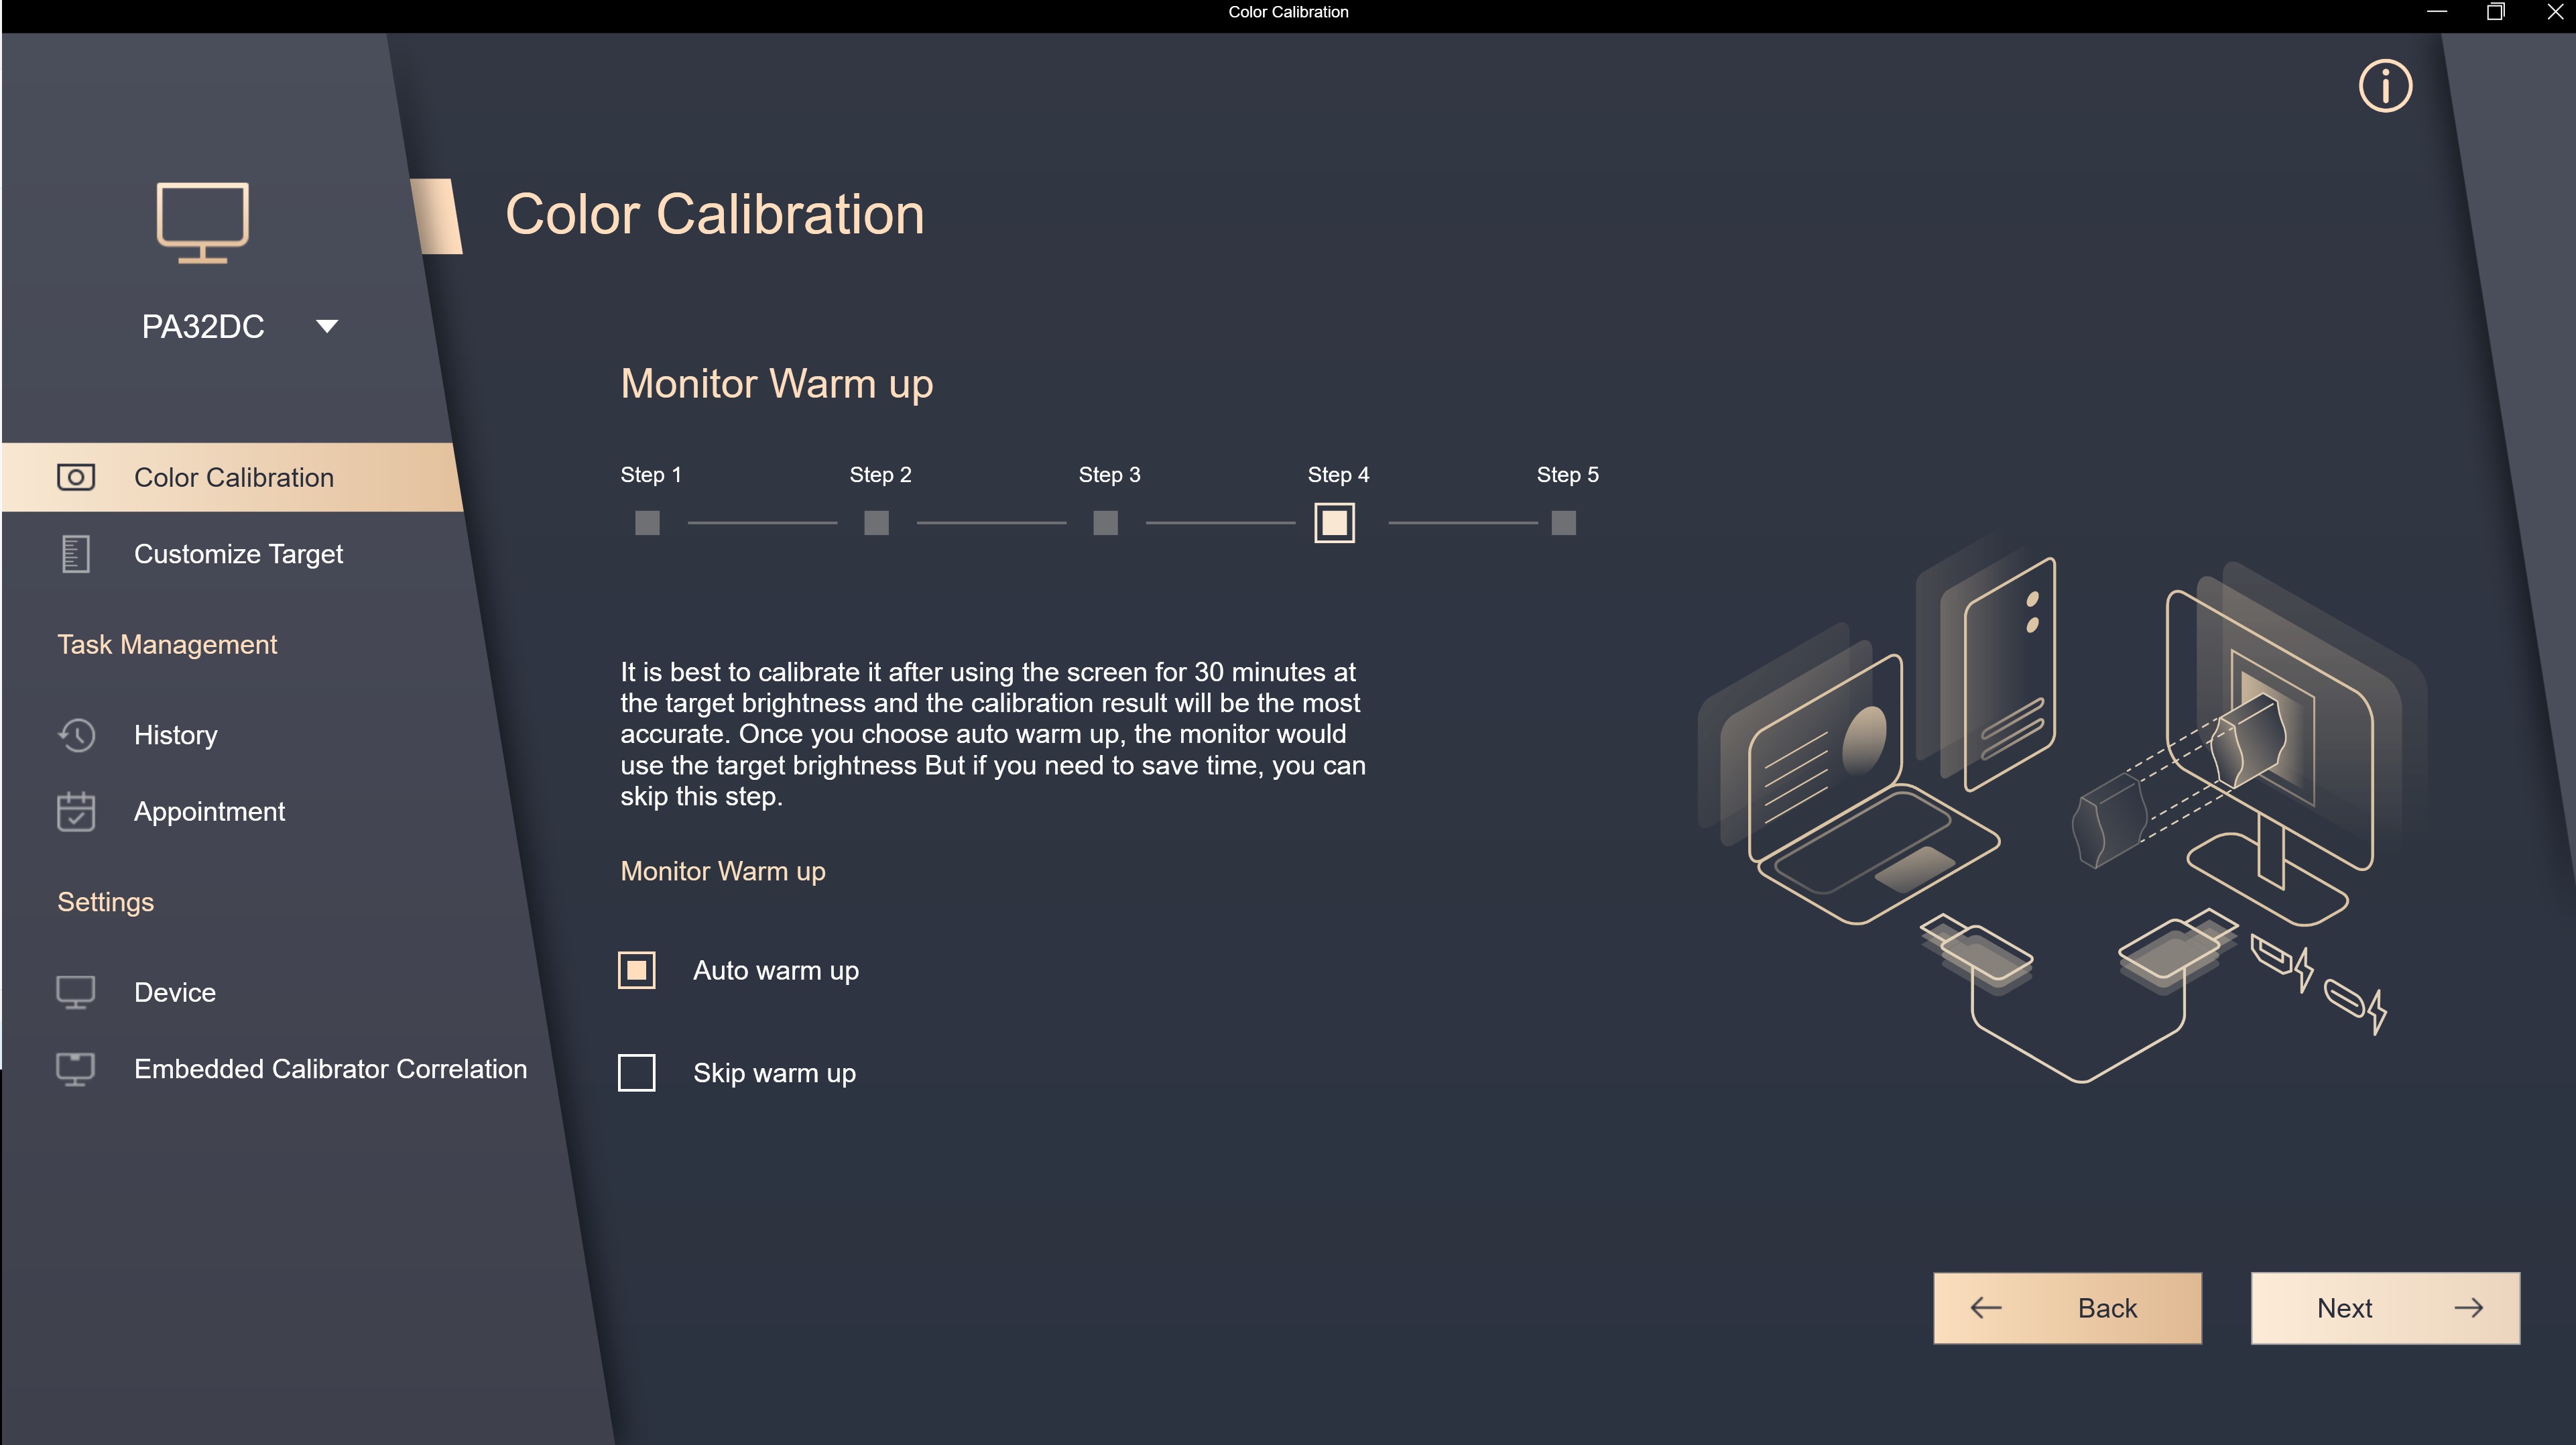
You can choose whether to allow a 30-minute warm-up before scheduled calibration for the most accurate results.
The set value of the scheduled calibration performed this time can be confirmed, and it can also be confirmed in [Appointment] in the future.
Before the scheduled calibration starts, a prompt message will pop up, reminding you to connect and place the calibrator in the correct position.
Customize Target
In the custom target, the non-default (EX:sRGB) value parameters that have been set in the past can be confirmed, and can be directly applied to re-calibrate.
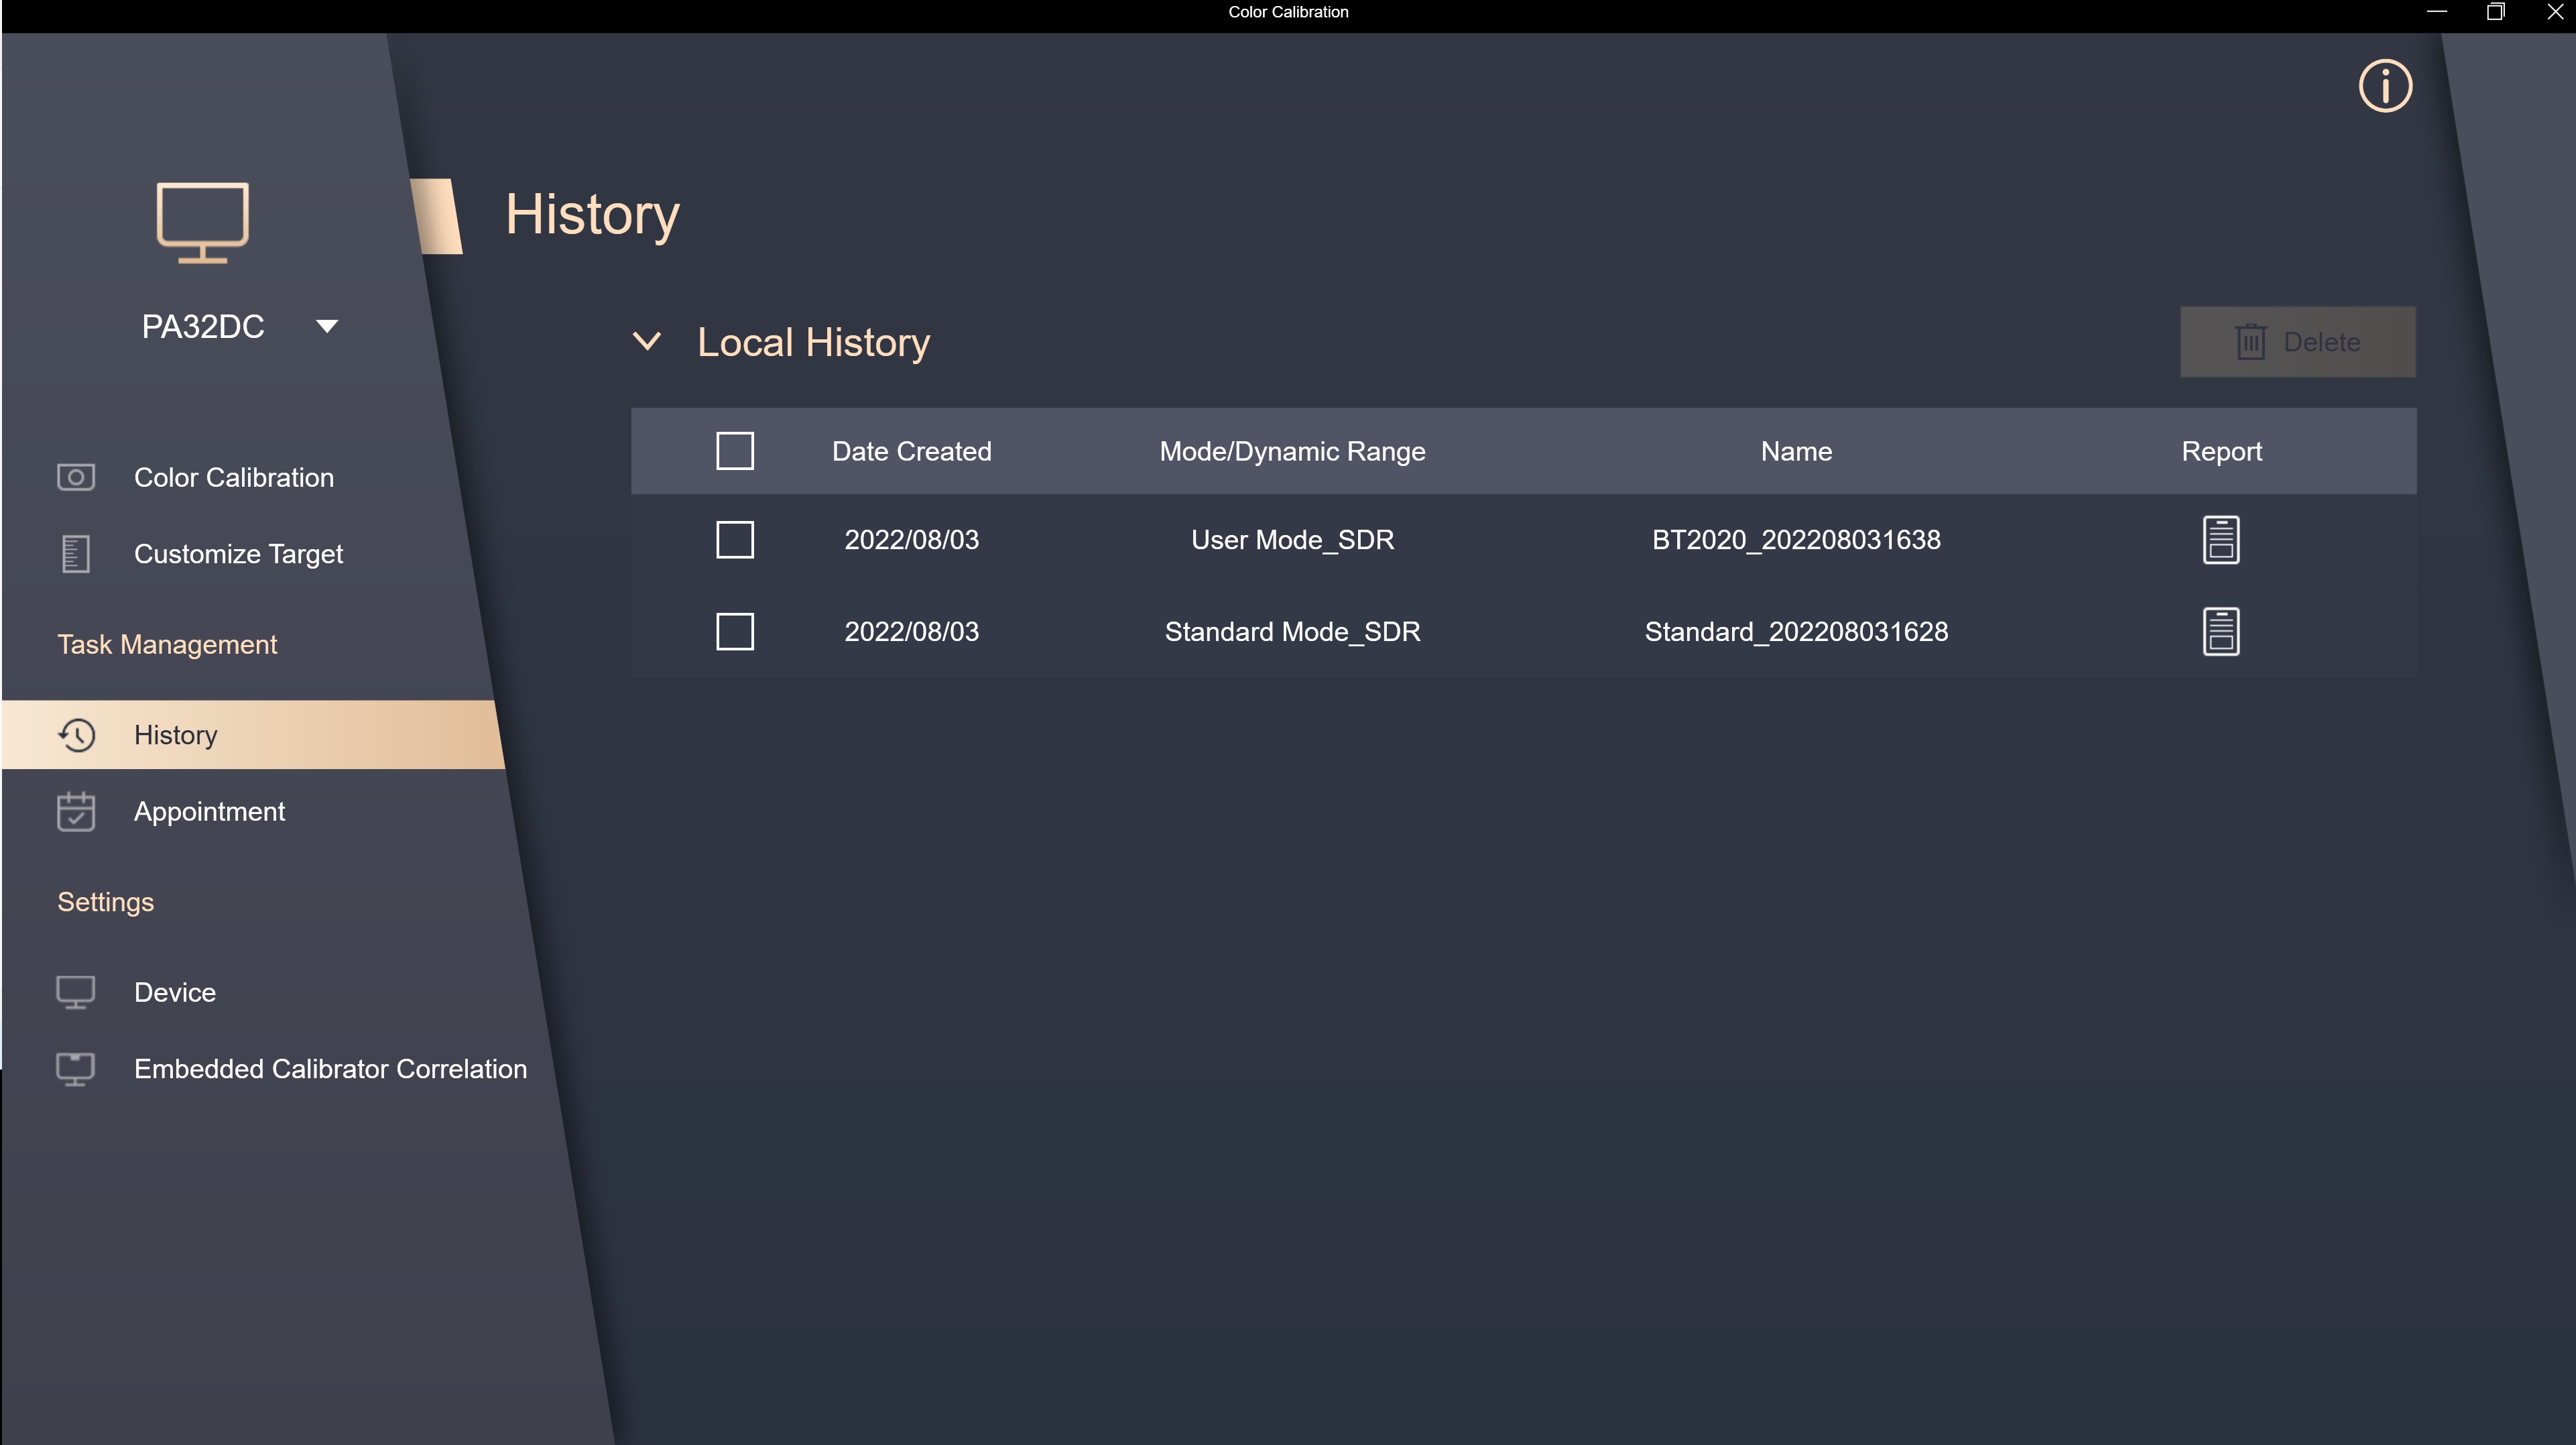
History
In the history, the report data of past color calibration can be confirmed; if there is any data that does not need to be kept, you can click [Delete].
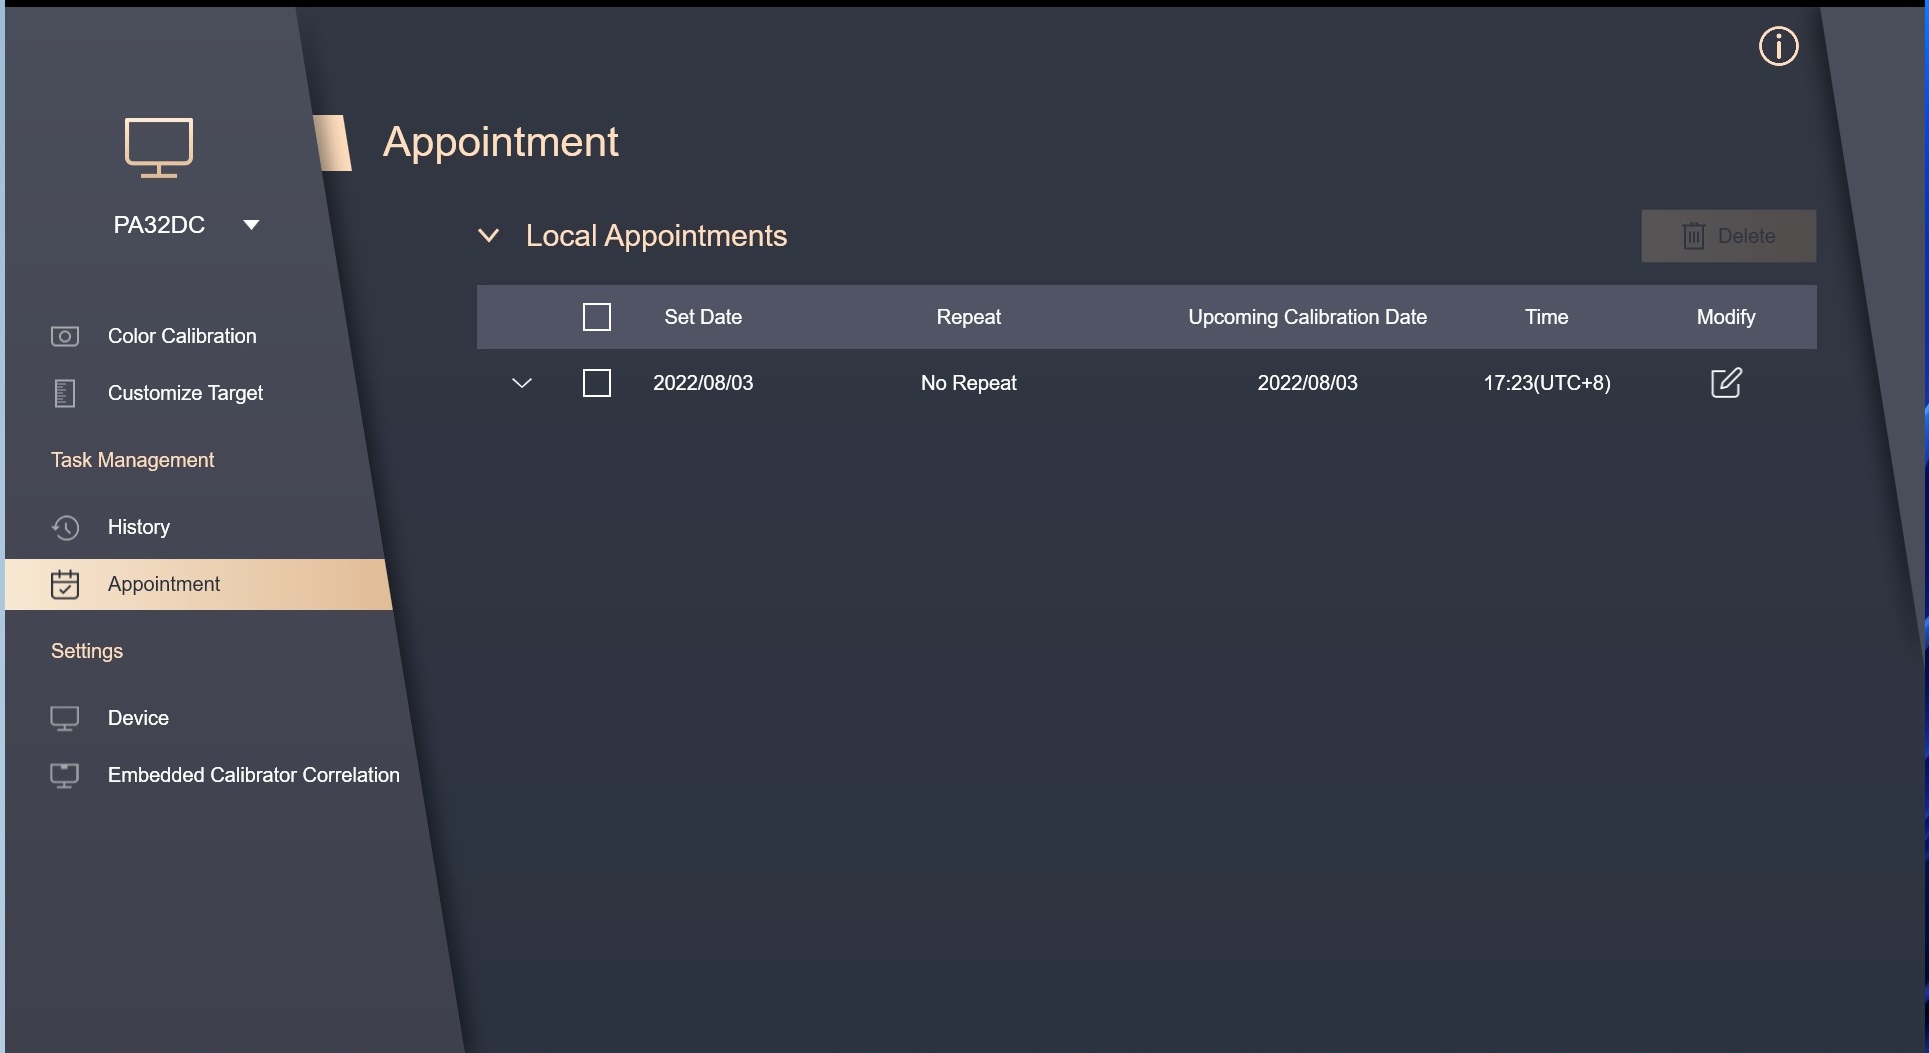
Appointment
In appointment,You can confirm the current scheduled calibration time and setting values, etc., and you can click the modify icon to modify and delete unnecessary schedules.
Device
In the settings, you can set User mode1 & 2 as the saved color calibration data in the OSD quick settings, and click [Apply] to save the data on the screen.
If you use PA32UCG/PA32DC, you can select the color calibration data you want to apply in each Preset Mode, or reset them to the default value.
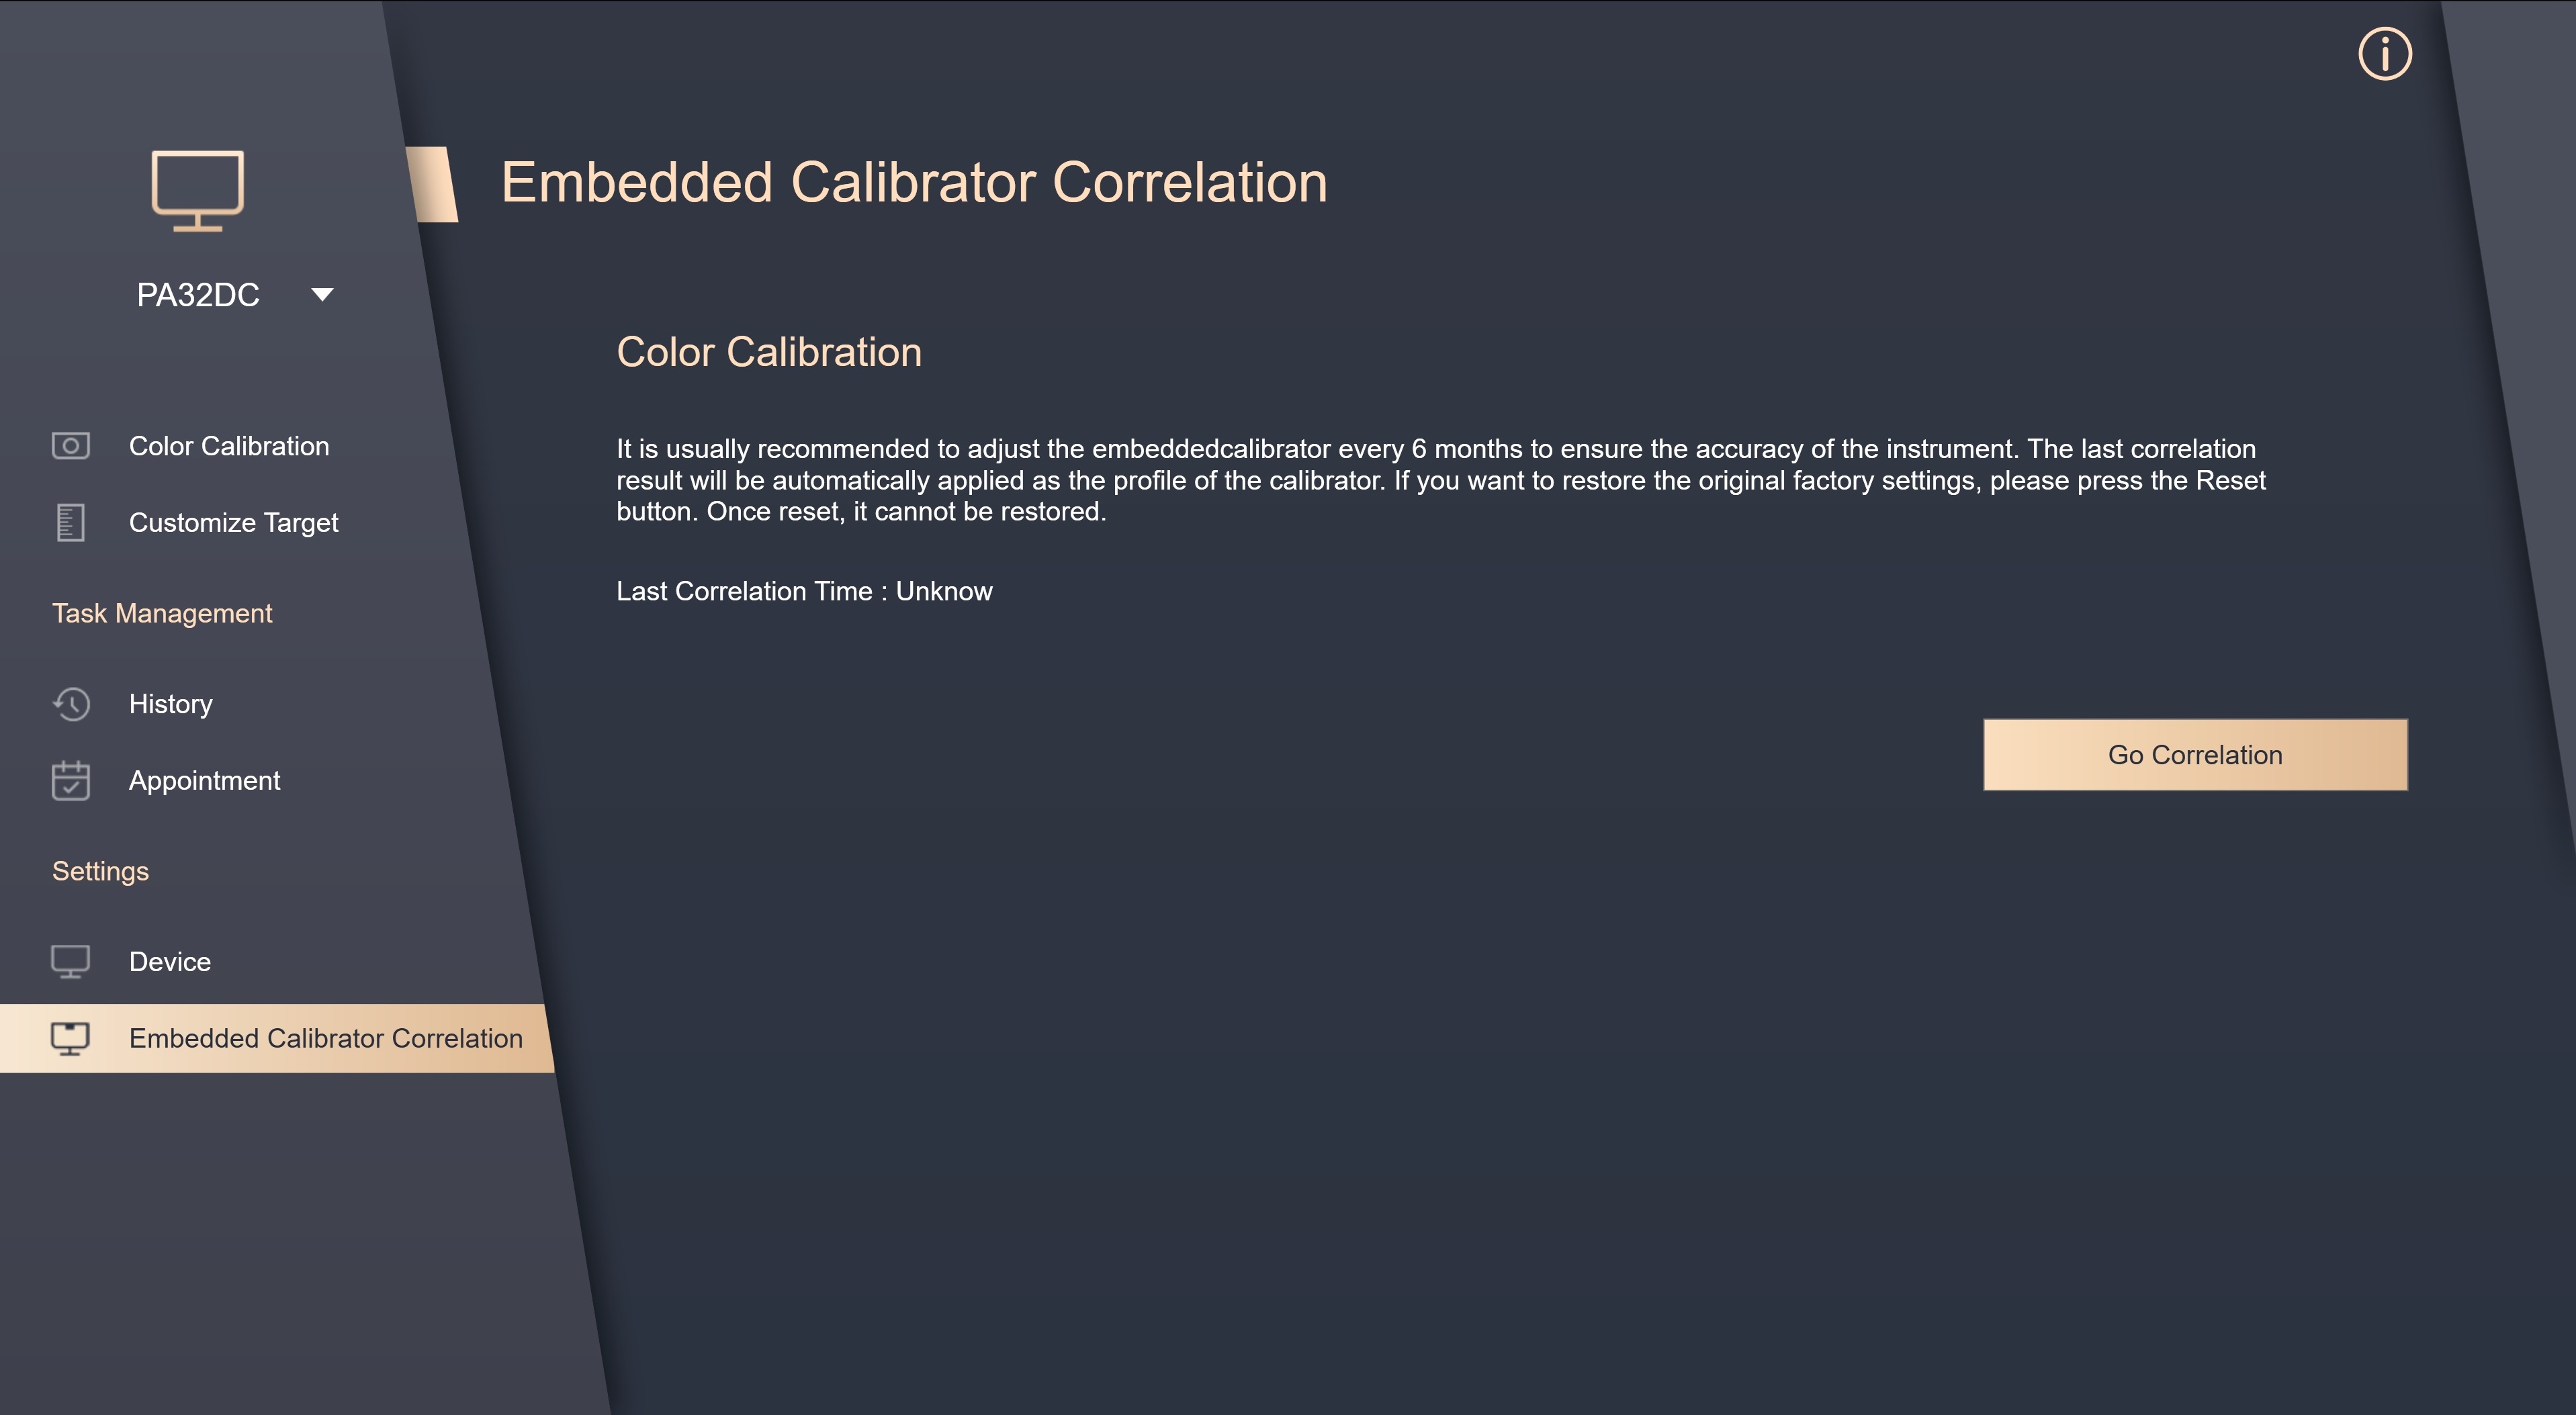
Embedded Calibrator Correlation
If you use PA32DC, you can use this function to calibrate embedded calibrator. It is recommended to calibrate once every 6 months to ensure the accuracy of embedded calibrator.
Please click [Go Correlation] to proceed.
Make sure the USB or Thunderbolt cable is connected to your monitor properly.
Please confirm the model of the external calibrator used for calibration.
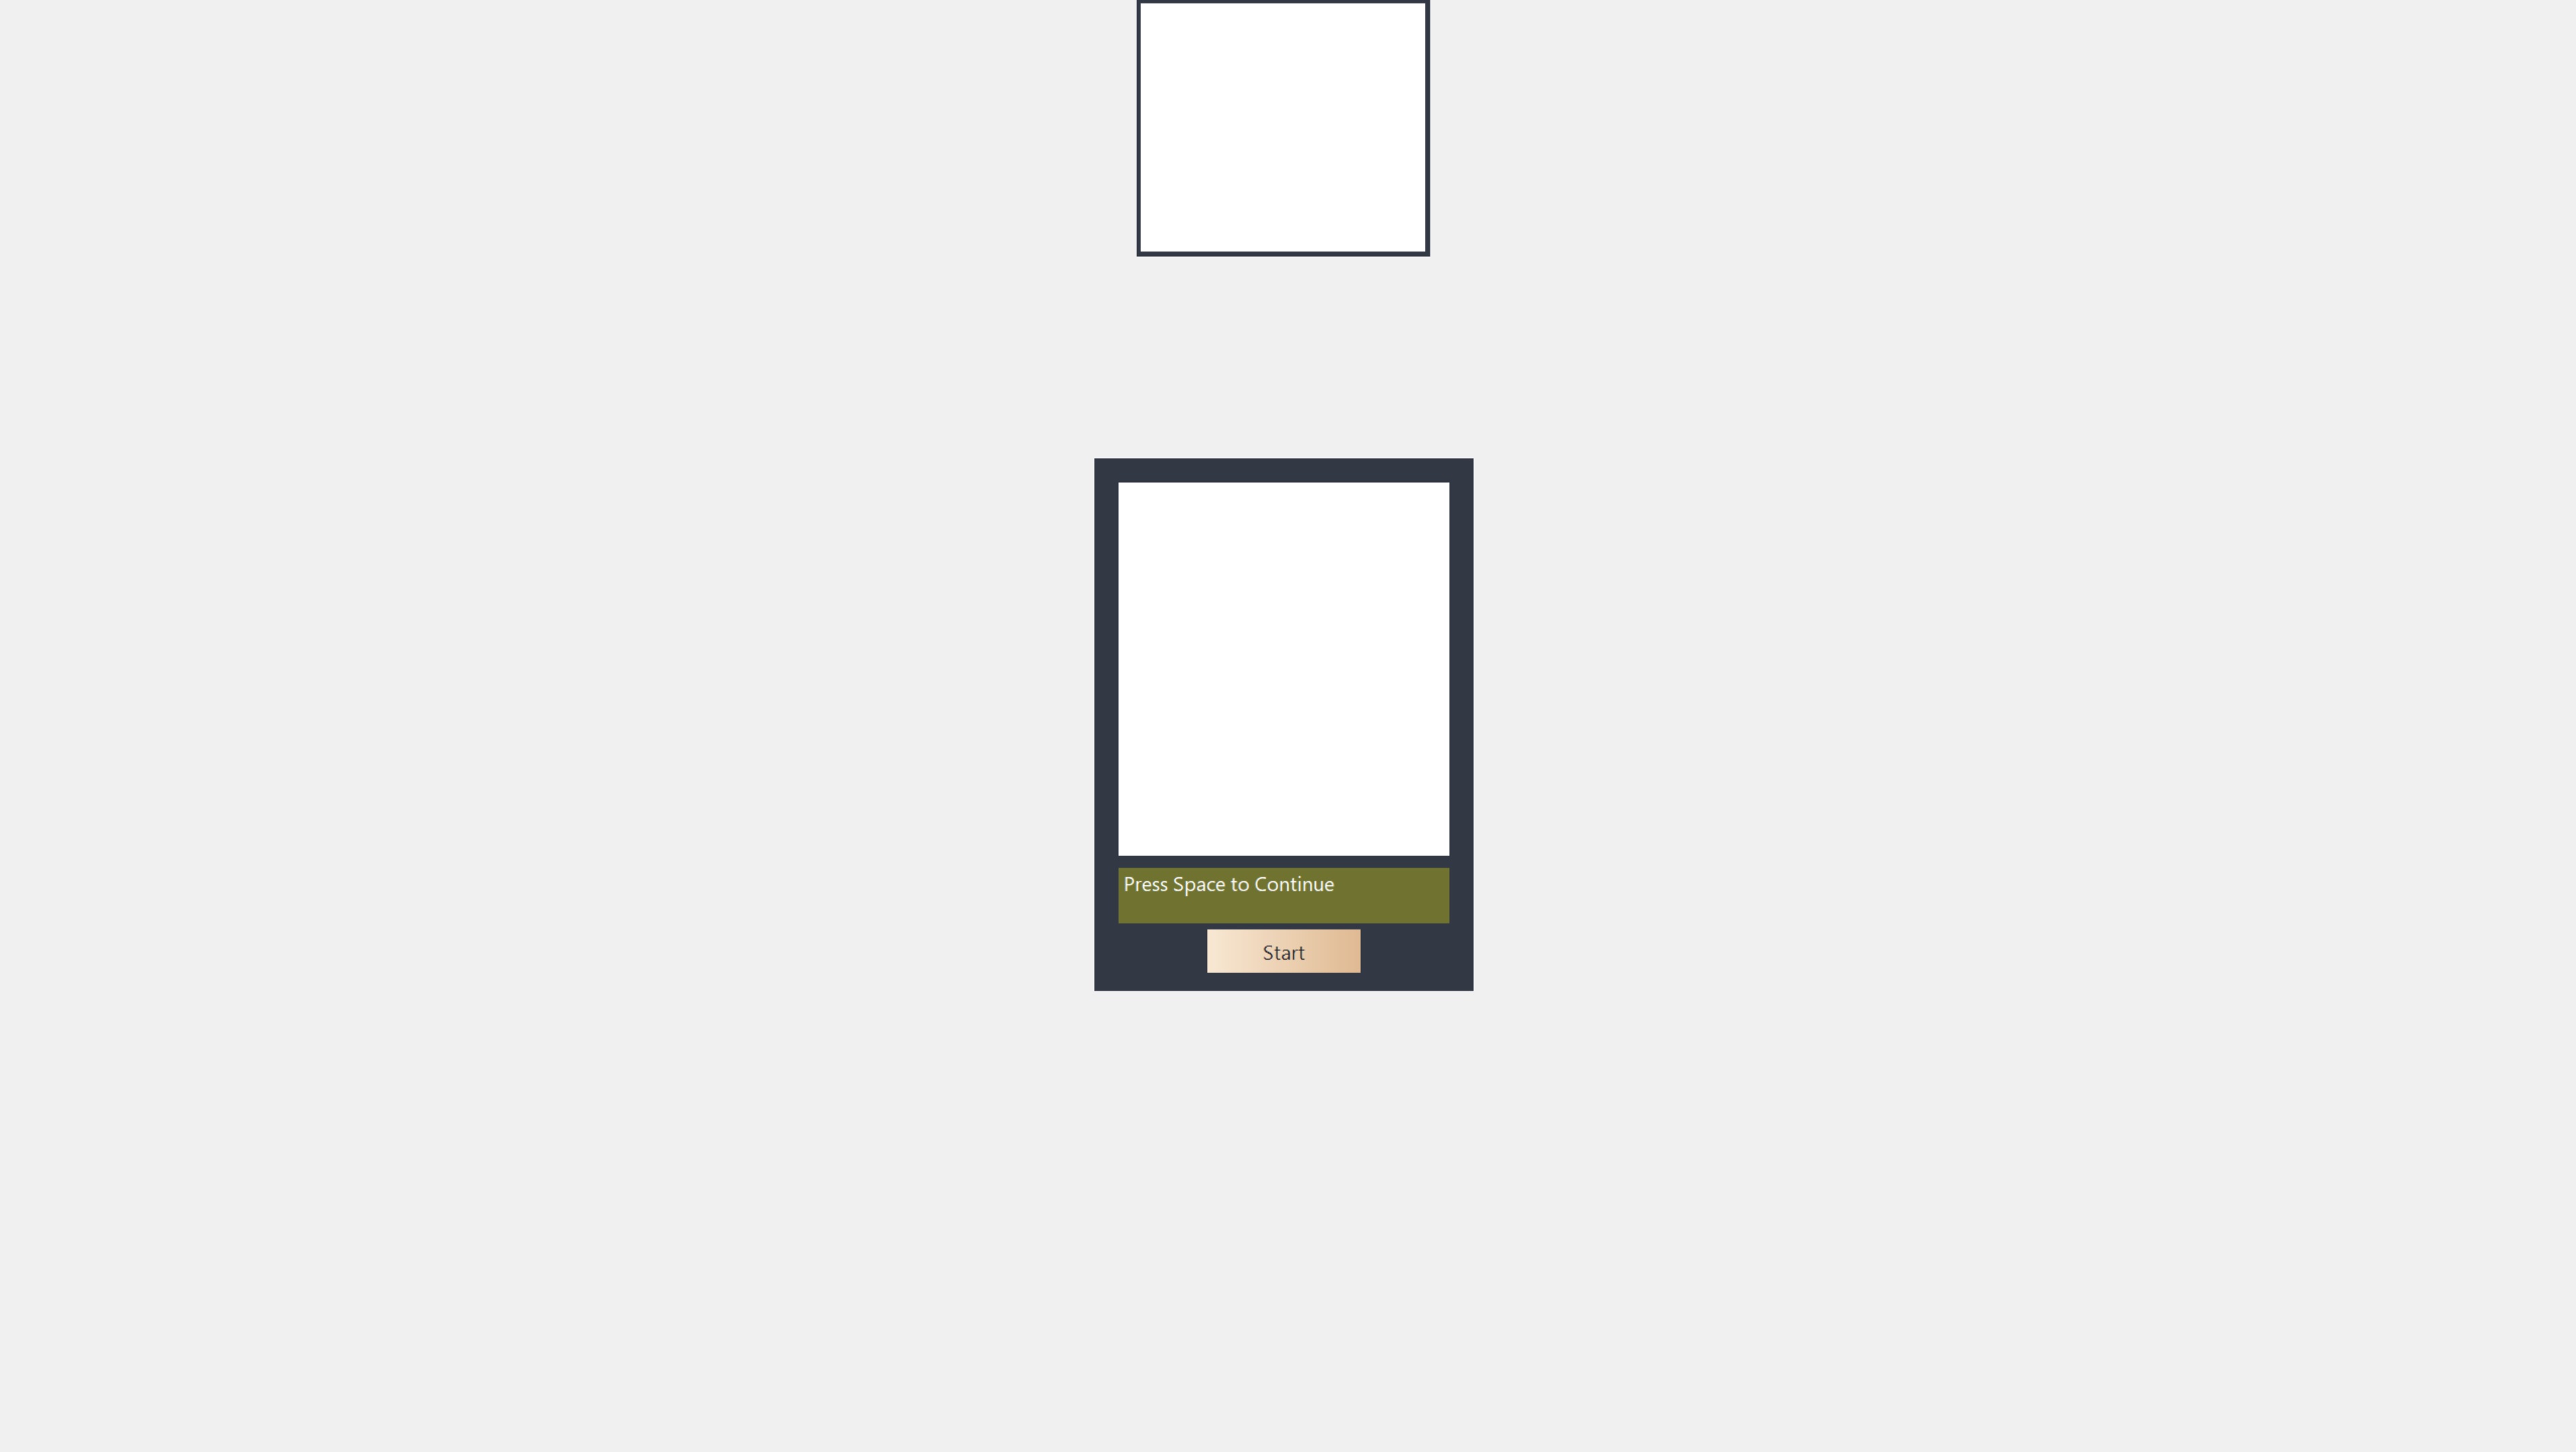
Click [Start] to start emdbedded calibrator correlation.
Please follow the instructions to place the calibrator and click [Start] to calibrate emdbedded calibrator.
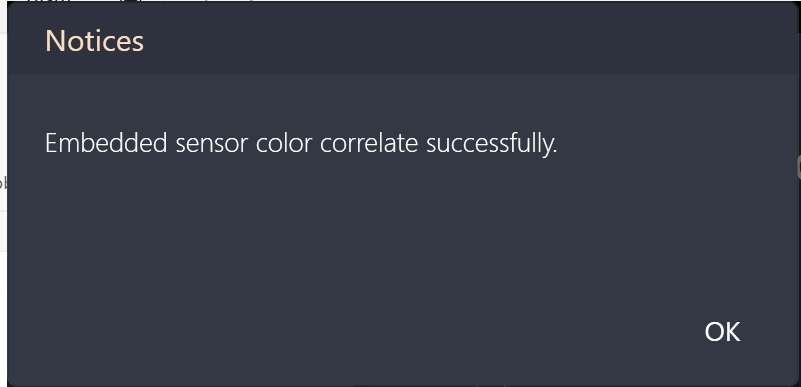
After completion, it will pop up the window of successful calibration of emdbedded calibrator.


 icon on desktop to start the application.