- English
- Other Products
- FAQ
- [Motherboard]Introduction to DIMM Fit
- Subscribe to RSS Feed
- Mark as New
- Mark as Read
- Bookmark
- Subscribe
- Printer Friendly Page
- Report Inappropriate Content
- Article History
- Subscribe to RSS Feed
- Mark as New
- Mark as Read
- Bookmark
- Subscribe
- Printer Friendly Page
- Report Inappropriate Content
on
12-21-2024
10:16 AM
- edited
Sunday
by
![]() ZenBot
ZenBot
[Motherboard]Introduction to DIMM Fit
DIMM Fit automatically adjusts BIOS parameters based on your hardware configuration and memory overclocking requirements to achieve the most stable state and improve system stability in this hardware configuration environment.
Contents:
一.How can I confirm if my motherboard supports DIMM Fit?
二. How to enable DIMM Fit in BIOS?
三. How to remove saved DIMM Fit Store parameters?
一.How can I confirm if my motherboard supports DIMM Fit?
1.Click on the ASUS support in the upper right corner, enter and select the motherboard model you need to confirm (for example: TUF GAMING Z890-PLUS WIFI).

2.Click on the [Tech Specs] page

3.In the [Memory] , if you see [DIMM Fit], it means that this motherboard model supports the DIMM Fit feature.

二. How to enable DIMM Fit in BIOS?
For example, the motherboard: TUF GAMING Z890-PLUS WIFI, and BIOS has enabled XMP, with memory frequency overclocked to 6400MHz.
(For information on how to enable XMP or other overclocking options, refer to the FAQ: How to optimize the Memory performance by setting XMP or EXPO or DOCP in BIOS)
* Due to memory differences and compatibility, it is recommended to use memory listed in the official website's QVL.
1. After power on, press the "Delete" key on the keyboard to enter BIOS [EZ Mode]
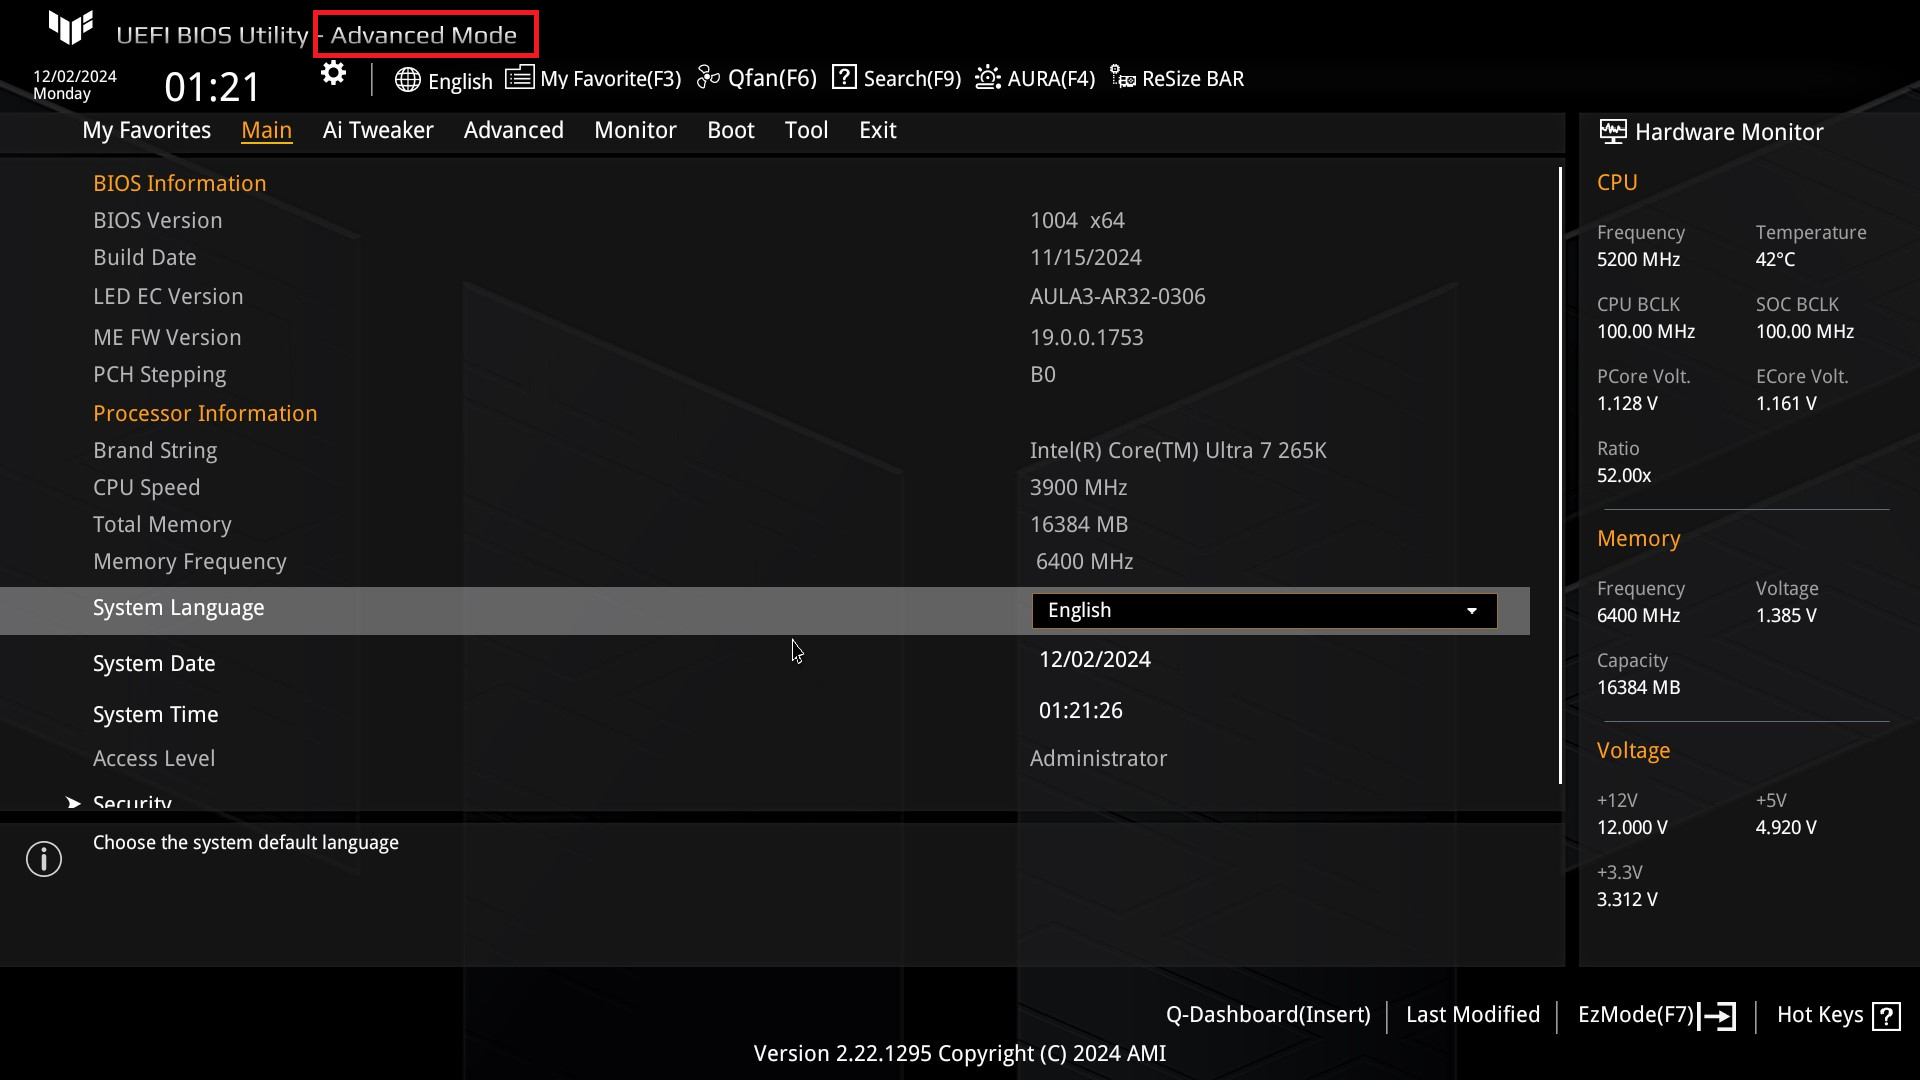
2.Press the F7 key on the keyboard to enter [Advanced Mode], as shown in the image below.
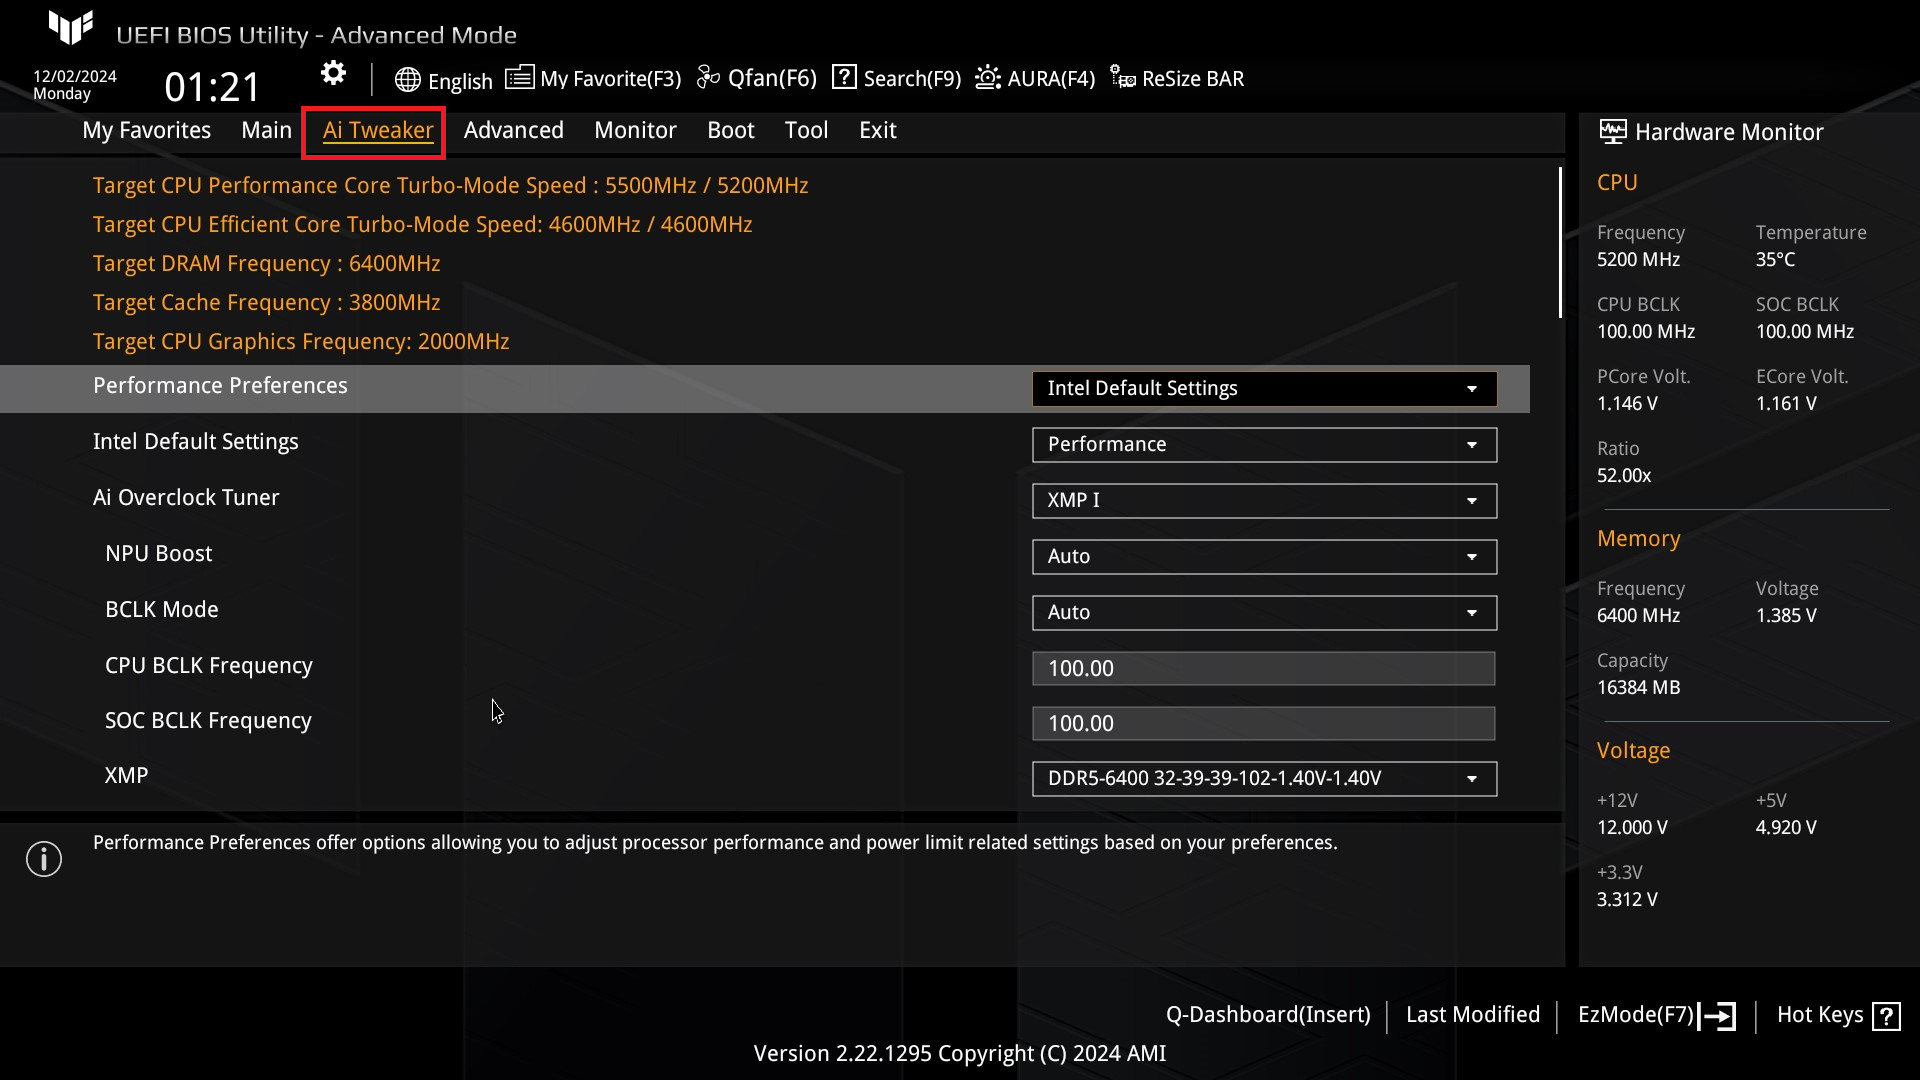
3.Click on the [Ai Tweaker] page, as shown in the image below.
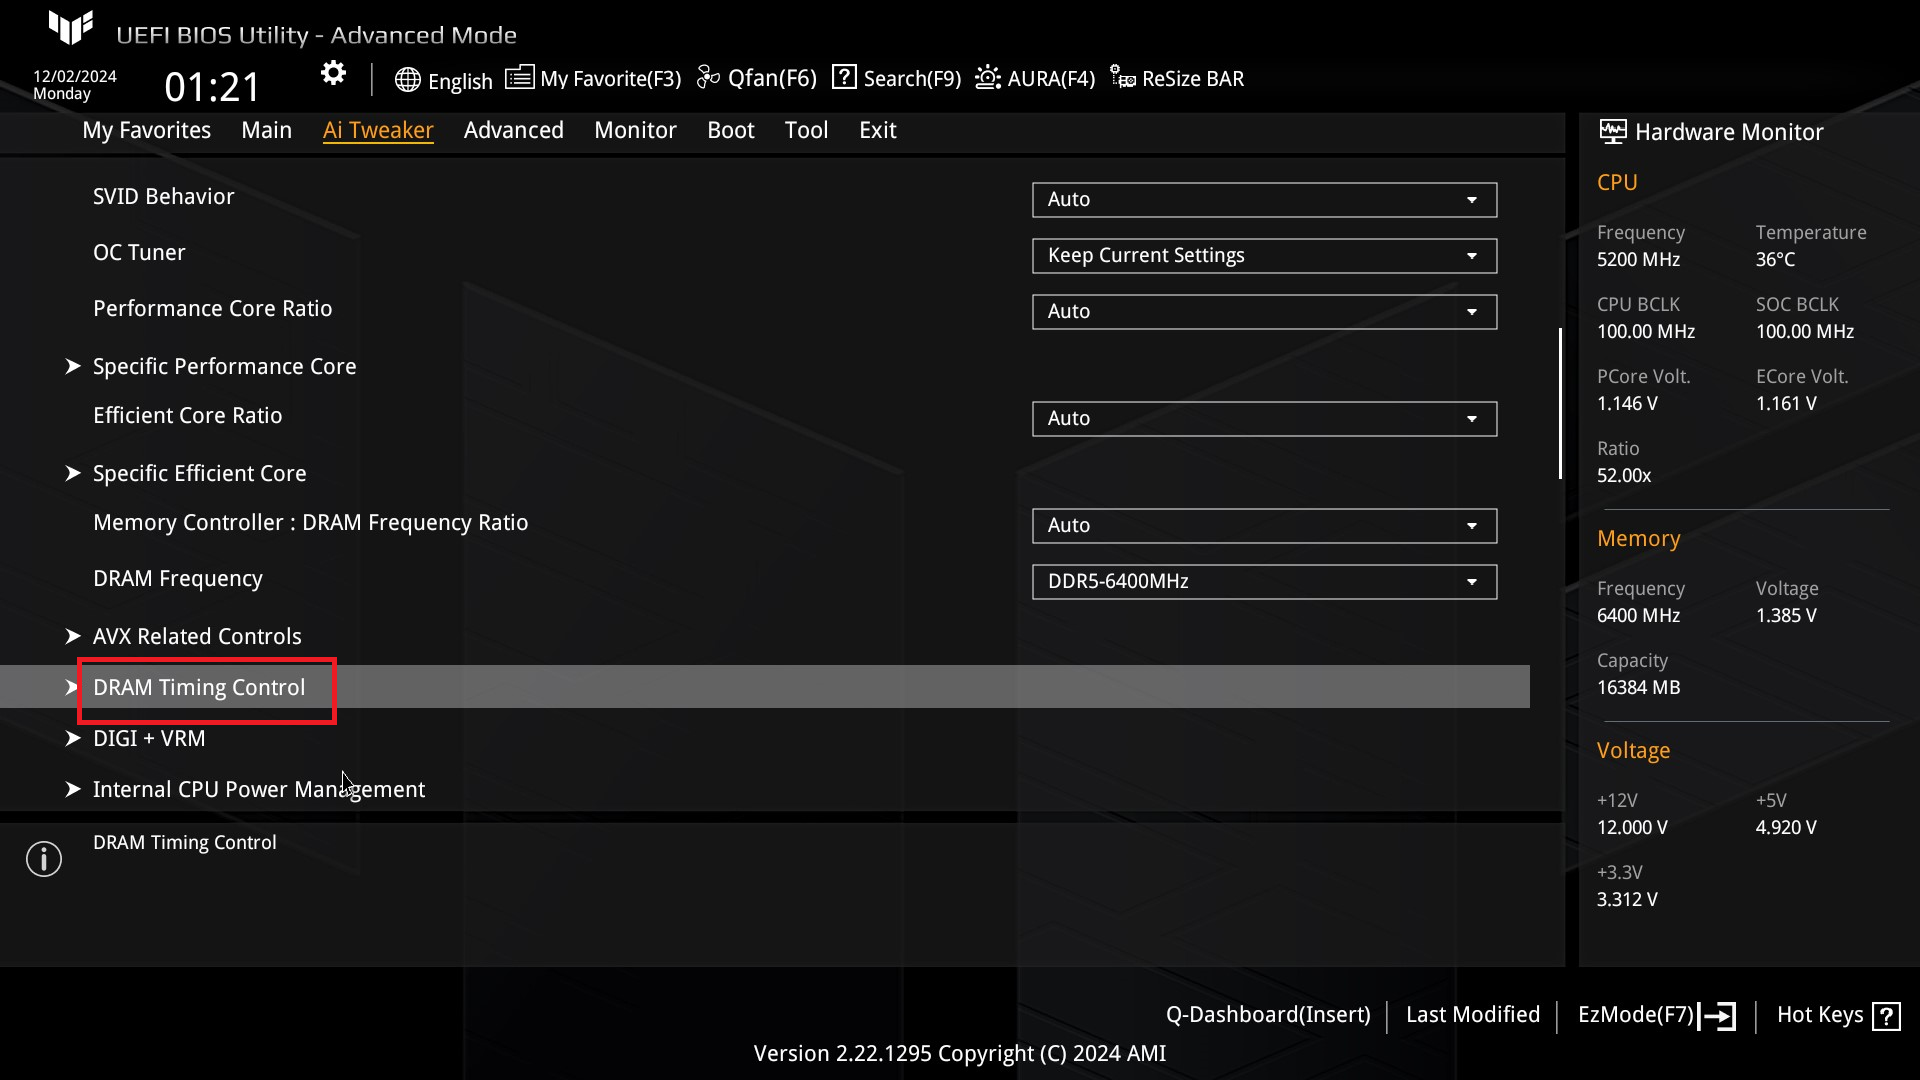
4.Click on [DRAM Timing Control], as shown in the image below.
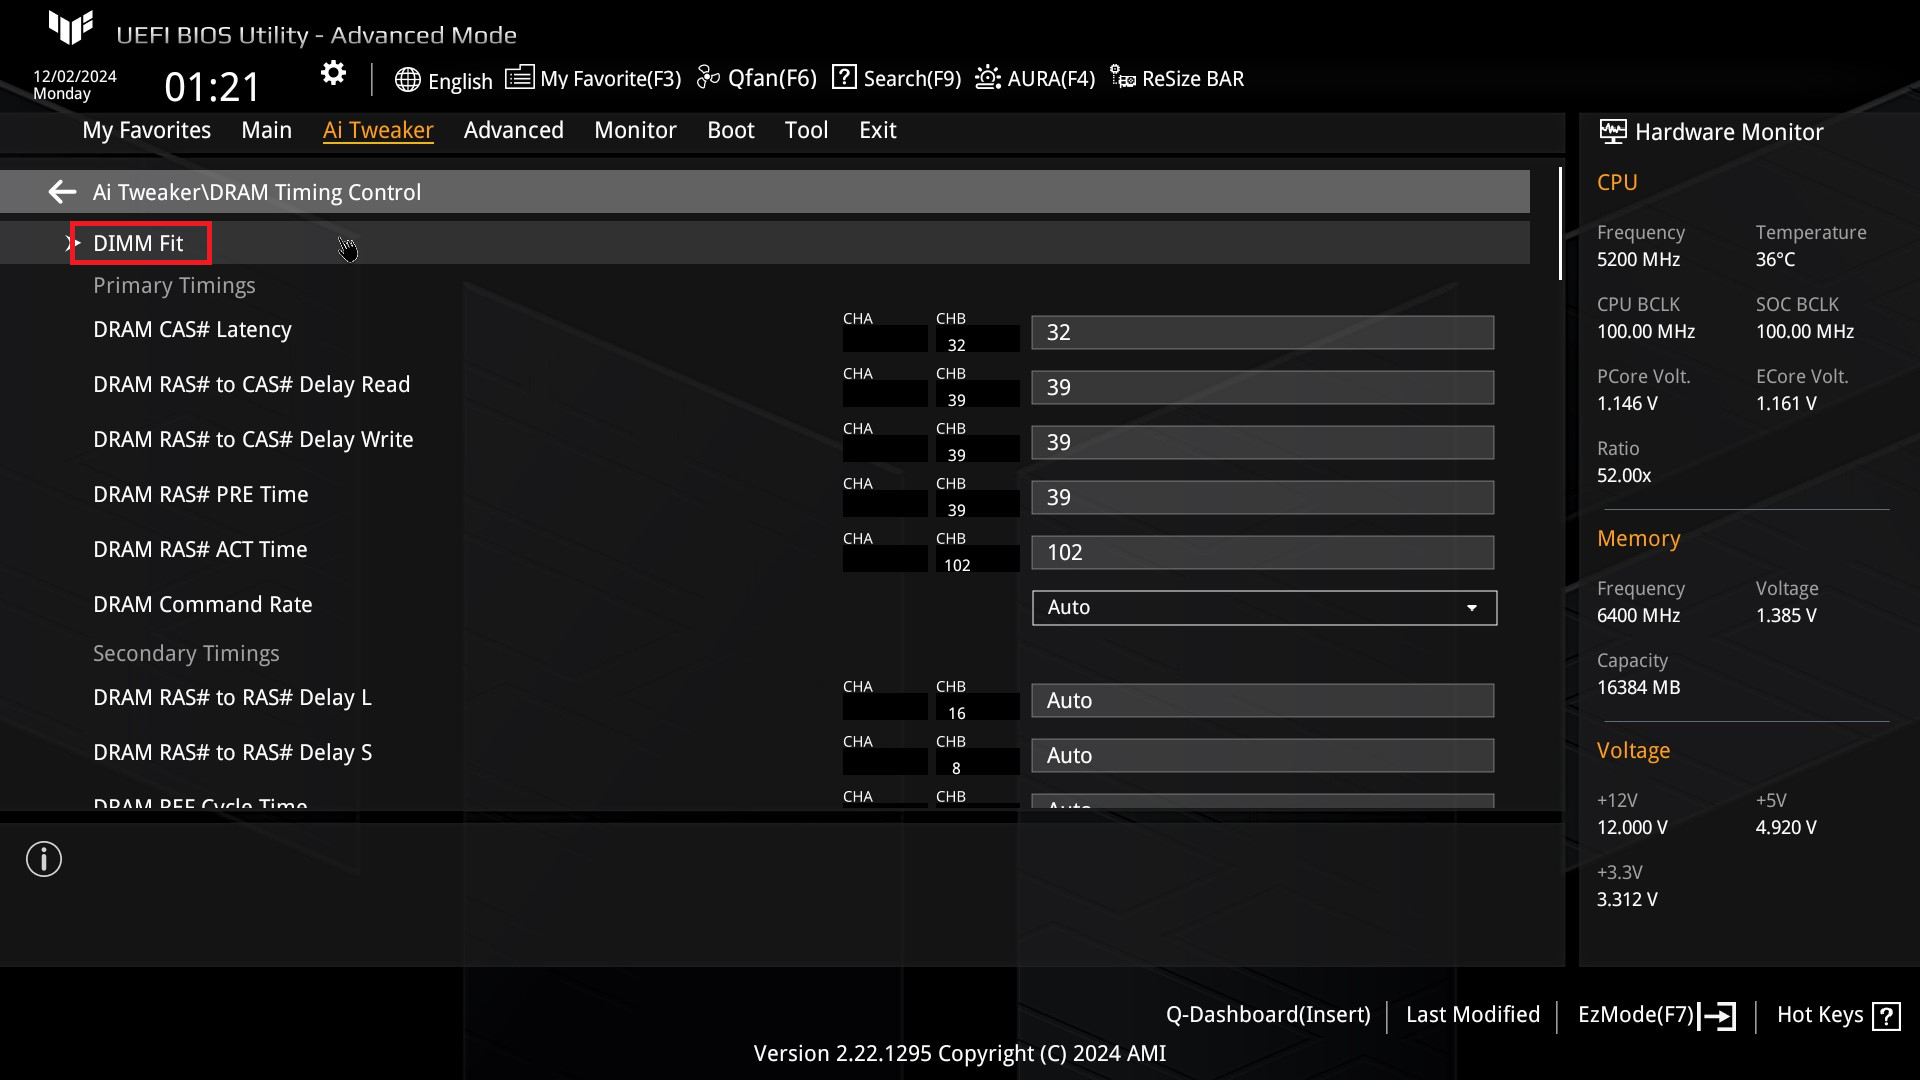
5. Click on [DIMM Fit], as shown in the image below.
6. Click on [DIMM Fit Store] and set it to [Store 0], as shown in the image below.
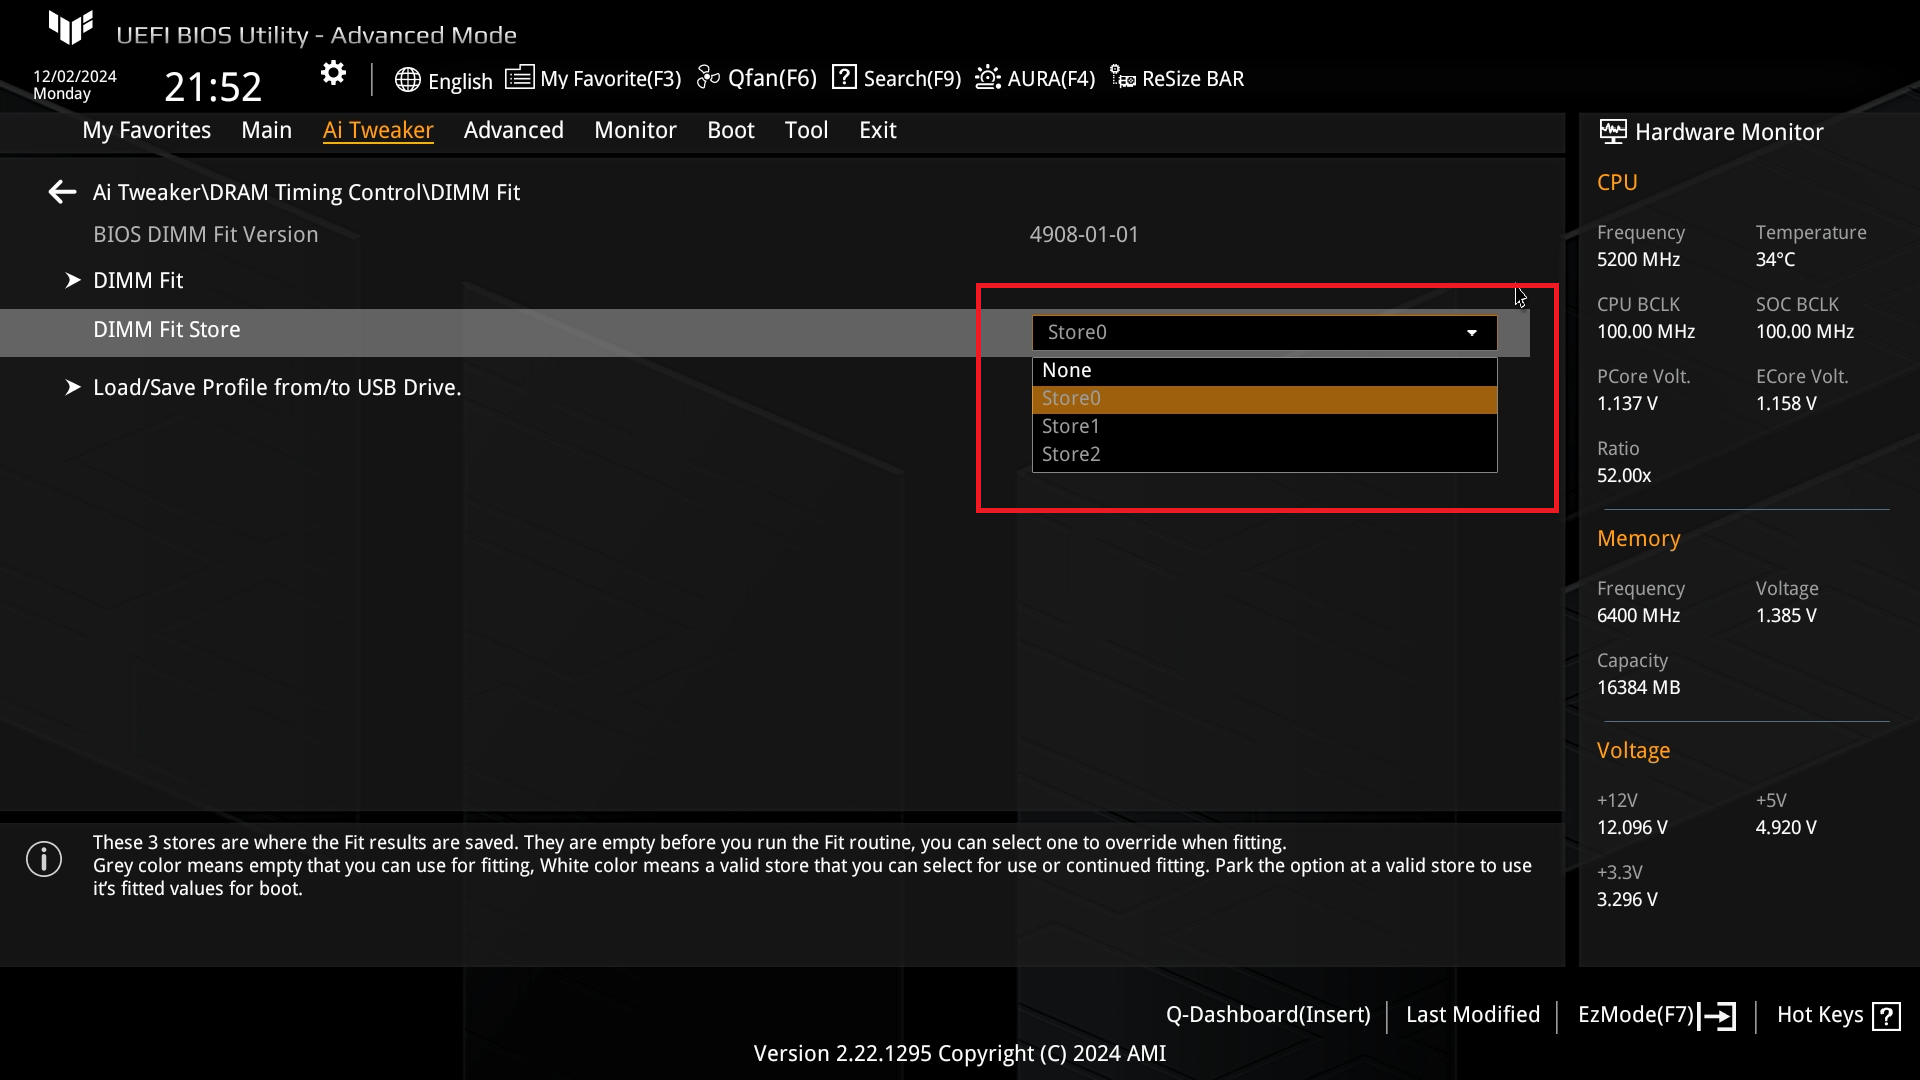
7. Click on [DIMM Fit], as shown in the image below.
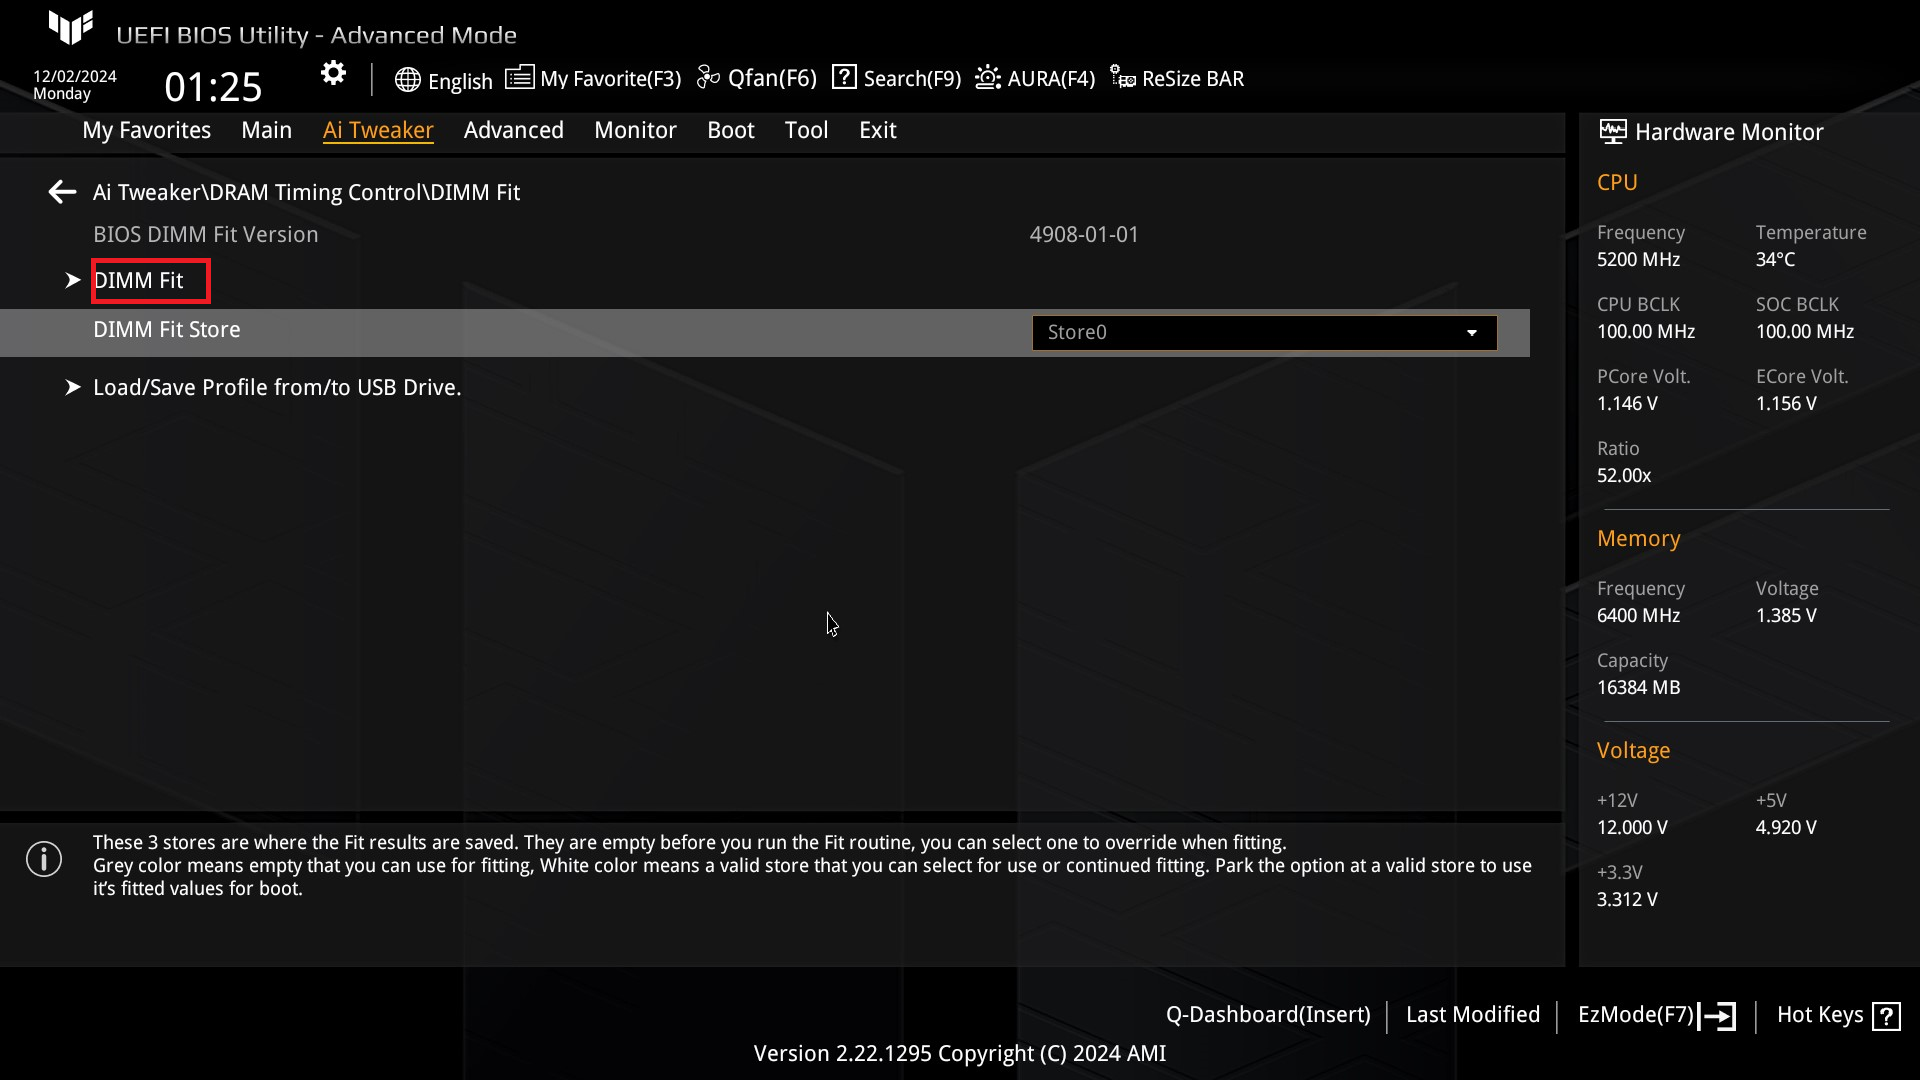
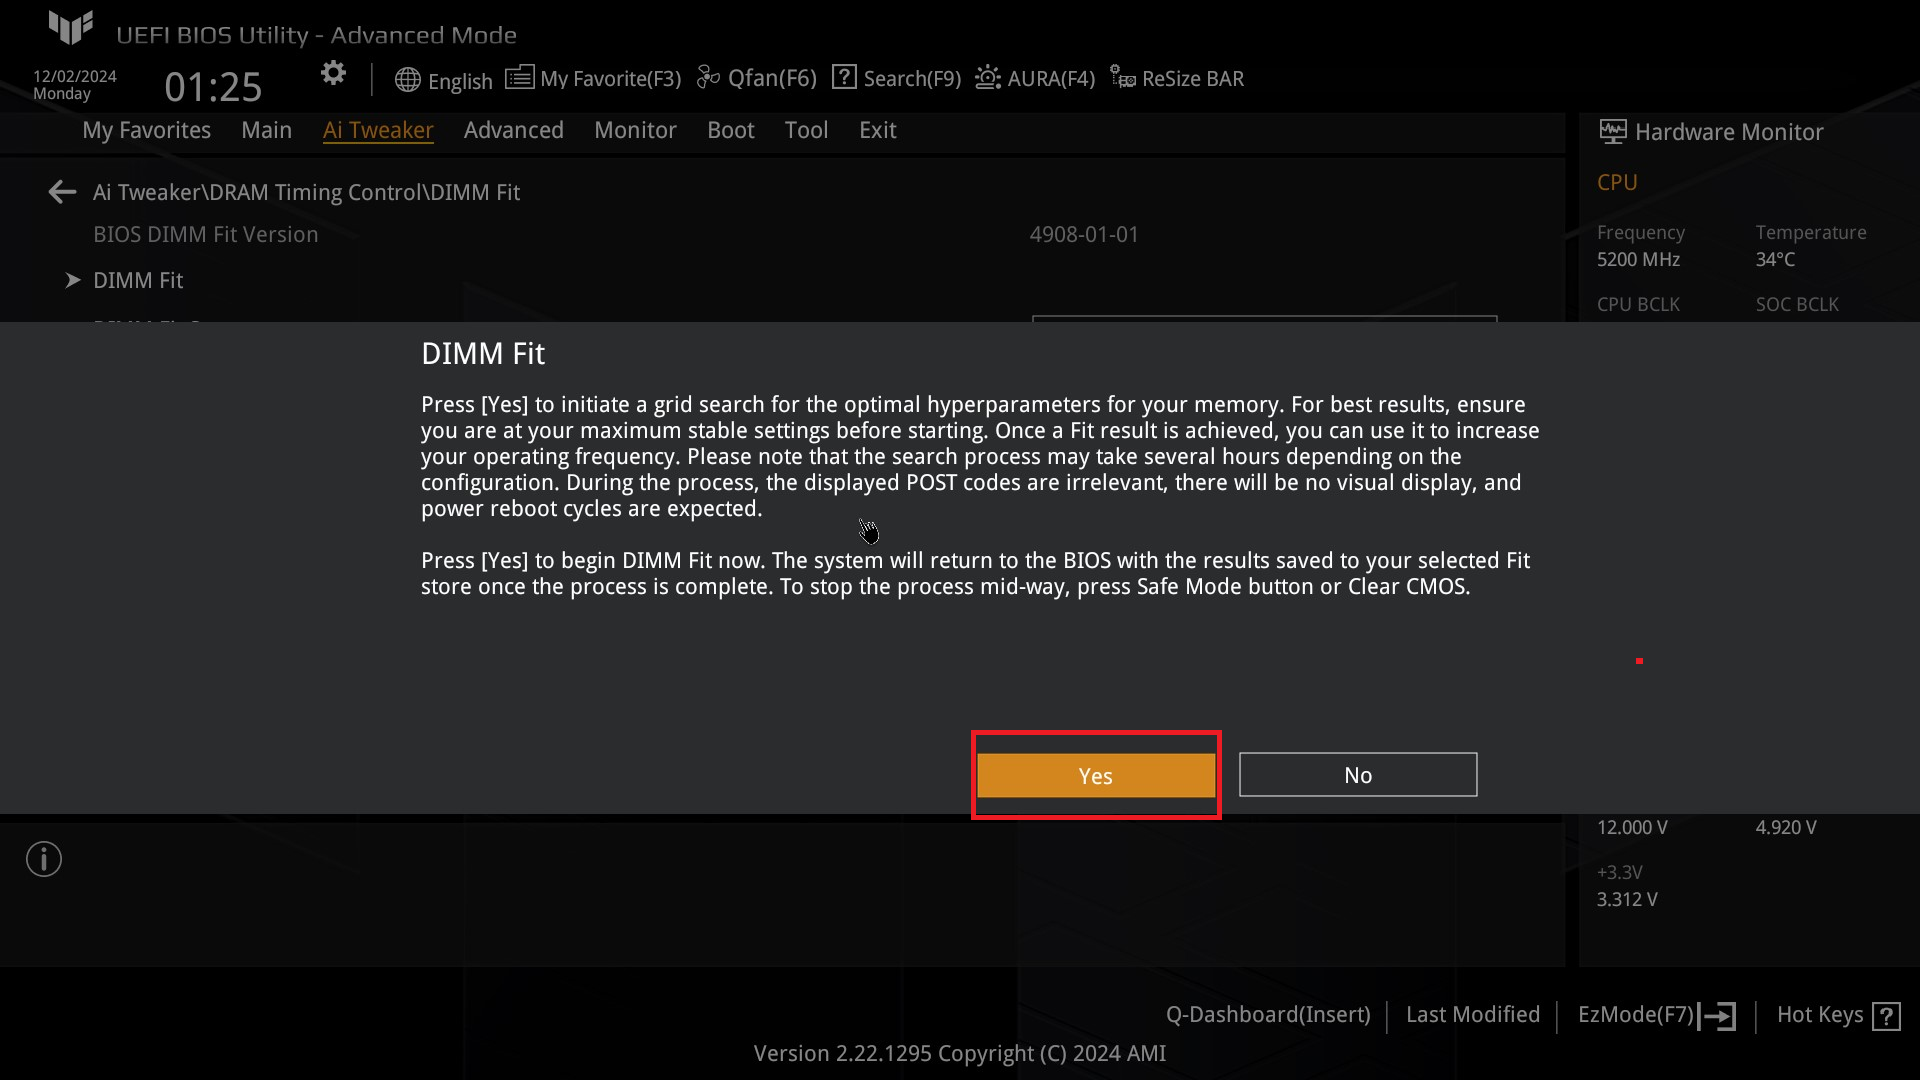
8. Click on [Yes], and the system will start auto-tuning, as shown in the image below.
Note: This process may take several hours, so please do not power off.
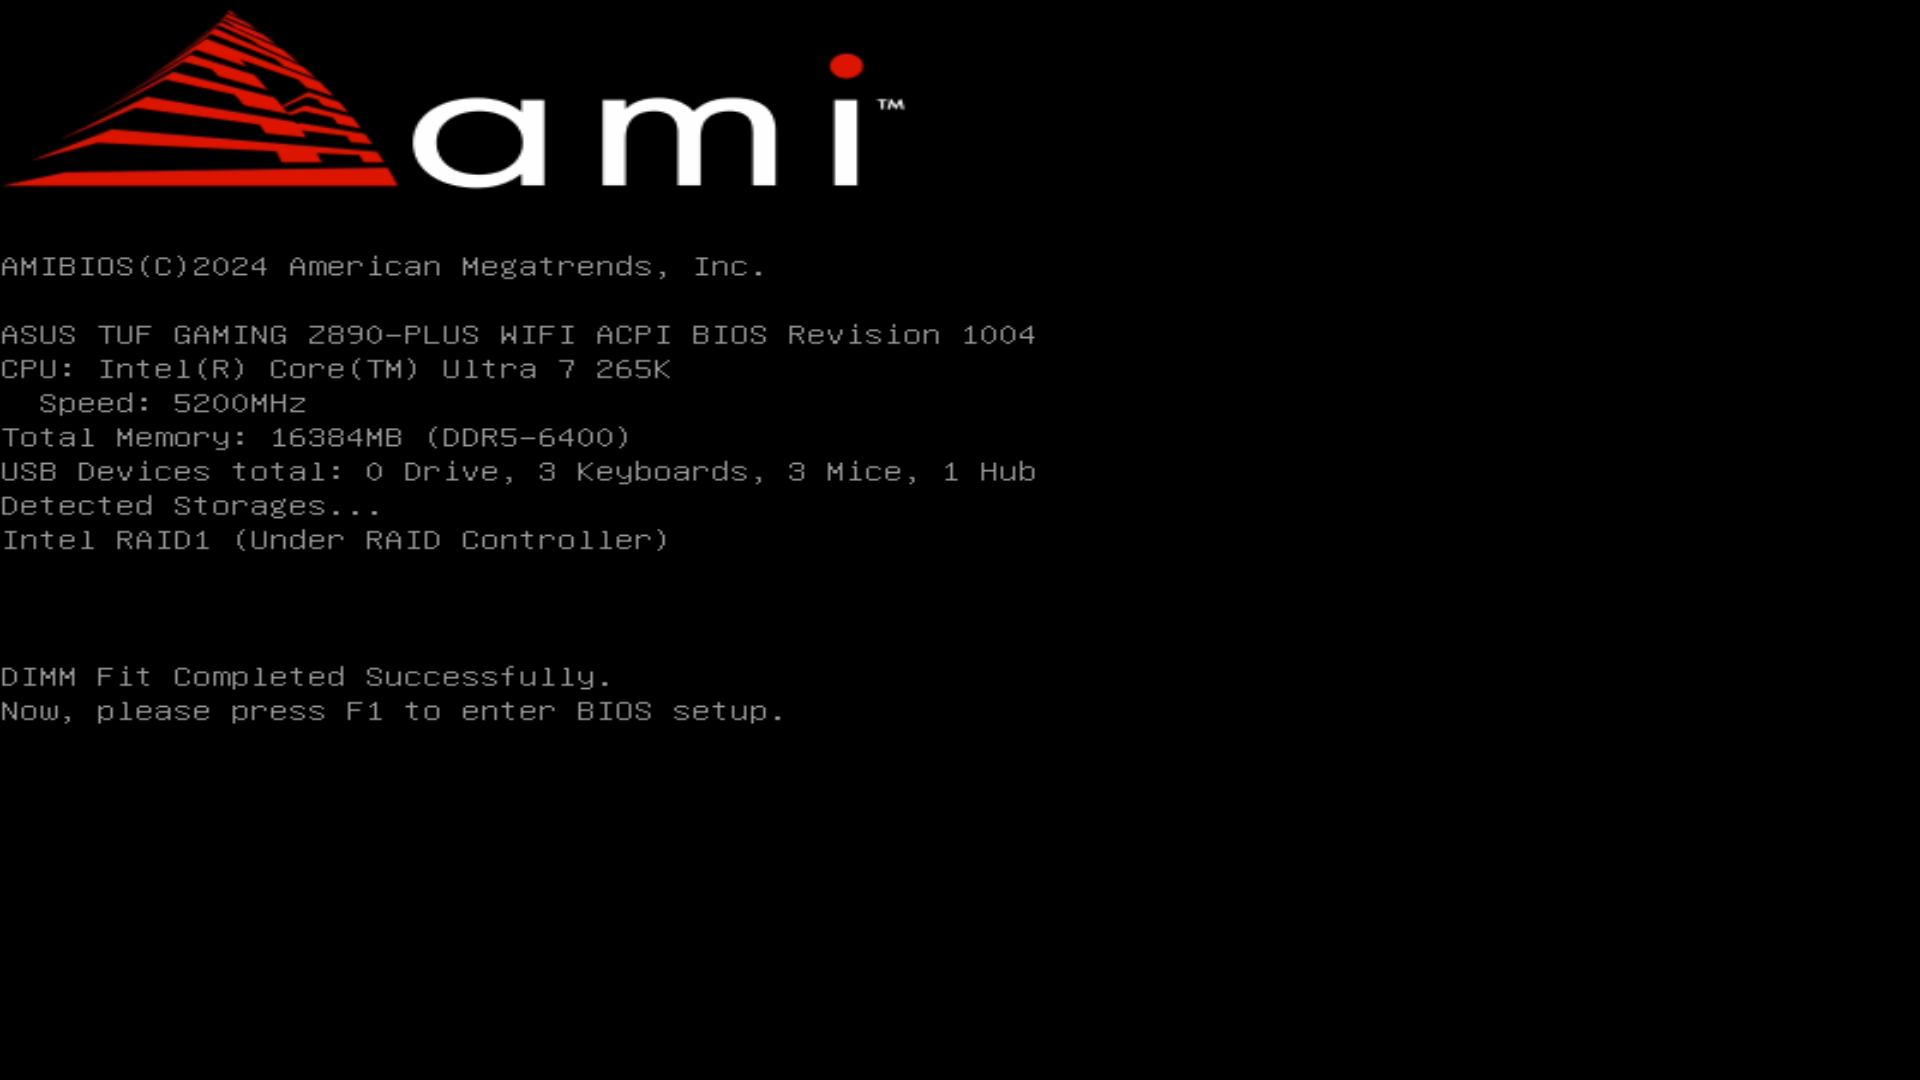
9. After the tuning is complete, the system will automatically restart. The boot screen will prompt you with DIMM Fit Completed Successfully and please press F1 to enter BIOS, as shown in the image below.
10. Now, the parameters that can improve system stability have been saved to Store 0, as shown in the image below.
三.How to remove saved DIMM Fit Store parameters?
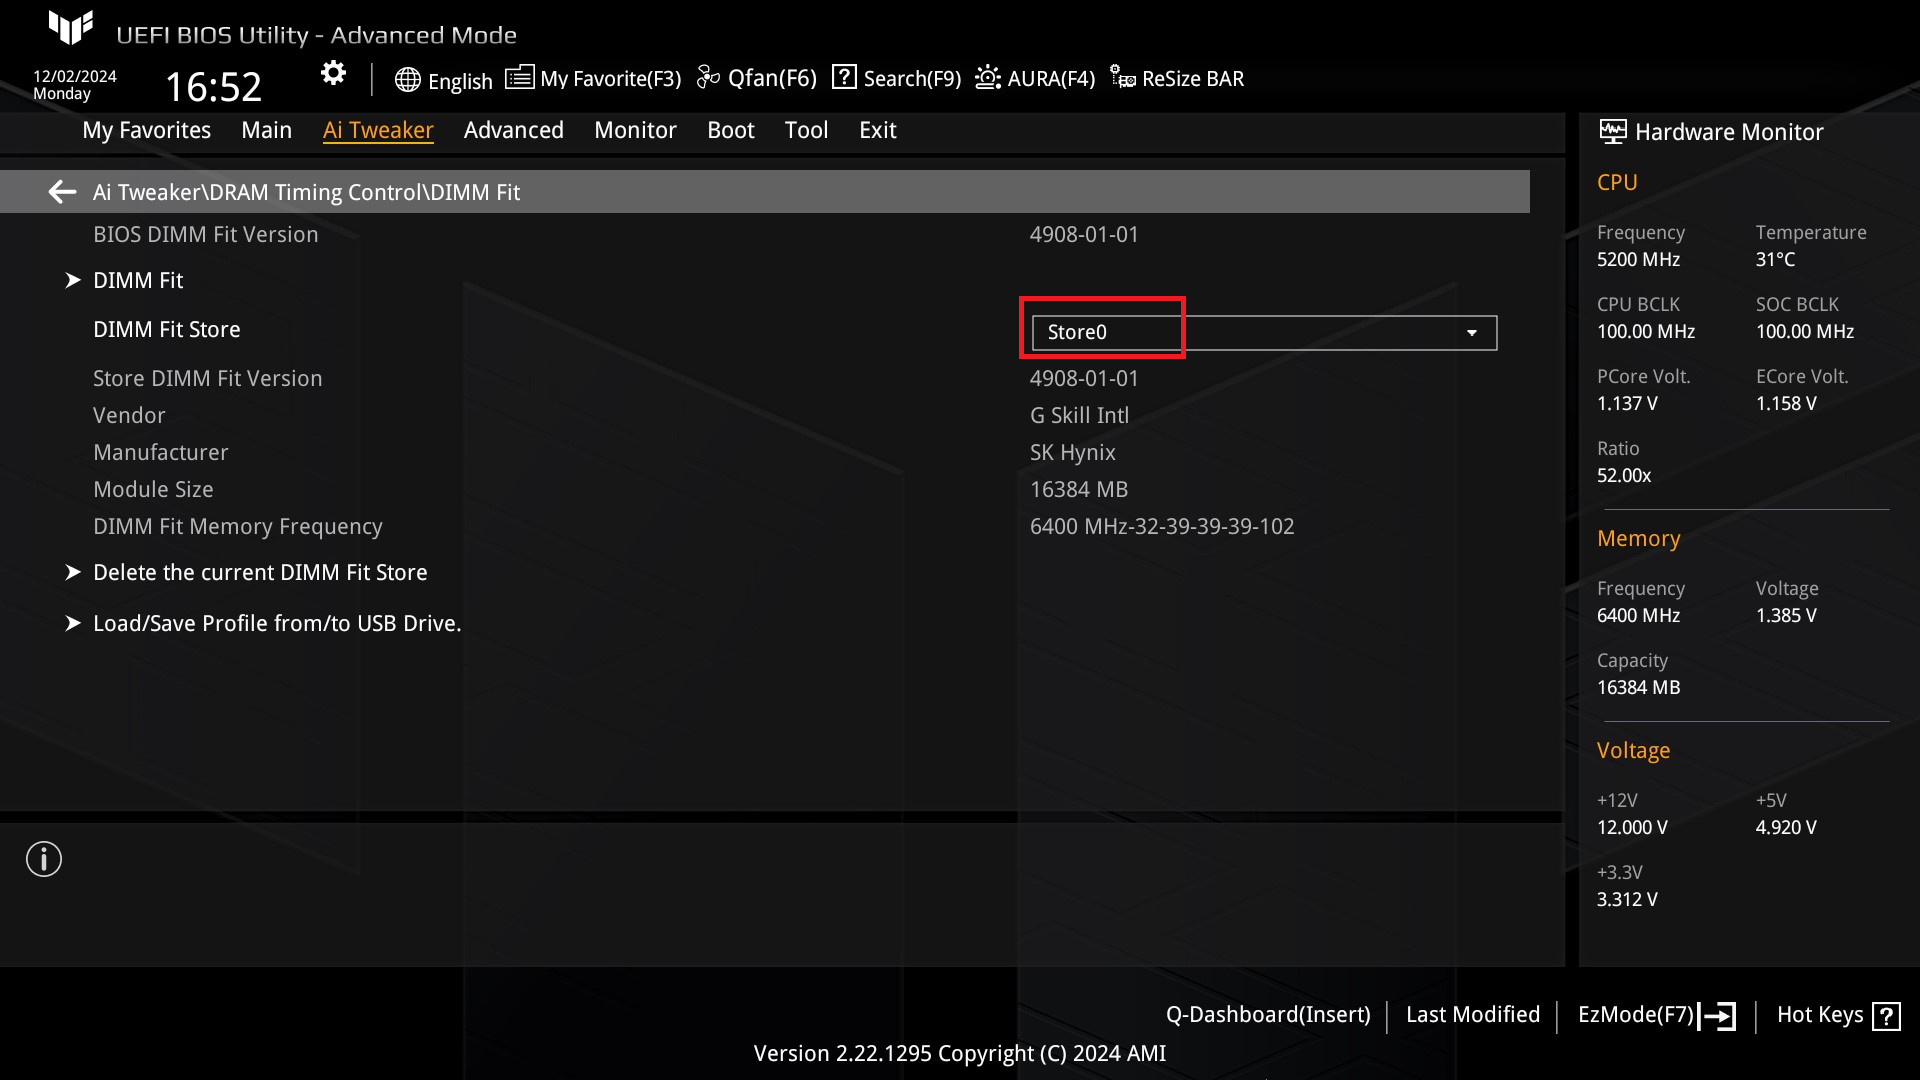
1. Following the steps above, enter the BIOS DIMM Fit , and select the Store you need to remove
(for example, remove Store 0).
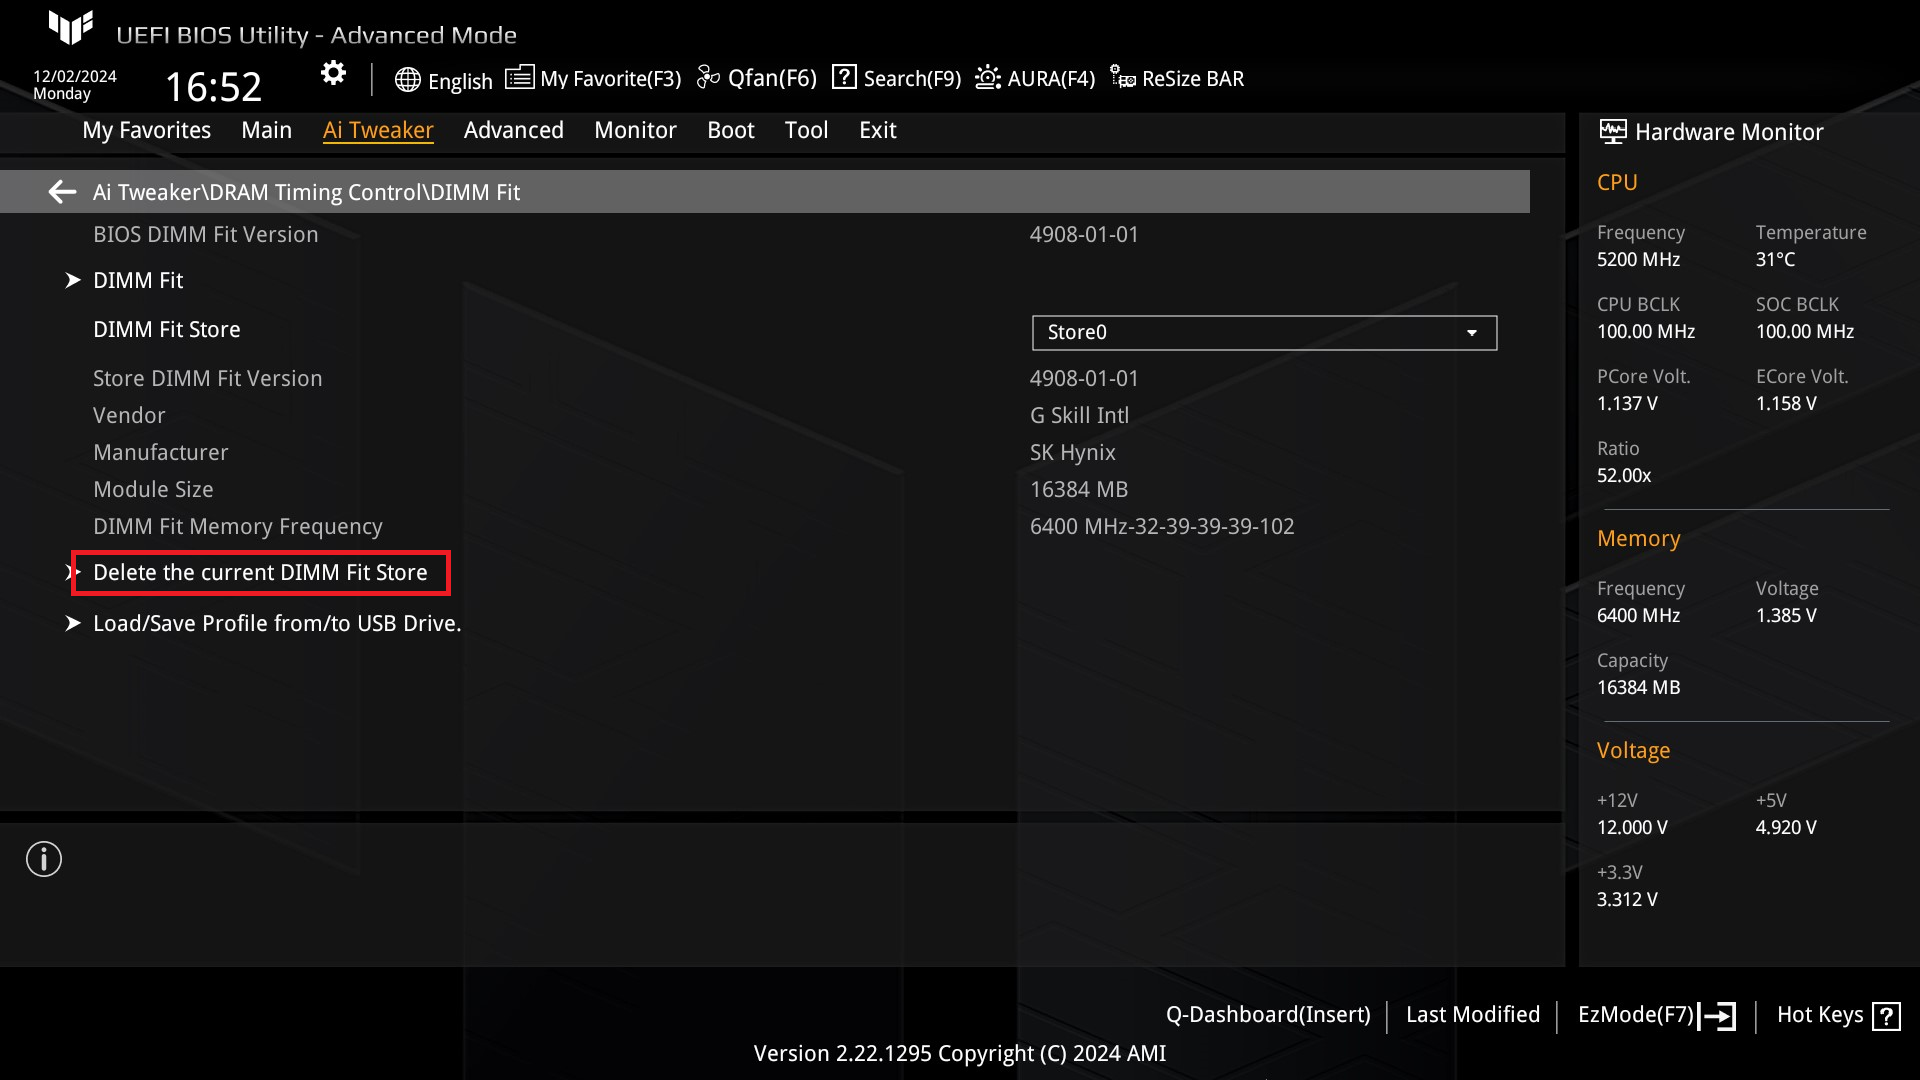
2.Click on [Delete the current DIMM Fit Store]
3.Click on[Yes]
