- English
- Other Products
- FAQ
- [LCD Monitor] ZenScreen Smart Monitor MS27UC Setup...
- Subscribe to RSS Feed
- Mark as New
- Mark as Read
- Bookmark
- Subscribe
- Printer Friendly Page
- Report Inappropriate Content
- Article History
- Subscribe to RSS Feed
- Mark as New
- Mark as Read
- Bookmark
- Subscribe
- Printer Friendly Page
- Report Inappropriate Content
on
11-30-2024
10:00 AM
- edited on
11-30-2024
10:15 AM
by
![]() ZenBot
ZenBot
[LCD Monitor] ZenScreen Smart Monitor MS27UC Setup and Feature Introduction
This 27-inch monitor is an ideal choice for work and various activities. Watch videos or play games on the 4K HDR panel, or use Google TV and its built-in library of over 10,000 apps to watch any content you desire*.
If you are a live streamer, you can use ZenScreen Smart MS27UC’s multi-platform live streaming app to stream on all your favorite websites.
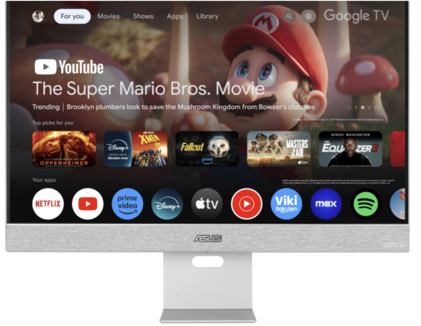
*Certain apps and content may only be available in specific countries/regions.
A. Monitor Settings (Using the Remote Control, Login/Register Google TV)
B. Online Platform Streamer Plus User Guide
C. Introduction to Mirroring and Multiple Display Source Features
-Miracast
-Multi View
D. Mouse/Keyboard Sharing Settings (PC/Google TV)
A. Monitor Settings (Using the Remote Control, Login/Register Google TV)
1. Press the Power Button at the Top of the Remote.
Note: Monitor Controls on the Monitor are located on the bottom or on the side of the Monitor.
(If the Monitor is in Boot State, a long press on the Power Button under the Monitor might be necessary.) 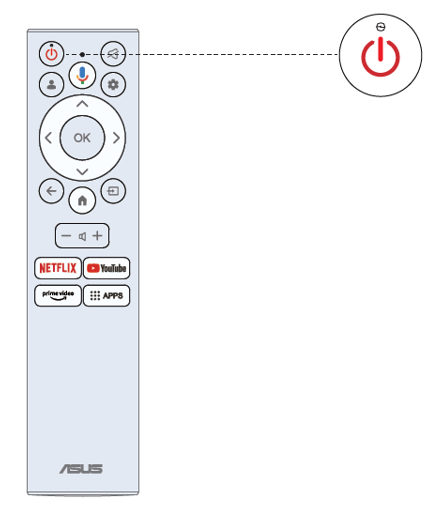
2. You will need to Pair the Remote with the Monitor firstly. After the code is successful, you can use the Bluetooth remote control to operate the Monitor.
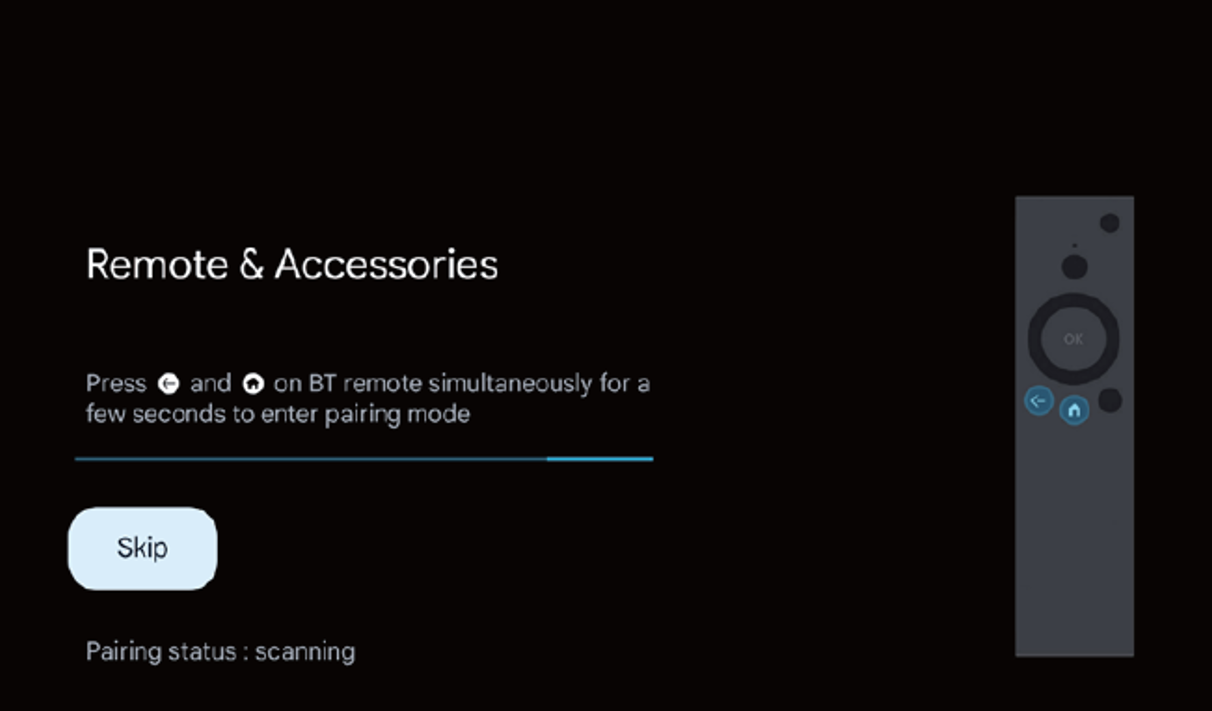
3. Press / to select the system language and press OK to confirm the language. 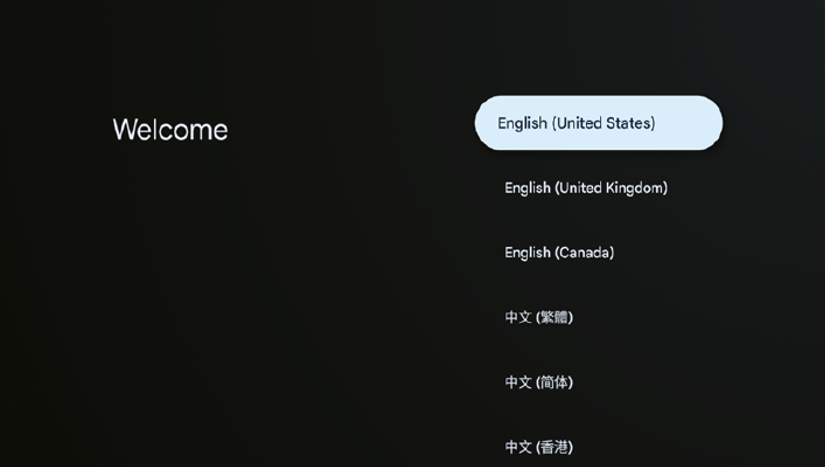
4. Press / to set up Google Monitor which need to sign in google account for Google service, or basic Monitor which not need to sign in google account. 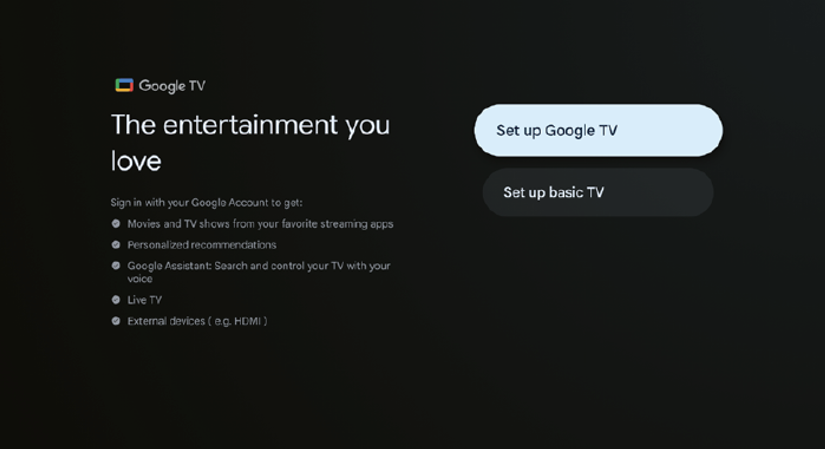
5. Scan setup code to download Google home app on your phone to set up or press / to set up on Monitor. 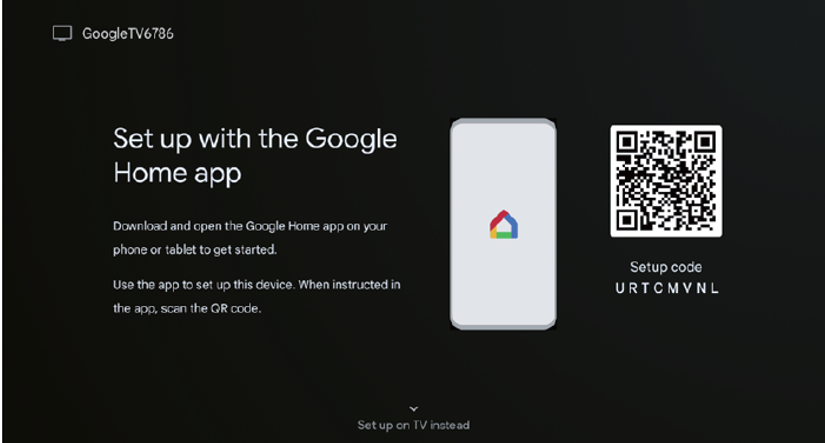
6. Select the wifi to connect, press OK and enter the password to confirm the connection is successful. 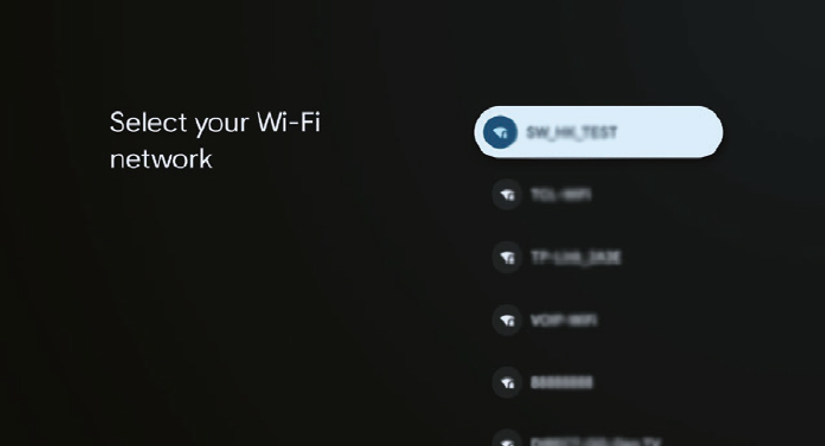
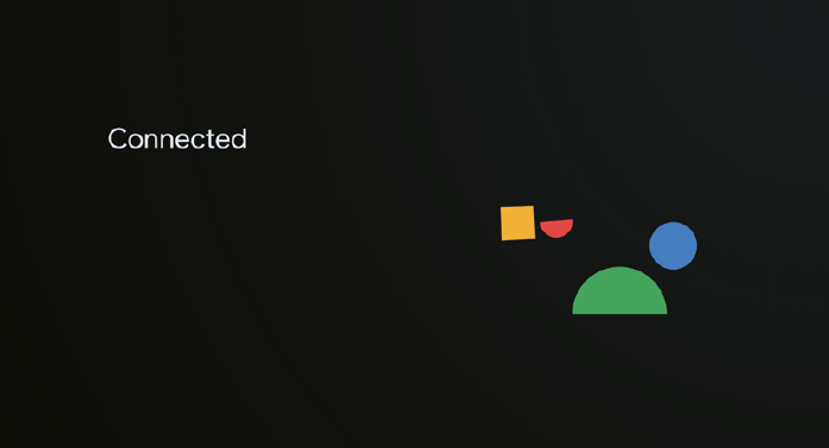
7. By accepting the Google Terms of Service to improve the product experience, select “Accept” to accept this condition. 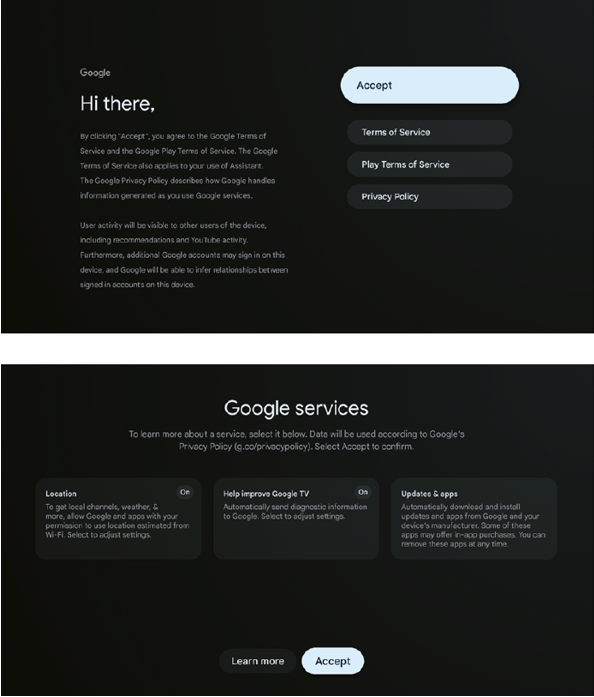
8. Once the Set-up is finished, to exit Google Monitor and access another component such as a notebook, press the Input button. 
B. Online Platform Streamer Plus User Guide
1. Multi-Platform streamer plus supports live streaming on four streaming platforms. Before using the application, please go to the following website to activate your account for live streaming.
Streaming platform | Web page |
YouTube | |
Twitch | |
Steam | https://help.steampowered.com/zh-tw/faqs/view/548FBC55-89EB-1BC8 |
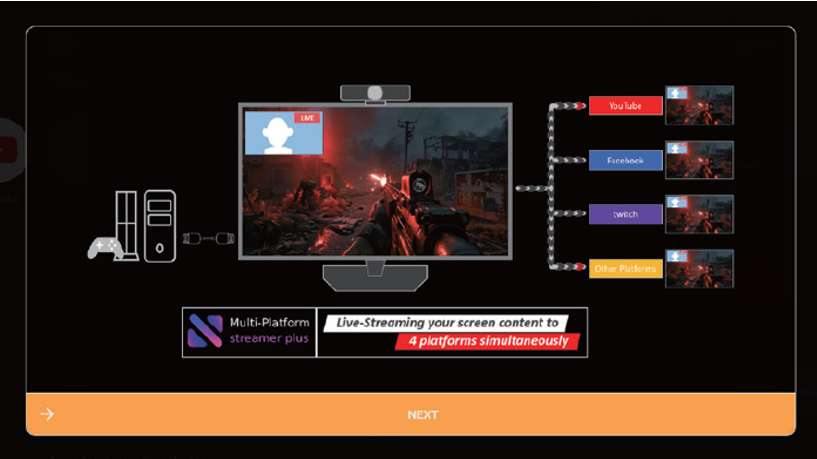
2. Launch page of Multi-Platform streamer plus is shown. 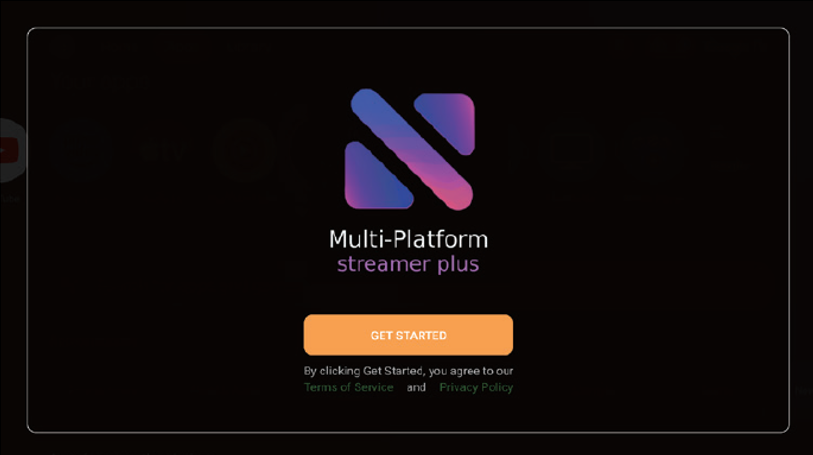
3. Control Menu is shown. 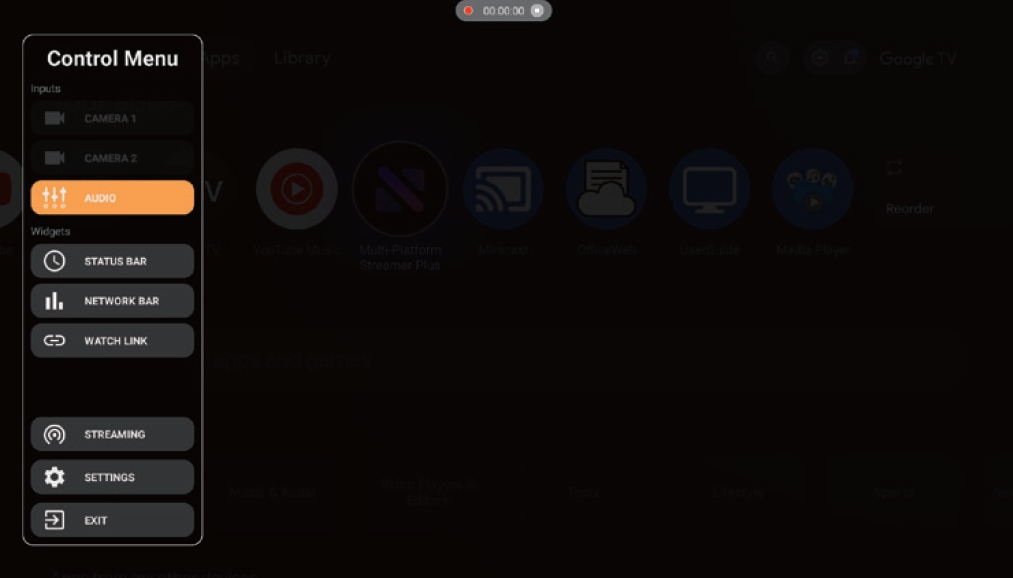
4.Confirm network setting
•check your monitor if connected to network.
5.Confirm camera setting
•Multi-Platform streamer plus supports at most two cameras output video in the same time. This character teaches you how to check camera and use other function for camera. Use camera 1 button and camera 2 button to check your camera if supported and output graph as expected.
6.How to setup cameras
•Enable camera through Control Menu.
•User could move, resize, change the overlay of camera widget through Camera Menu by remote controller, keyboard or mouse.

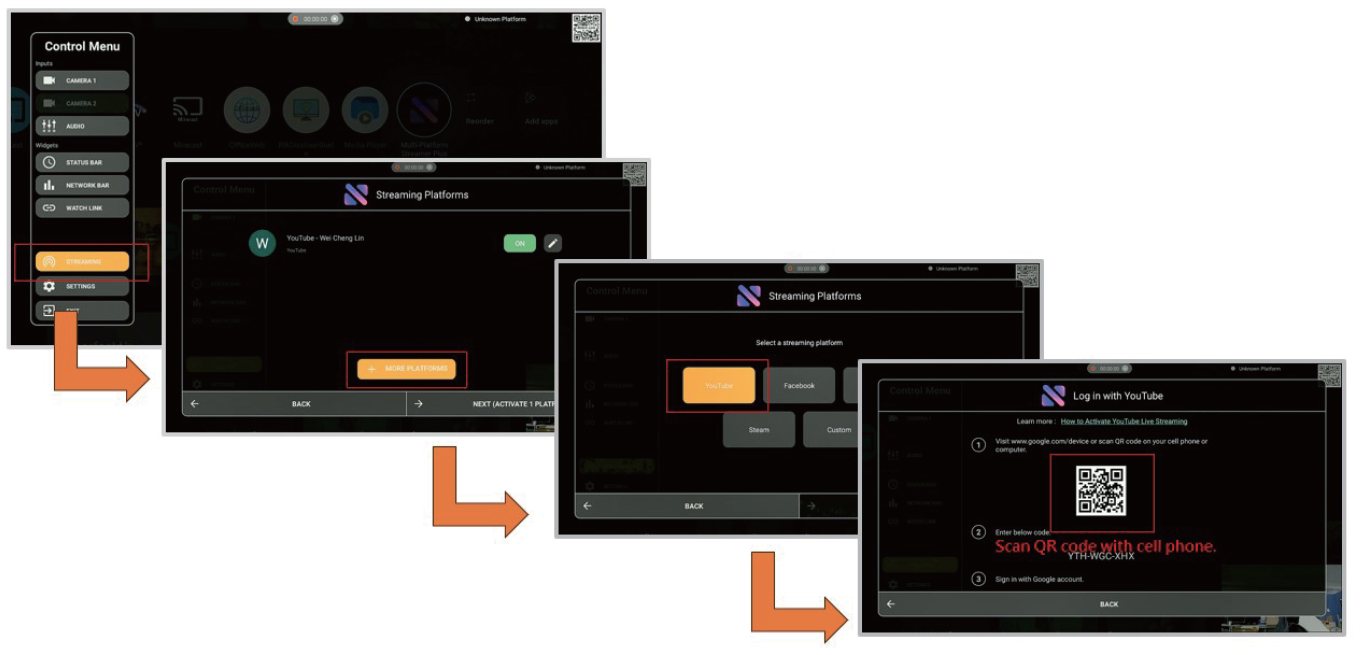
7.Add Multiple Platforms
•Click “STREAMING” Menu.
•User could add different social accounts with cell phone.
8.How to start live streaming
•Click “STREAMING” Menu.
•Choose the platforms for live streaming
•GO LIVE! 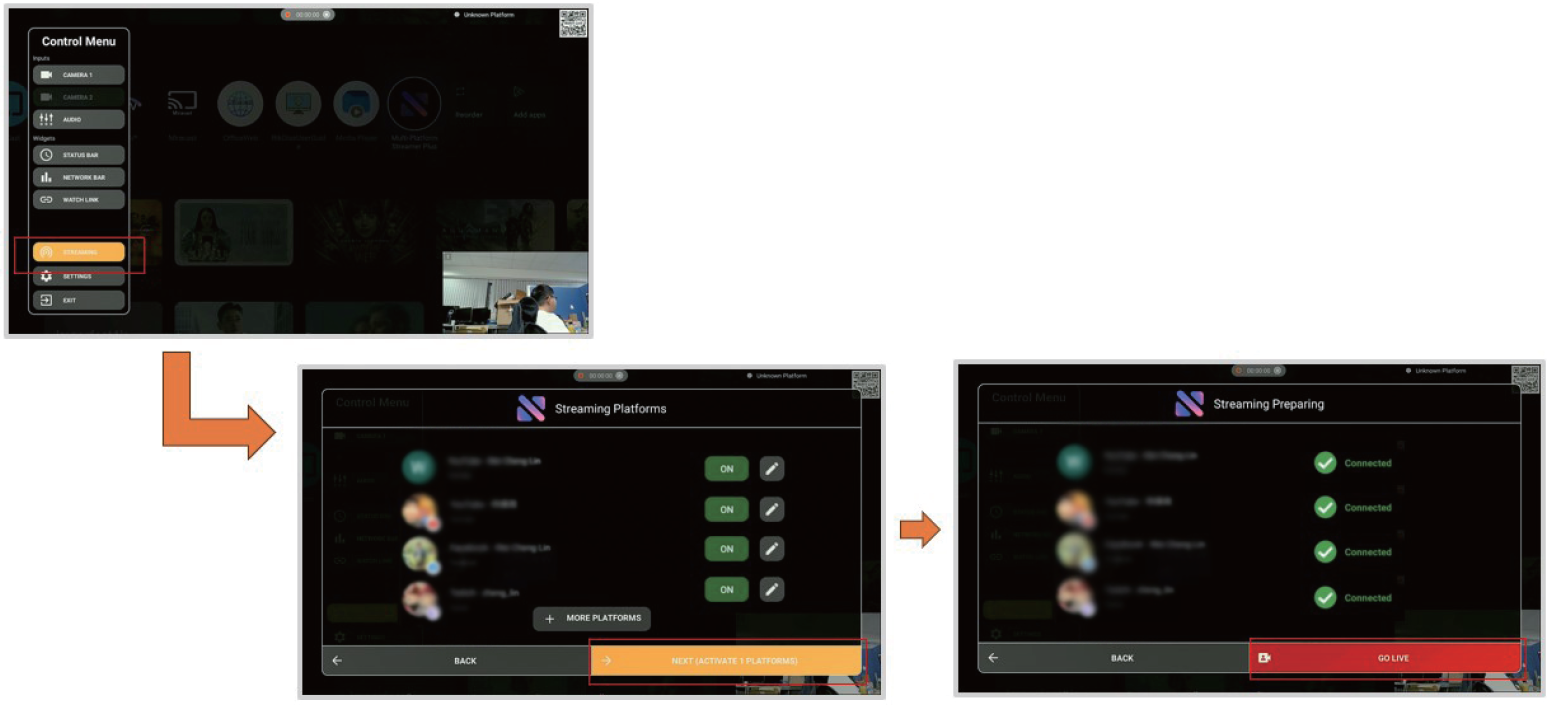
For related issues, please refer to the FAQ:[LCD Monitor] Multi-Platform Streamer Plus FAQ
C. Introduction to Mirroring and Multiple Display Source Features
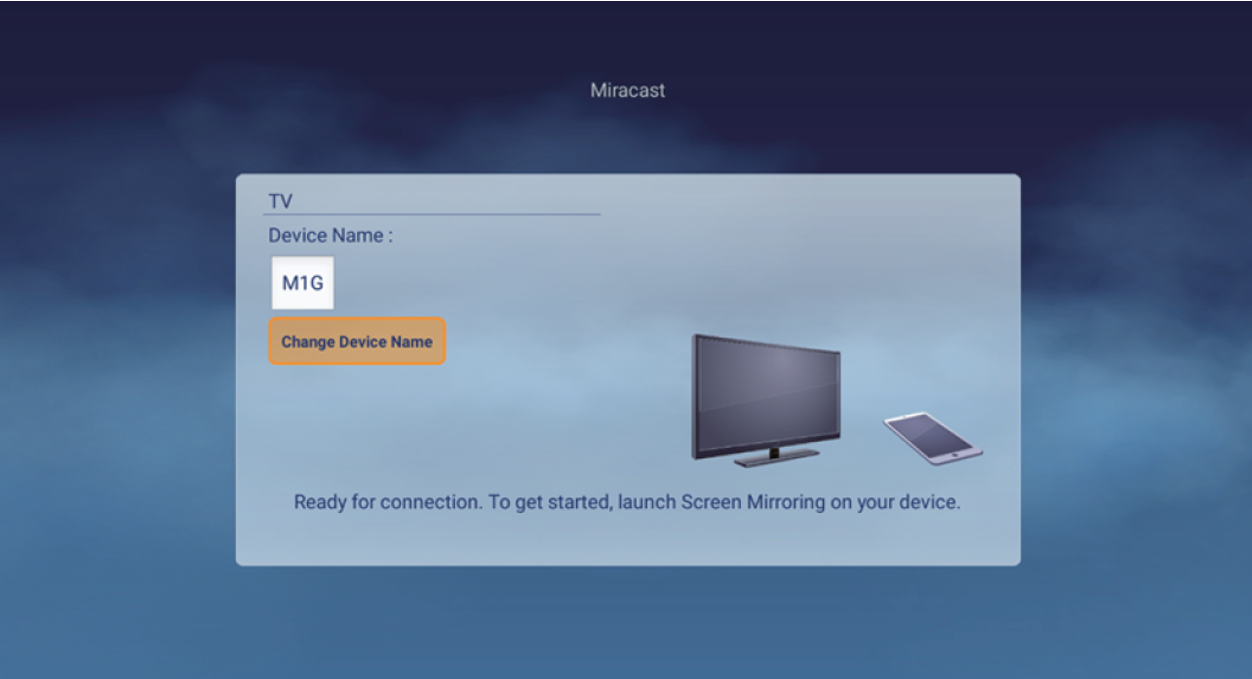
-Miracast
Wireless screen mirroring from a mobile phone:
•Please log into your Google account before using Miracast.
•Miracast can be found in Google luncher.
-Multi View:
1.Please follow Shortcut menu to enable Multi View icons
2.Plugin input source (HDMI / USB-C / DP), Main source screen display input signal.
3.Use mobile phone cast to the platform sub screen via Miracast.
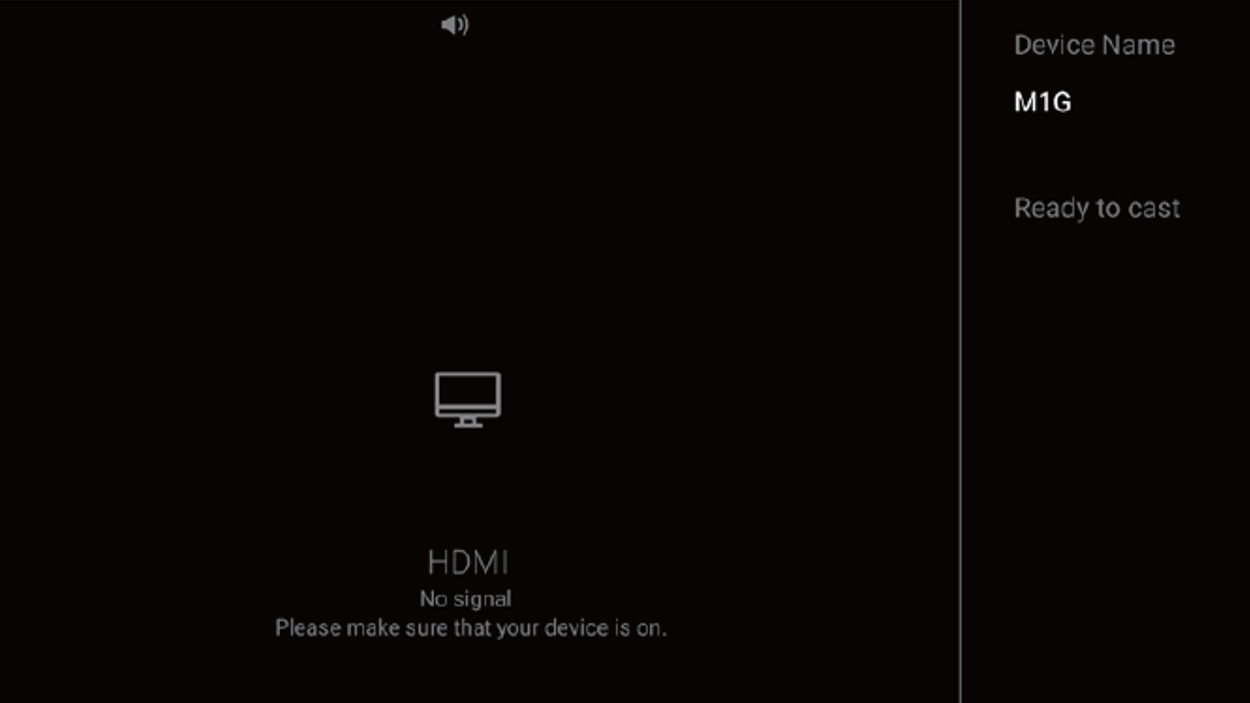
Note. Please select the platform device name on Miracast search.
Device name can be found in “Android Settings -> System -> About -> Device name”
4.Focus view will show when multi view mode on, there are four icons on the two sides of the window divider. There are two icons on each side, and stand for mouse/keyboard control and audio focus.
How to open Focus view on Multi view.
Remote Control:
>Select input source
Computer Mouse:
>Move Computer Mouse to the right or top side of the screen.
>Click Computer Mouse middle key in HDMl/ Type-C/DP source.
•Users can use the blue icons to know whether the current screen mouse/keyboard control and volume focus are on the left or right.
•Users can choose to control the left or right screen through Focus view, and whether the sound is output from the left or right.
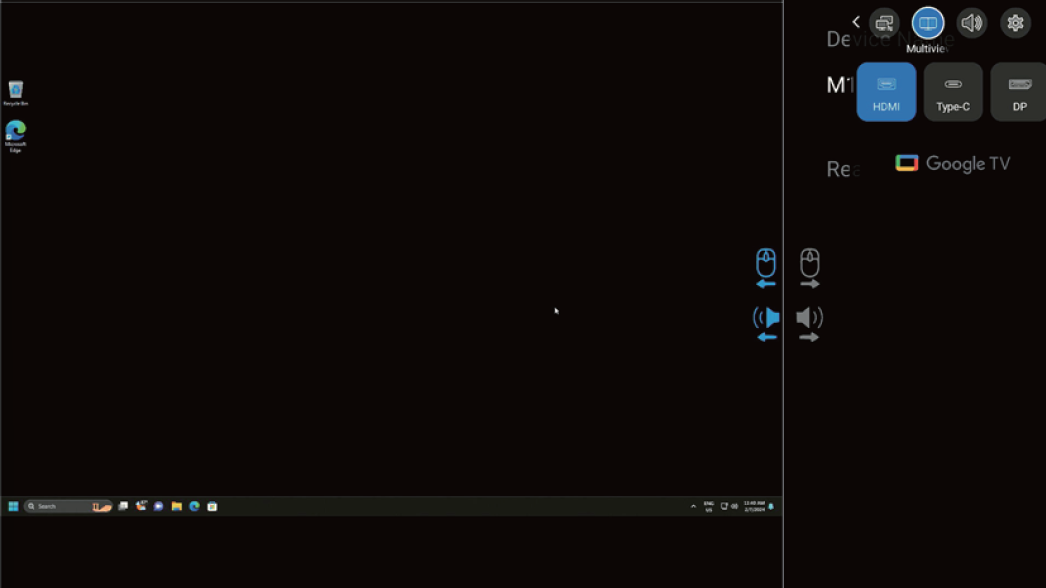
D. Mouse/Keyboard Sharing Settings (PC/Google TV)
- For Type-C Follow this step: 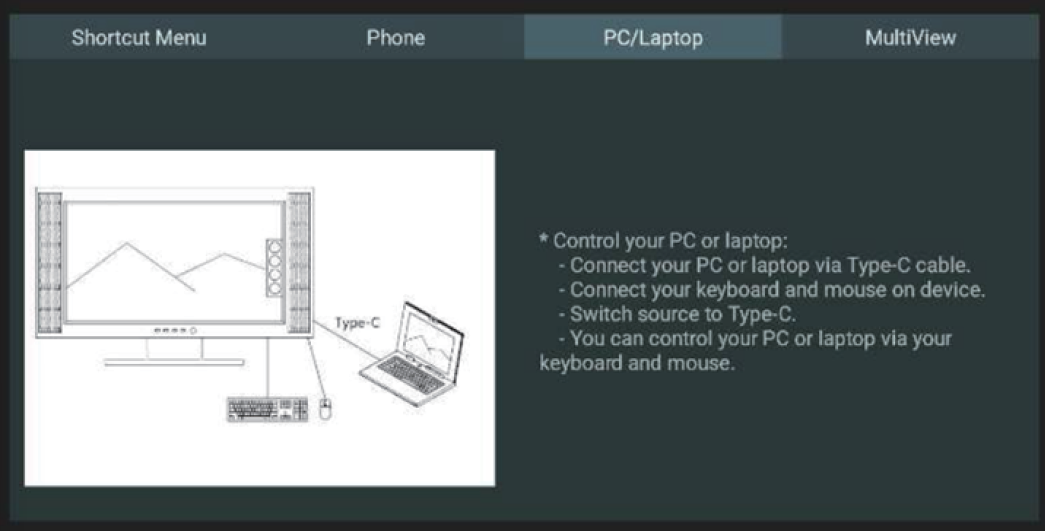
- For HDMI/DP Follow this step:
1.Make sure Settings—Monitor—Keyboard/Mouse—Control Device is open.
2.Follow Keyboard/Mouse—Add Device step to connect PC and monitor with Bluetooth.
3. Now could use wire/2.4G mouse & Keyboard to reverse control PC via monitor. 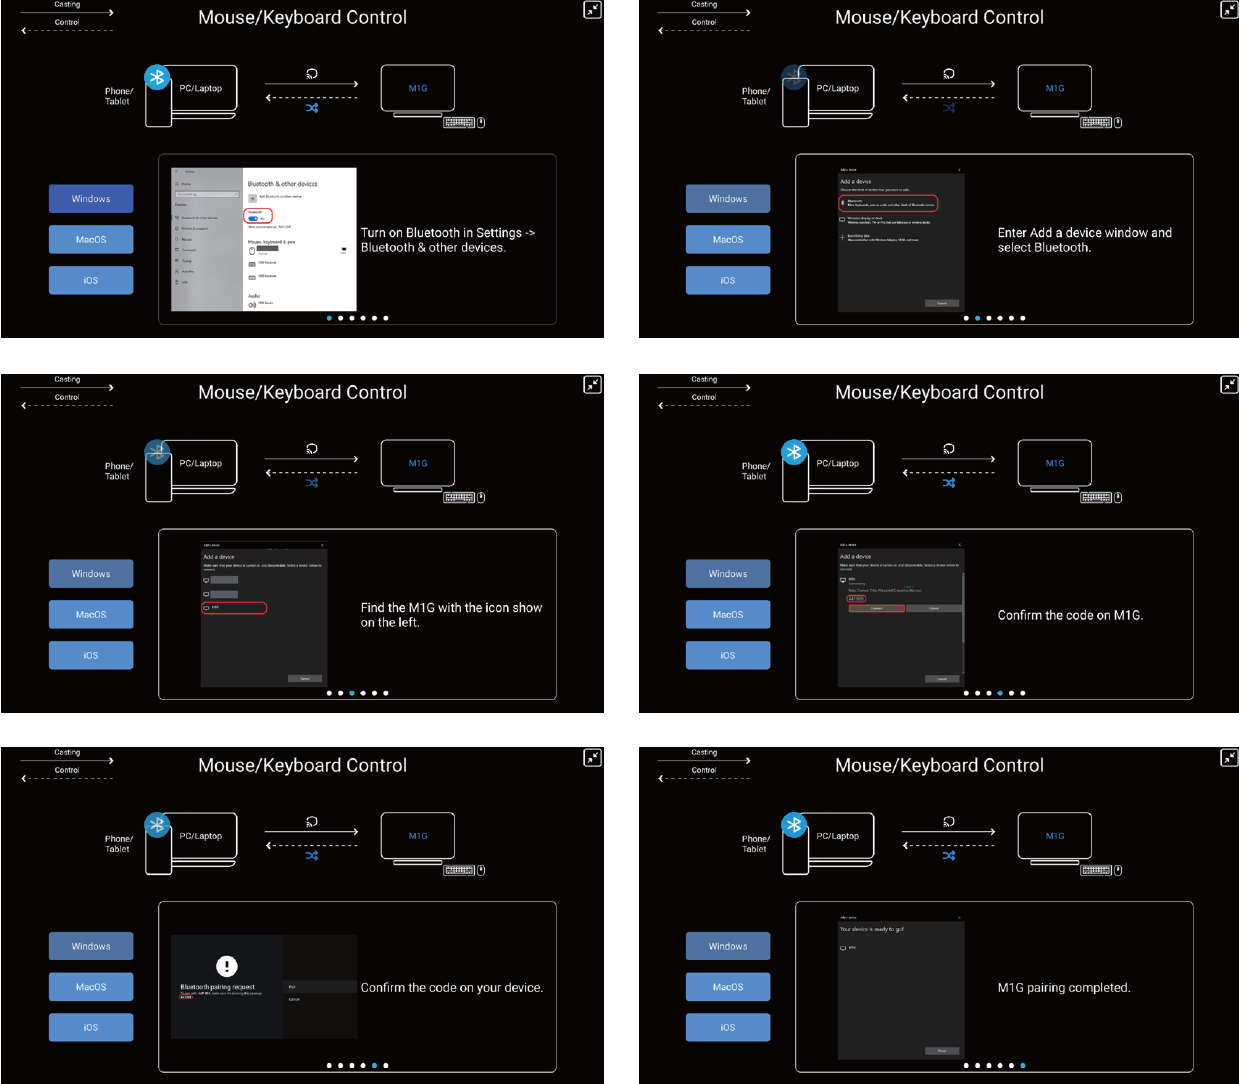
Shop Mode
Shop mode can be found in “Settings -> System -> About -> Environment ->Shop”
The Shop mode in a retail environment is a specific setting designed to optimize the display's performance in stores or exhibition spaces. This function helps attract customers' attention and enhance sales performance.
Q1. Using the Multi-platform streamer feature: How to set up the camera? Or what specifications should it support?
A1. It supports up to MJPEG 720p@15fps, USB 2.0. The camera does not have system specification limitations, but it must support USB UVC.
Q2. Can the remote control and accessories only pair with the remote control? What other accessories can be paired? Can regular Bluetooth headphones be used?
A2. Most Bluetooth devices are supported, such as Bluetooth headphones, Bluetooth speakers, Bluetooth keyboards, Bluetooth mice, etc.
Q3. If the voice search feature is not working, how can I troubleshoot it?
A3. Log in to your Google account, connect to the internet, and then press and hold the voice button on the remote control to start voice search. *If the internet connection is poor, there may be no response. Please try a different network.
