- Article History
- Subscribe to RSS Feed
- Mark as New
- Mark as Read
- Bookmark
- Subscribe
- Printer Friendly Page
- Report Inappropriate Content
on
07-13-2024
10:12 AM
- edited
Sunday
by
![]() ZenBot
ZenBot
[LCD Monitor] Things to Note When Installing the Wall Mount Bracket on the ROG Series
When you need to use a wall mount, you must install a VESA wall mount adapter kit to use the VESA wall mount. This will make your wall mount more stable and easier to install.
*This is a ROG series wall mount adapter kit. (Included in machine accessories, please refer to the user manual of each model)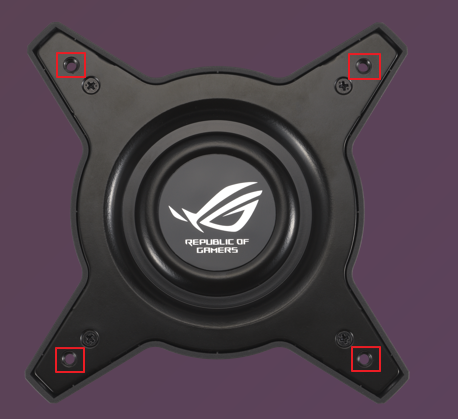
*The screw holes are marked with red boxes and need to be secured with the screws that came with the bracket you purchased*
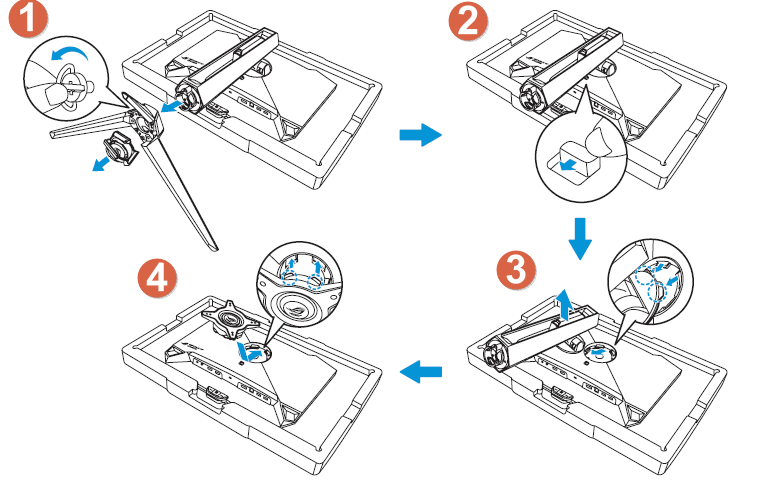
Next, we will explain how to install the wall mount adapter kit.
①Remove the LED projector cover. Then, loosen the included screws and detach the base from the stand.
②Press the release button to remove the stand from the monitor.
③Detach the stand and then install the wall mount bracket on the back of the monitor.
④After installing the VESA wall mount kit, use a VESA wall mount (sold separately).
Finally, we remind you that when choosing a wall mount, it must comply with VESA wall mount standards, such as 100 x 100 mm.
For example, the size of the wall mount screws is M4, and the screw length may vary depending on the wall mount manufacturer. Therefore, we recommend confirming with the wall mount manufacturer before use to ensure the chosen length meets your requirements.
If you have any questions about selecting a wall mount or need more information, please feel free to contact us. We will be happy to assist and provide answers.
