Find an appropriate spot to mount the security camera.
Make sure the Camera operates in environments with ambient temperatures between -20°C (-4°F) ~ 45°C (113°F).
Step1: CloudHub Setup
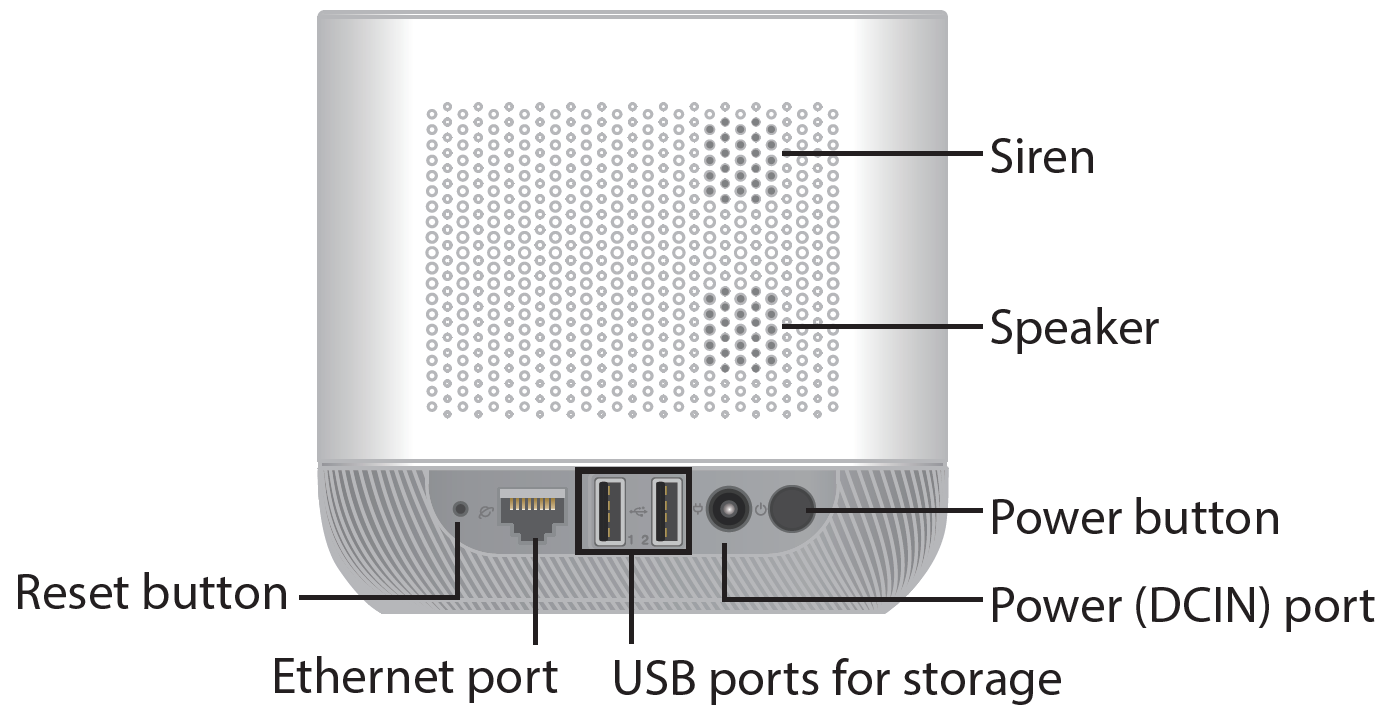
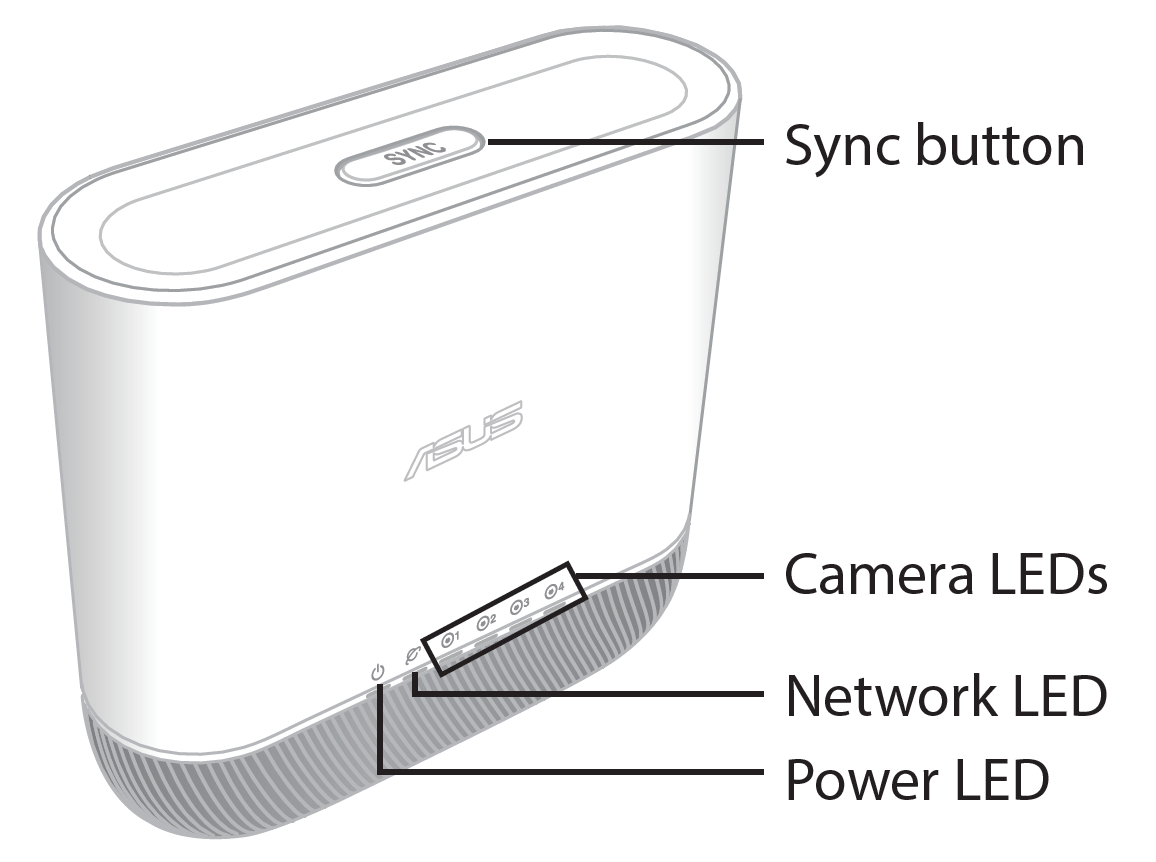
Connect the DC adapter to CloudHub and a power outlet, then press the power button to turn on CloudHub.
Connect CloudHub to your Wi-Fi router with the Ethernet cable provided, and make sure your mobile device and CloudHub are accessing the same Wi-Fi network.
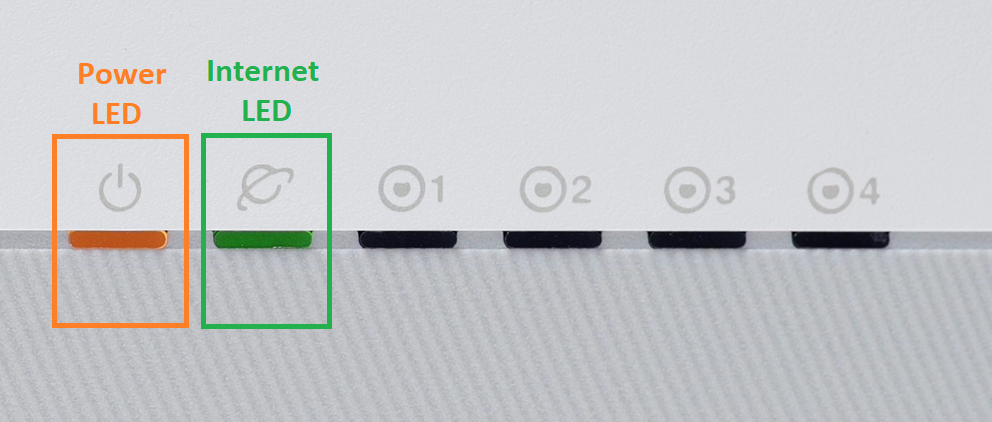
Wait for the power light to turn solid amber and the network light to turn solid green.
Step2: APP Setup
1. Create a new ASUS account or log into your existing ASUS account from your mobile device.
[Note]Registration ASUS account, please refer to this.
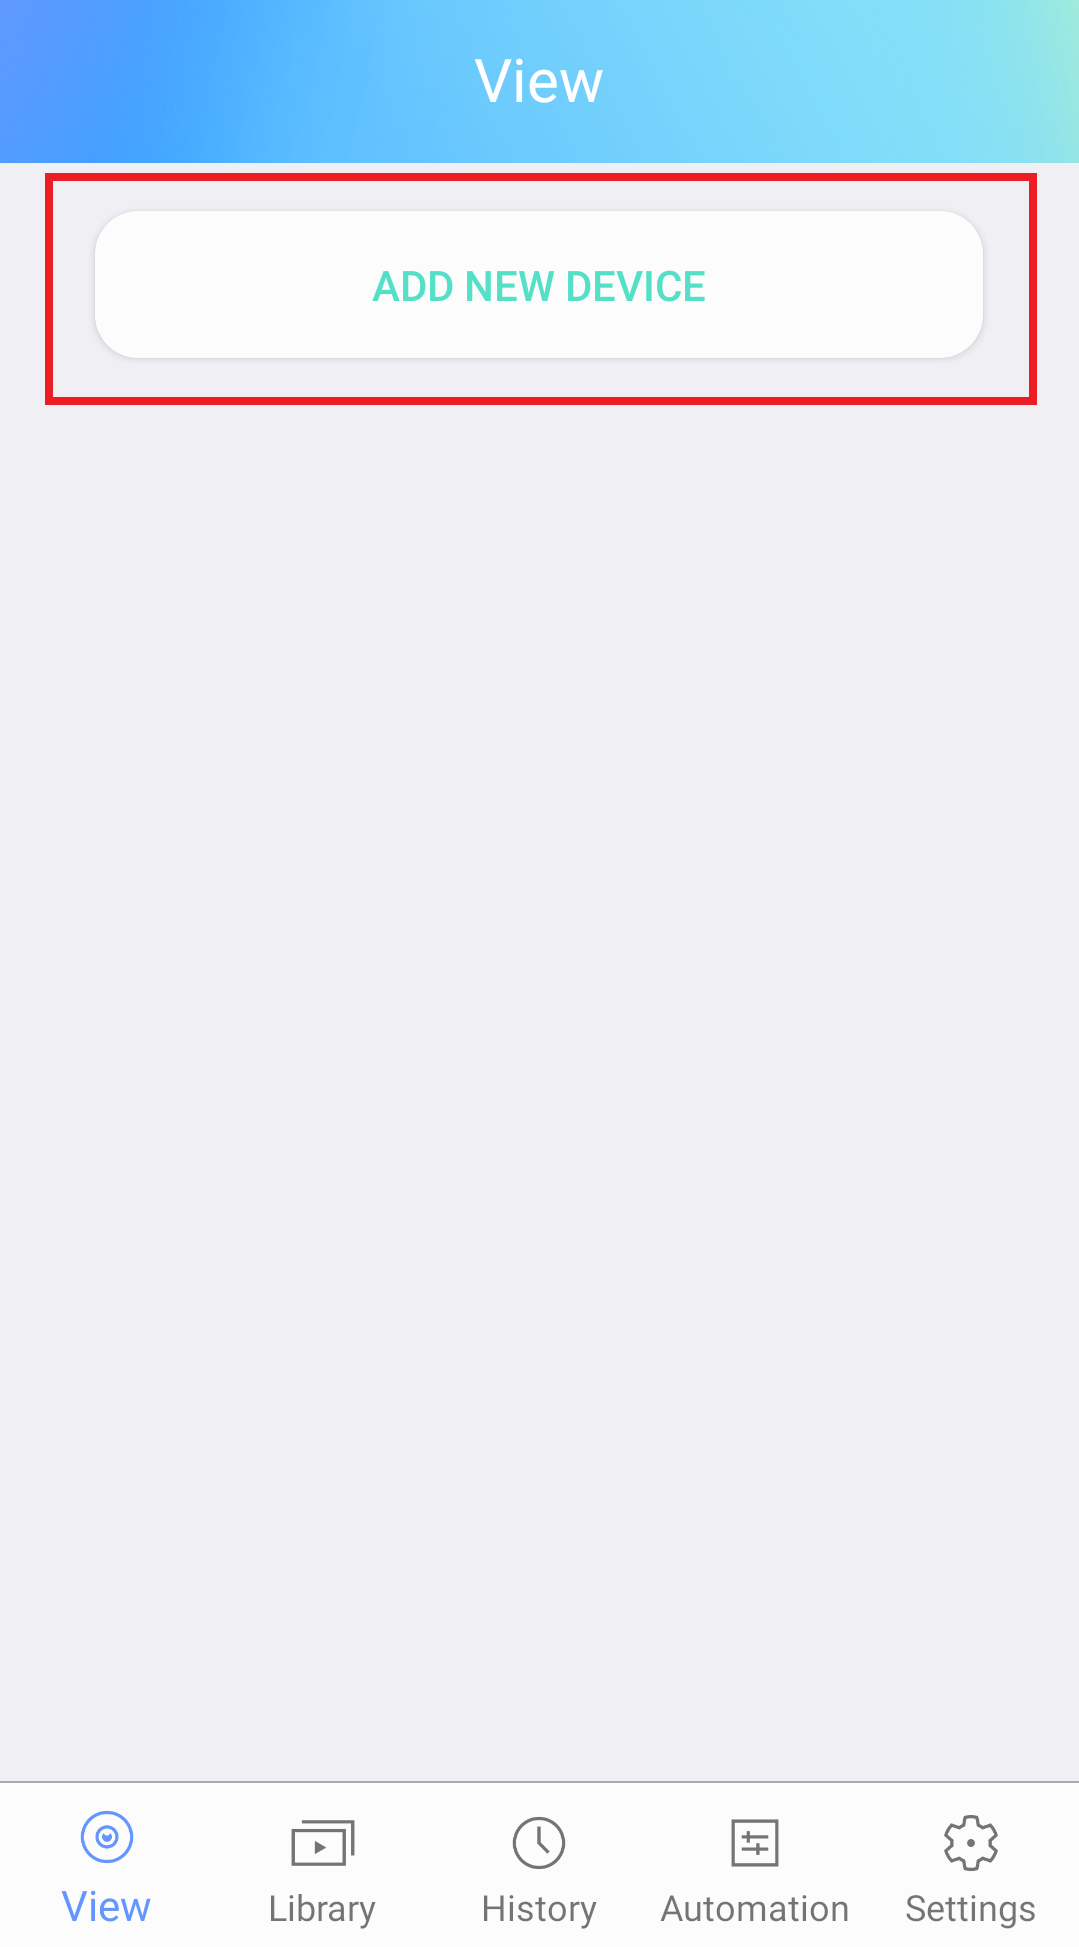
2. On the home screen, tap “Add New Device”.
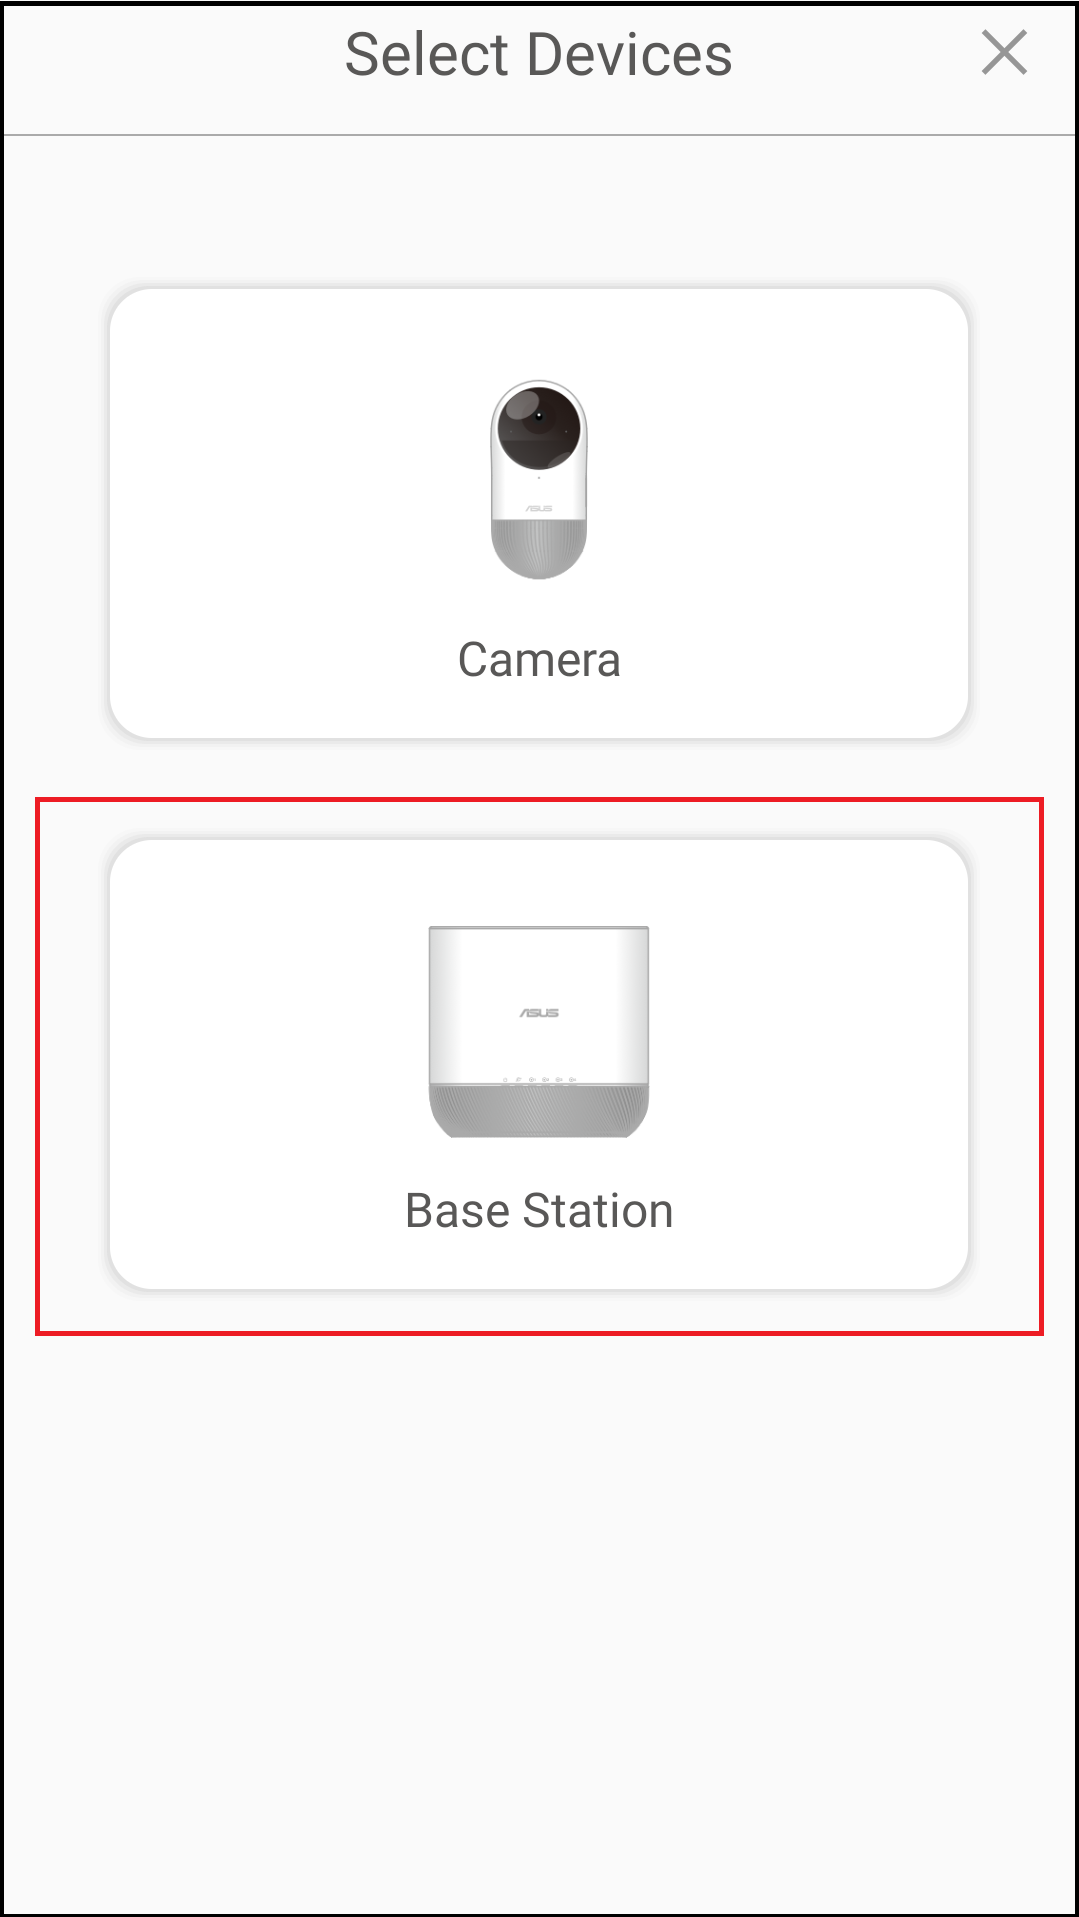
3. Click Base station and follow the on-screen instructions to add CloudHub.
Step3: Camera Installation and Setup
1. Press the “SYNC” button at the top of CloudHub for at least 1 second and wait for the LED light to start blinking.
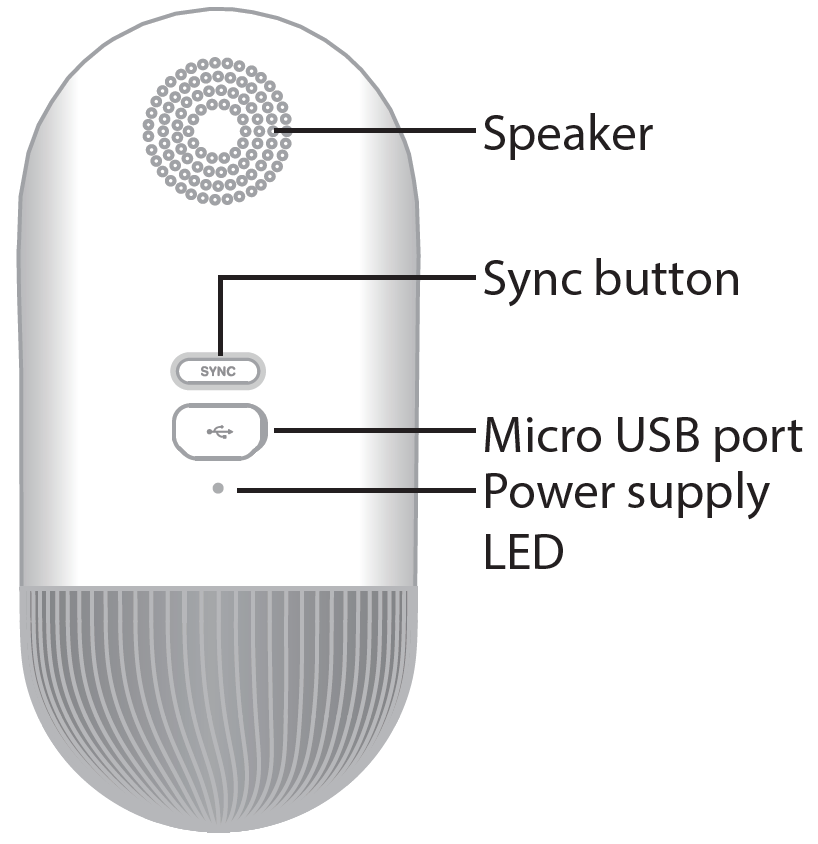
2. Press the “SYNC” button at the rear of ZenEye camera for at least 1 second.
3. The Status light on the front of ZenEye camera will start blinking.
4. Once ZenEye camera and CloudHub have been paired, the blinking light on CloudHub will turn solid green.
Find the spot where you want to place the camera.
You can now access the camera from the ASUSZenEye App.