- English
- Other Products
- FAQ
- [Gaming Cases] ROG Strix Helios GX601 gaming case ...
- Subscribe to RSS Feed
- Mark as New
- Mark as Read
- Bookmark
- Subscribe
- Printer Friendly Page
- Report Inappropriate Content
- Article History
- Subscribe to RSS Feed
- Mark as New
- Mark as Read
- Bookmark
- Subscribe
- Printer Friendly Page
- Report Inappropriate Content
on
01-29-2024
06:01 PM
- edited
Sunday
by
![]() ZenBot
ZenBot
[Gaming Cases] ROG Strix Helios GX601 gaming case fan (front/rear) disassembly and assembly instructions
Preparation
Tool: Philips Screwdriver PH2

Fan Compatibility:
( Pre install fans information, please refer to specification page of product )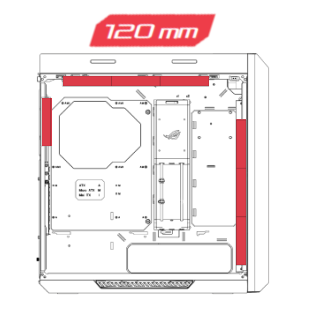

Replace FAN
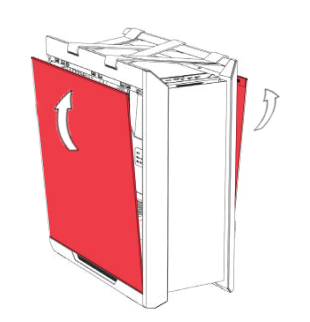
1. Remove side panel of both sides
Note: Please put the case on a flat table to prevent the side panel from falling during disassembly and assembly.
Please handle with care when disassembling and assembling the glass side panel to avoid collision/drop/heavy pressure.
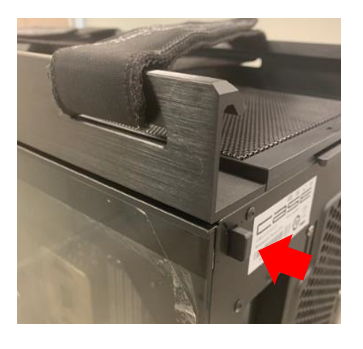
Push the button at the upper back of the case to release side panel, and lift it up carefully.

2. Replace Fan
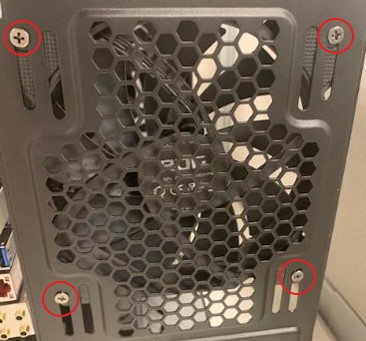
A. Replace Rear Fan
Use Phillips screwdriver to remove four screws as shown in the red circle, then replace the fan with a new one.
B . Replace Front RGB Fan
01. Remove the rear cable cover
a. release 2 screws.
b. open cover to 90° then lift up to remove.
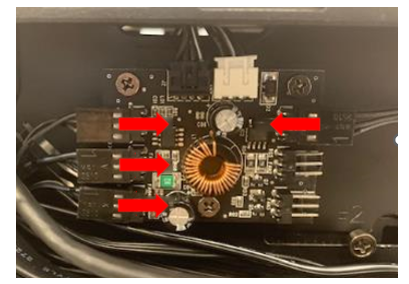
02. Remove fan connector from fan hub.
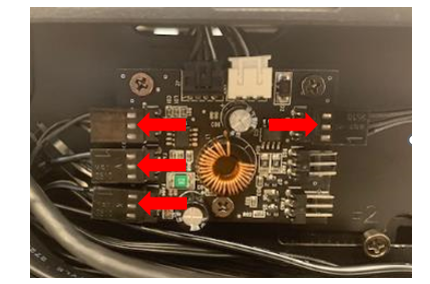
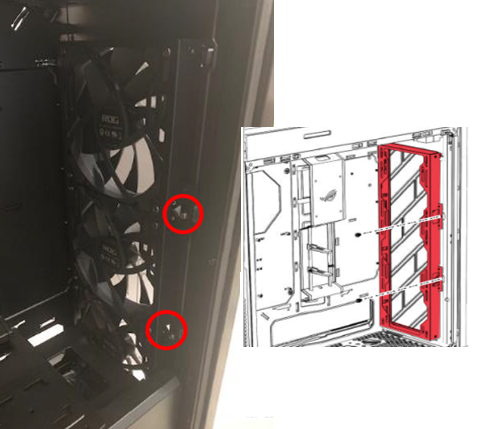
03. Release 2 hand screws of fan mount and lift up from latch to pull out.
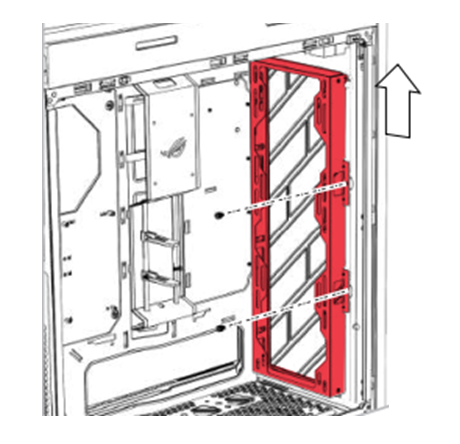
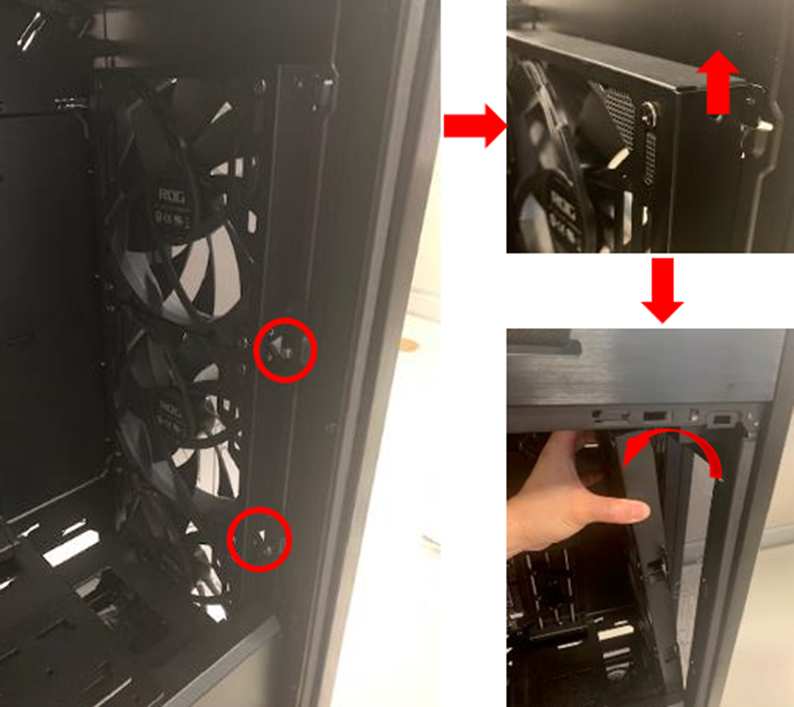
04. Release 4 screws of fan and carefully pull fan cable out from cable organize groove to remove the fan.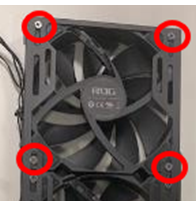
05. Place the fan and check the direction of fan and the trace of fan cable are right , then tighten fan screws to lock.
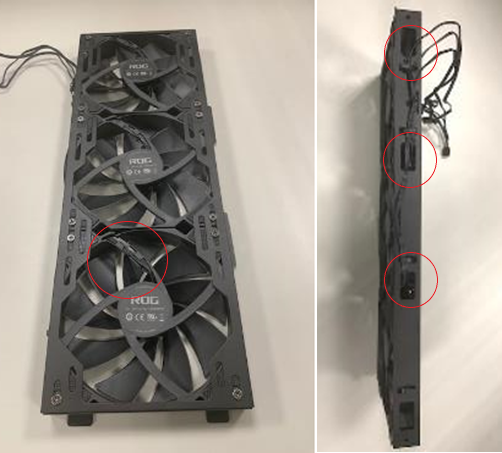
06. Arrange fan cable into the cable organize hole of case
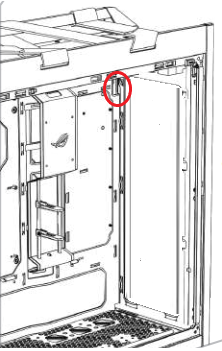

07. Place the fan mount incline first, and push forward and down to settle mount back into the latch on front panel.
08. Tighten 2 hand screws of fan mount.
09. Connect fan connector to fan hub then put up rear cable cover back to finish.
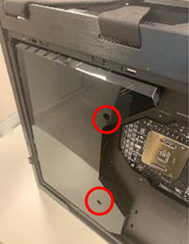
3. Close side panel of both side.
Note: Please put the case on a flat table to prevent the side panel from falling during disassembly and assembly.
Please handle with care when disassembling and assembling the glass side panel to avoid collision/drop/heavy pressure.
Place the down edge of side panel at the panel groove at the bottom of case, then push panel forward to case until hear the "click" to locked on.
