[FA707NU/FX707VU] How to update dGPU firmware
Applicable Models: FA707NU, FX707VU
This article will guide you on how to use the dGPU firmware update program downloaded from the Mainboard Configuration Tool.
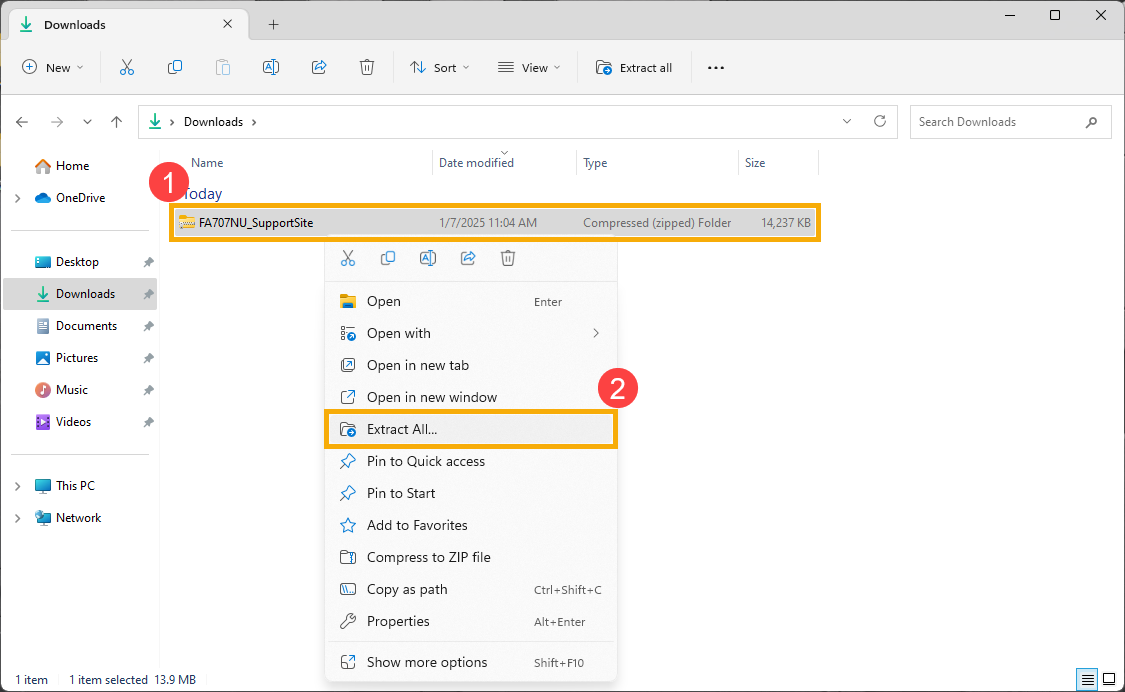
- After downloading the dGPU firmware update program, right-click the [SupportSite] compressed file①, then select [Extract All]②.
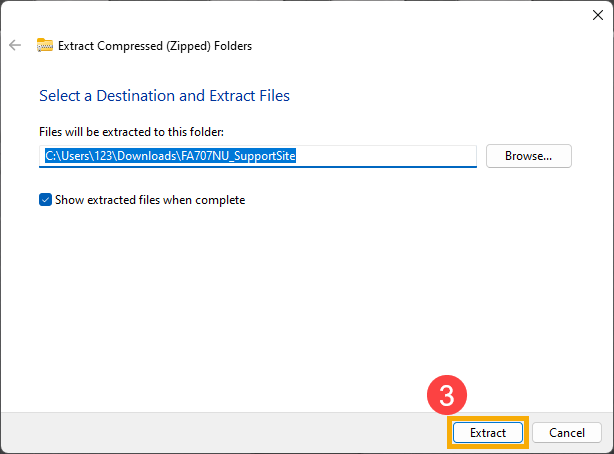
- Click [Extract]③.
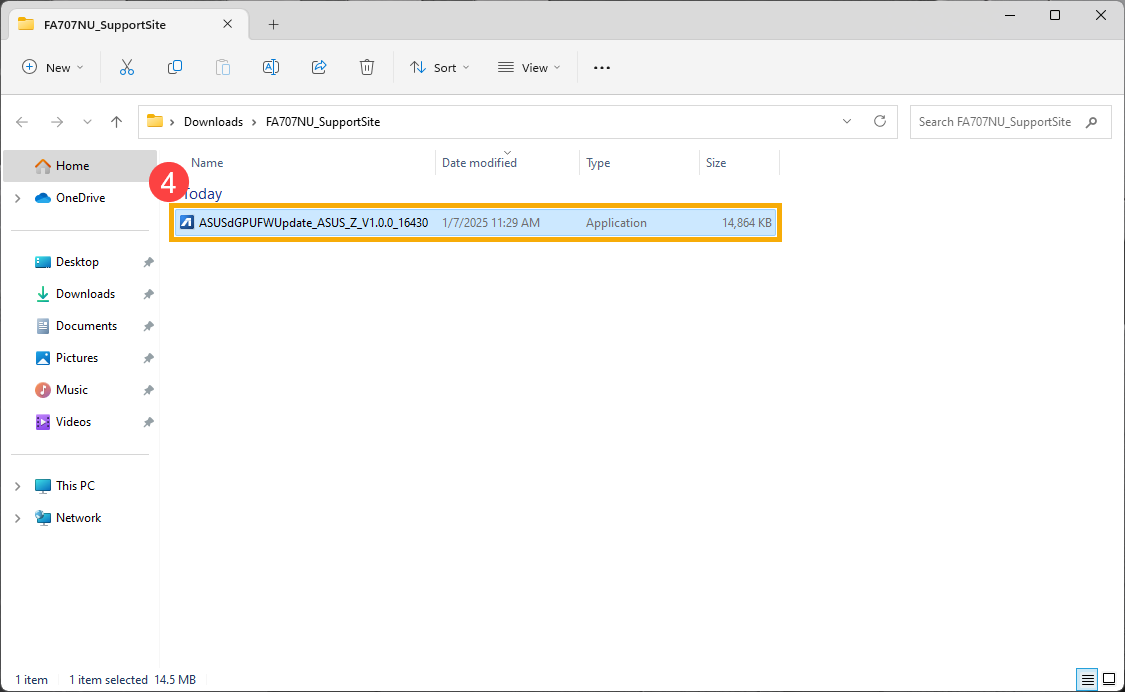
- Once the extraction is complete, double-click the [ASUSdGPUFWUpdate] application④.
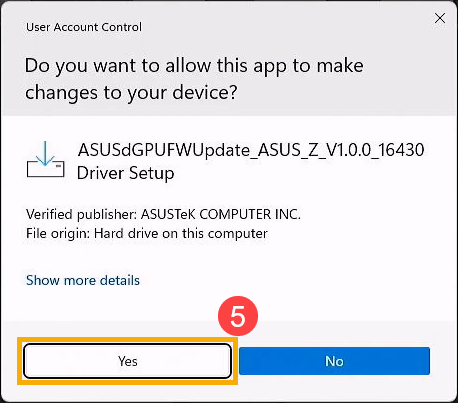
- If the User Account Control window appears, click [Yes]⑤.
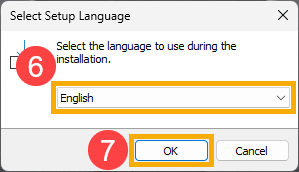
- Select your preferred language for the installation process⑥, then click [OK]⑦.
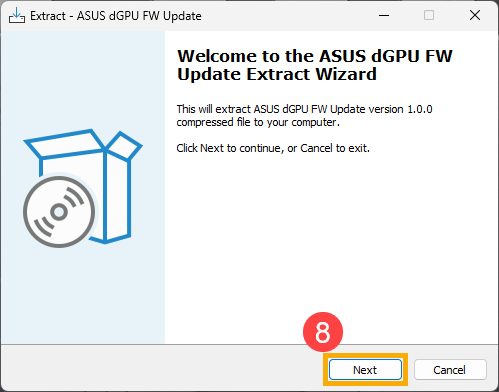
- When the ASUS dGPU FW Update Extract Wizard opens, click [Next]⑧.
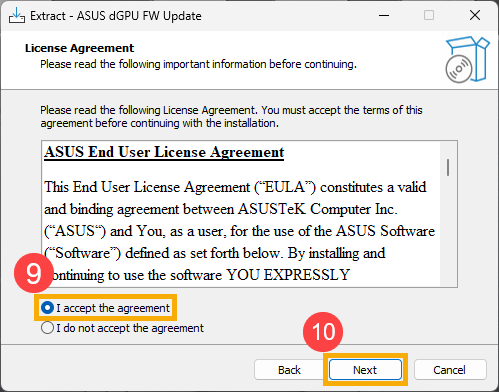
- Read the ASUS End User License Agreement. Check [I accept the agreement]⑨, then click [Next]⑩.
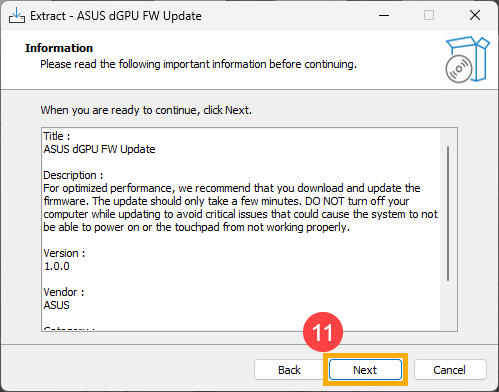
- Read the important information, then click [Next]⑪.
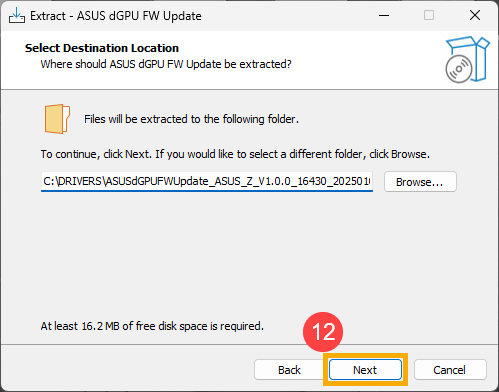
- Click [Next]⑫.
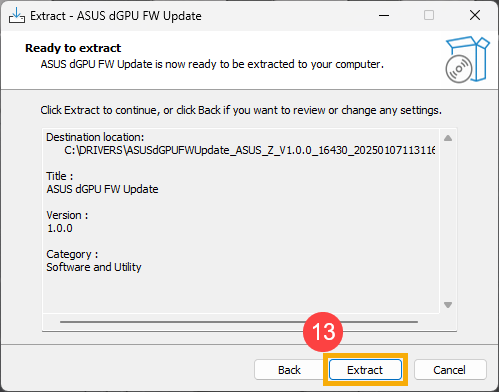
- Click [Extract]⑬ to extract the ASUS dGPU FW Update program.
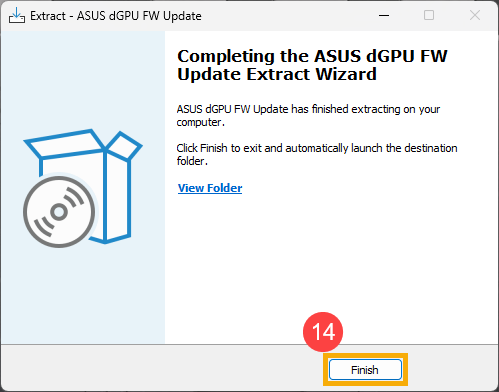
- Once the extraction is complete, click [Finish]⑭. The system will automatically open the installed file location.
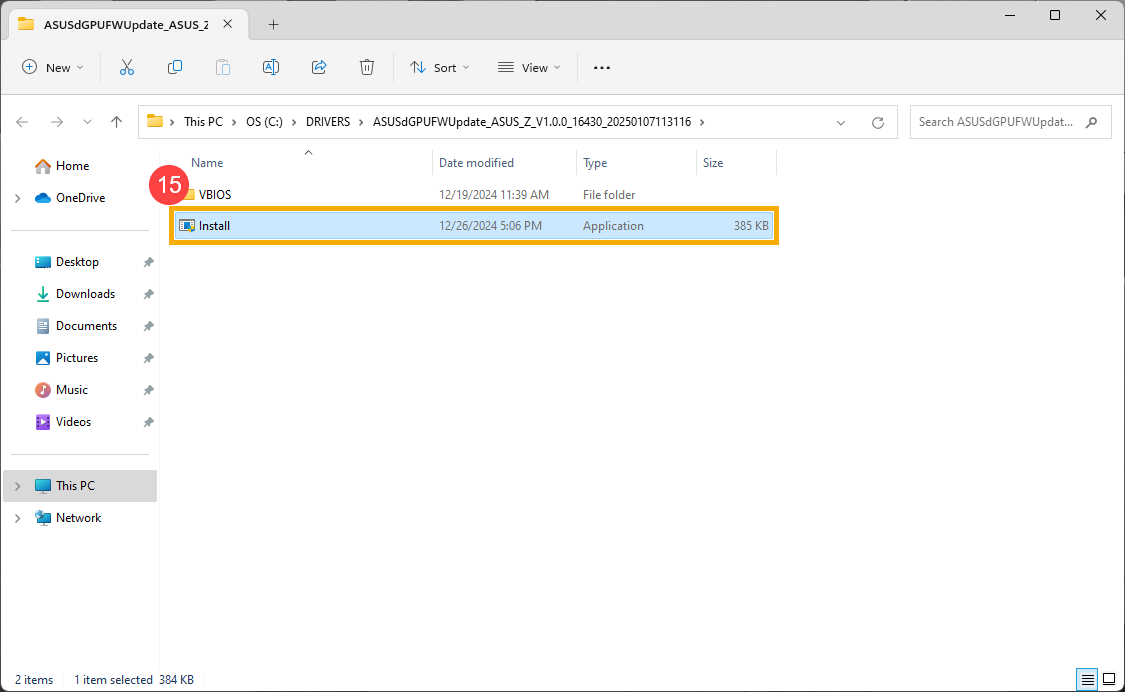
- Double-click the [Install] application⑮ to open the dGPU firmware auto-update program.
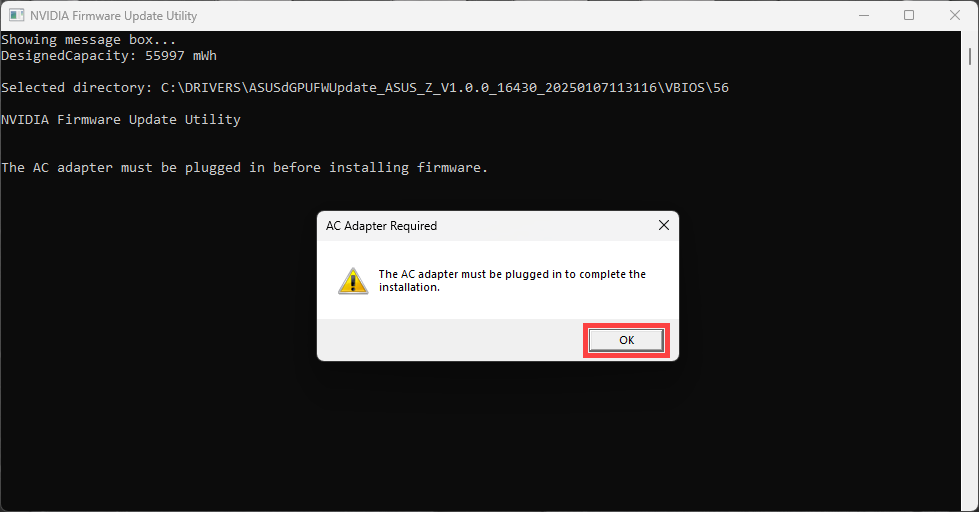
Note: Before starting the dGPU firmware update, please connect your computer to the AC adapter.
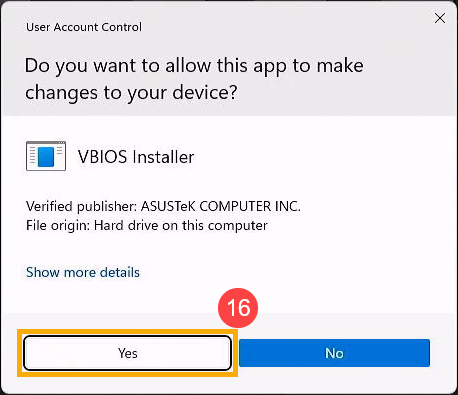
- If the User Account Control window appears, click [Yes]⑯.
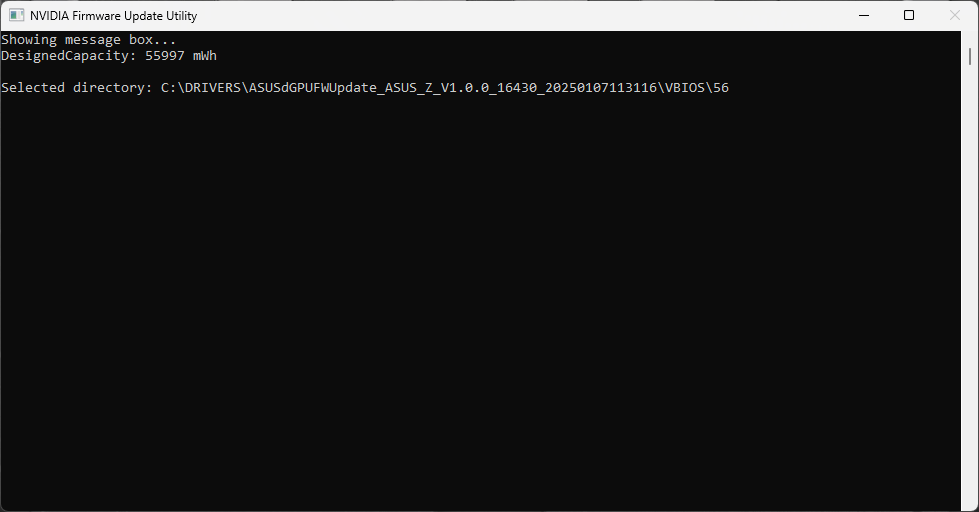
- The dGPU firmware update program will open and automatically execute the update.
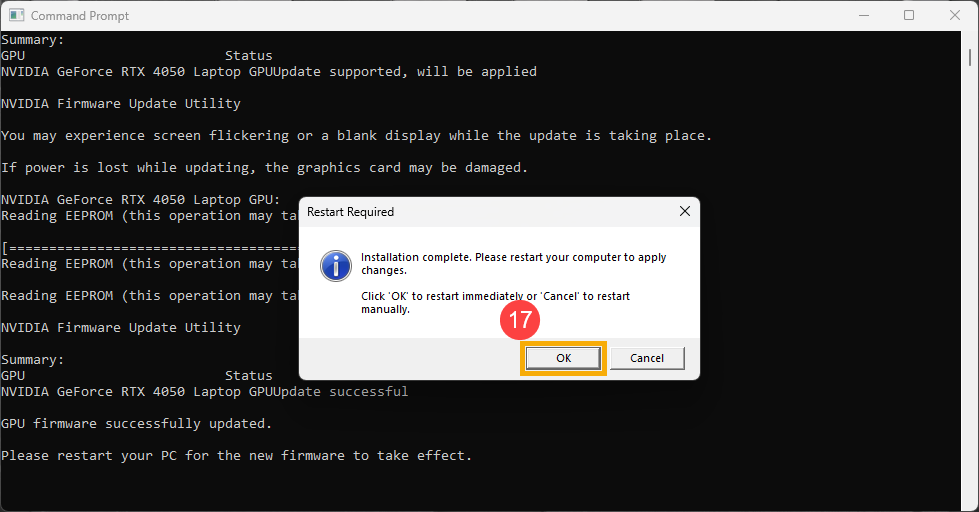
- When the following window appears, it indicates that the dGPU firmware auto-update program has completed. Click [OK]⑰ and the system will automatically restart to apply the changes.
Note: Save your work before restarting the device to avoid data loss.
If the following window appears, it means your computer is not connected to the AC adapter. Click [OK], connect the AC adapter, and then run the dGPU firmware auto-update program again.