- English
- Other Products
- FAQ
- ASUS System Configuration Tool for Self Replacemen...
- Subscribe to RSS Feed
- Mark as New
- Mark as Read
- Bookmark
- Subscribe
- Printer Friendly Page
- Report Inappropriate Content
- Article History
- Subscribe to RSS Feed
- Mark as New
- Mark as Read
- Bookmark
- Subscribe
- Printer Friendly Page
- Report Inappropriate Content
on
12-07-2024
09:56 AM
- edited on
12-07-2024
10:30 AM
by
![]() ZenBot
ZenBot
ASUS System Configuration Tool for Self Replacement Solution after Replacing Mainboard
Thank you for utilizing the ASUS self-replacement solution and completing the entire components replacement procedure. Upon the successful completion of the specified process, the following steps will ensure that your device functions optimally post-repair and remains eligible for future ASUS RMA services. If your device has not yet undergone repairs, we recommend visiting the provided website for access to self-repair information.
ASUS Windows Laptops, Desktops, All-in-one PCs, Mini PCs and Gaming Handhelds.
Please access ASUS Self Replacement Solution website, and fully read all information on it. After that, please check [I have read above and agree to Continue] and click [Continue].
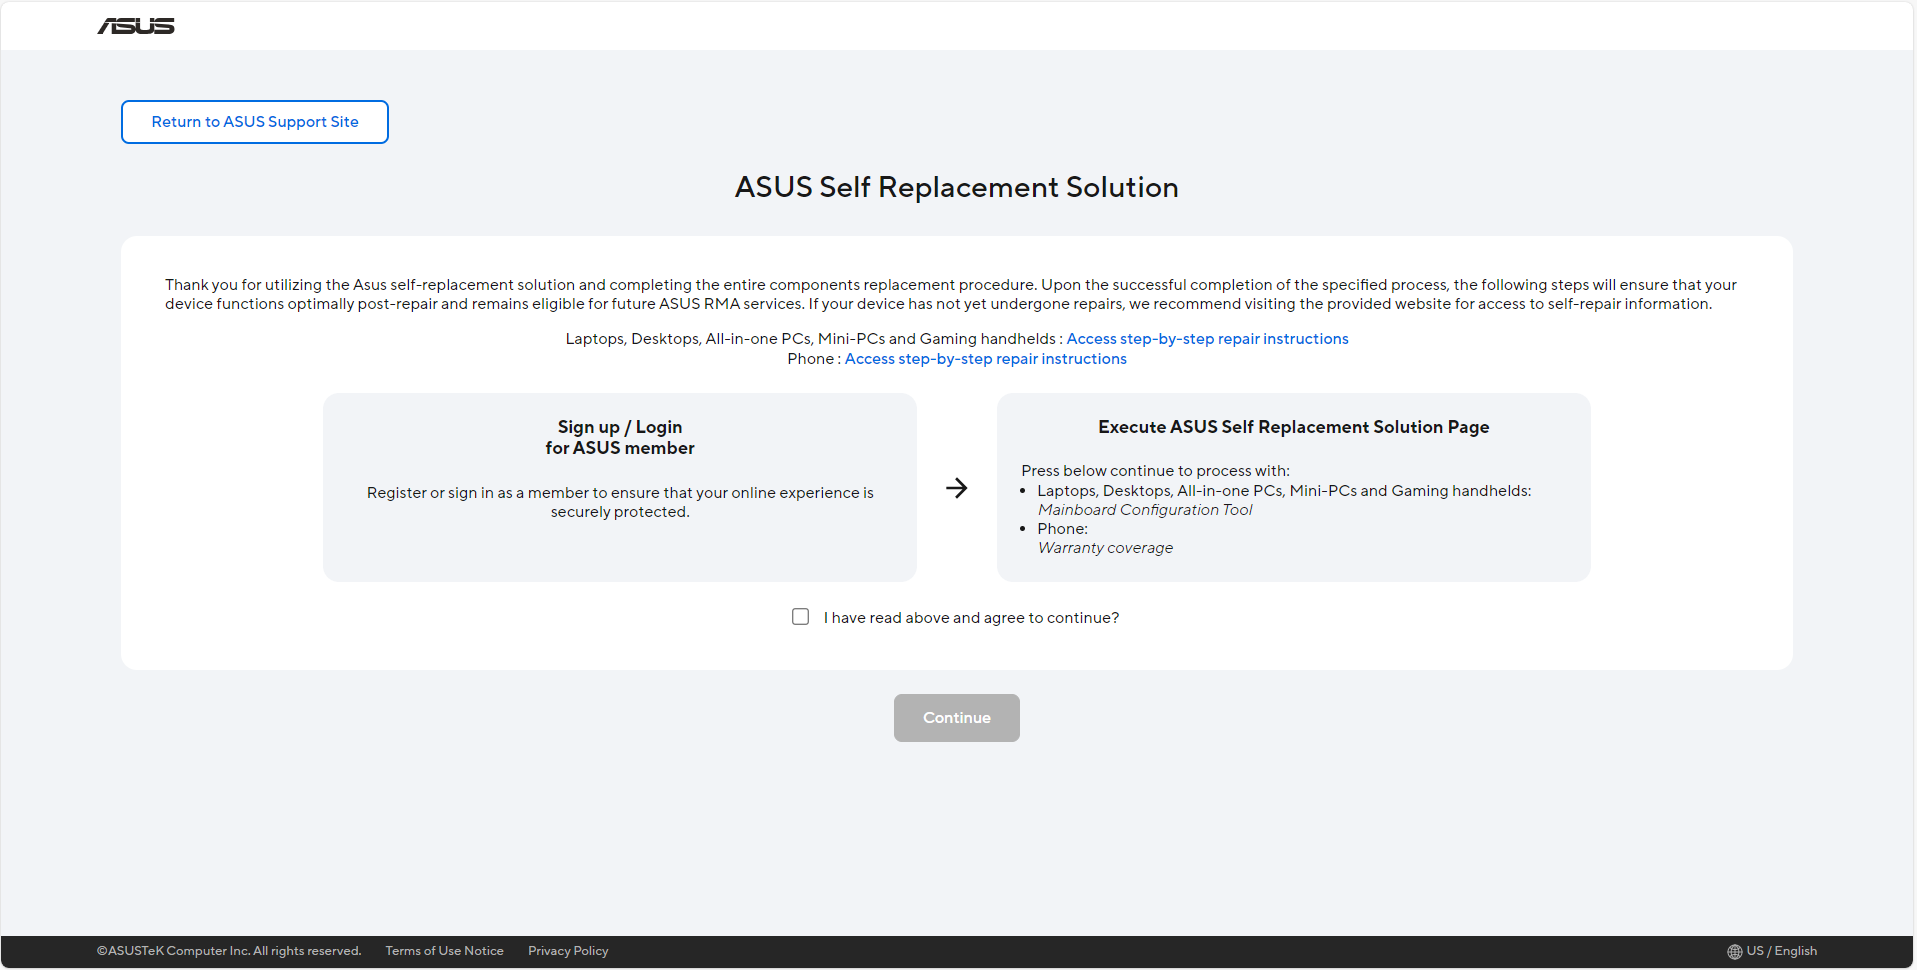
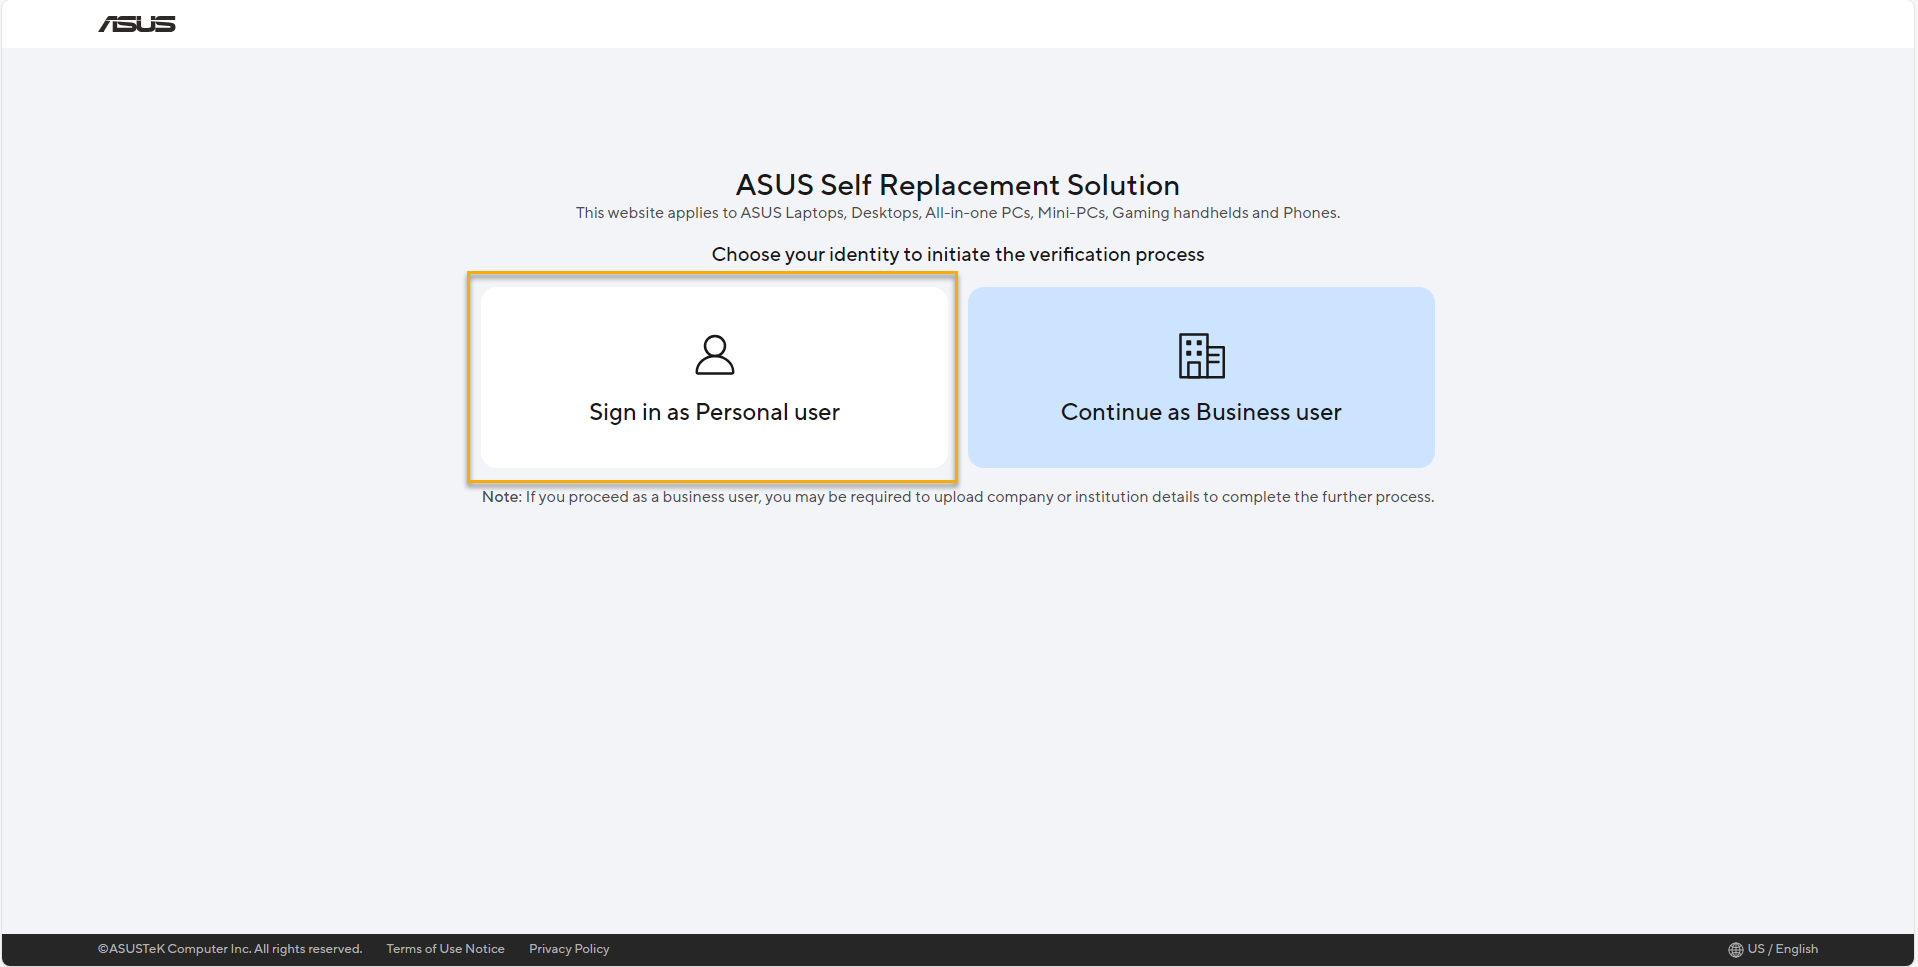
For [Personal user], please select [Sign in as Personal user].
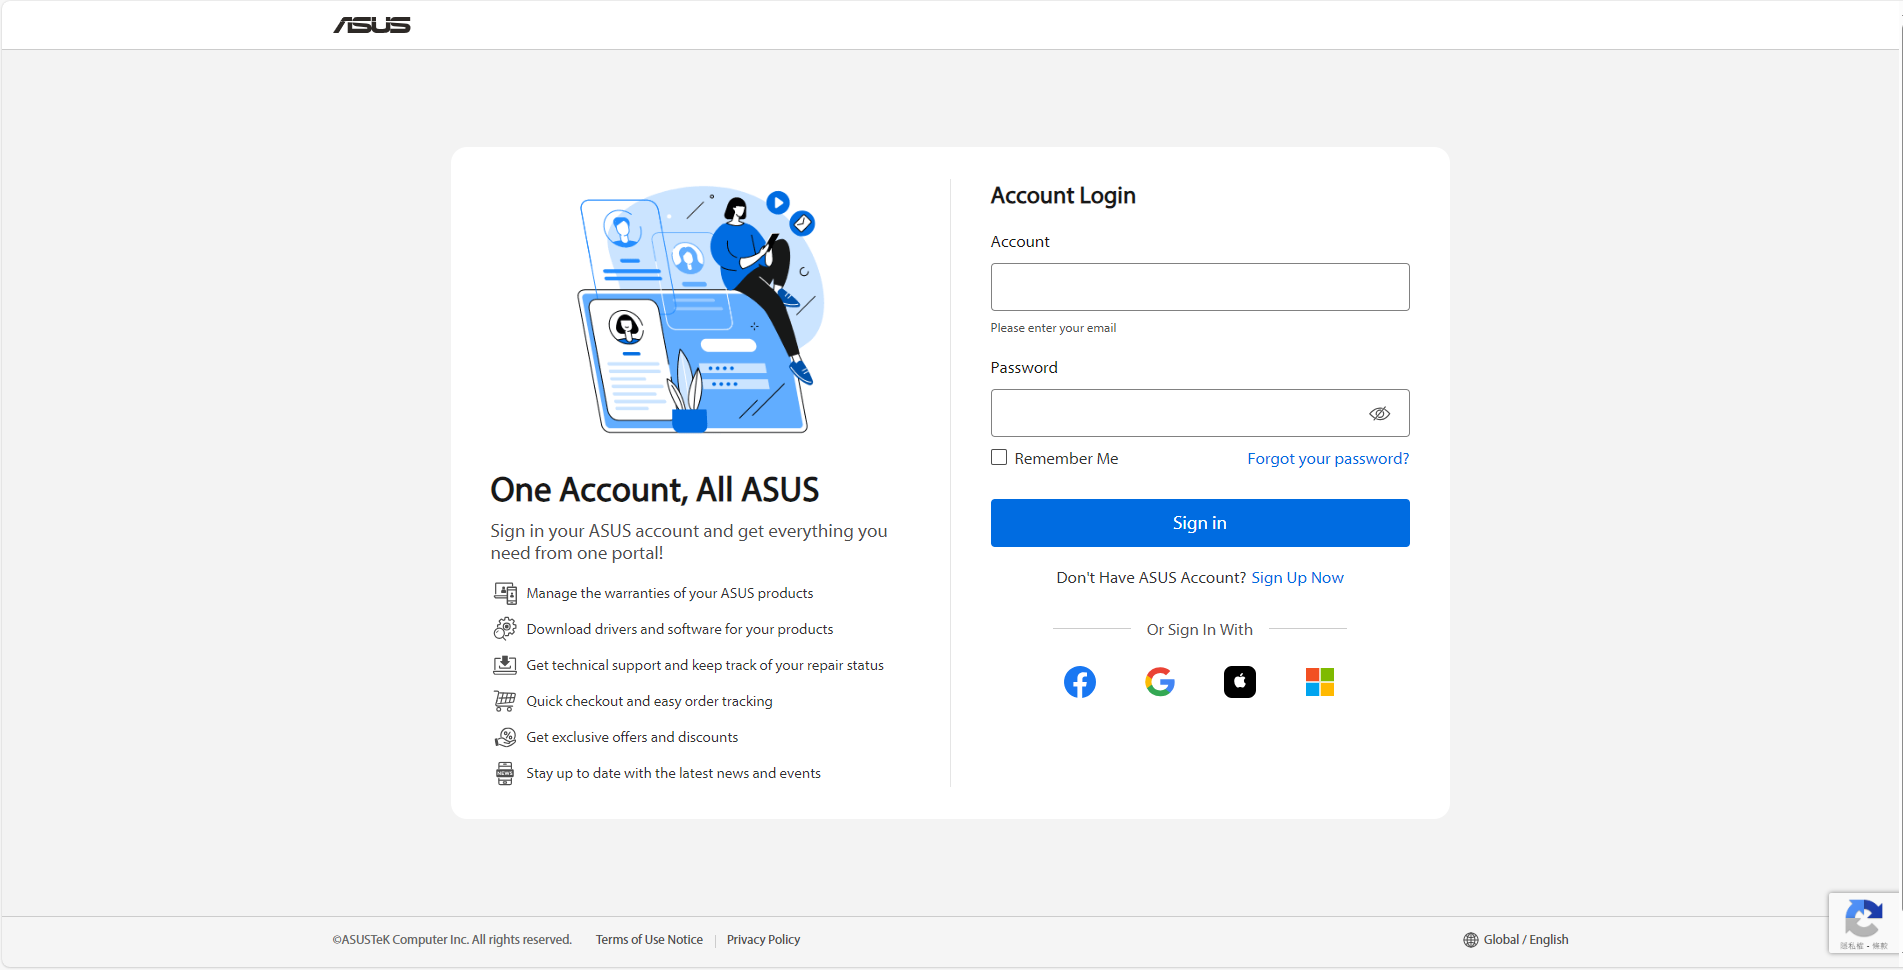
In the login page, enter your ASUS member account and password.
*Please refer to the link for how to register the ASUS account.
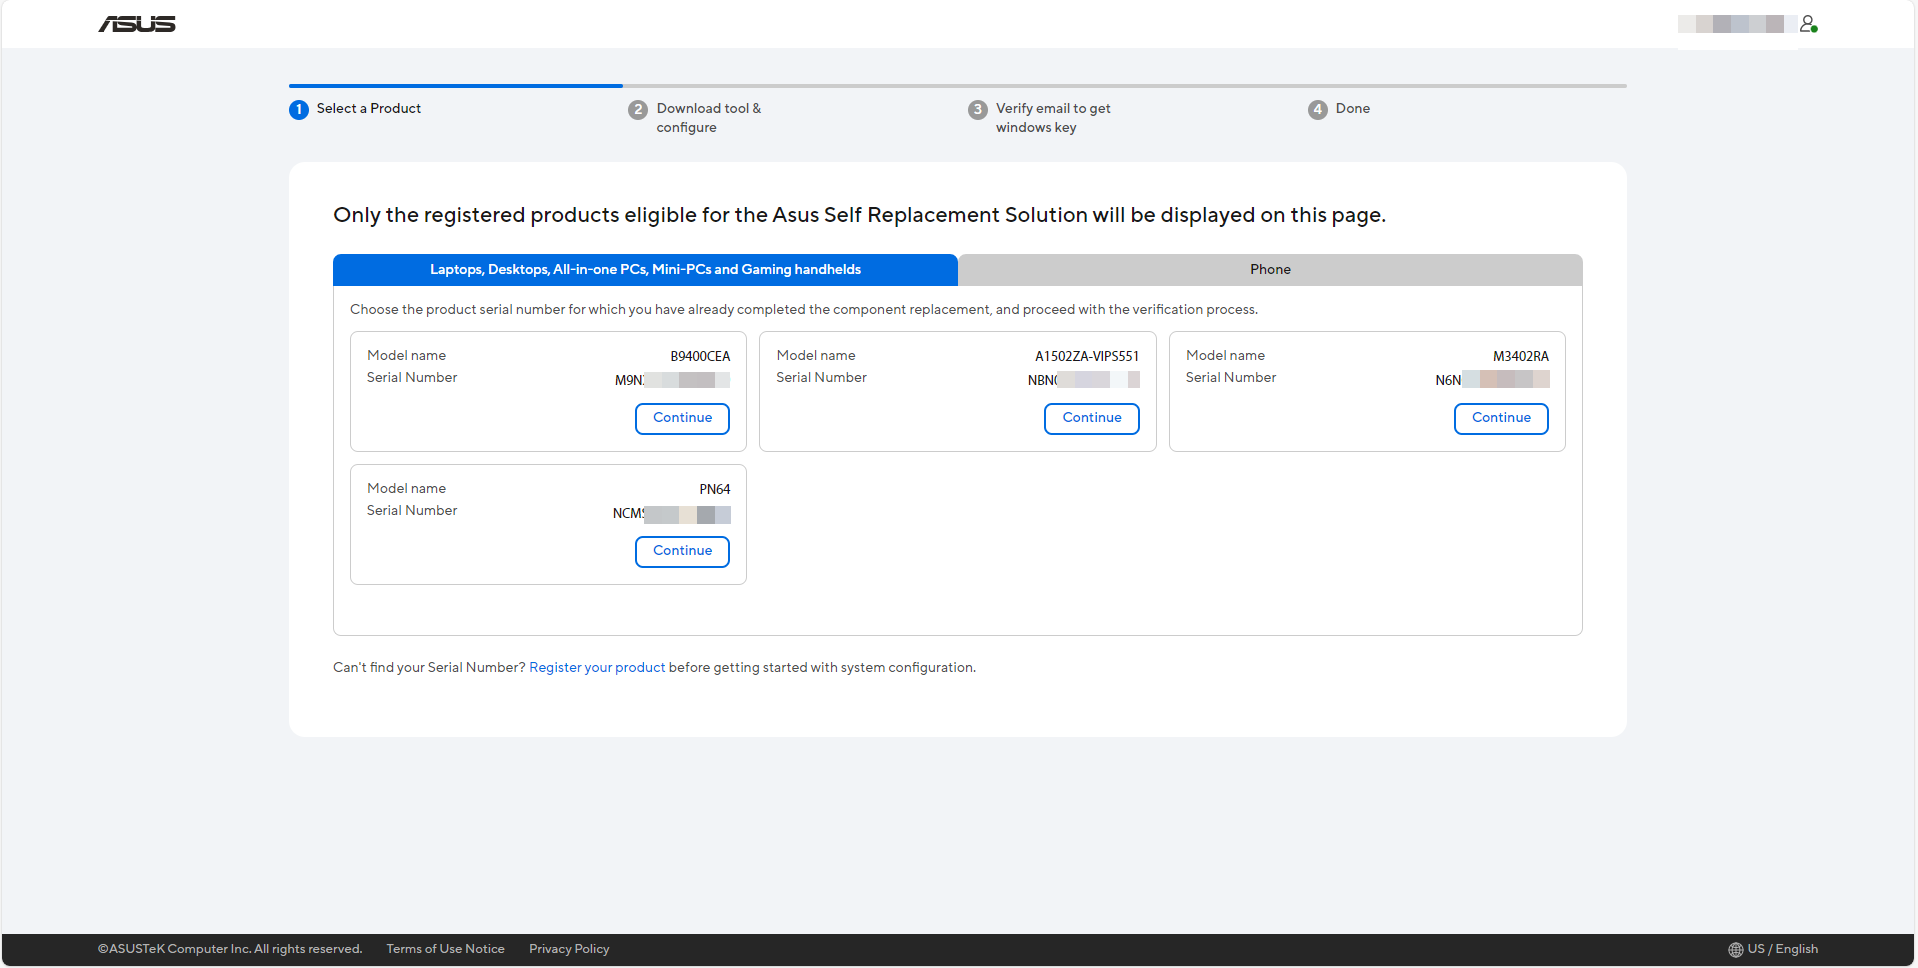
Choose the product serial number for which you have already completed replacement, and then click [Continue] to proceed with verification process,
*Only the registered products eligible for the ASUS Self Replacement Solution will be displayed on this page.
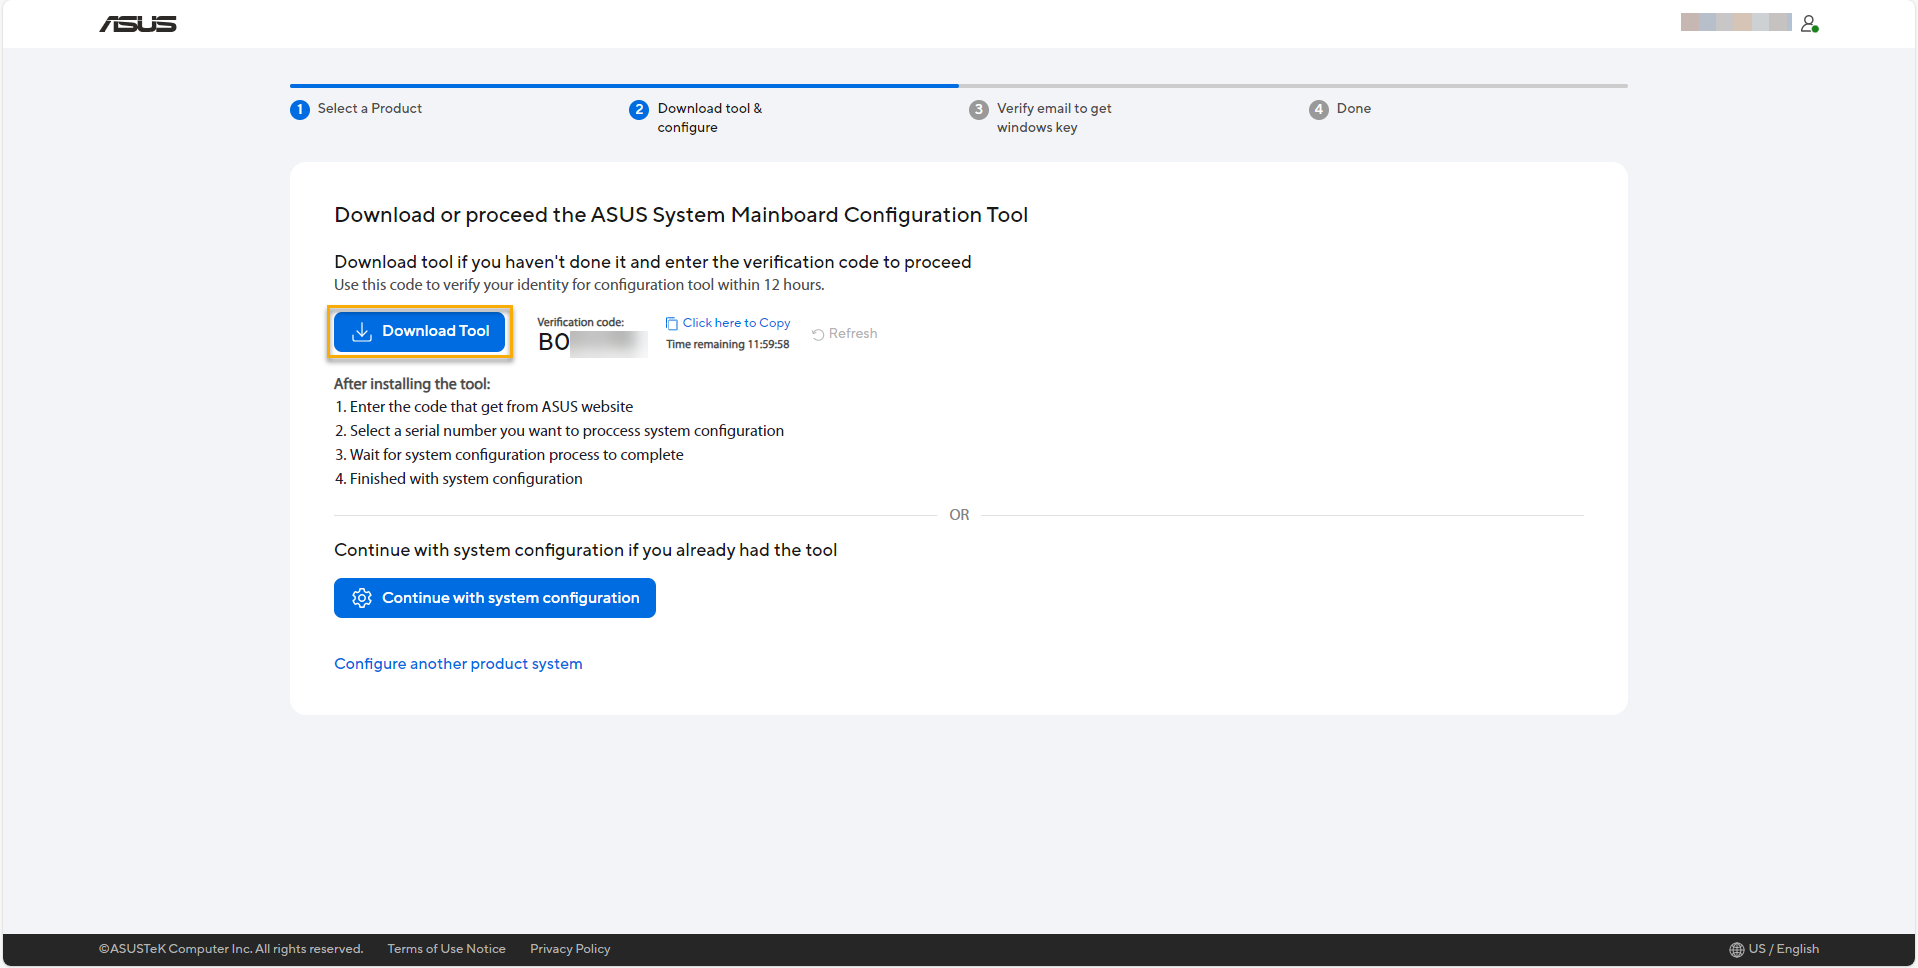
Please download the ASUS System Mainboard Configuration Tool, and then copy your verification code for tool startup.
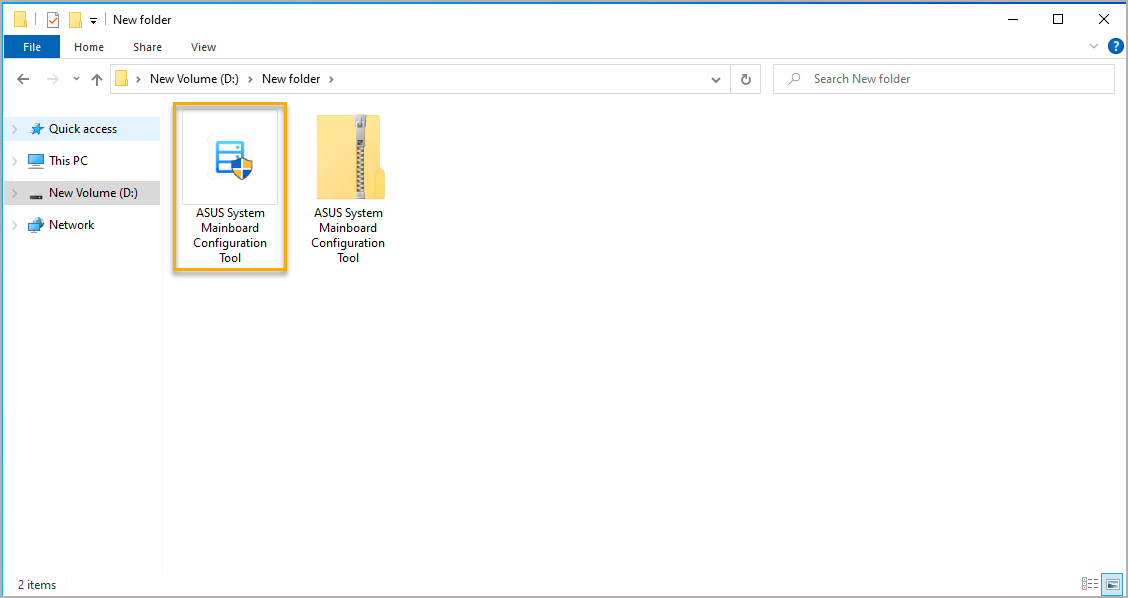
Execution ASUS System Mainboard Configuration Tool, please execute the tool on the product which you have already completed replacement. You have to unzip the tool file [ASUS System Mainboard Configuration Tool.ZIP], and then double left-click mouse on [ASUS System Mainboard Configuration Tool.exe] file in folder.
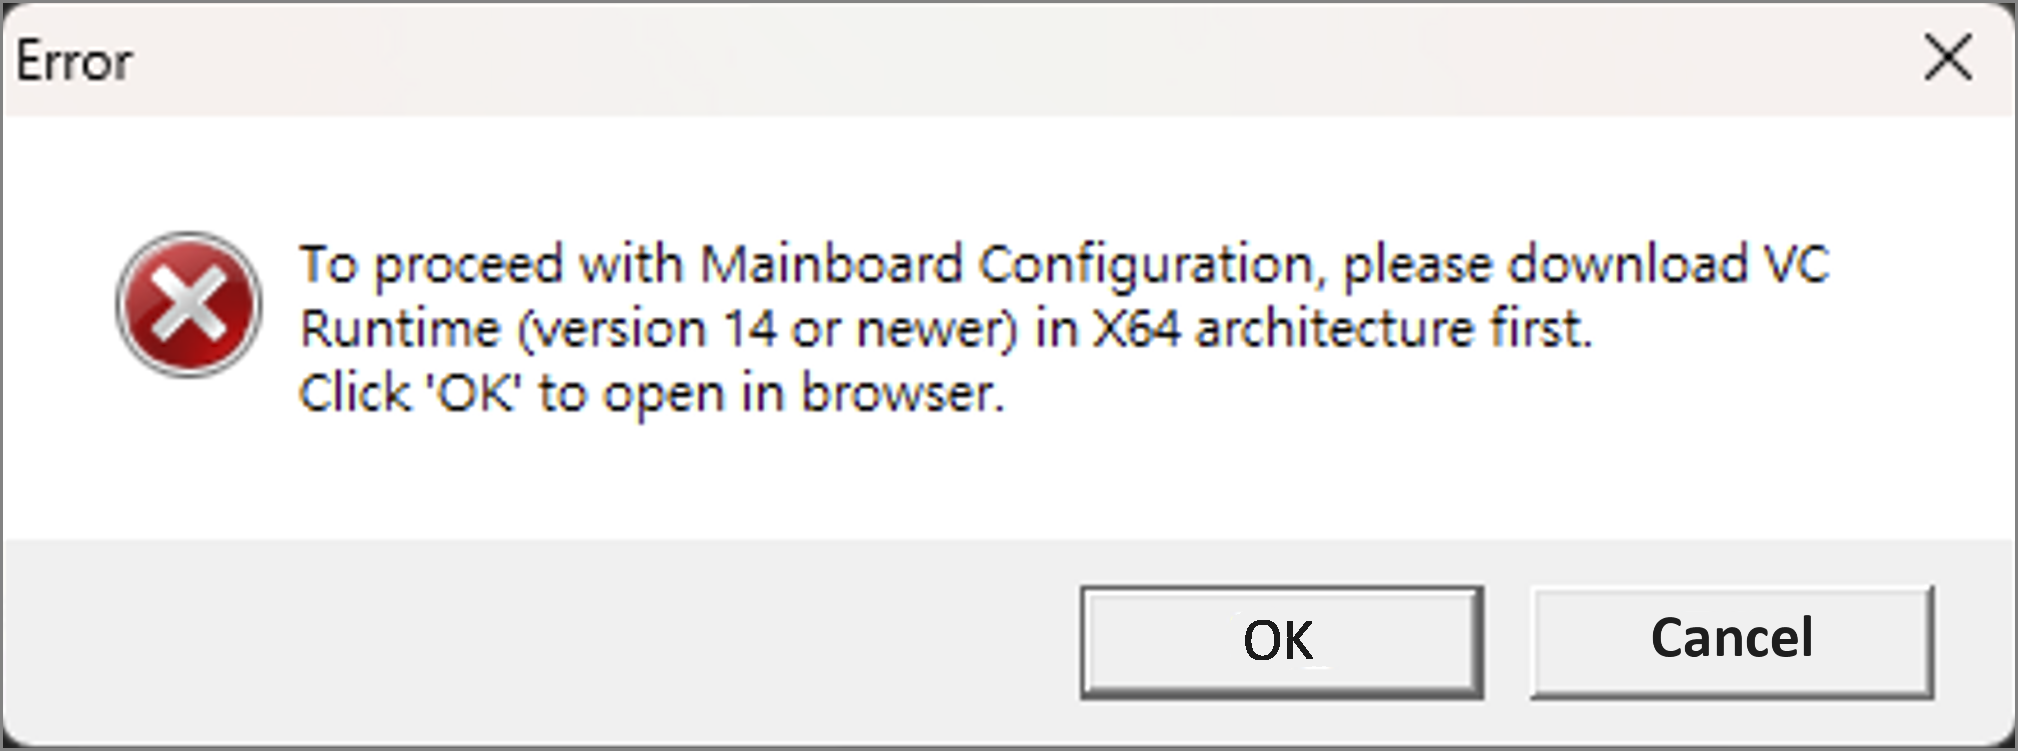
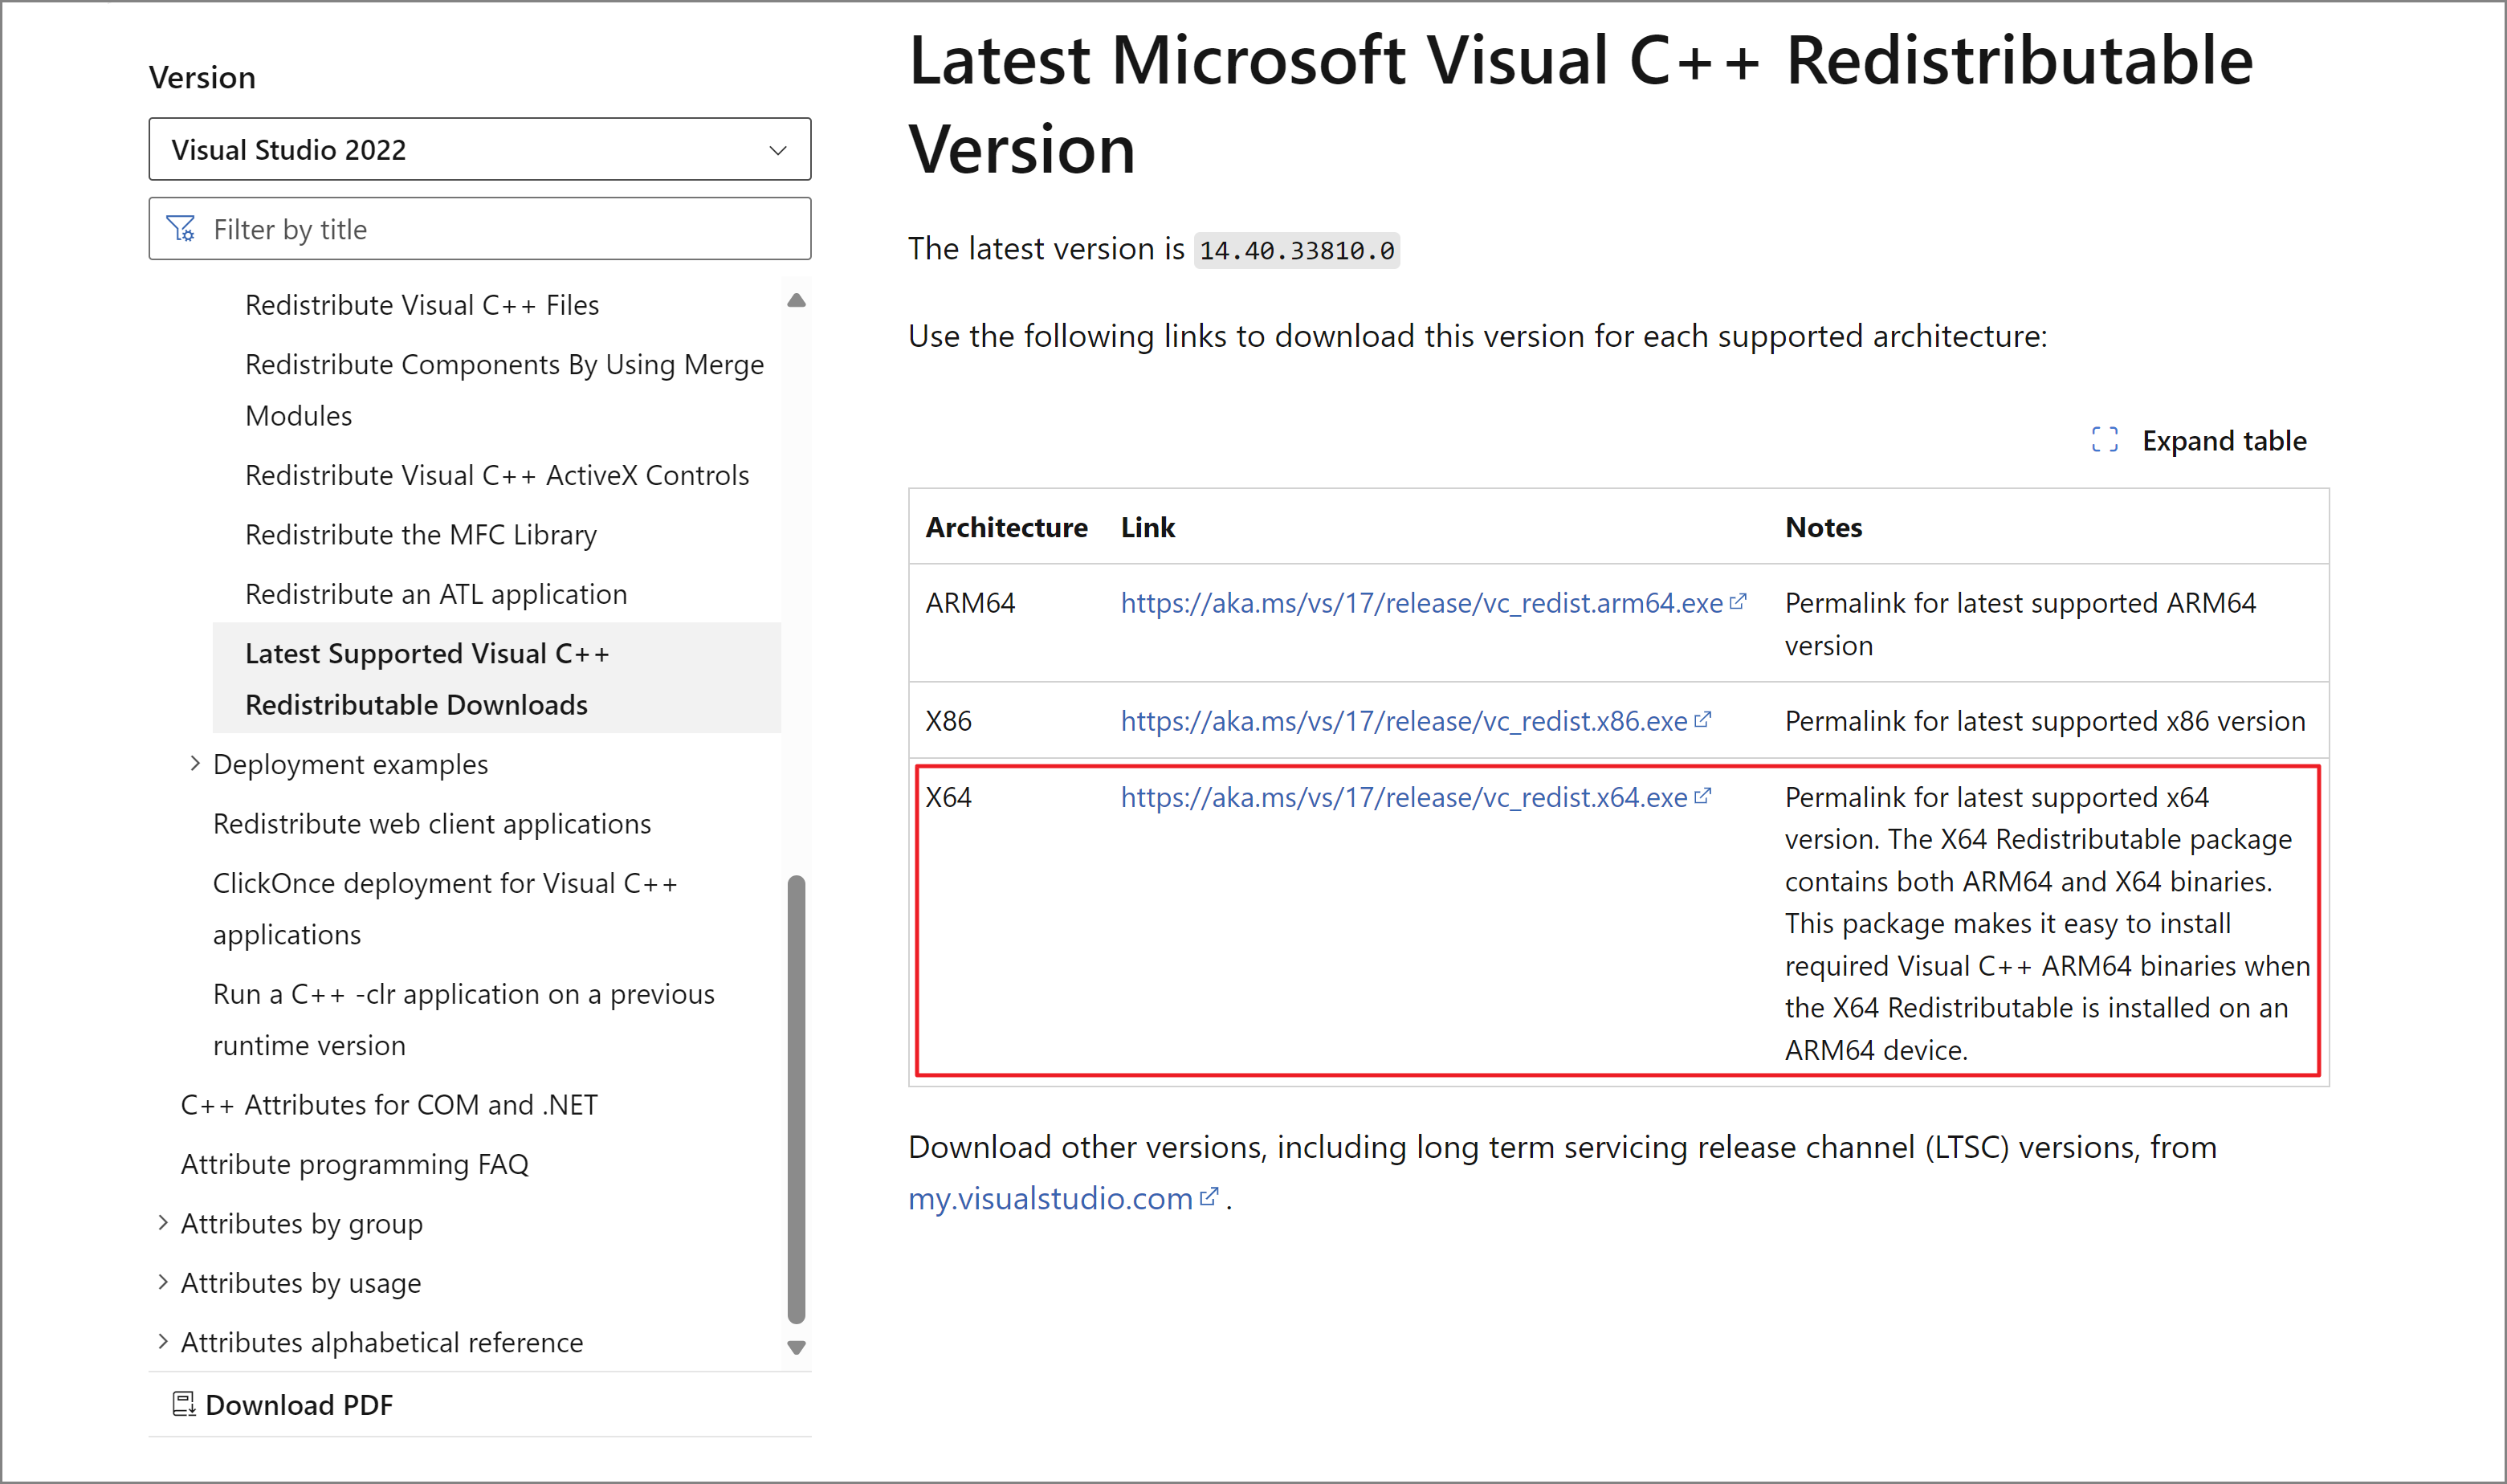
While executing ASUS System Mainboard Configuration Tool, the Error message pop-up as below. Please download and install VC Runtime in X64 architecture to fix, and you can click [OK] to visit website to download it.
Please download the Latest Microsoft Visual C++ Redistributable Version with X64 Architecture, and then execute the EXE file to install. After that, please restart your device, then you can back to launch the ASUS System Mainboard Configuration Tool again.
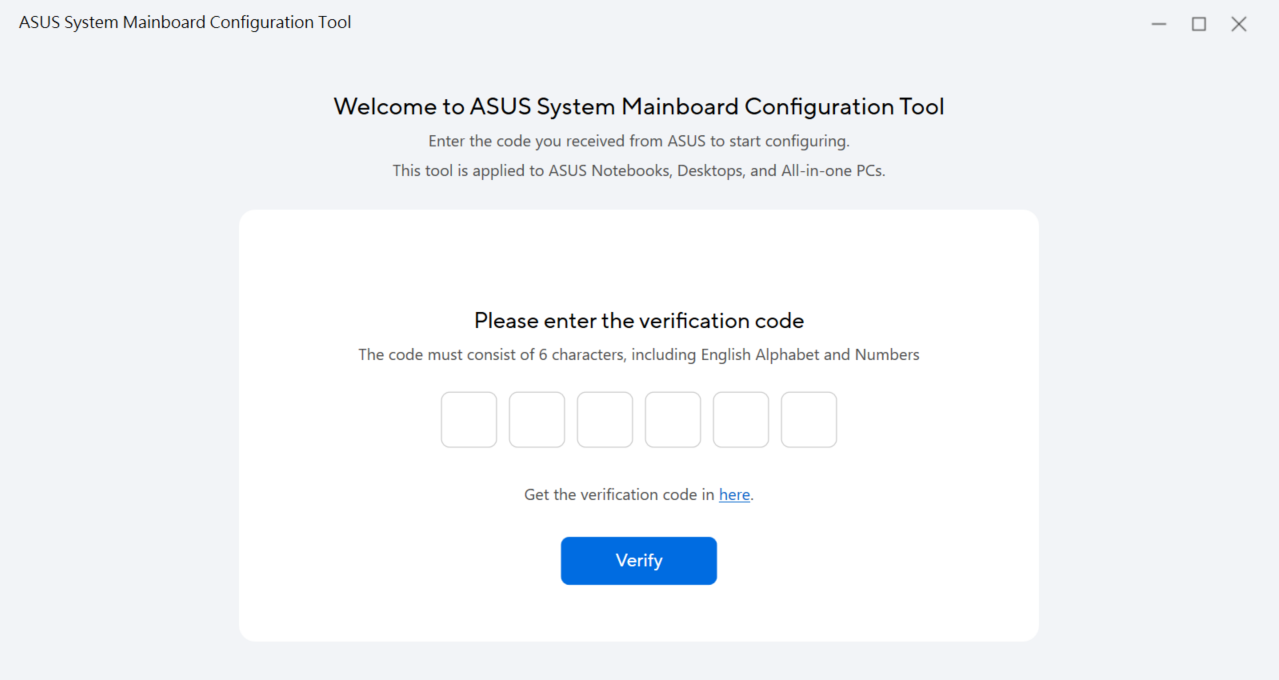
Launch the tool, enter the verification code you already get on ASUS Self Replacement Solution website, then click [Verify] to continue.
*Get your verification code Here.
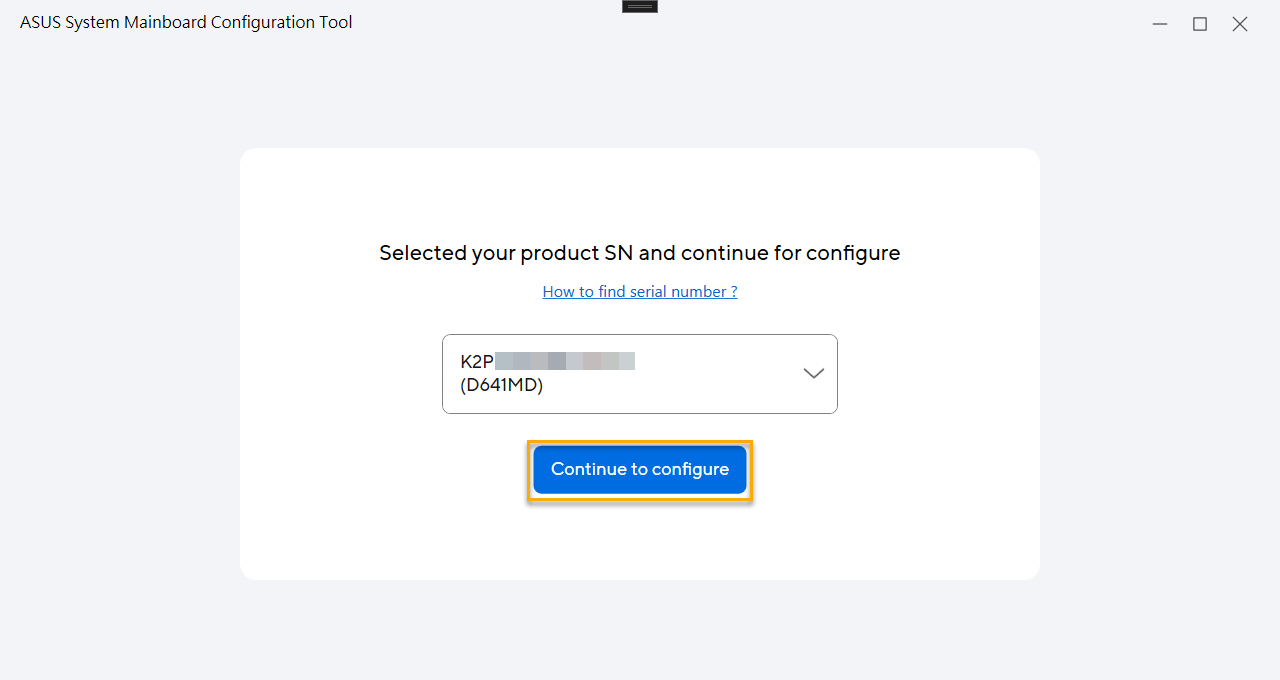
Then, selected your product serial number and click [Continue for configure].
*How to find Product Serial Number and Check Number.
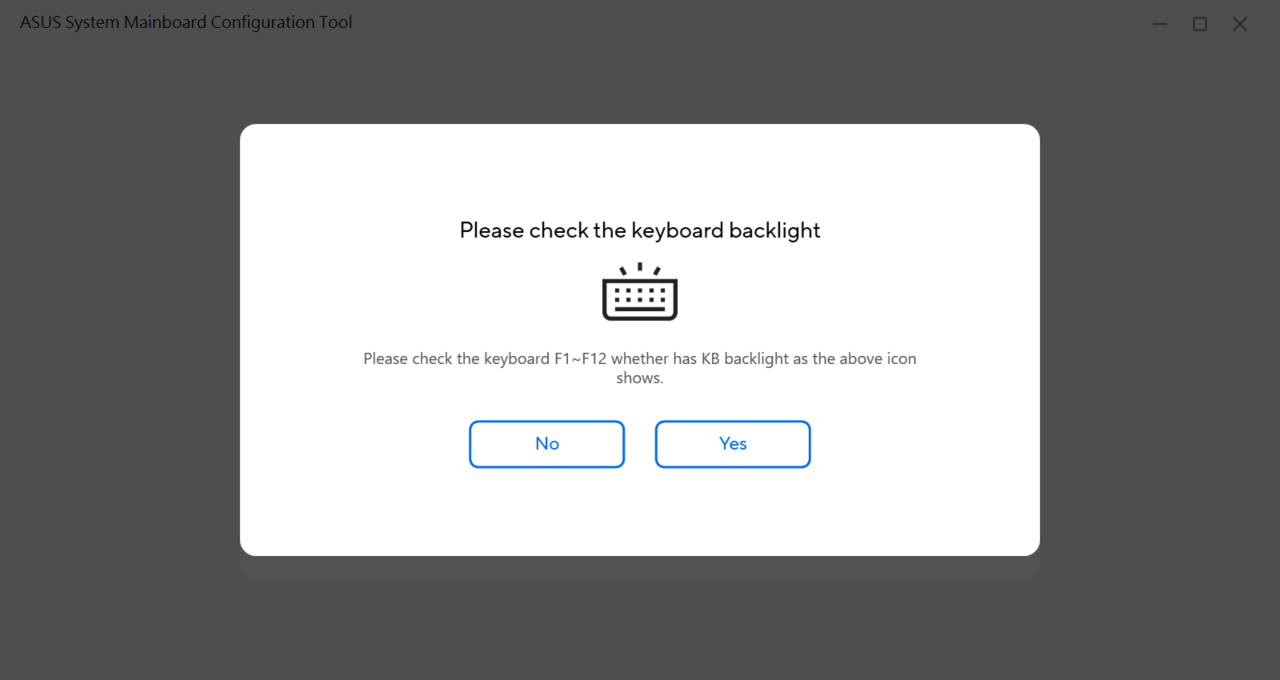
For some selected model, please follow the guidance to confirm whether has the keyboard backlight.
* For selected model only.
Tool will configure data automatically, when display [Configuration succeed], it means configure completely.
If your product comes with Windows OS at purchase time, please continue to retrieve the Windows Key.
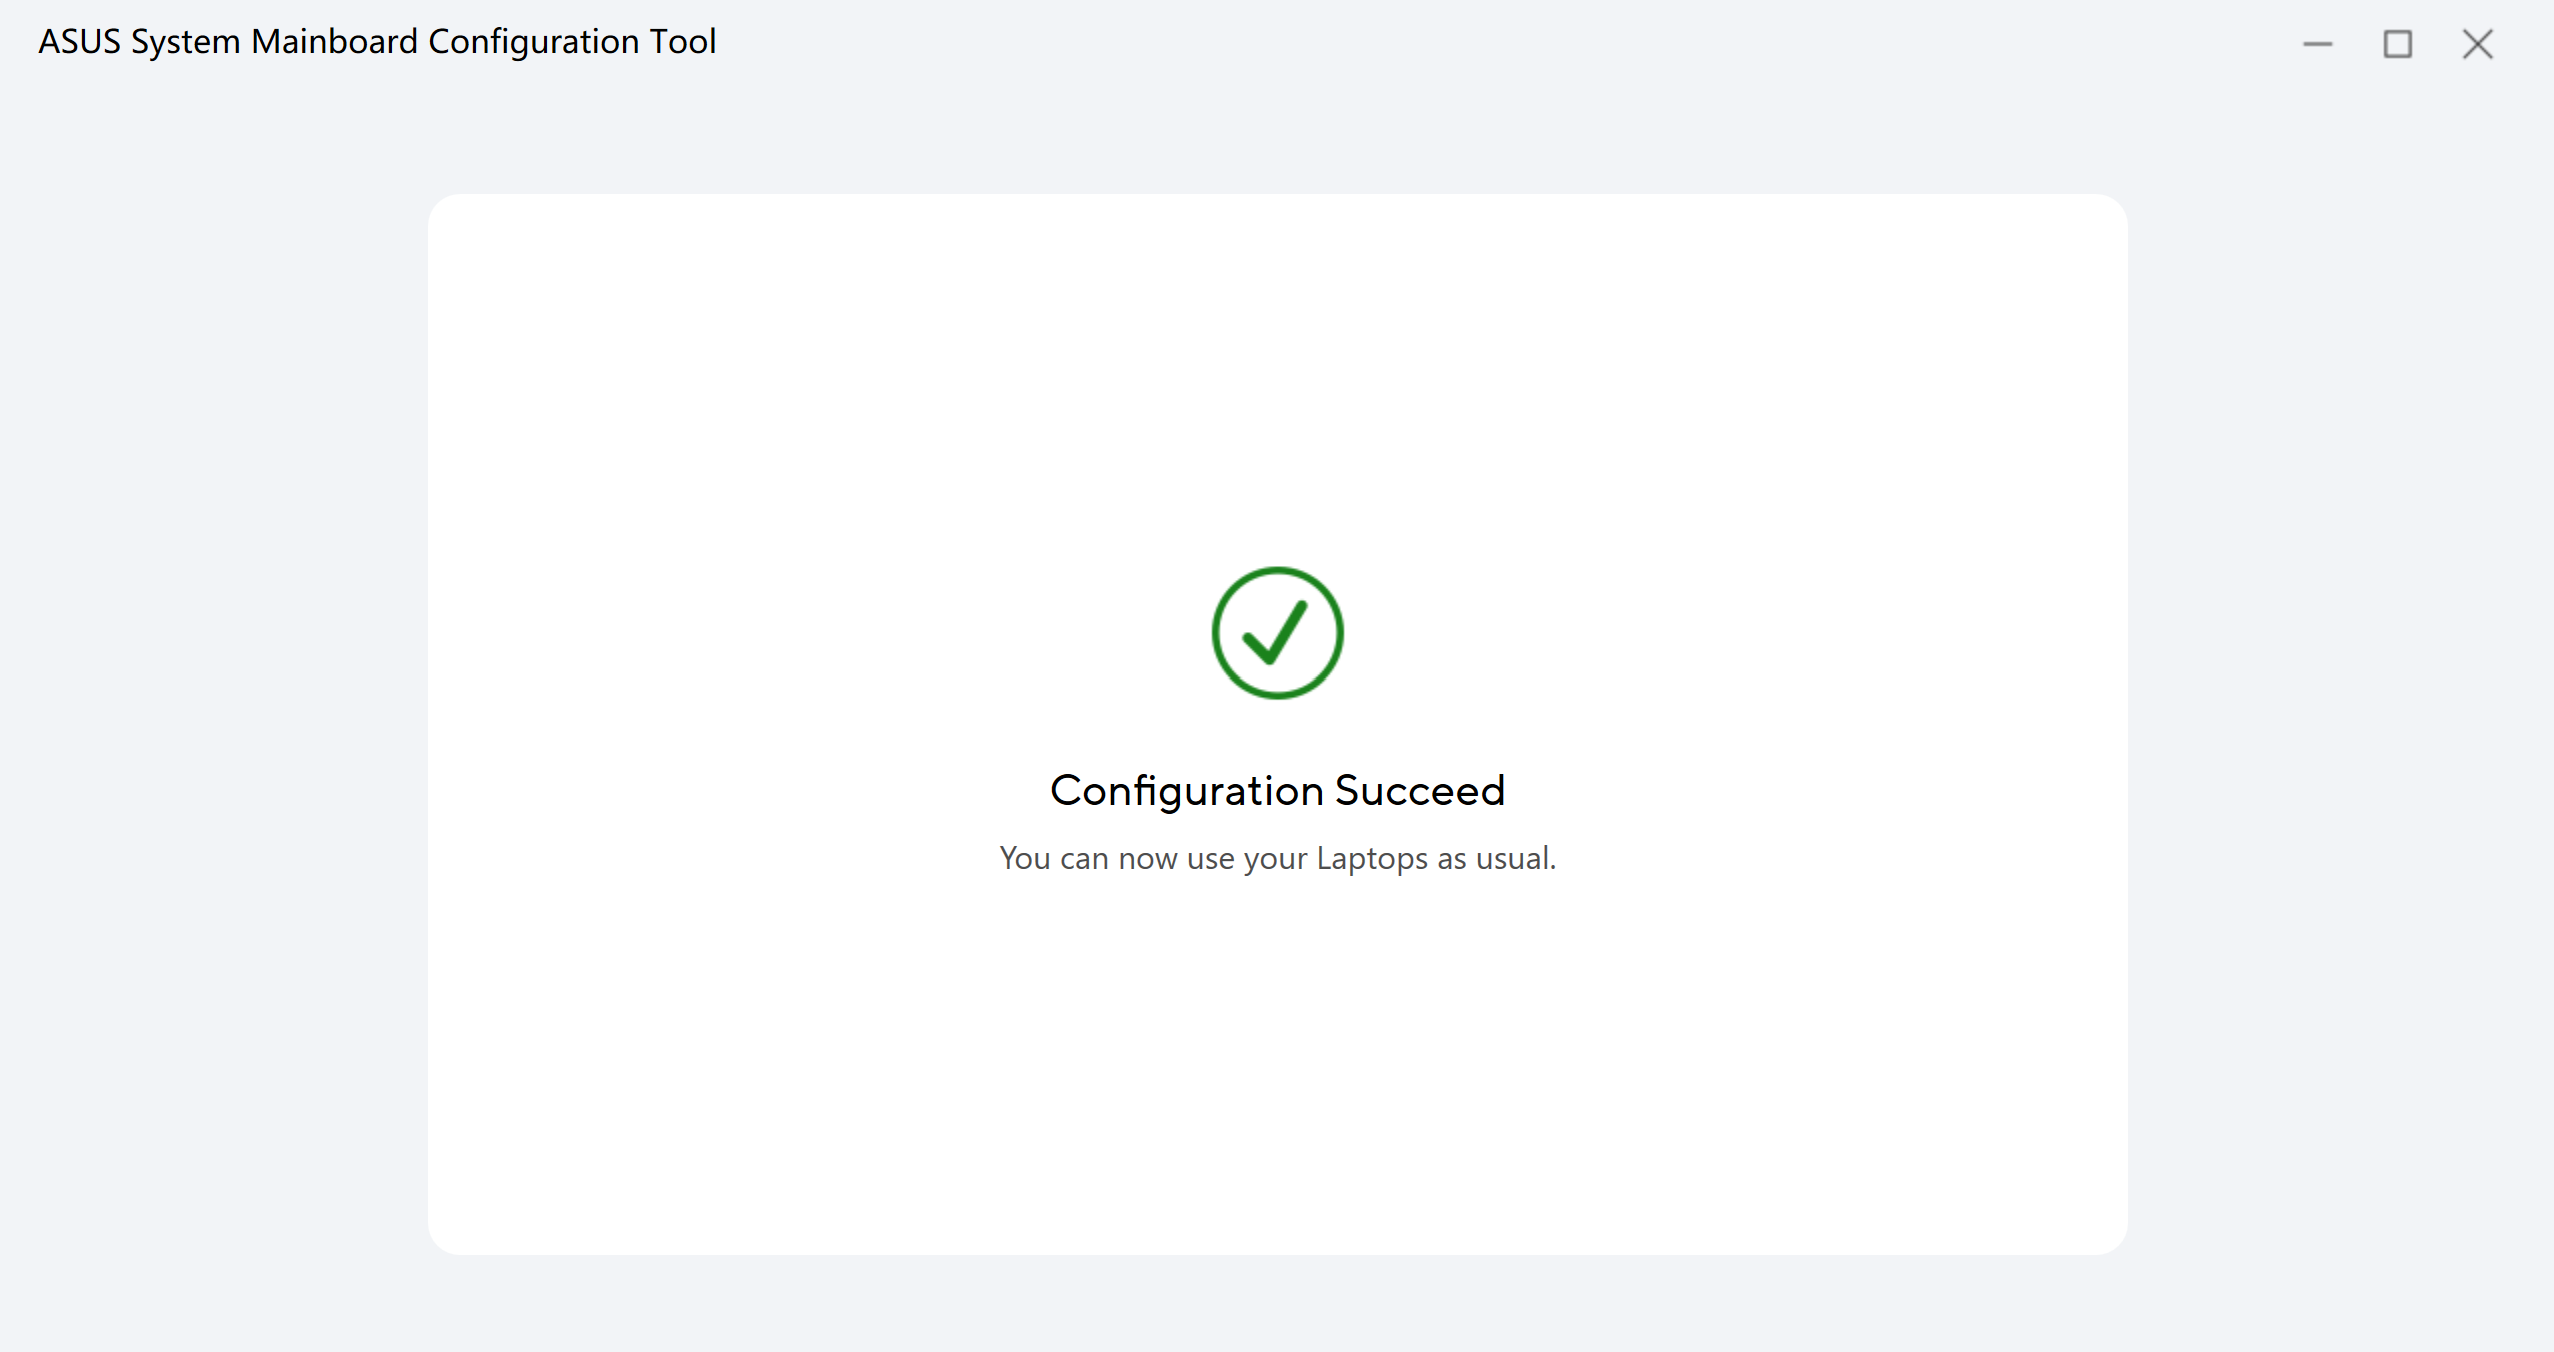
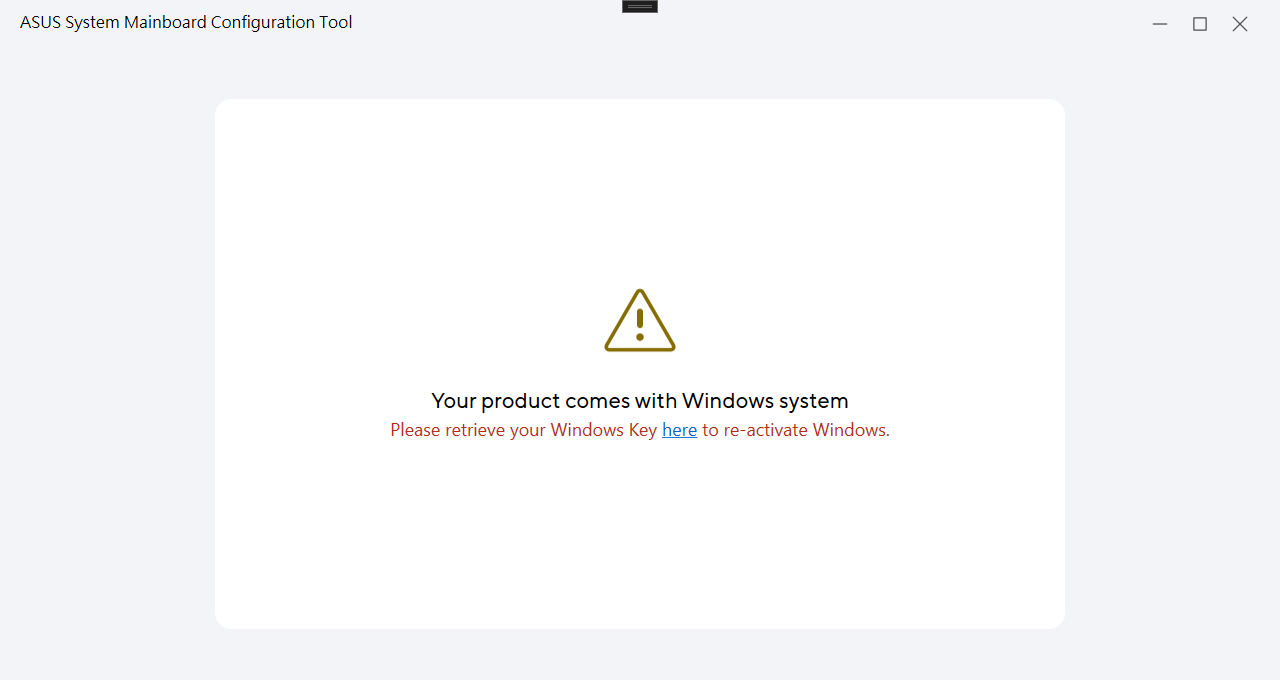
If your product comes with Windows OS at purchase time, it will display information below after configuring completely.
Please follow the guidance to retrieve the Windows Key.
*Click Here and select your product SN to retrieve Windows Key.
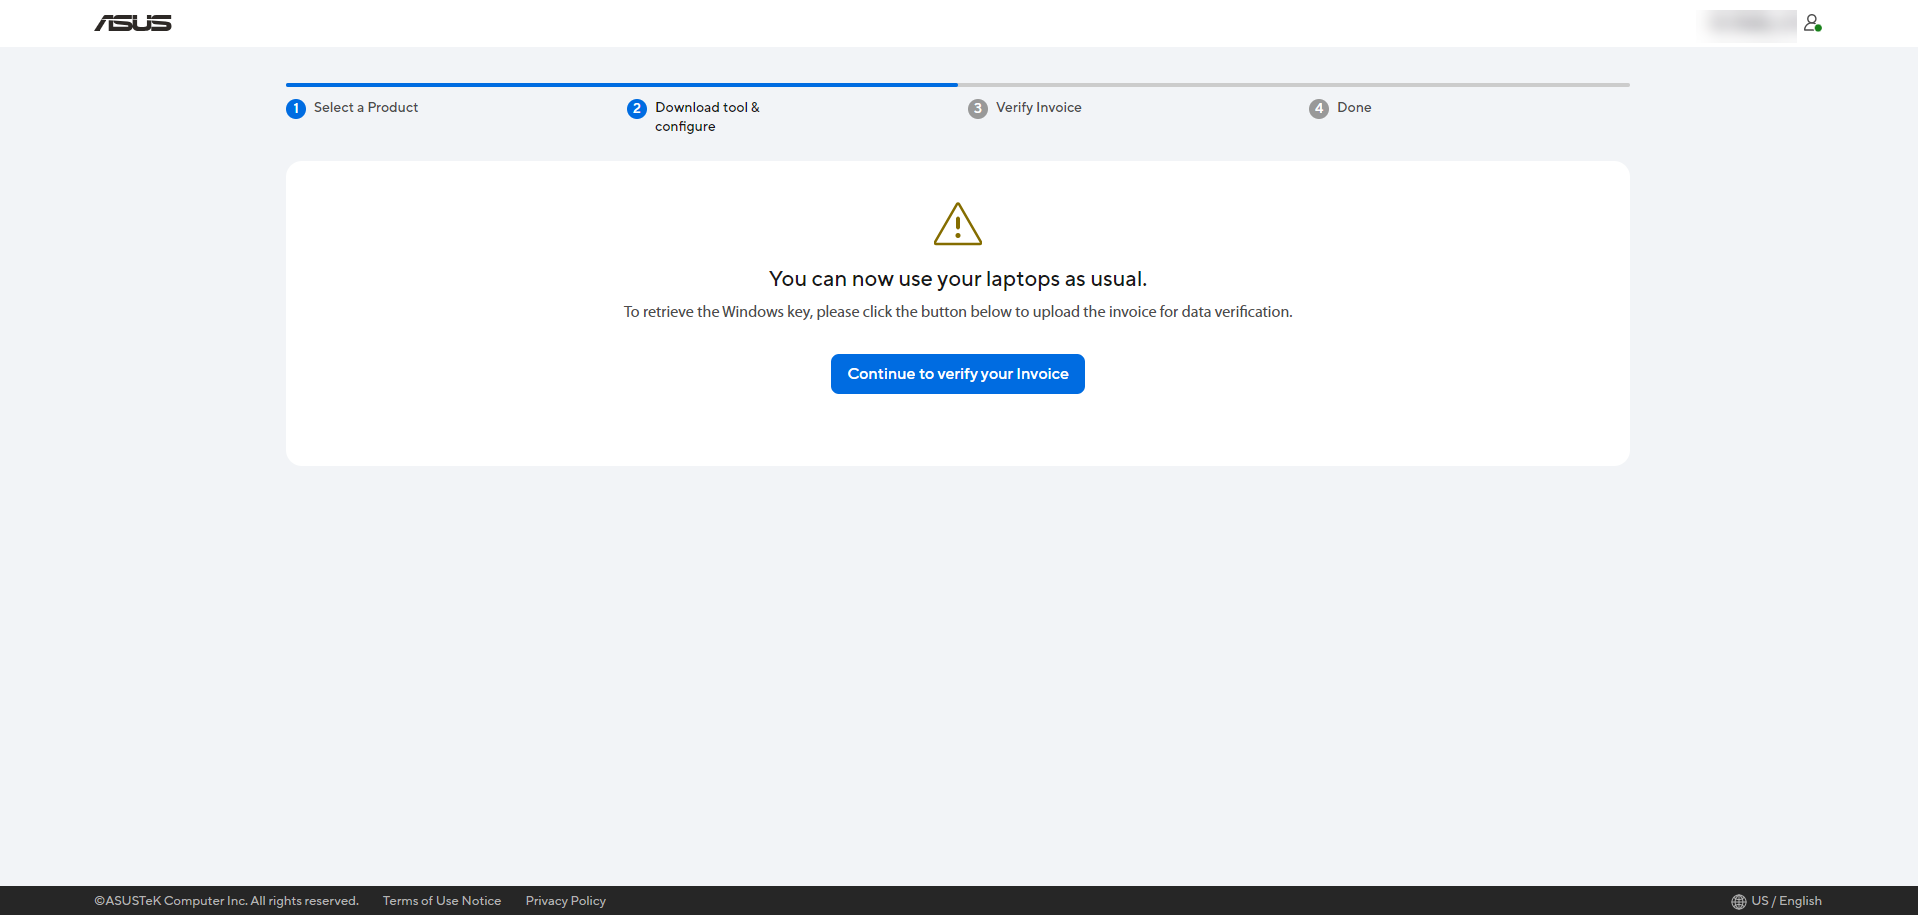
To retrieve the Windows Key, please click the button [Continue to verify your invoice] to upload the invoice for your data verification first.
kindly submit the invoice for the recently bought mainboard used in the repair process.
Note: The re-injection of the Windows Key in only necessary if a new mainboard has been installed.
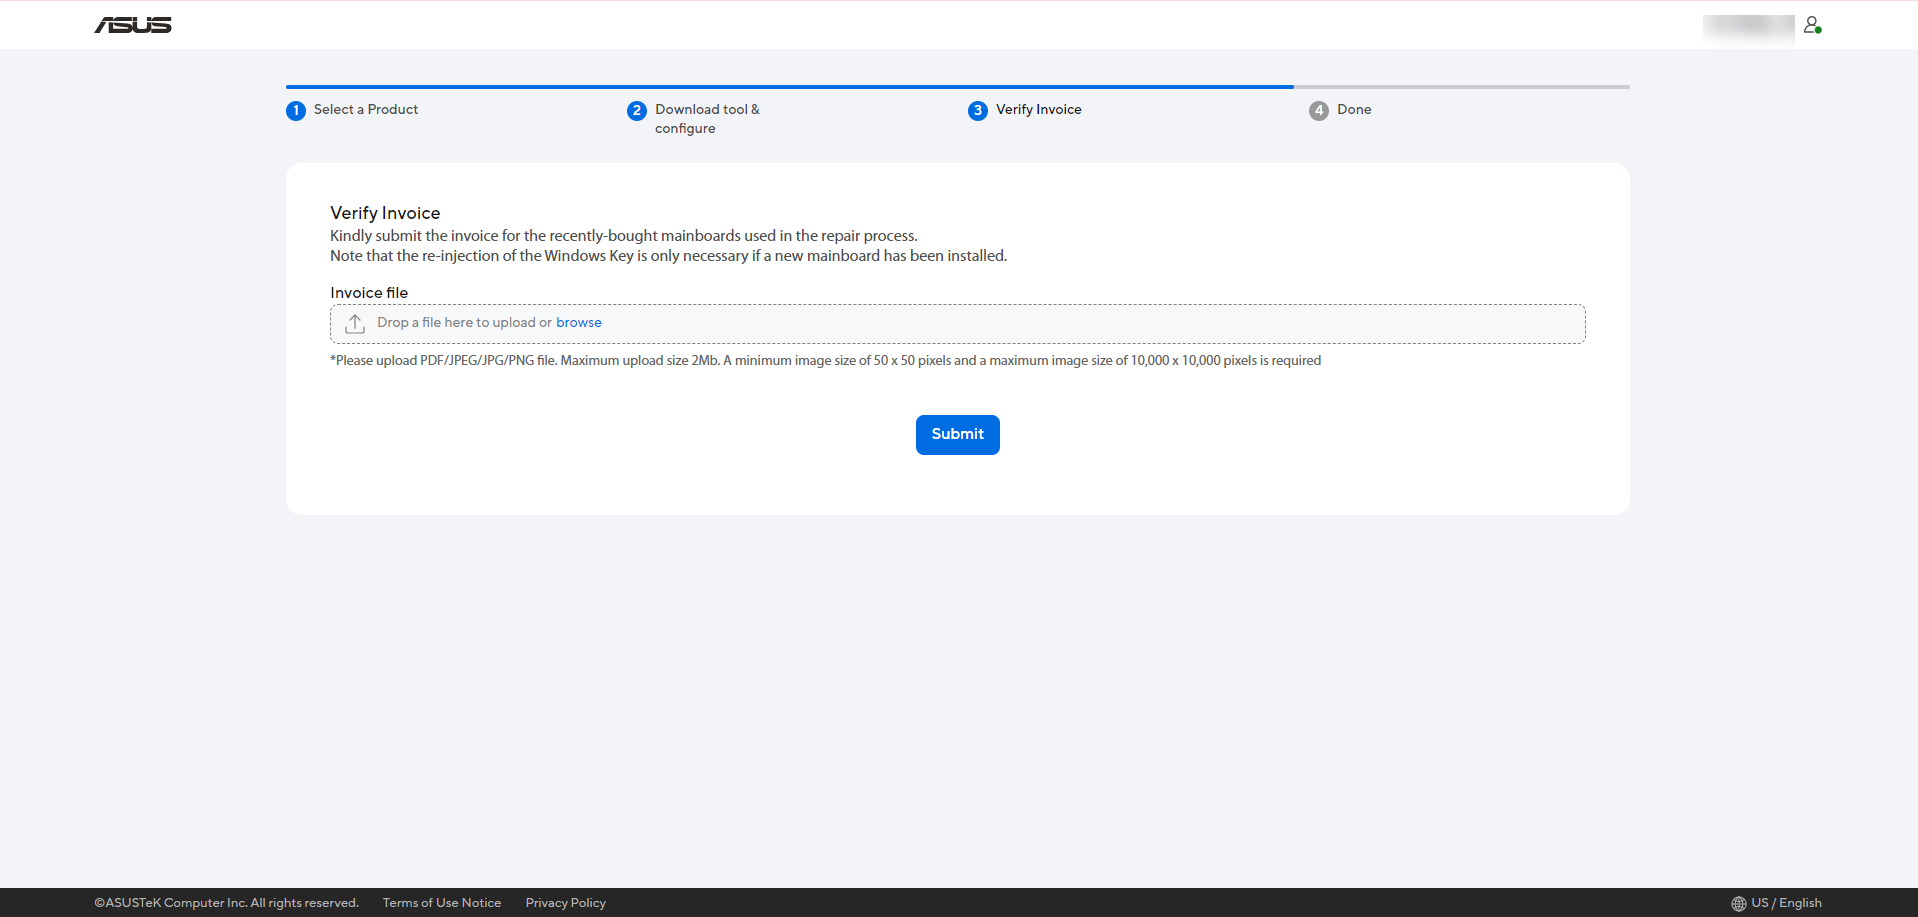
After submitted, please allow 3-5 working days for our review process.
Once the verification is complete, ASUS will notify you of the results by email.
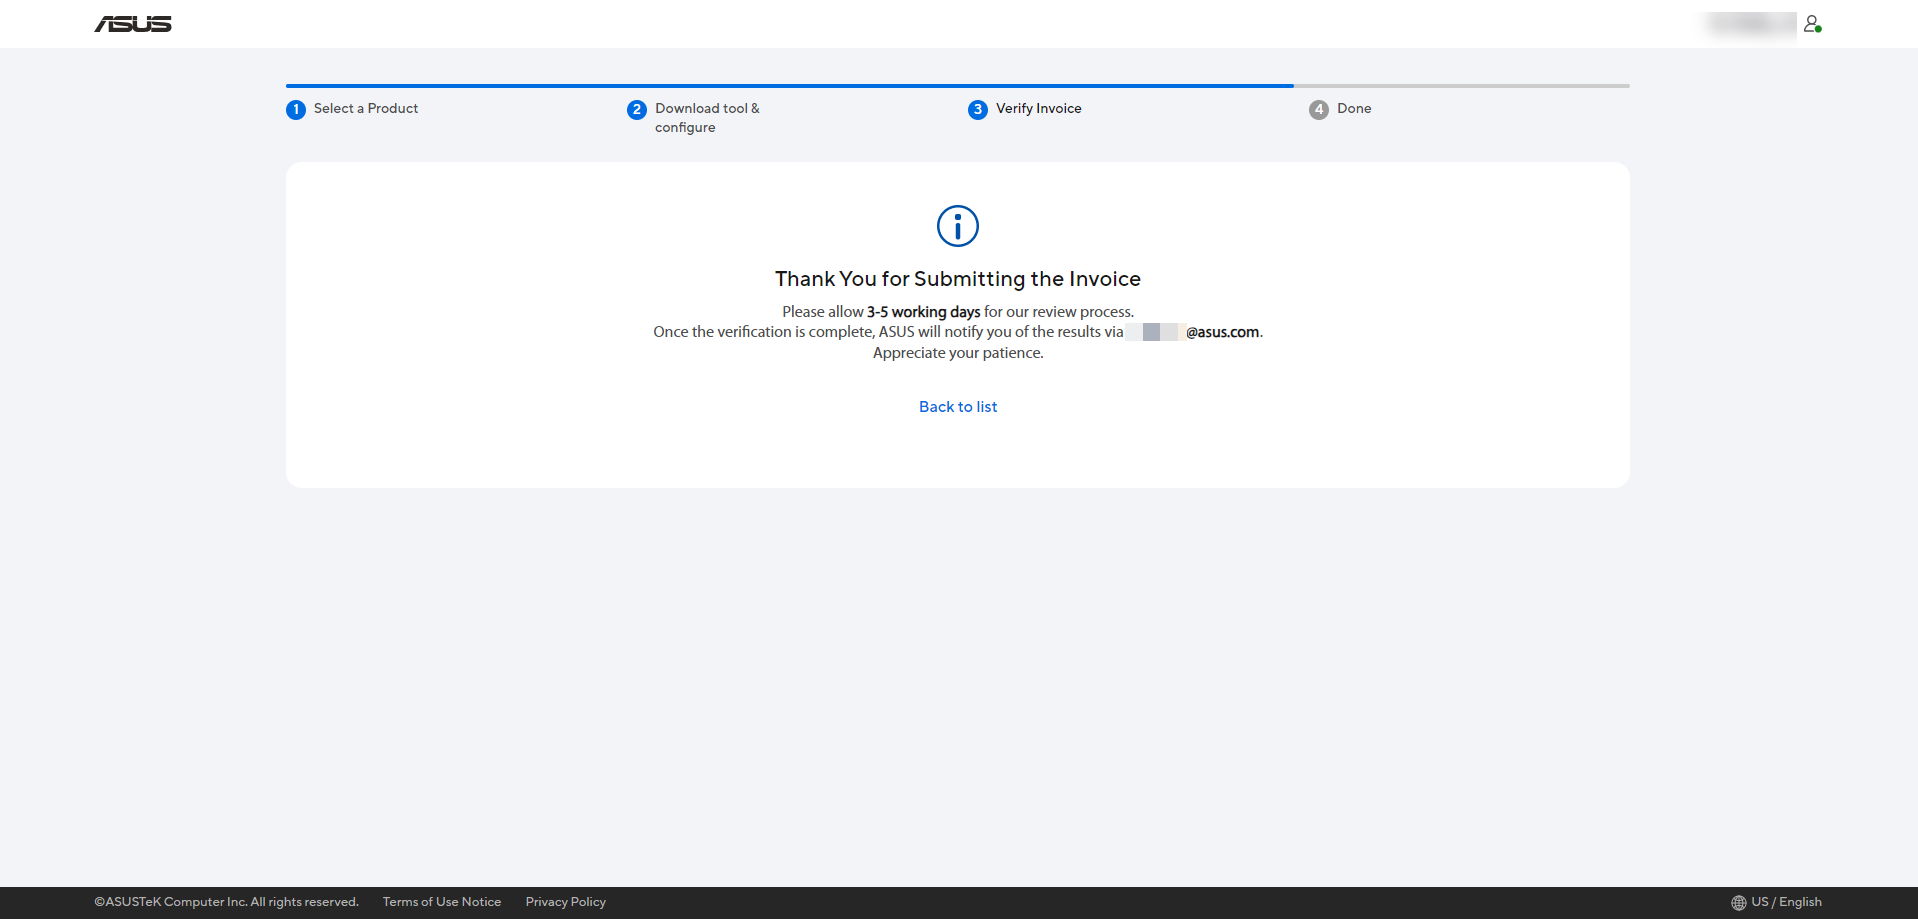
When you receive ASUS verification email, you can through the link in email to continue the Windows Key obtaining.
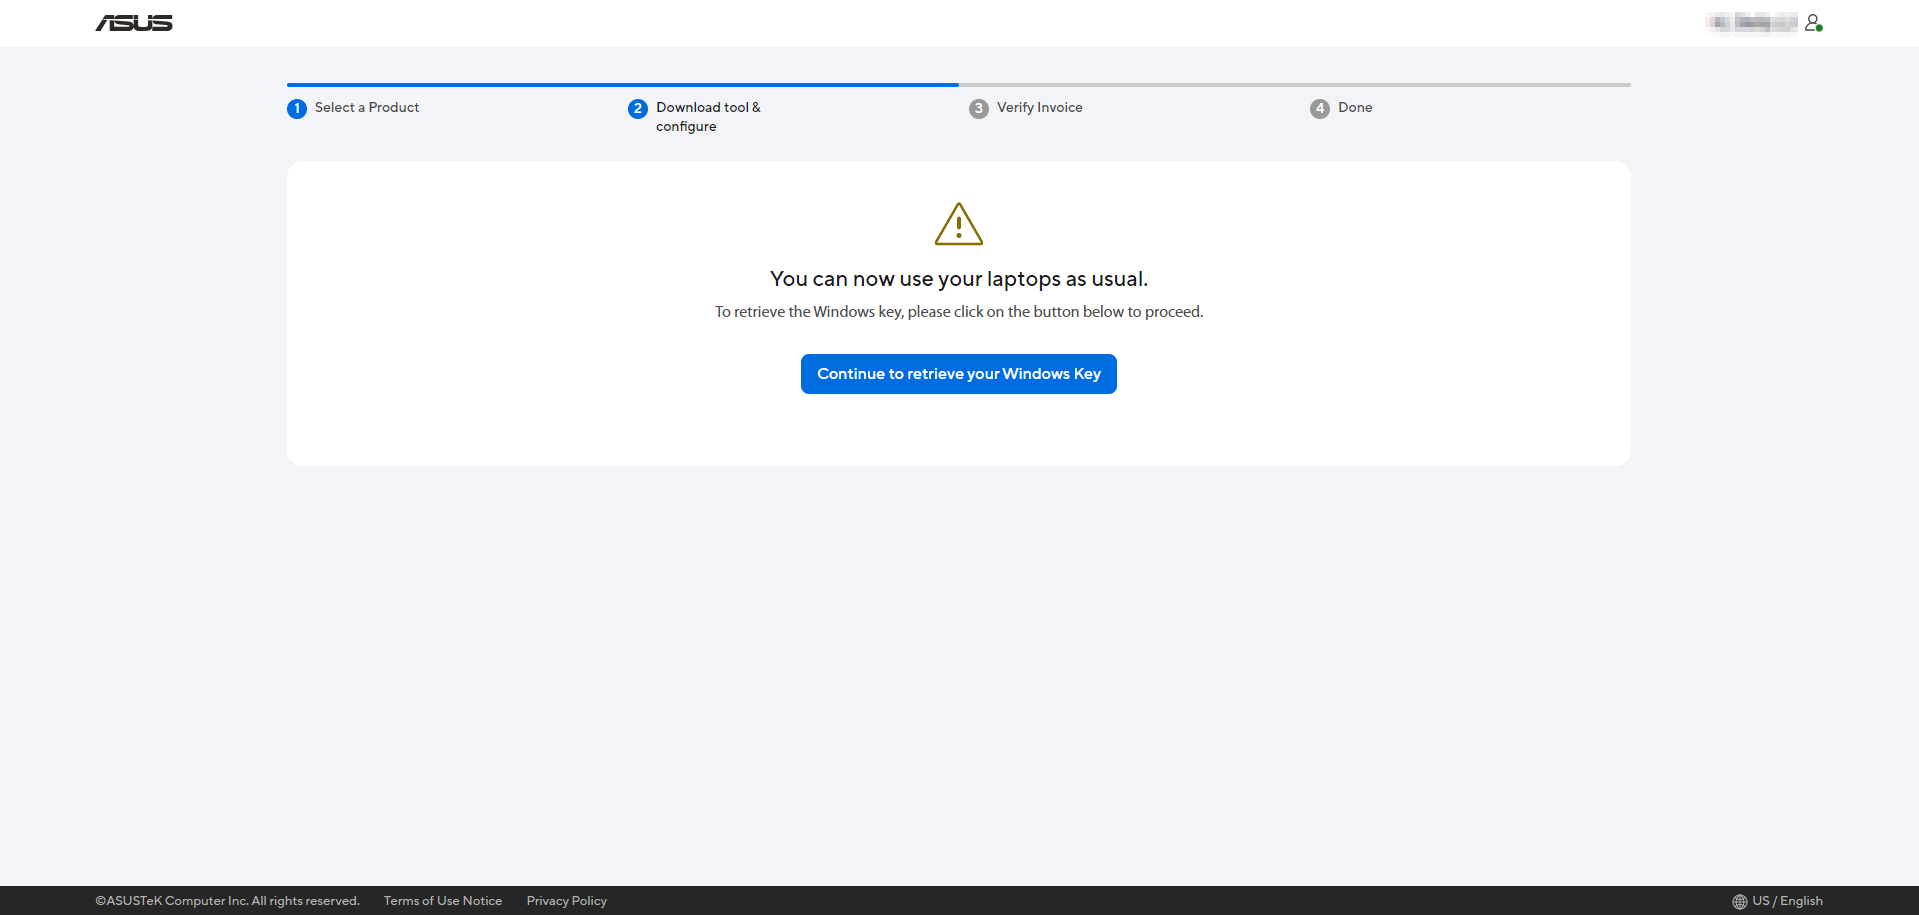
You will return to ASUS Self Replacement Solution website to retrieve the Windows Key, please click the button [Continue to retrieve your Windows Key] for Windows Key obtaining.
Please confirm your product serial number and Windows Key, and refer to Windows Activation, Retrieval, and Modification of Product Key to re-inject Windows Key to continue using unit as it was. 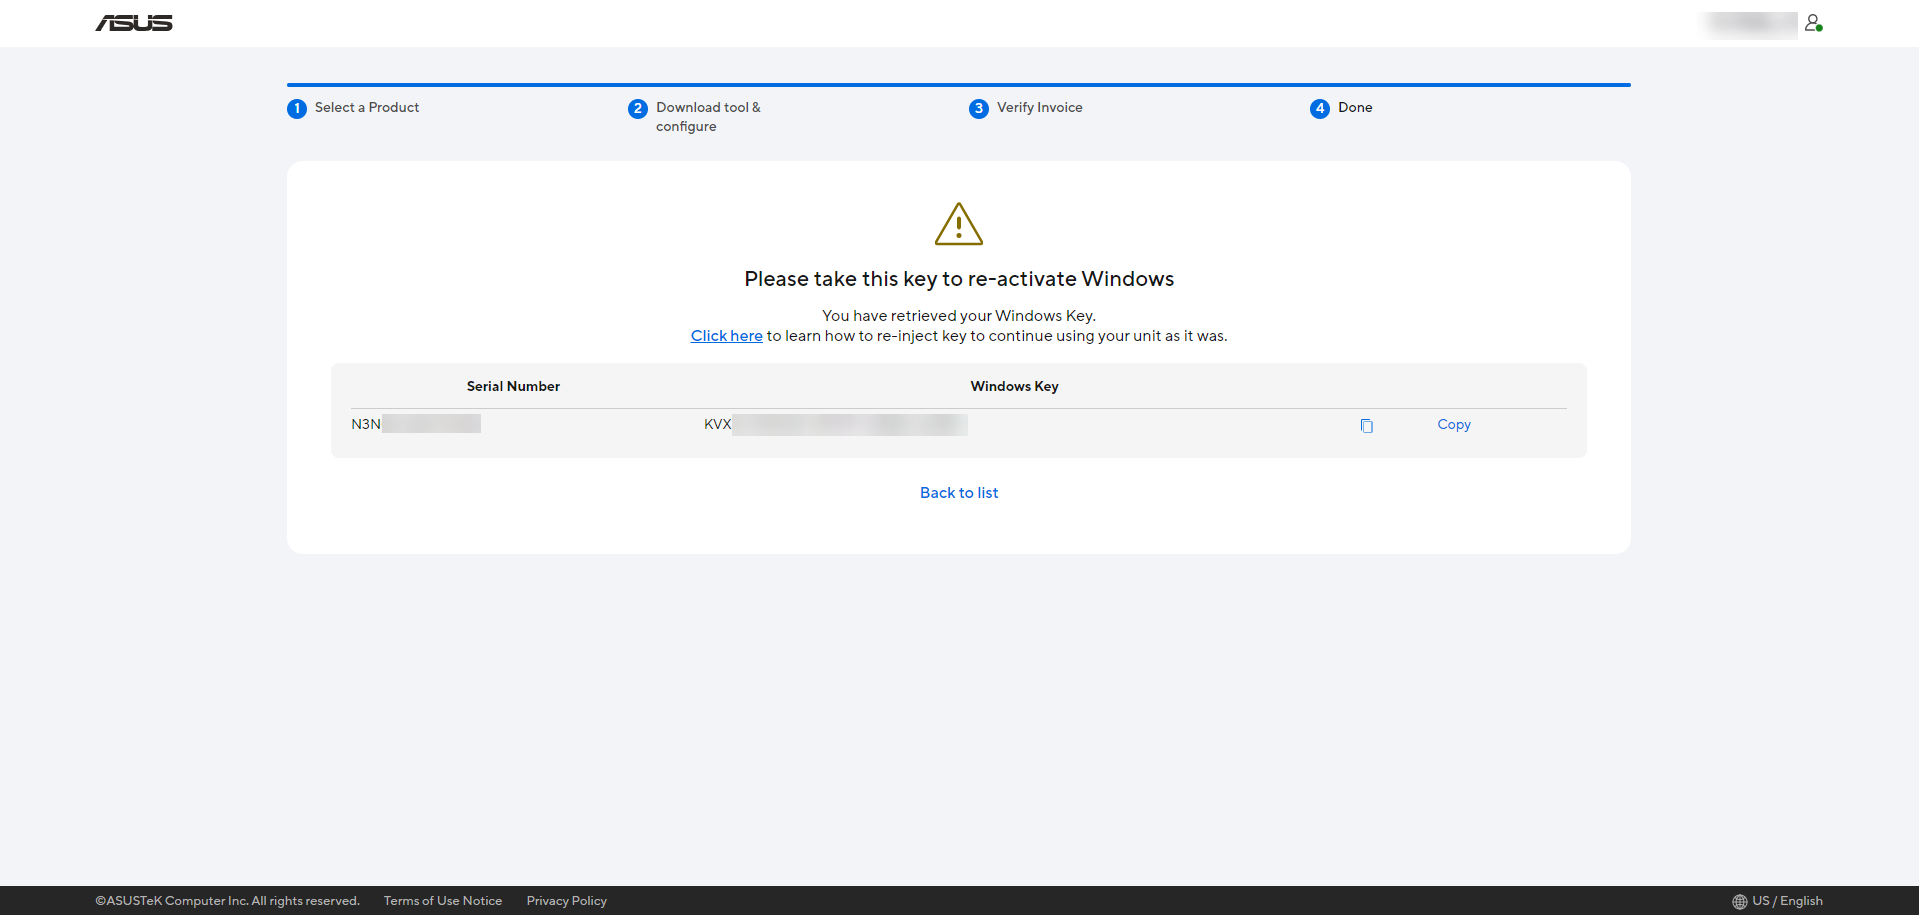
Please access ASUS Self Replacement Solution website, and fully read all information on it. After that, please check [I have read above and agree to Continue] and click [Continue].

For [Business user], please select [Continue as Business user].
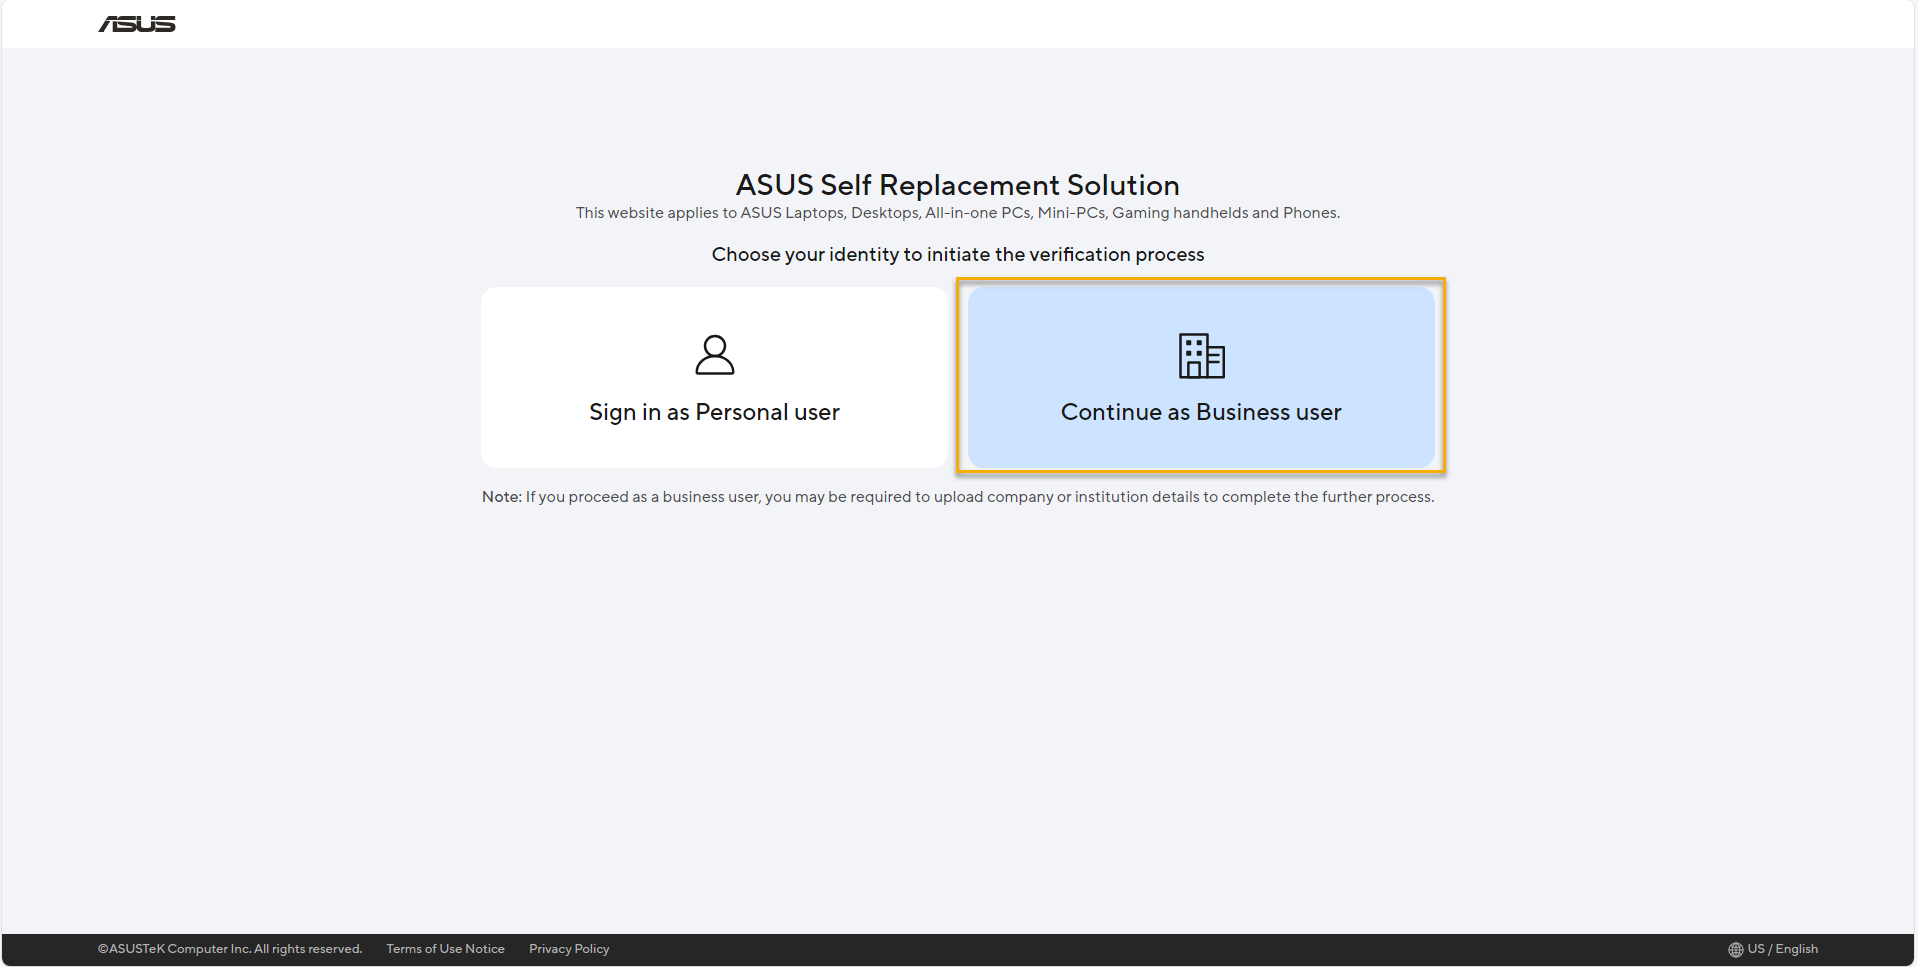
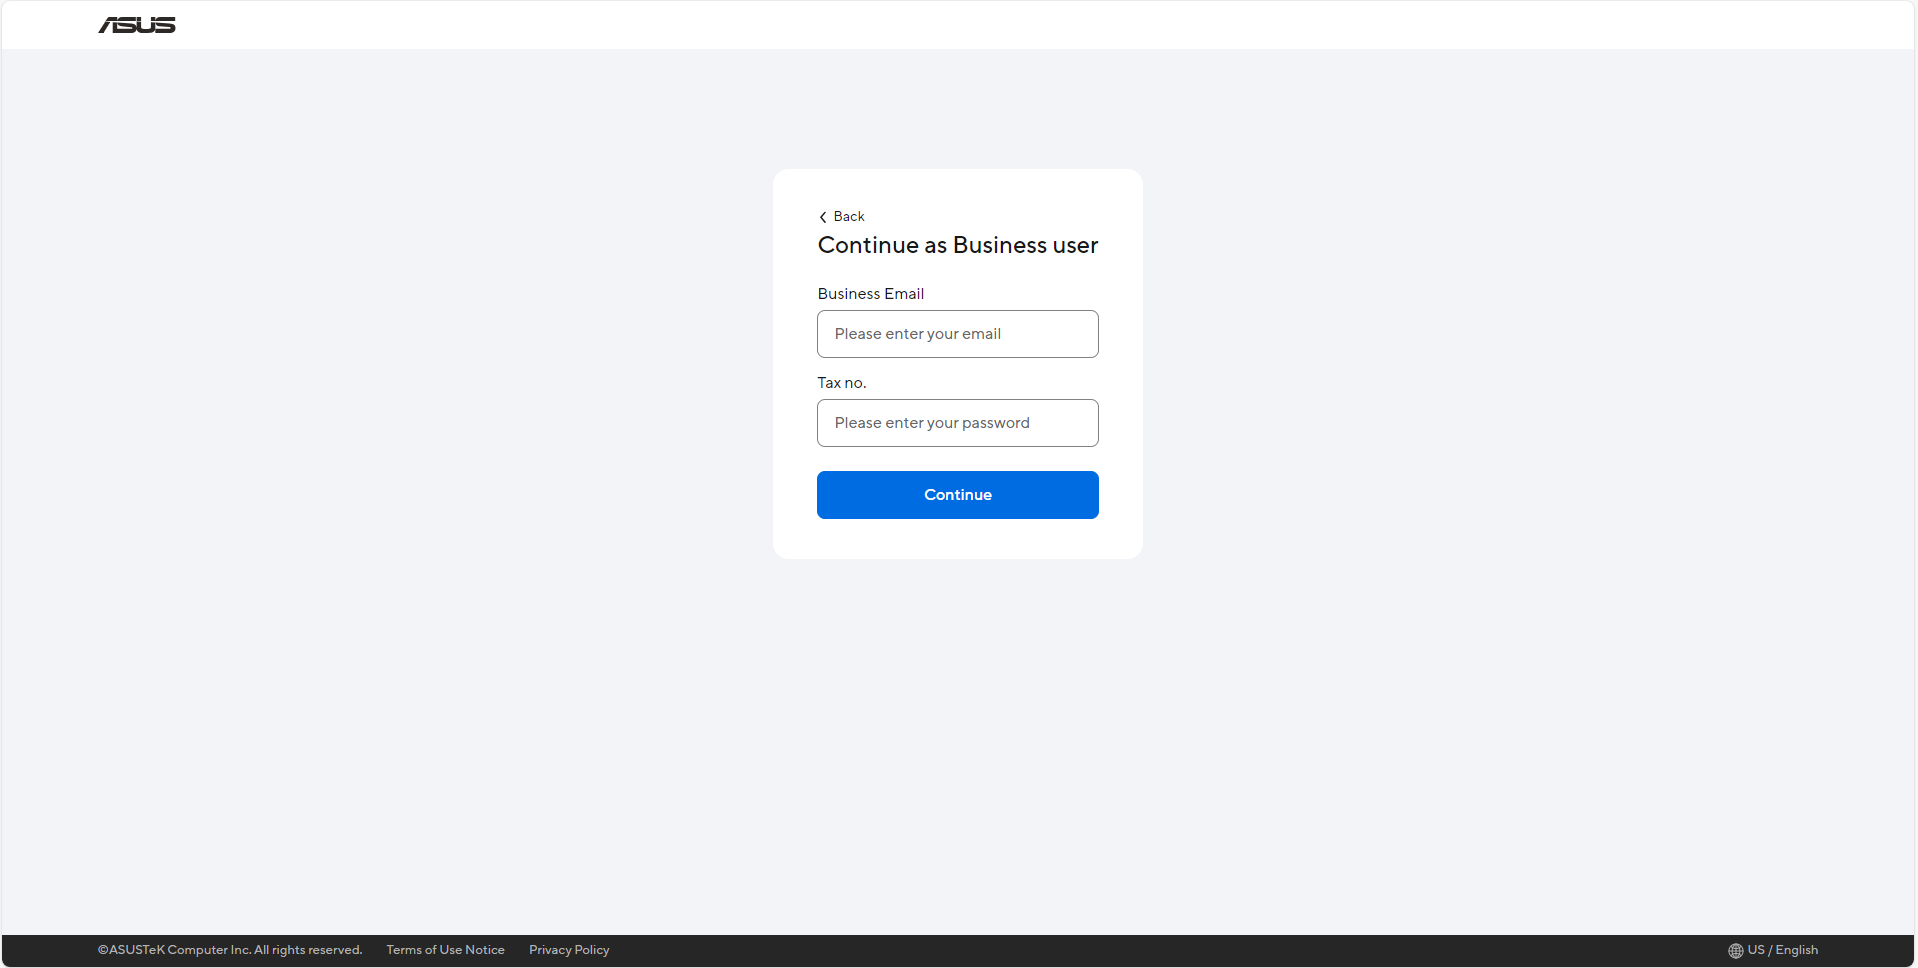
In the login page, enter your Business Email and Tax no.
Enter the product serial number for which you have already completed replacement and then click [Add] to add new serial number, or you can download SN list template to fill in and then upload to add new serial number. After adding SN completely, you can click [Continue to upload business license].
*Please only select a method manually update or upload template to add product serial number. 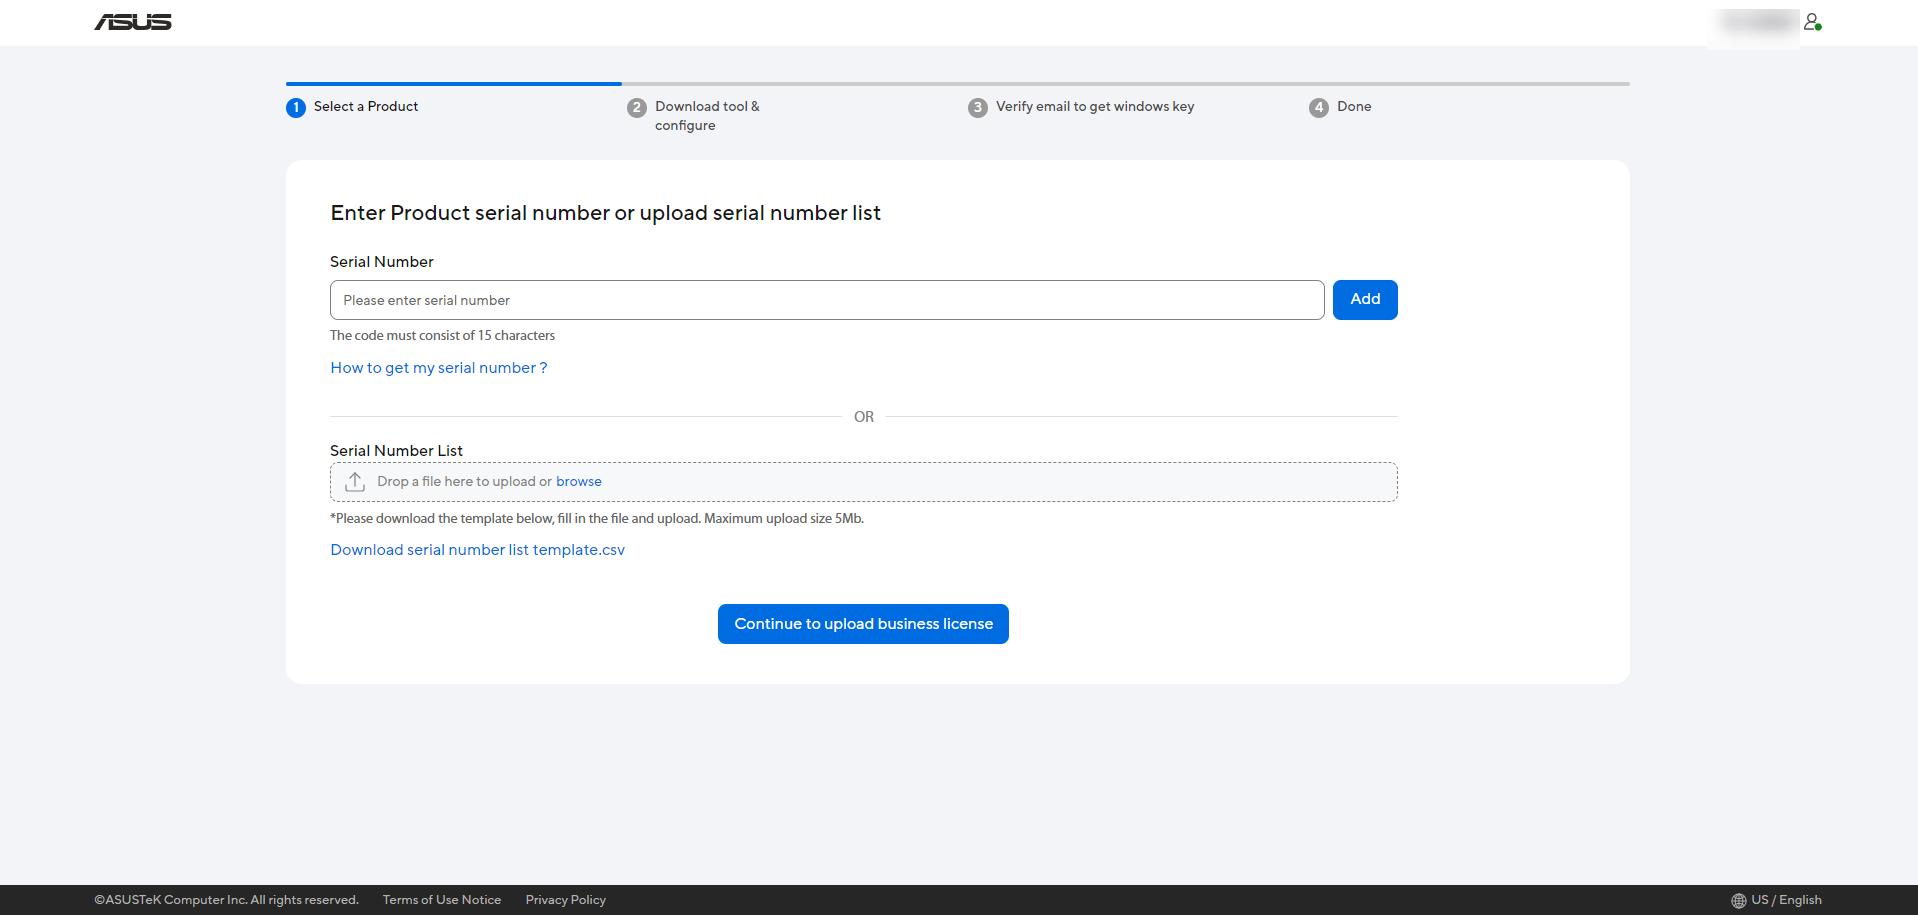
Then, you have to upload the Business license and Invoice, then click [Verify] to continue.
*Business license and Invoice are allowed to upload PDF/JPEG/JPG/PNG file. 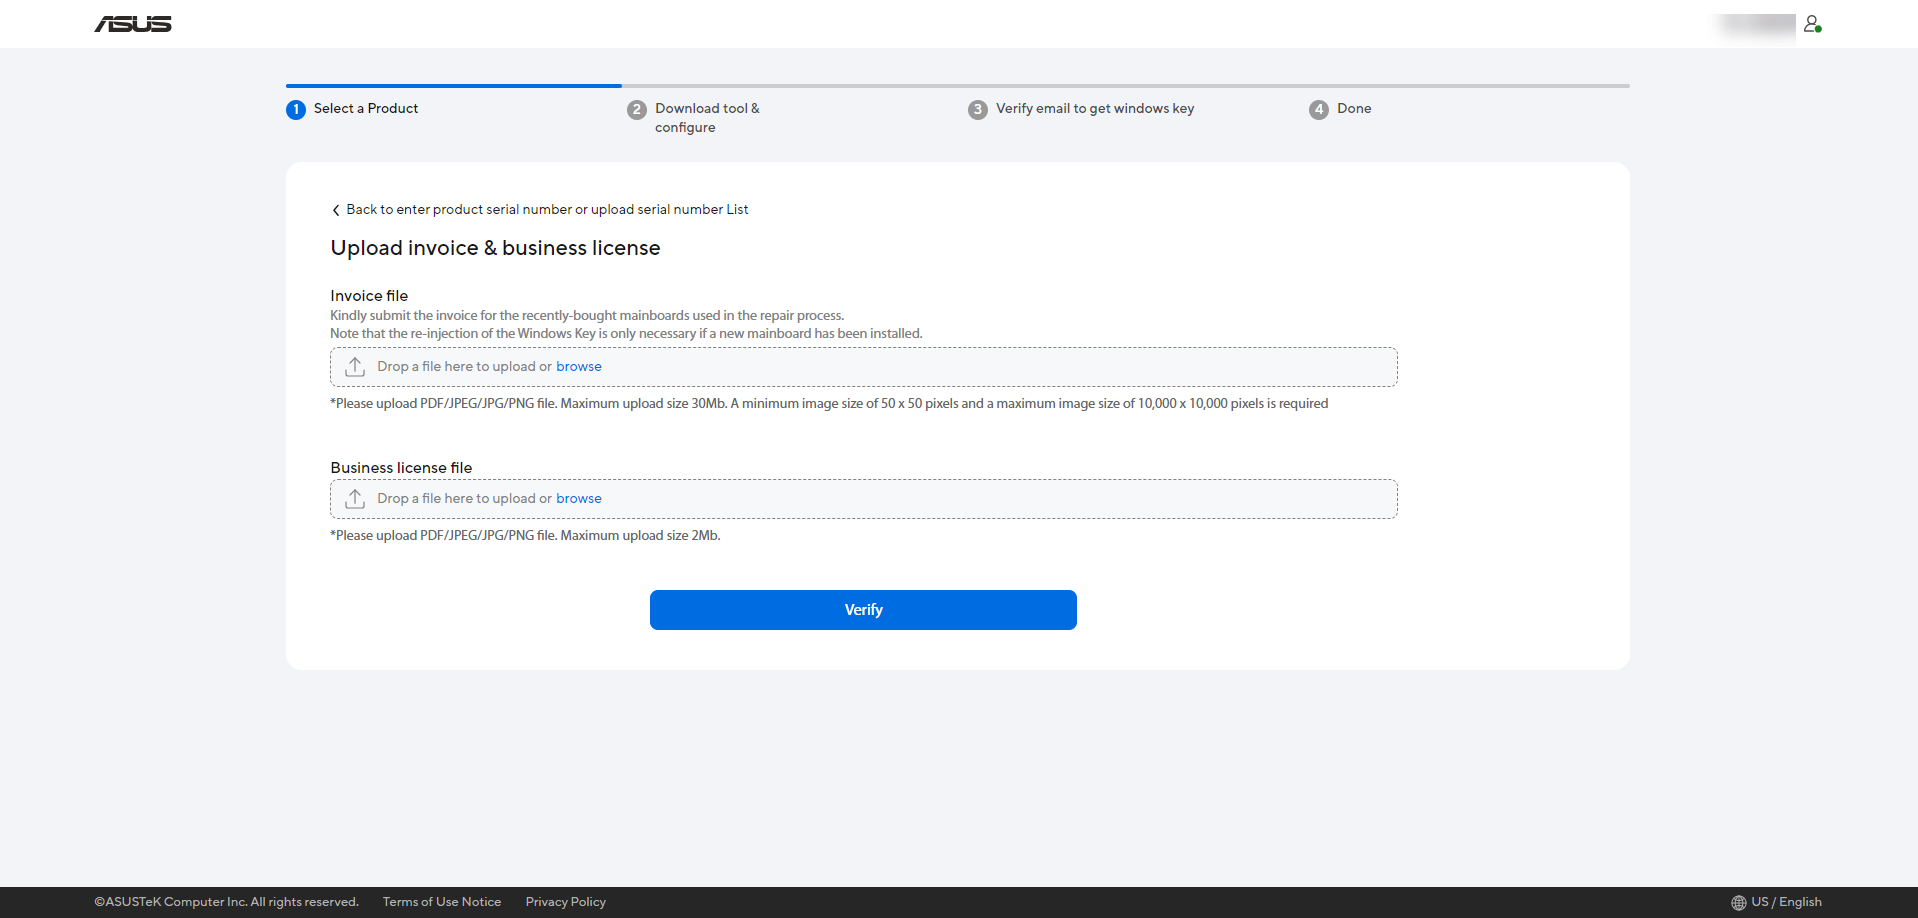
Apply completely, your Business License and Invoice are under authentication.
Please wait 5-7 working days for your Business License and Invoice authentication, then ASUS will send the result to your Email, when it’s approved. 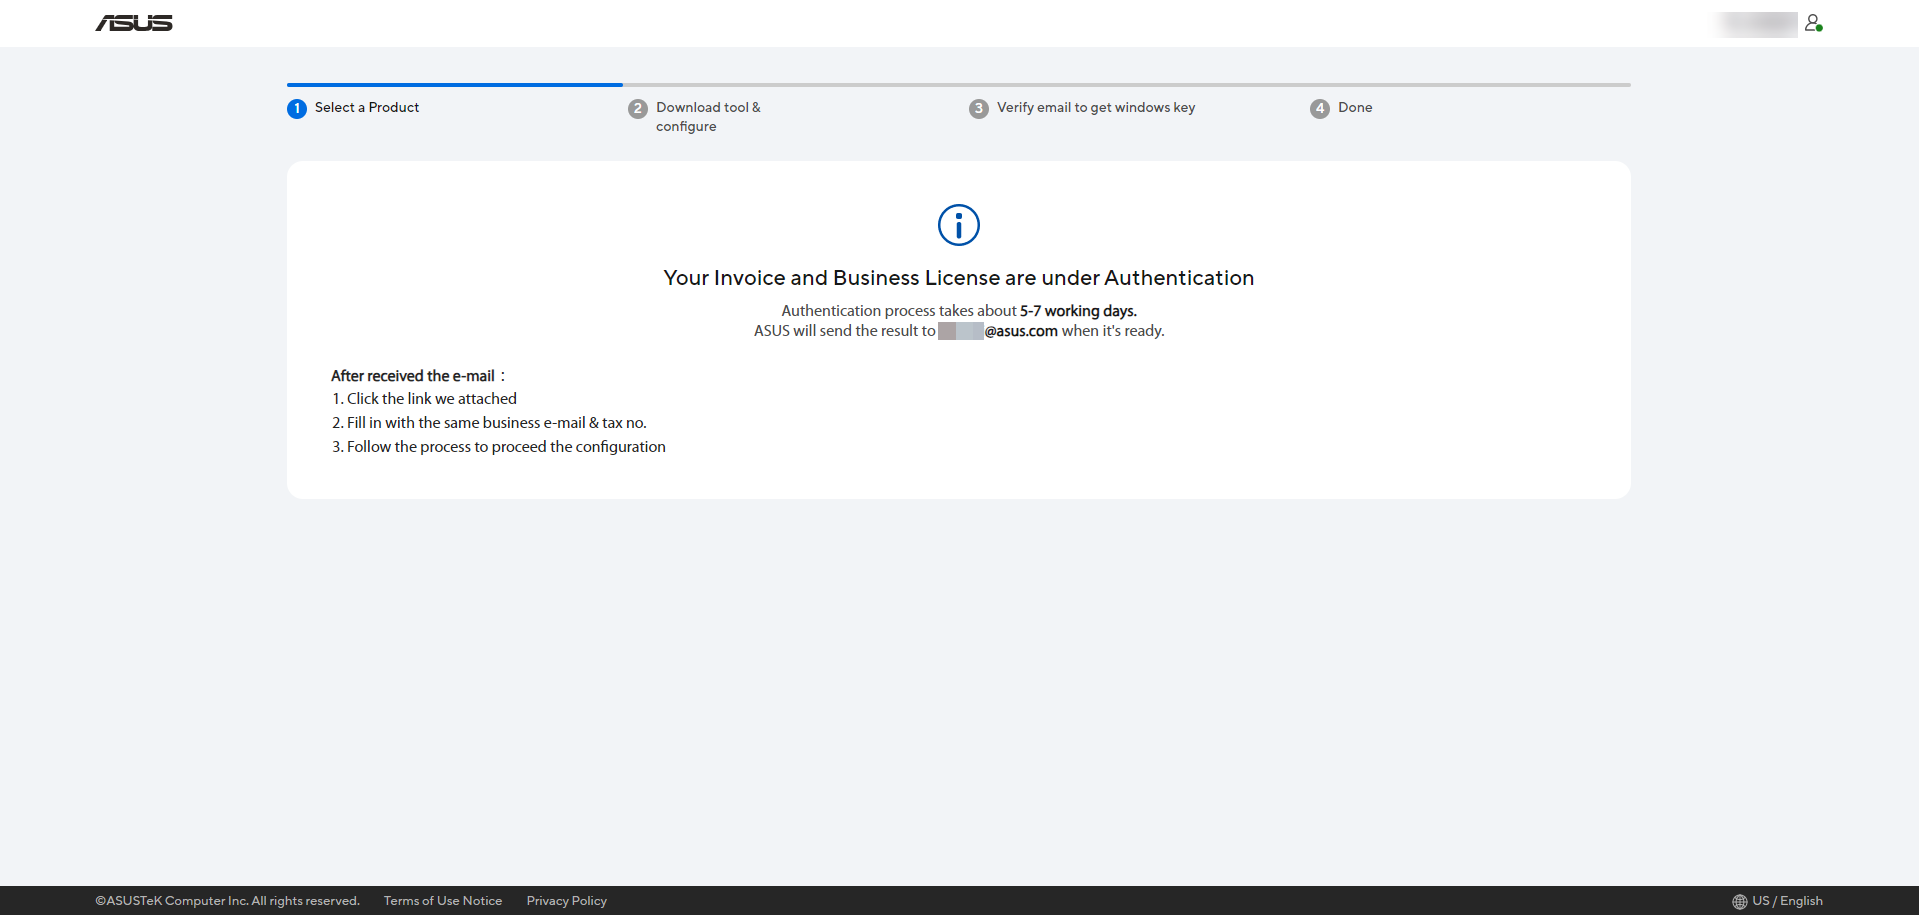
When you receive ASUS email about your Tax number and Business license have been successfully approved, it means you apply successfully, please login to ASUS Self Replacement Solution website again.

As [Business user], please select [Continue as Business user].

In the login page, enter your Business Email and Tax no.

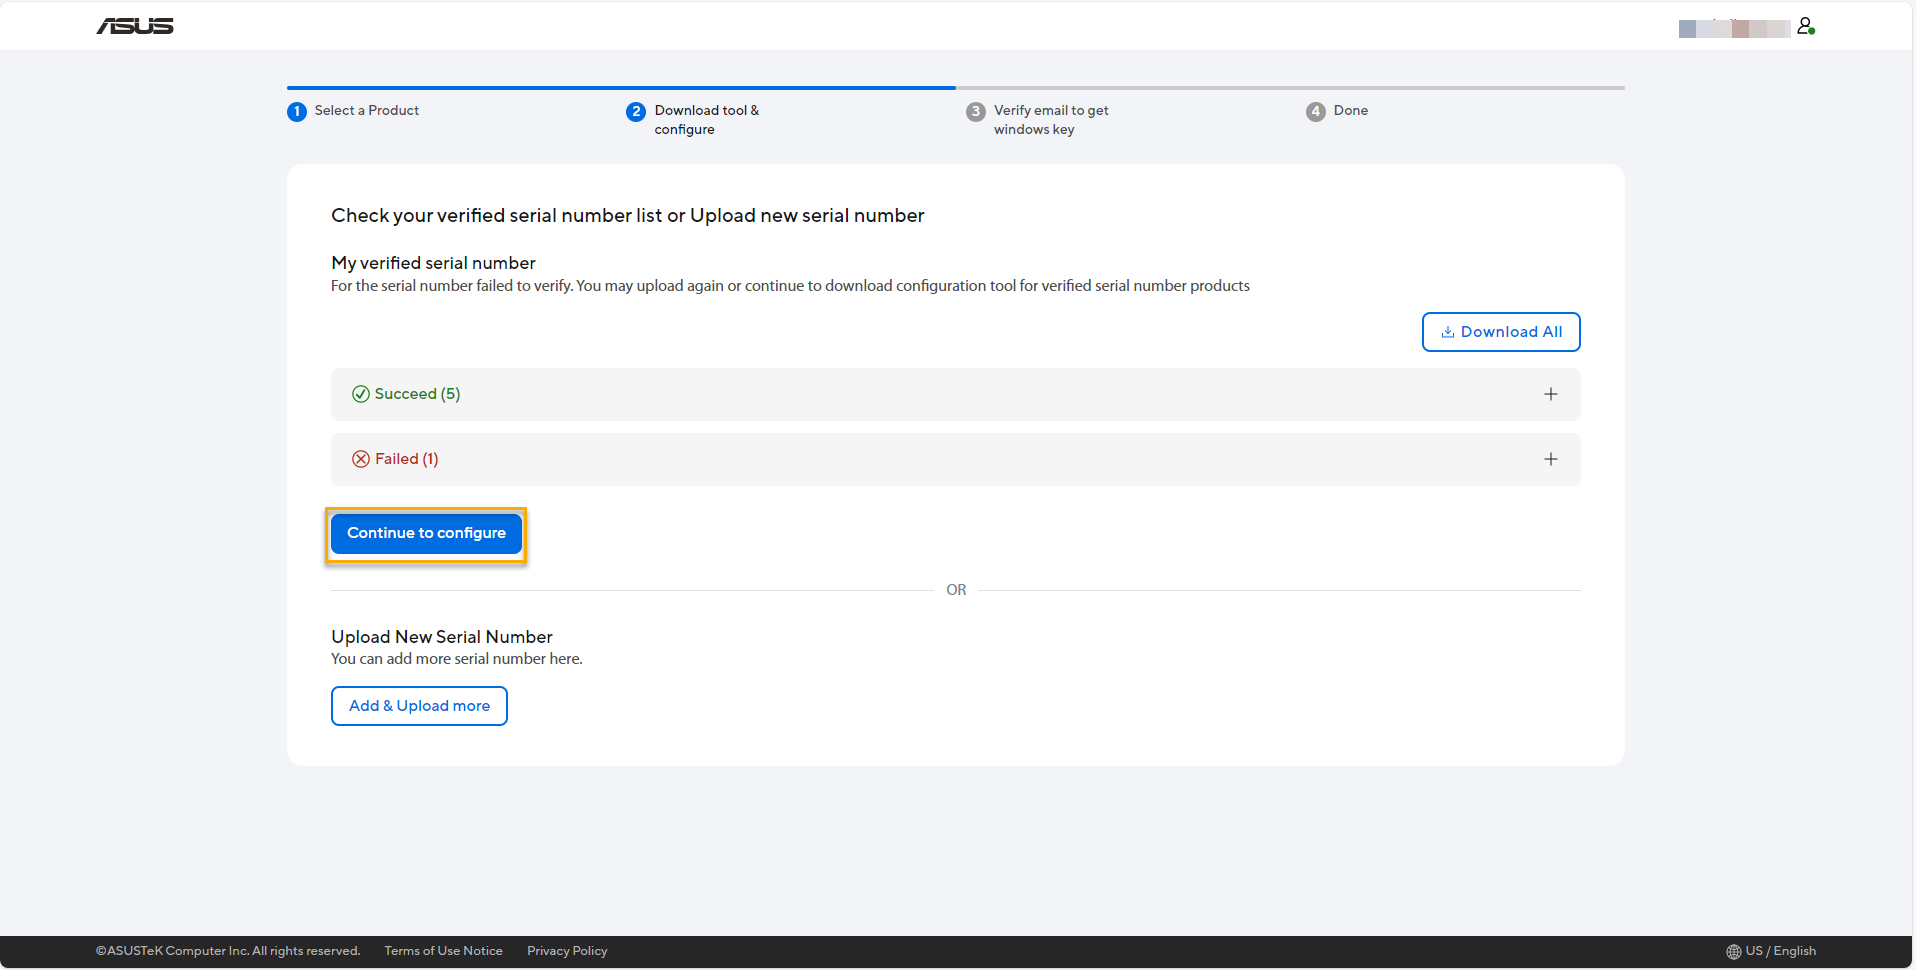
You will reach to [Download tool & configure] page after login, then all apply product serial number and upload date will be list. Then click [Continue to configure] to proceed tool download.
*Click [Download All] to confirm all succeed product SN and fail result.
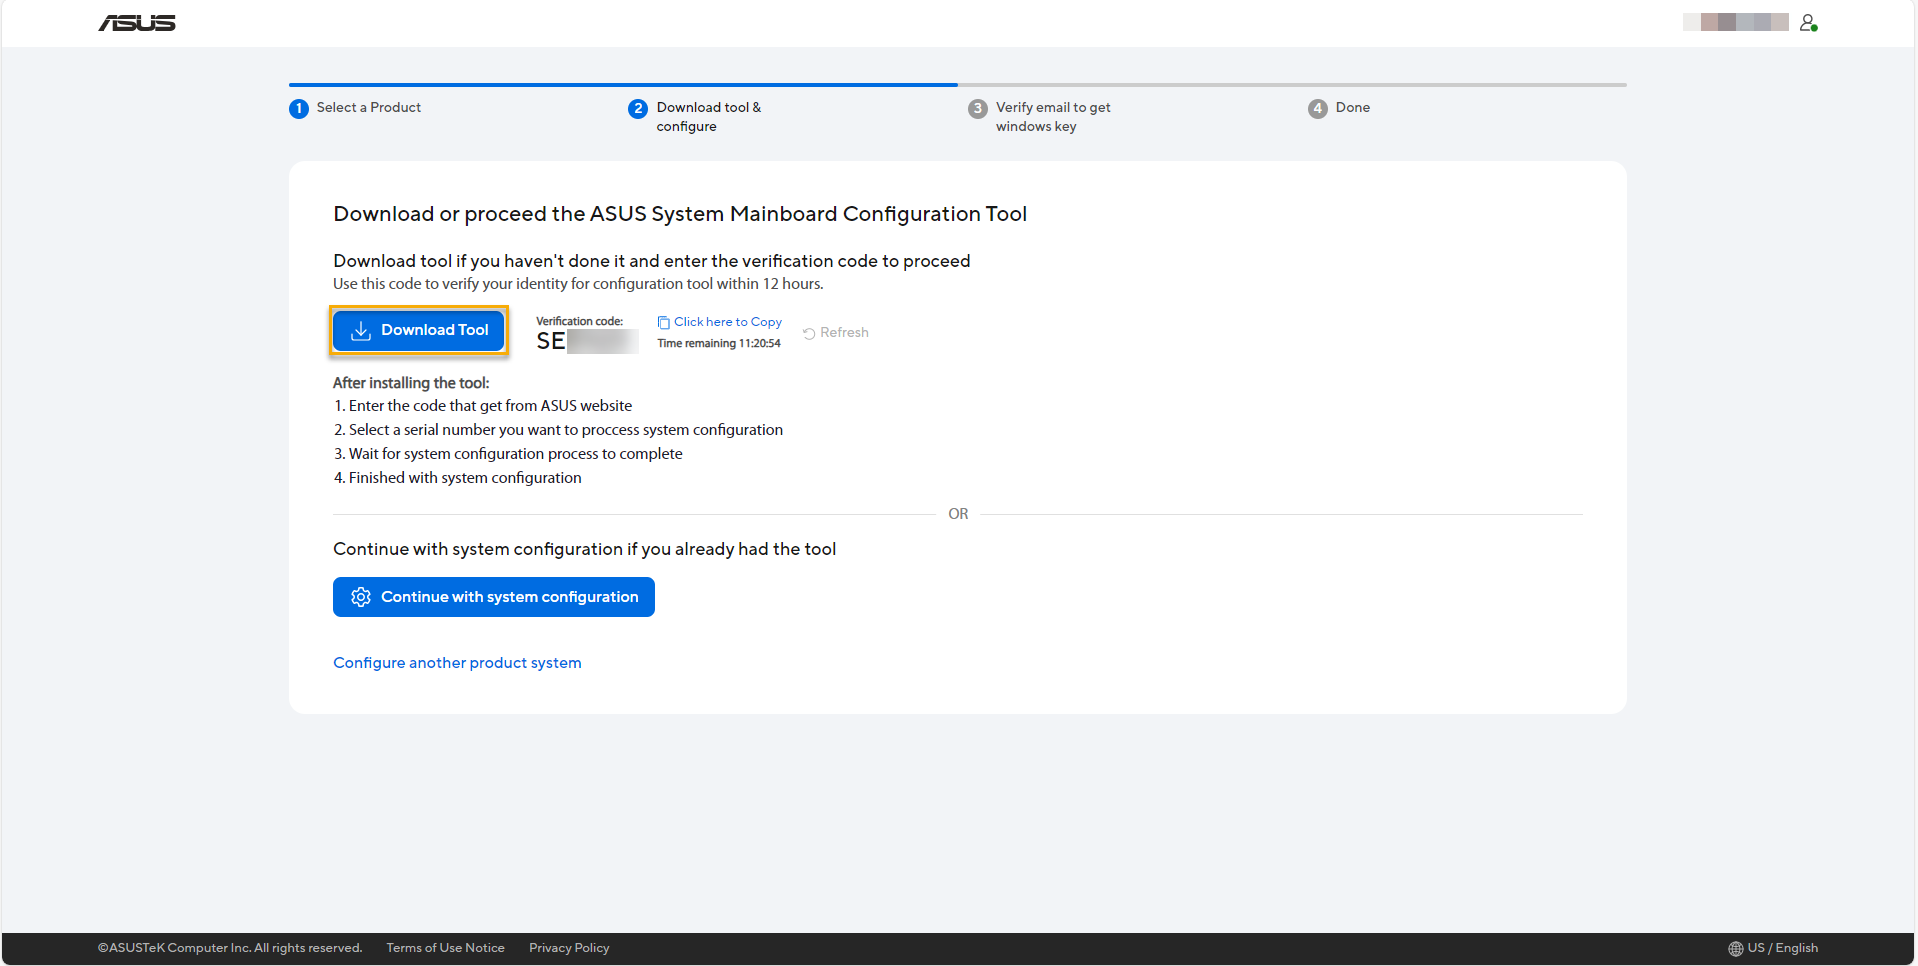
Please download the ASUS System Mainboard Configuration Tool, and then copy your verification code for tool startup.
Execution ASUS System Mainboard Configuration Tool, please execute the tool on the product which you have already completed replacement. You have to unzip the tool file [ASUS System Mainboard Configuration Tool.ZIP], and then double left-click mouse on [ASUS System Mainboard Configuration Tool.exe] file in folder.

While executing ASUS System Mainboard Configuration Tool, the Error message pop-up as below. Please download and install VC Runtime in X64 architecture to fix, and you can click [OK] to visit website to download it.

Please download the Latest Microsoft Visual C++ Redistributable Version with X64 Architecture, and then execute the EXE file to install. After that, please restart your device, then you can back to launch the ASUS System Mainboard Configuration Tool again.

Launch the tool, enter the verification code you already get on ASUS Self Replacement Solution website, then click [Verify] to continue.

Then, selected your product serial number and click [Continue for configure].

For some selected model, please follow the guidance to confirm whether has the keyboard backlight.
* For selected model only.

Tool will configure data automatically, when display [Configuration succeed], it means configure completely.
If your product comes with Windows OS at purchase time, please continue to retrieve the Windows Key.

If your product comes with Windows OS at purchase time, it will display information below after configuring completely.
Please follow the guidance to retrieve the Windows Key.
*Click Here to retrieve Windows Key.

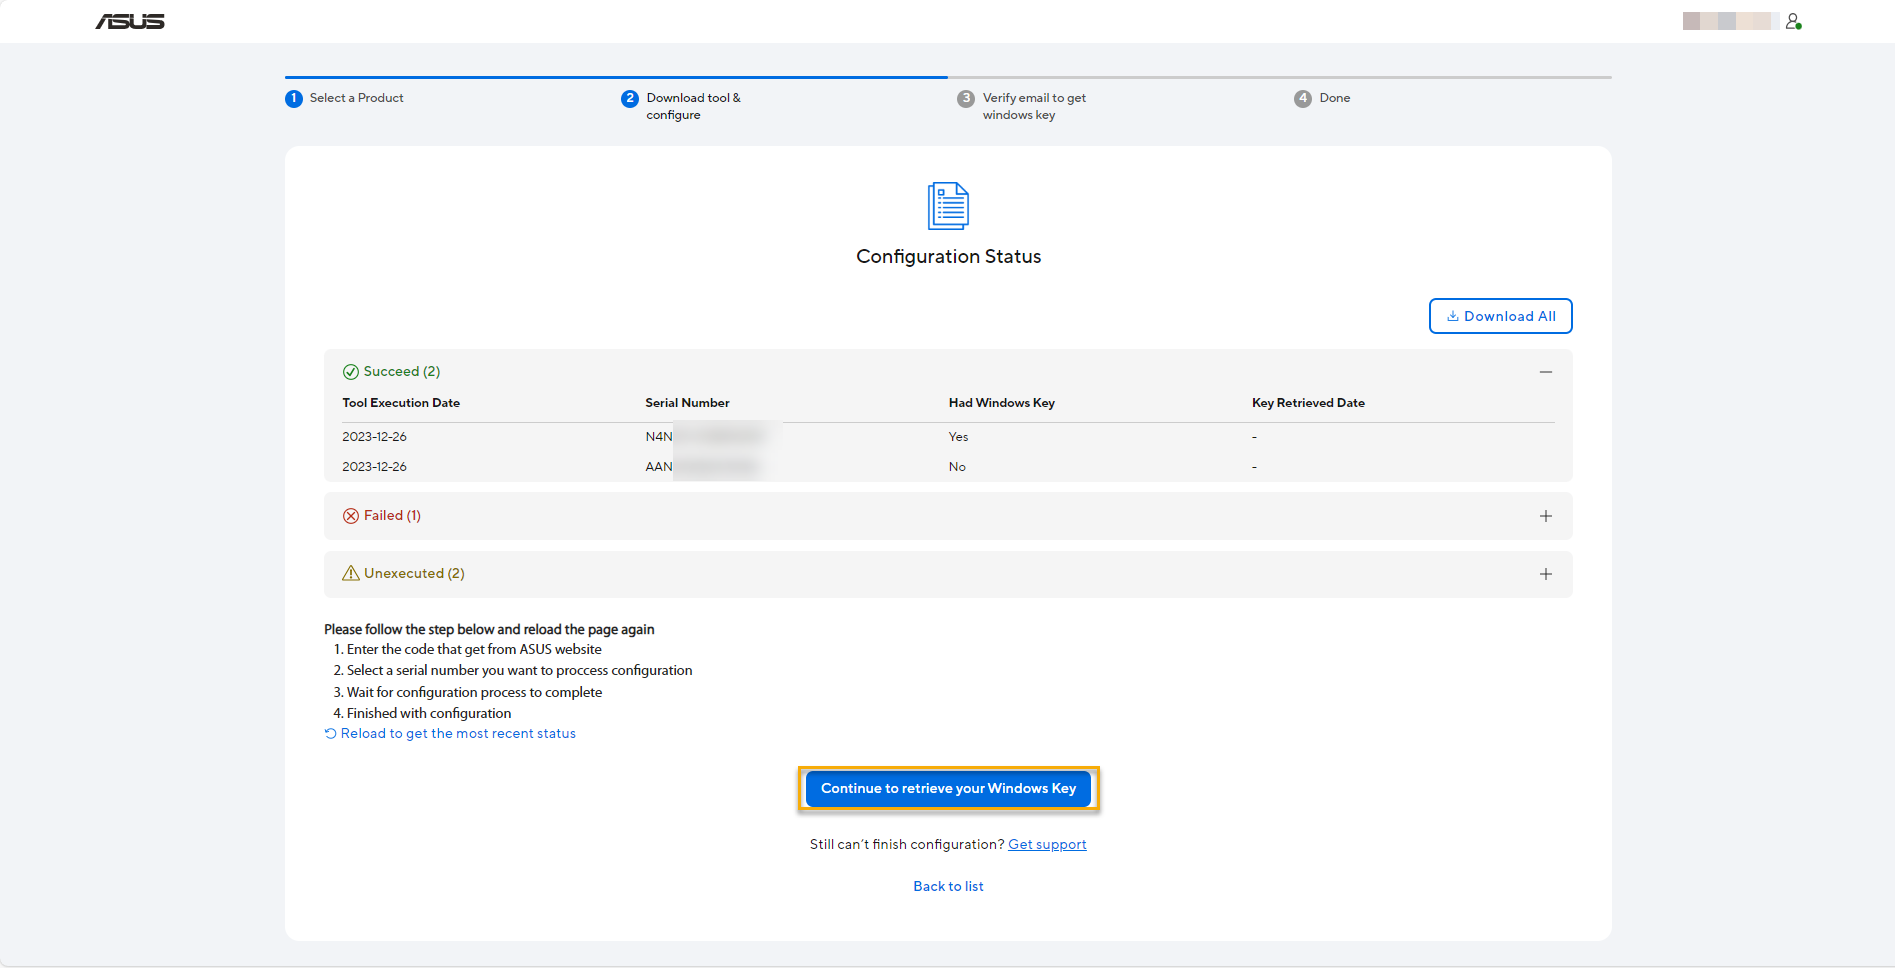
Then you will access to ASUS Self Replacement Solution website to retrieve the Windows Key with clicking [Continue to retrieve your Windows Key].
* Click [Download All] to download Excel file and confirm all succeed product SN is whether with Windows Key, and check failed or unexecuted product SN.
**Only you have one product is configuring successfully and comes with Windows OS at purchase time, then the button [Continue to retrieve your Windows Key] will display at the time.
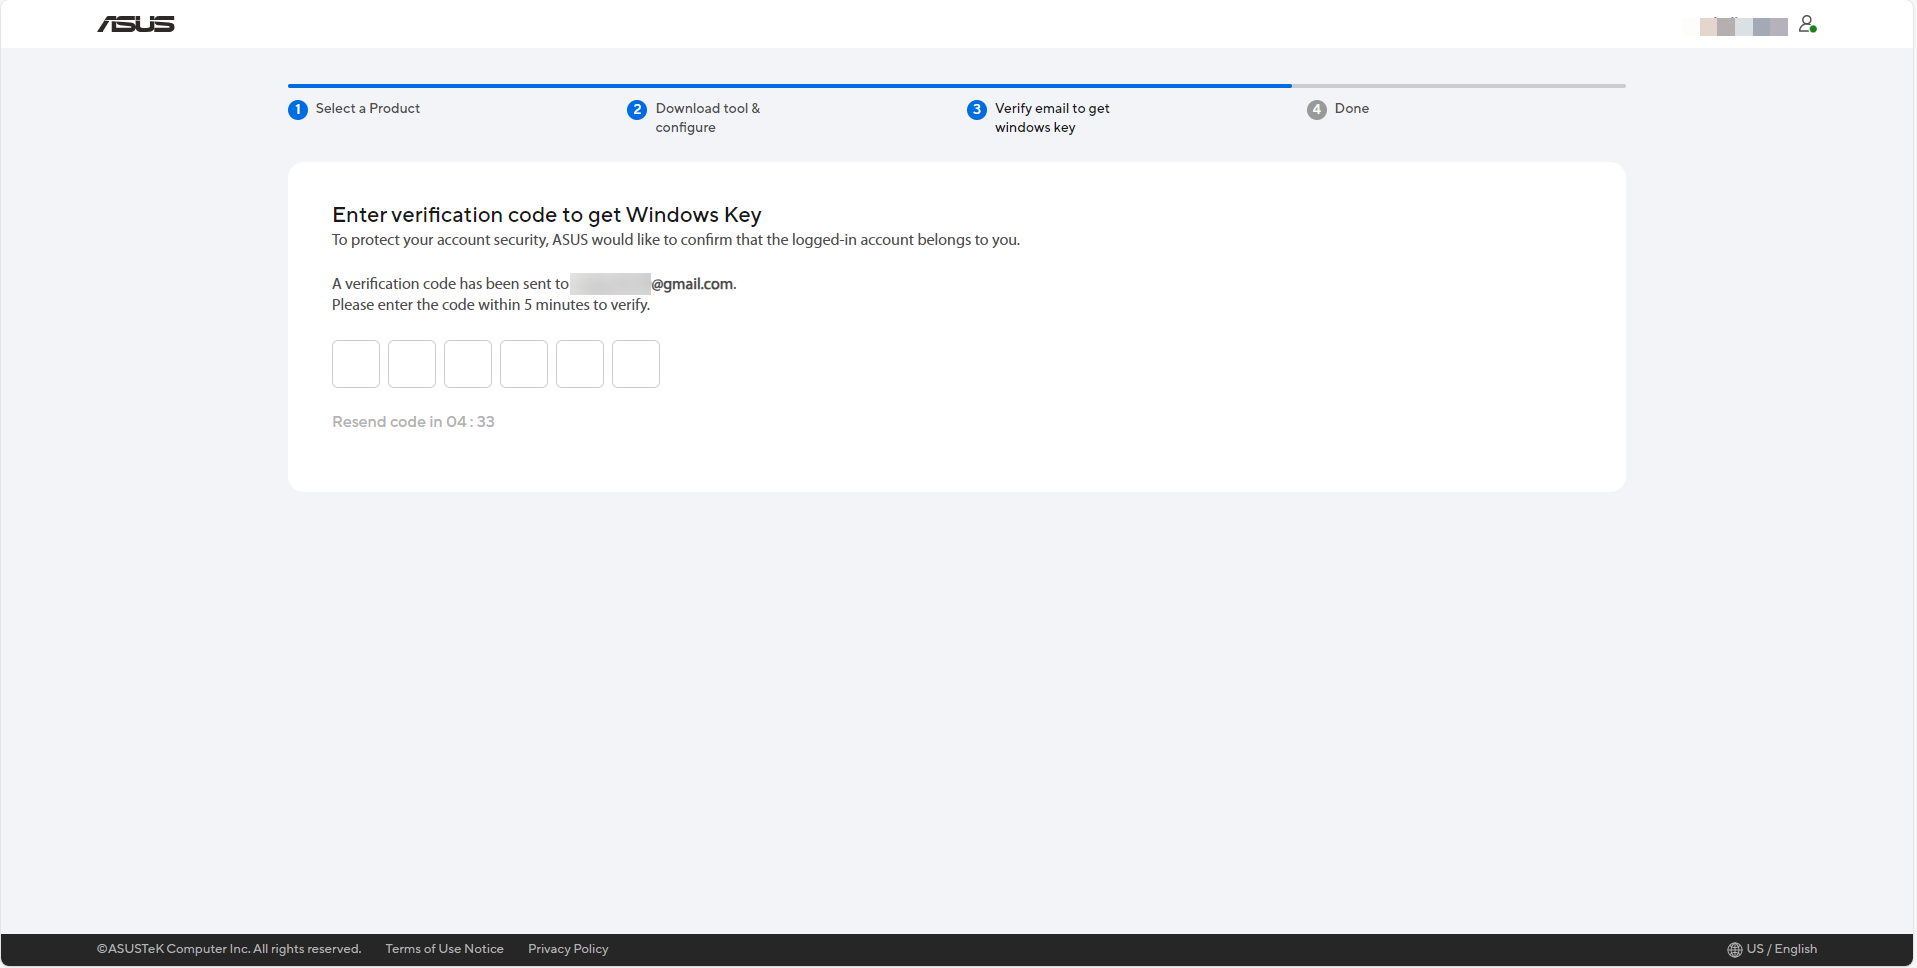
Soon, the system will send an Email to your Business Email with a verification code. Please confirm the Email and record the verification code, then enter verification code to retrieve Windows Key.
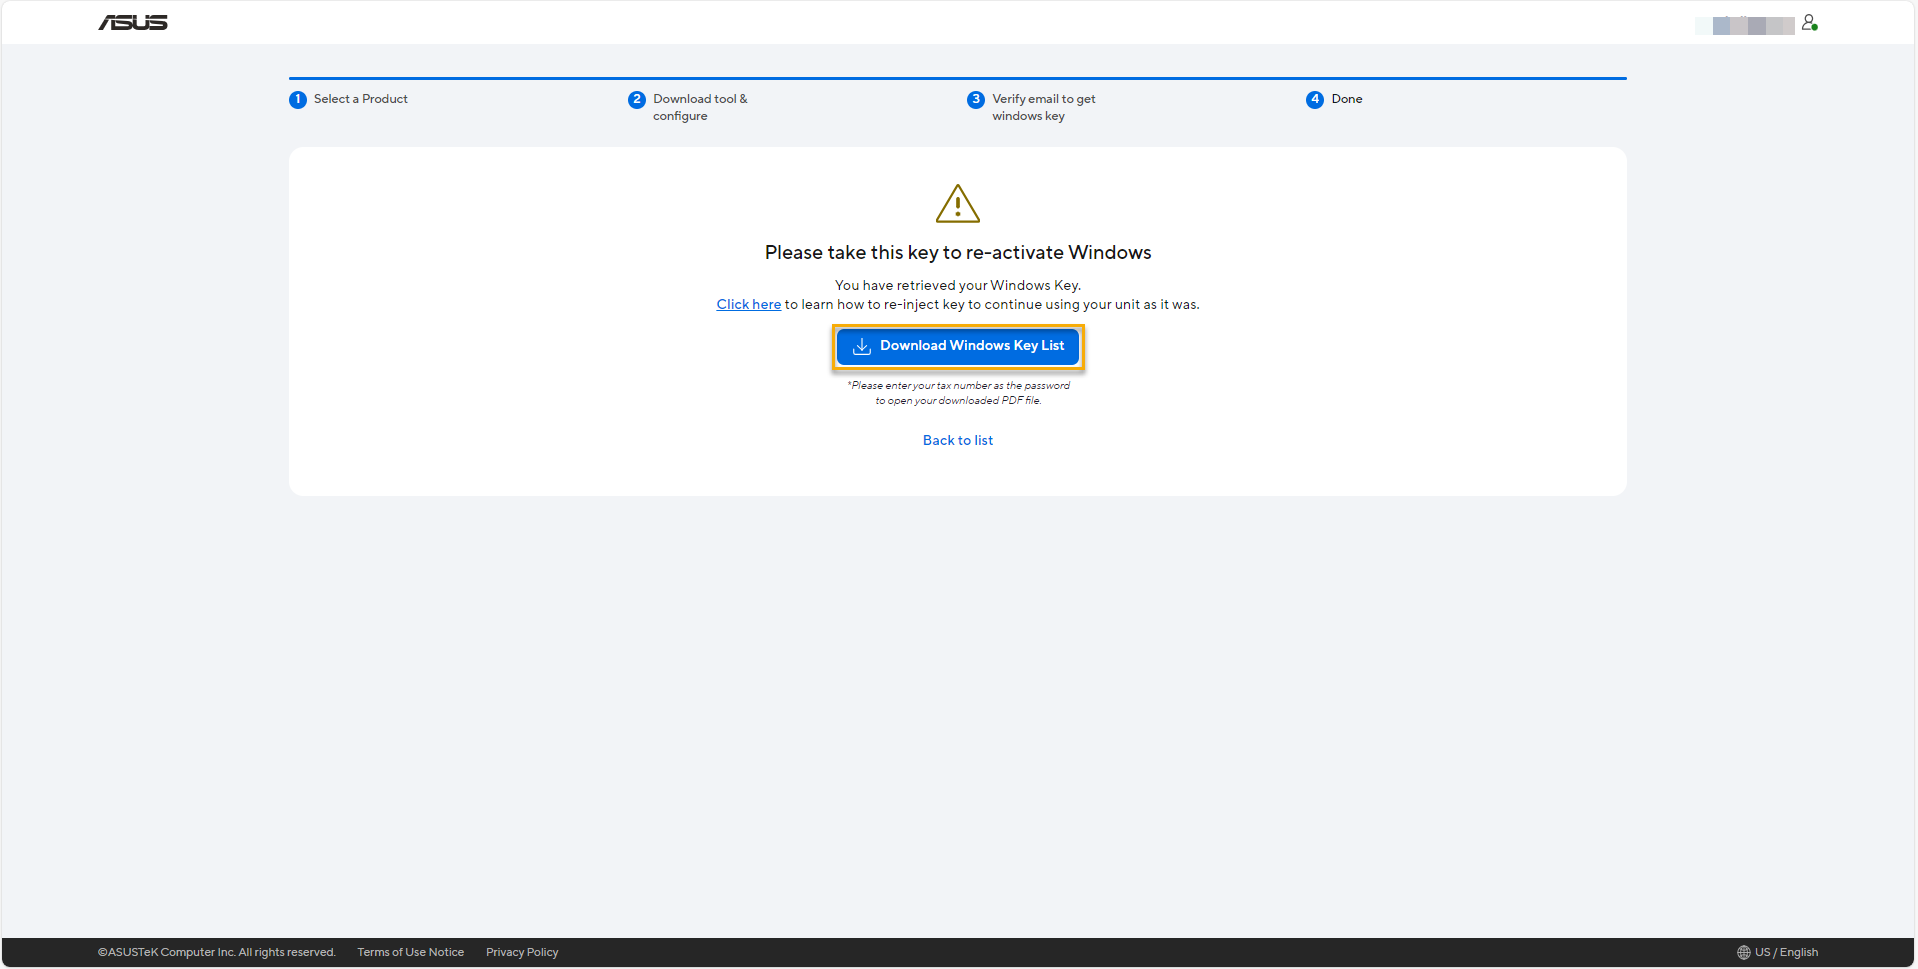
Please click [Download Windows Key List] to download a PDF file which is your product SN with Windows Key list, and then refer to Windows Activation, Retrieval, and Modification of Product Key to re-inject Windows Key to continue using unit as it was.
*Please notice that your Tax number is the password to open your download PDF file.
Important: Be sure to store Windows Key List securely. If you need to obtain it again, kindly proceed through the entire configuration process once more.
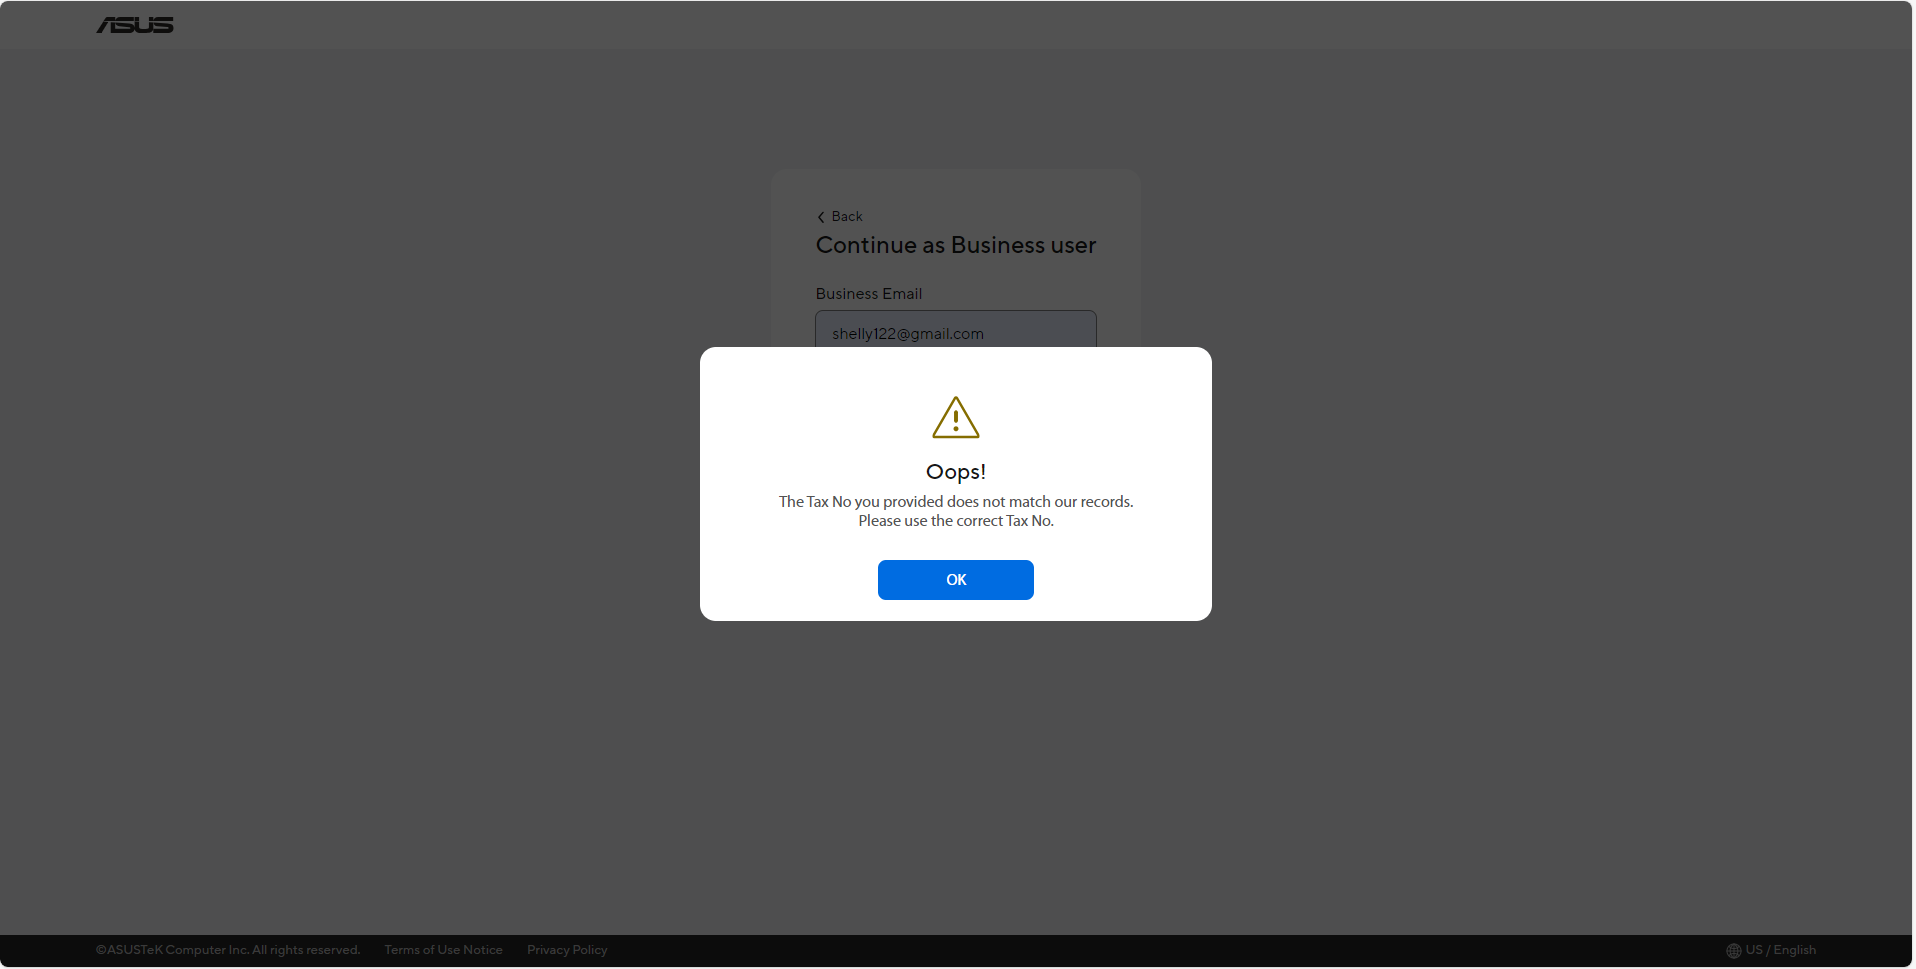
Q1: Why I receive message [The Tax No you provided does not match our records. Please use the correct Tax No] while I login to ASUS Self Replacement Solution website?
A1: For the business user, it means your Business License authentication is disapproved. Please double-check ensure you select a valid Tax number.
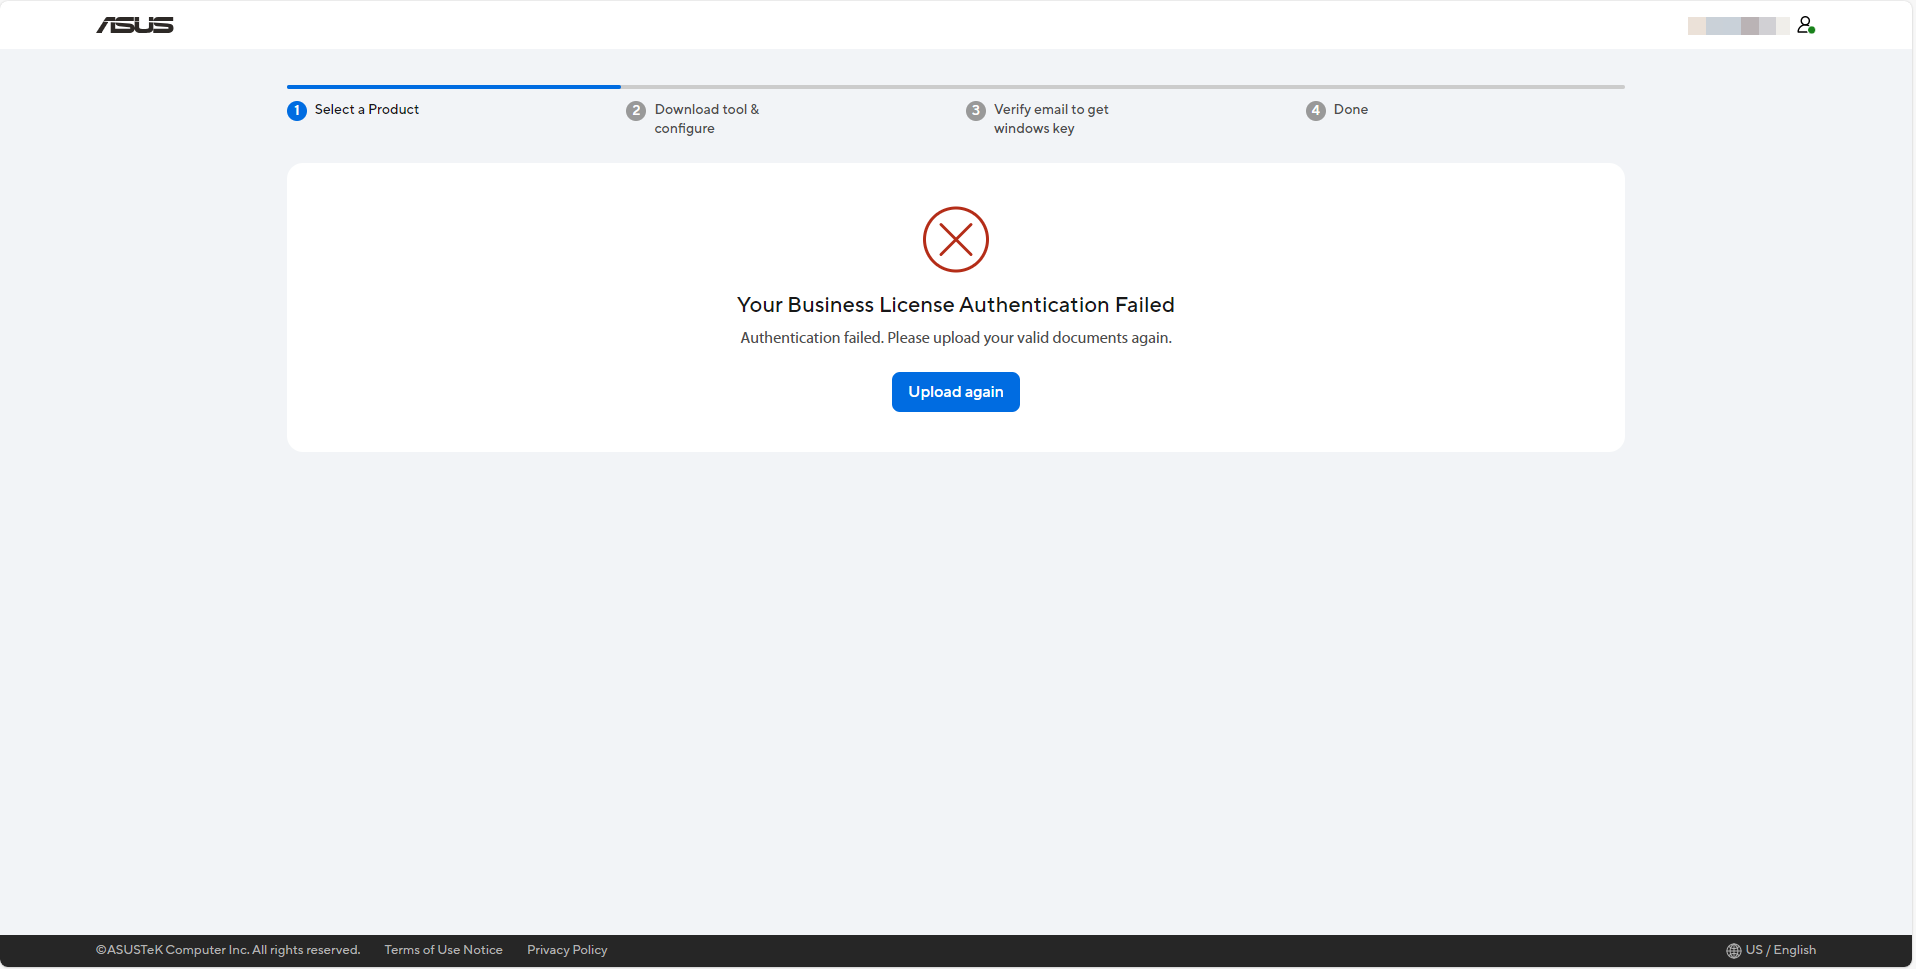
Q2: Why I receive message [Your Business License authentication Failed] while I login to ASUS Self Replacement Solution website?
A2: For the business user, it means your Business License authentication is disapproved. Please double-check ensure you have provided a valid business license.
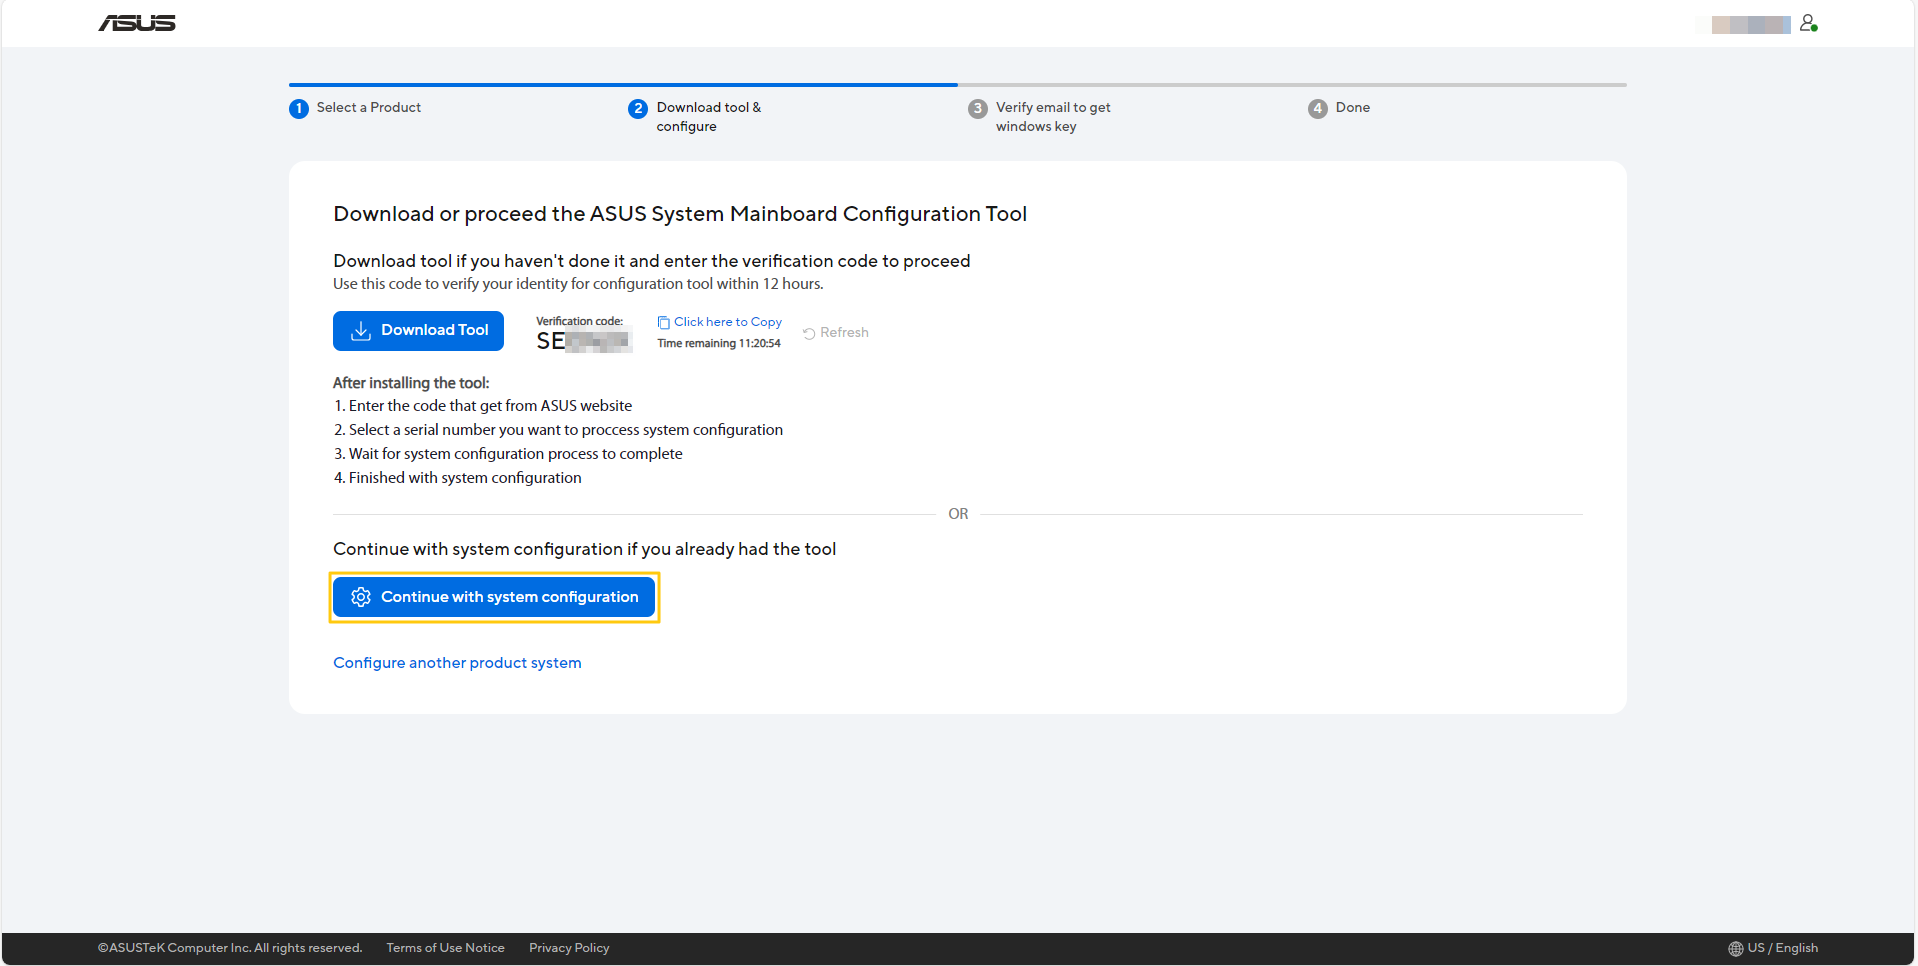
Q3: How can I confirm my device configuration status?
A3: You can click [Continue with system configuration] to confirm your device configuration status in download tool & configure page.
Q4: Why I can not see the [Continue to retrieve your Windows Key] button to retrieve the Windows Key after configuring completely?
A4: You have to meet all condition below, and then to see [Continue to retrieve your Windows Key] button.
* You have one product is configuring successfully at least.
* The product must come with Windows OS at purchase time.
* The product did not retrieve Windows Key before.
Q5: Do I need to connect internet while ASUS System Mainboard Configuration Tool is running?
A5: Yes, you have to connect the internet while tool is running.
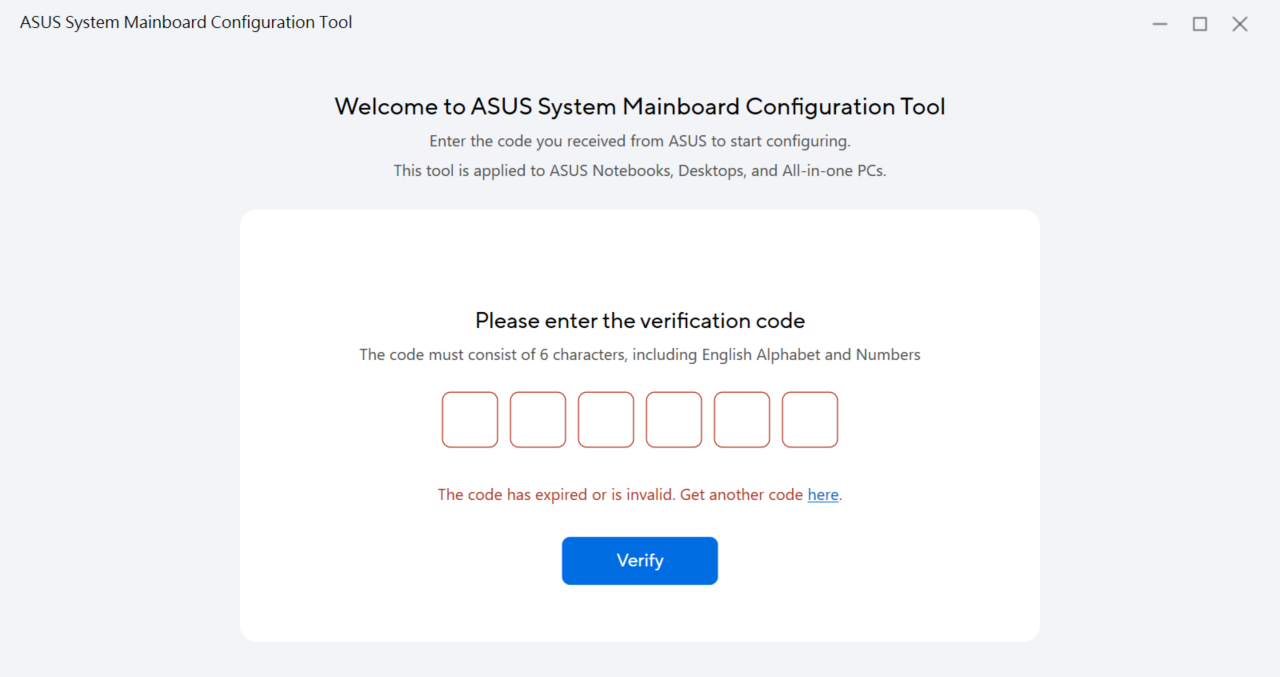
Q6: What can I do when I receive message [The code has expired or is invalid. Get another code Here]?
A6: You may use an invalid verification code, please confirm your verification code again. If your verification code has expired, you can click Here to get another one.
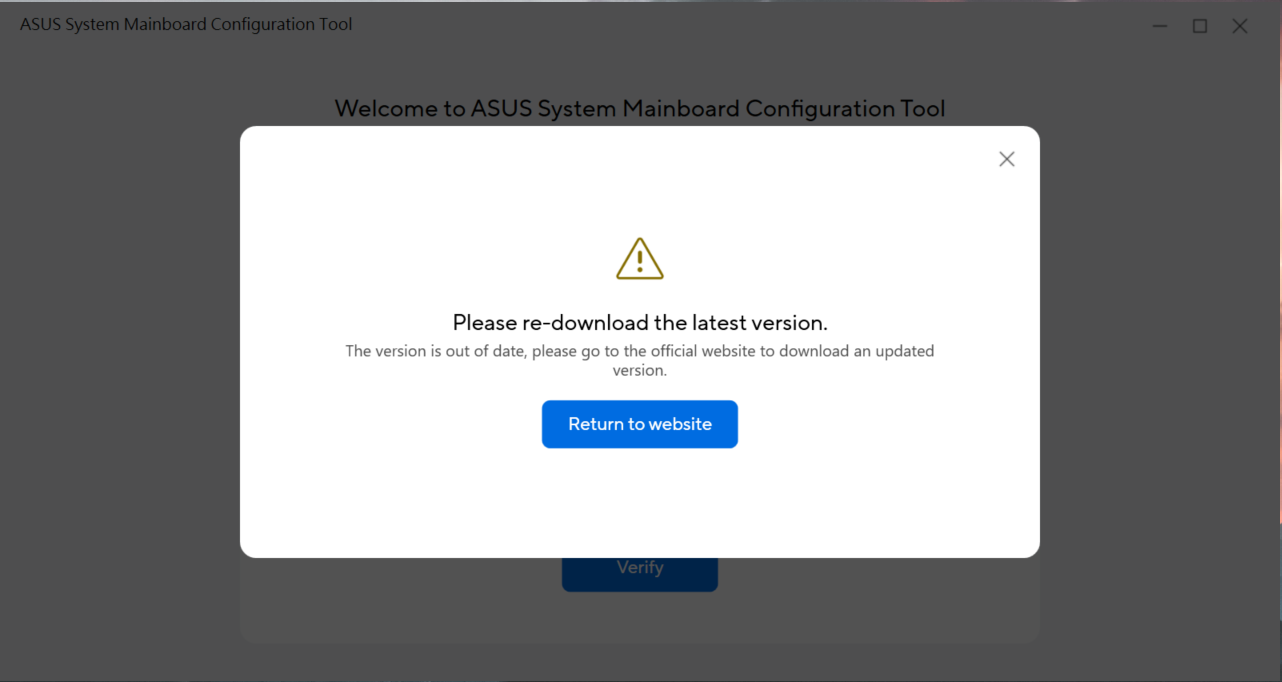
Q7: What should I do when I receive message [Please re-download the latest version]?
A7: It means your ASUS System Mainboard Configuration Tool is out of date, please return to the official website to download an updated version.
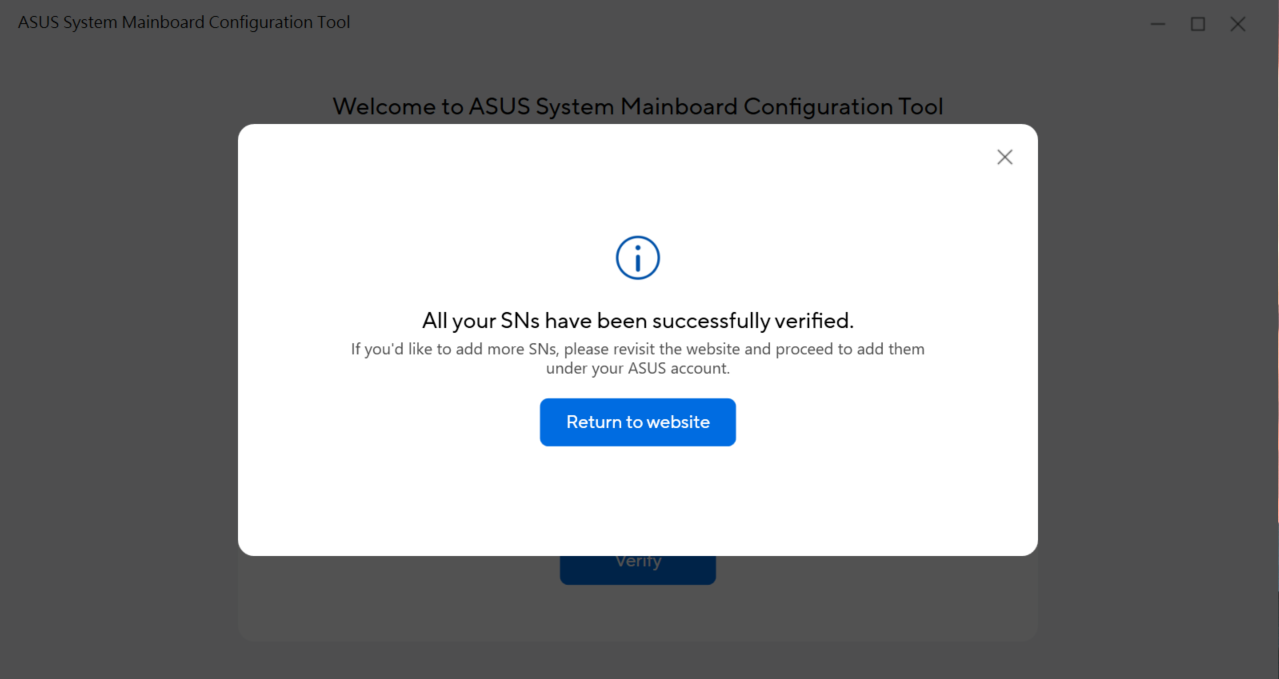
Q8: What does it mean for message [All your SNs have been successfully verified]?
A8: It means you are completed for all your applied models. If you would like to add more model serial number, please revisit the website and proceed to add them under your ASUS account.
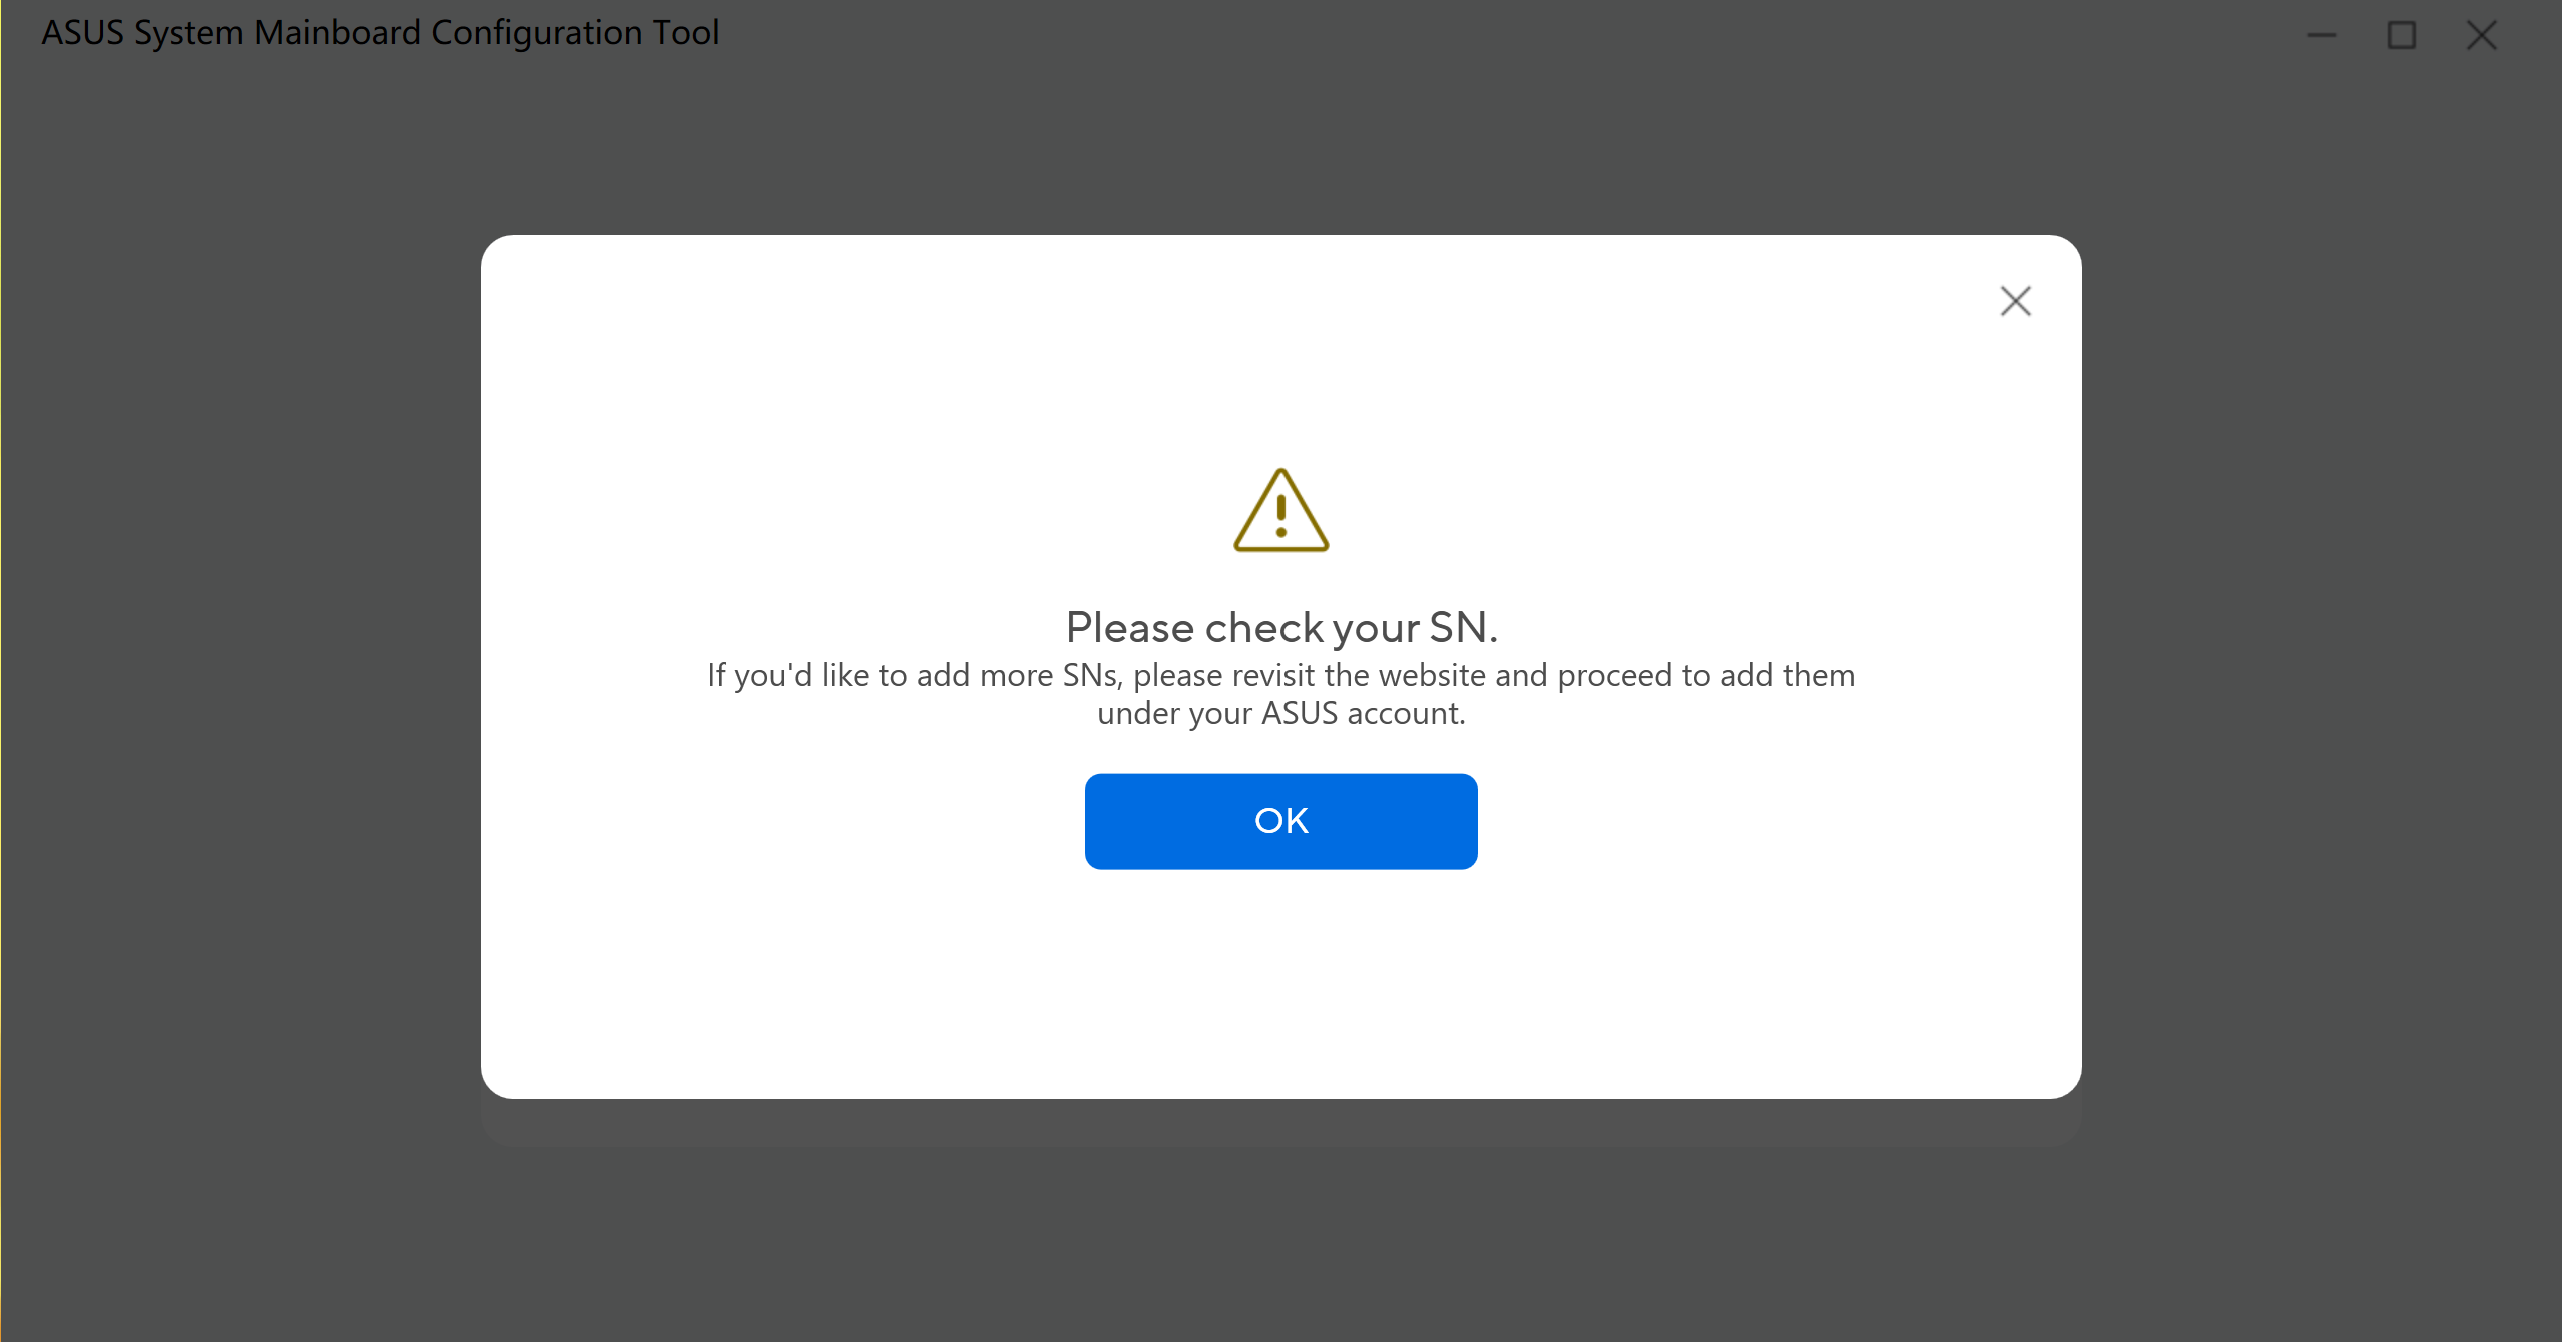
Q9: What does it mean for message [Please check your SN]?
A9: You may key in a wrong model serial number. Please check your model serial number again for tool configuration.
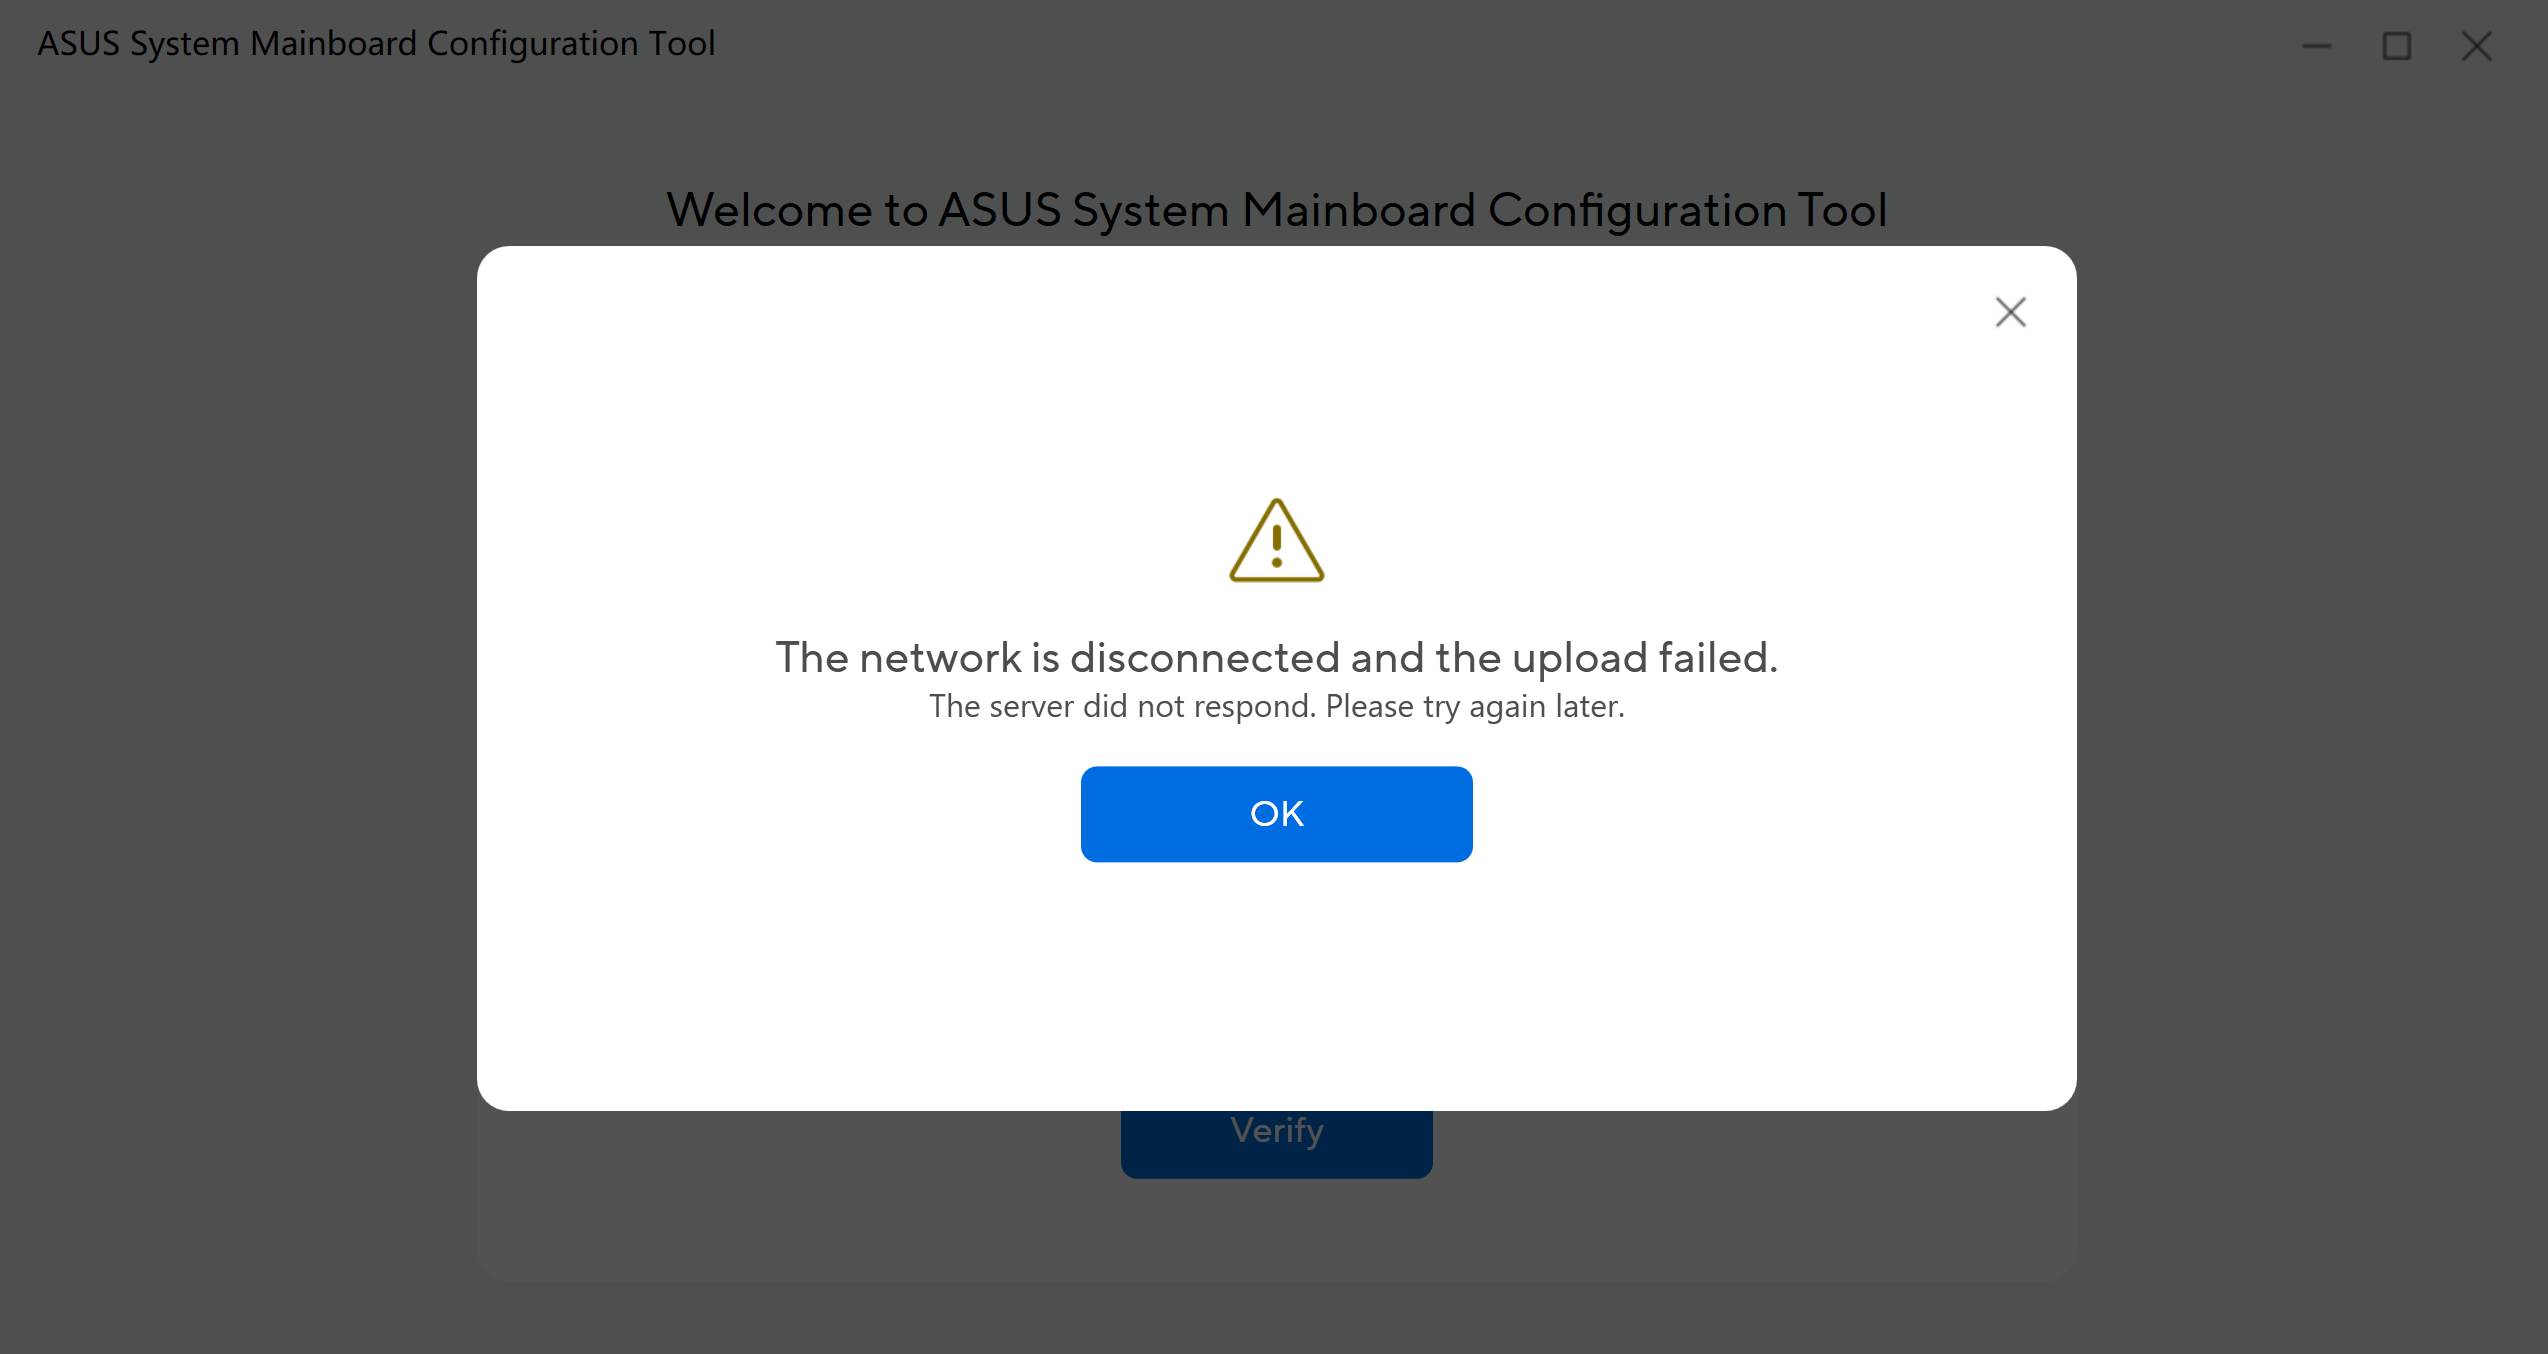
Q10: What should I do when I receive message [The network is disconnected and the upload failed]?
A10: It means the server did not respond, please check your internet connection and try again later.
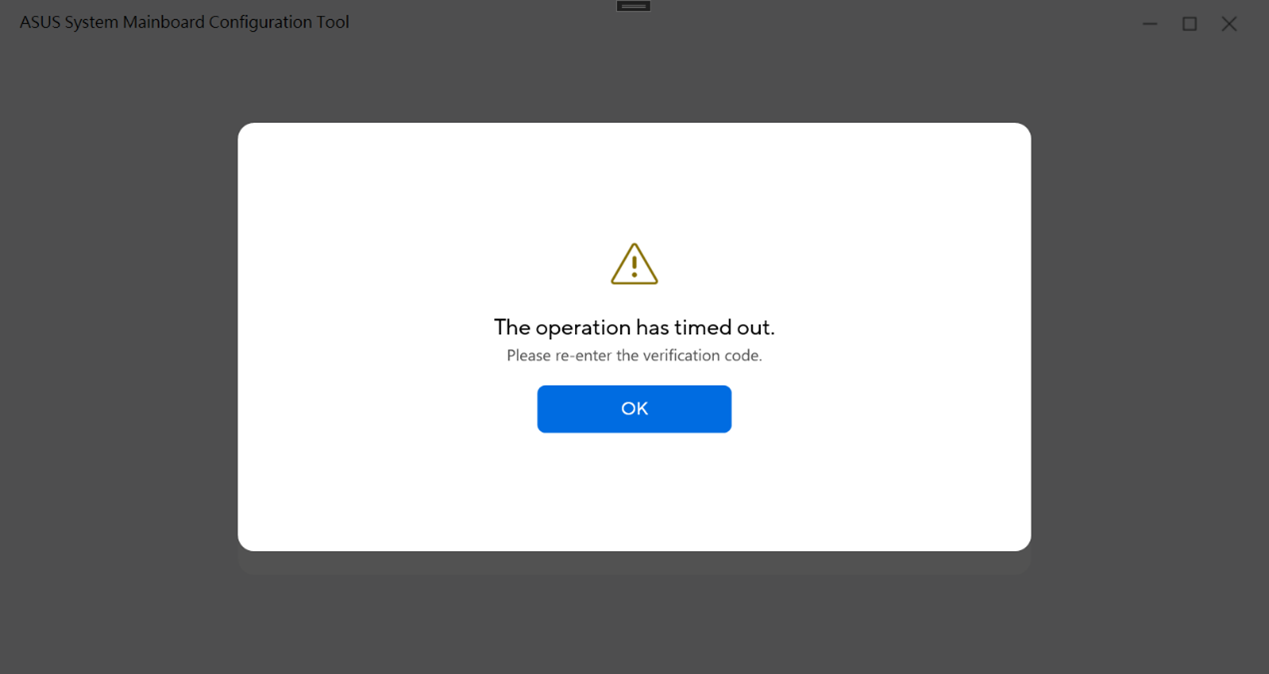
Q11: What should I do when I receive message [The operation has timed out]?
A11: It means your tool operating time is too long, please re-enter the verification code to launch tool and try again.
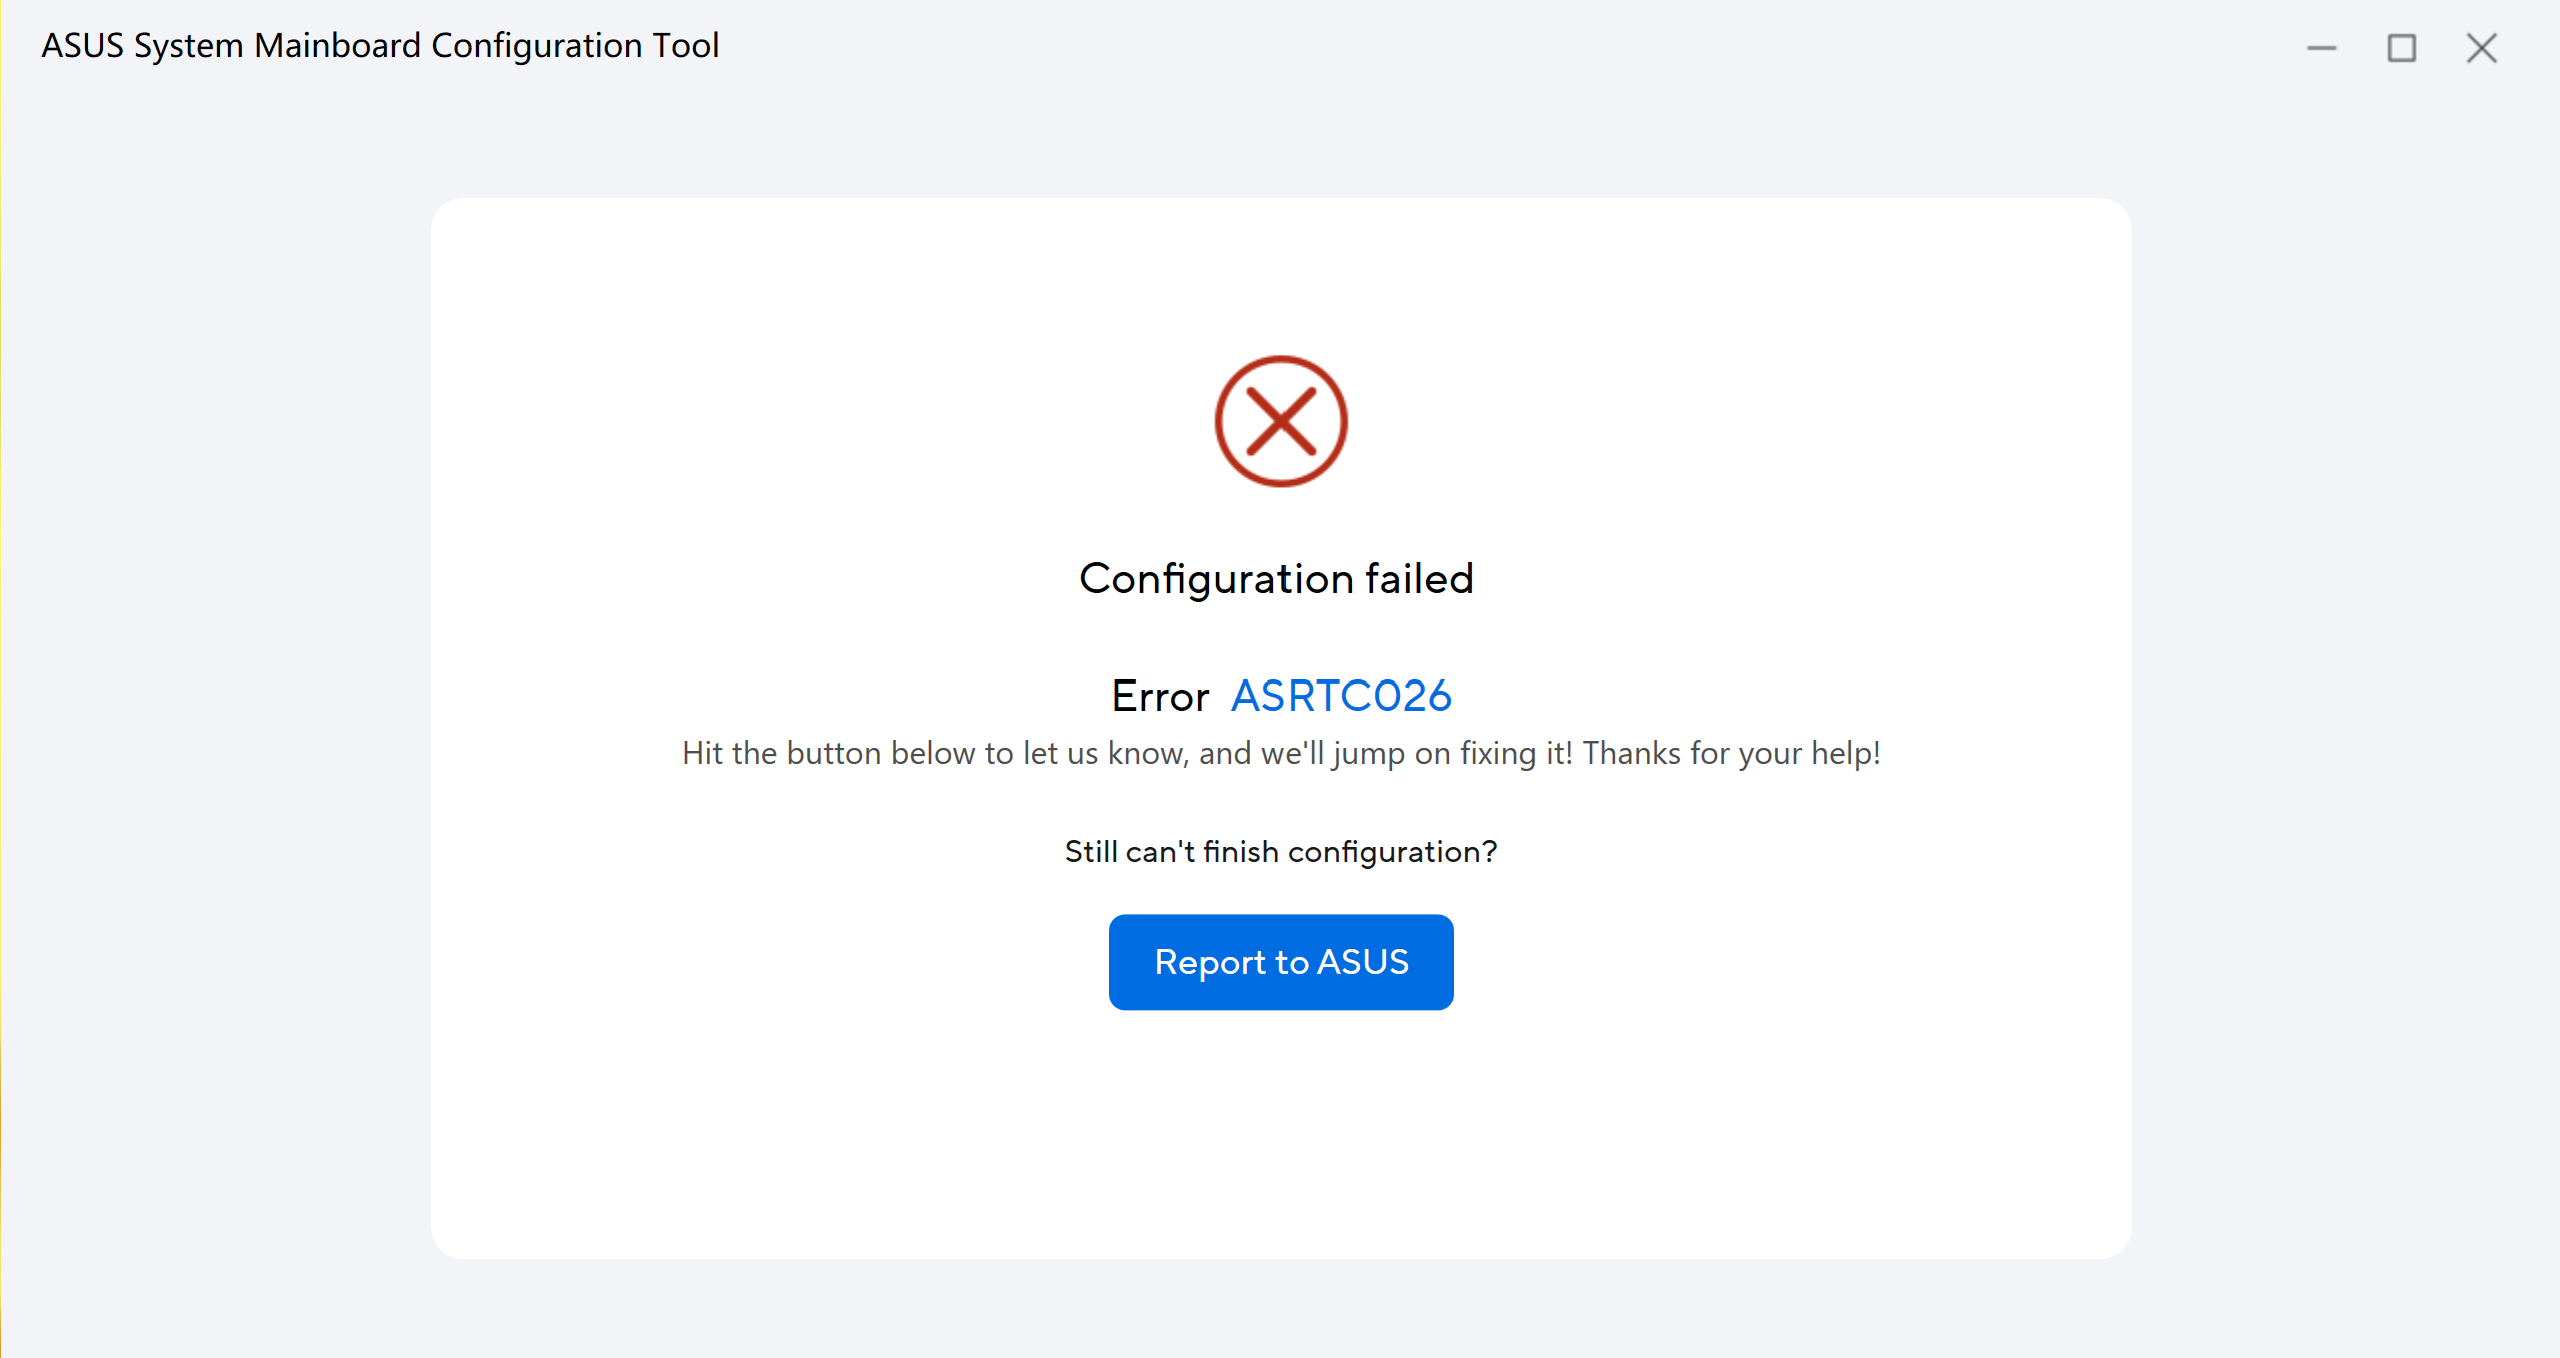
Q12: How can I do when ASUS System Mainboard Configuration Tool get Configuration Failed?
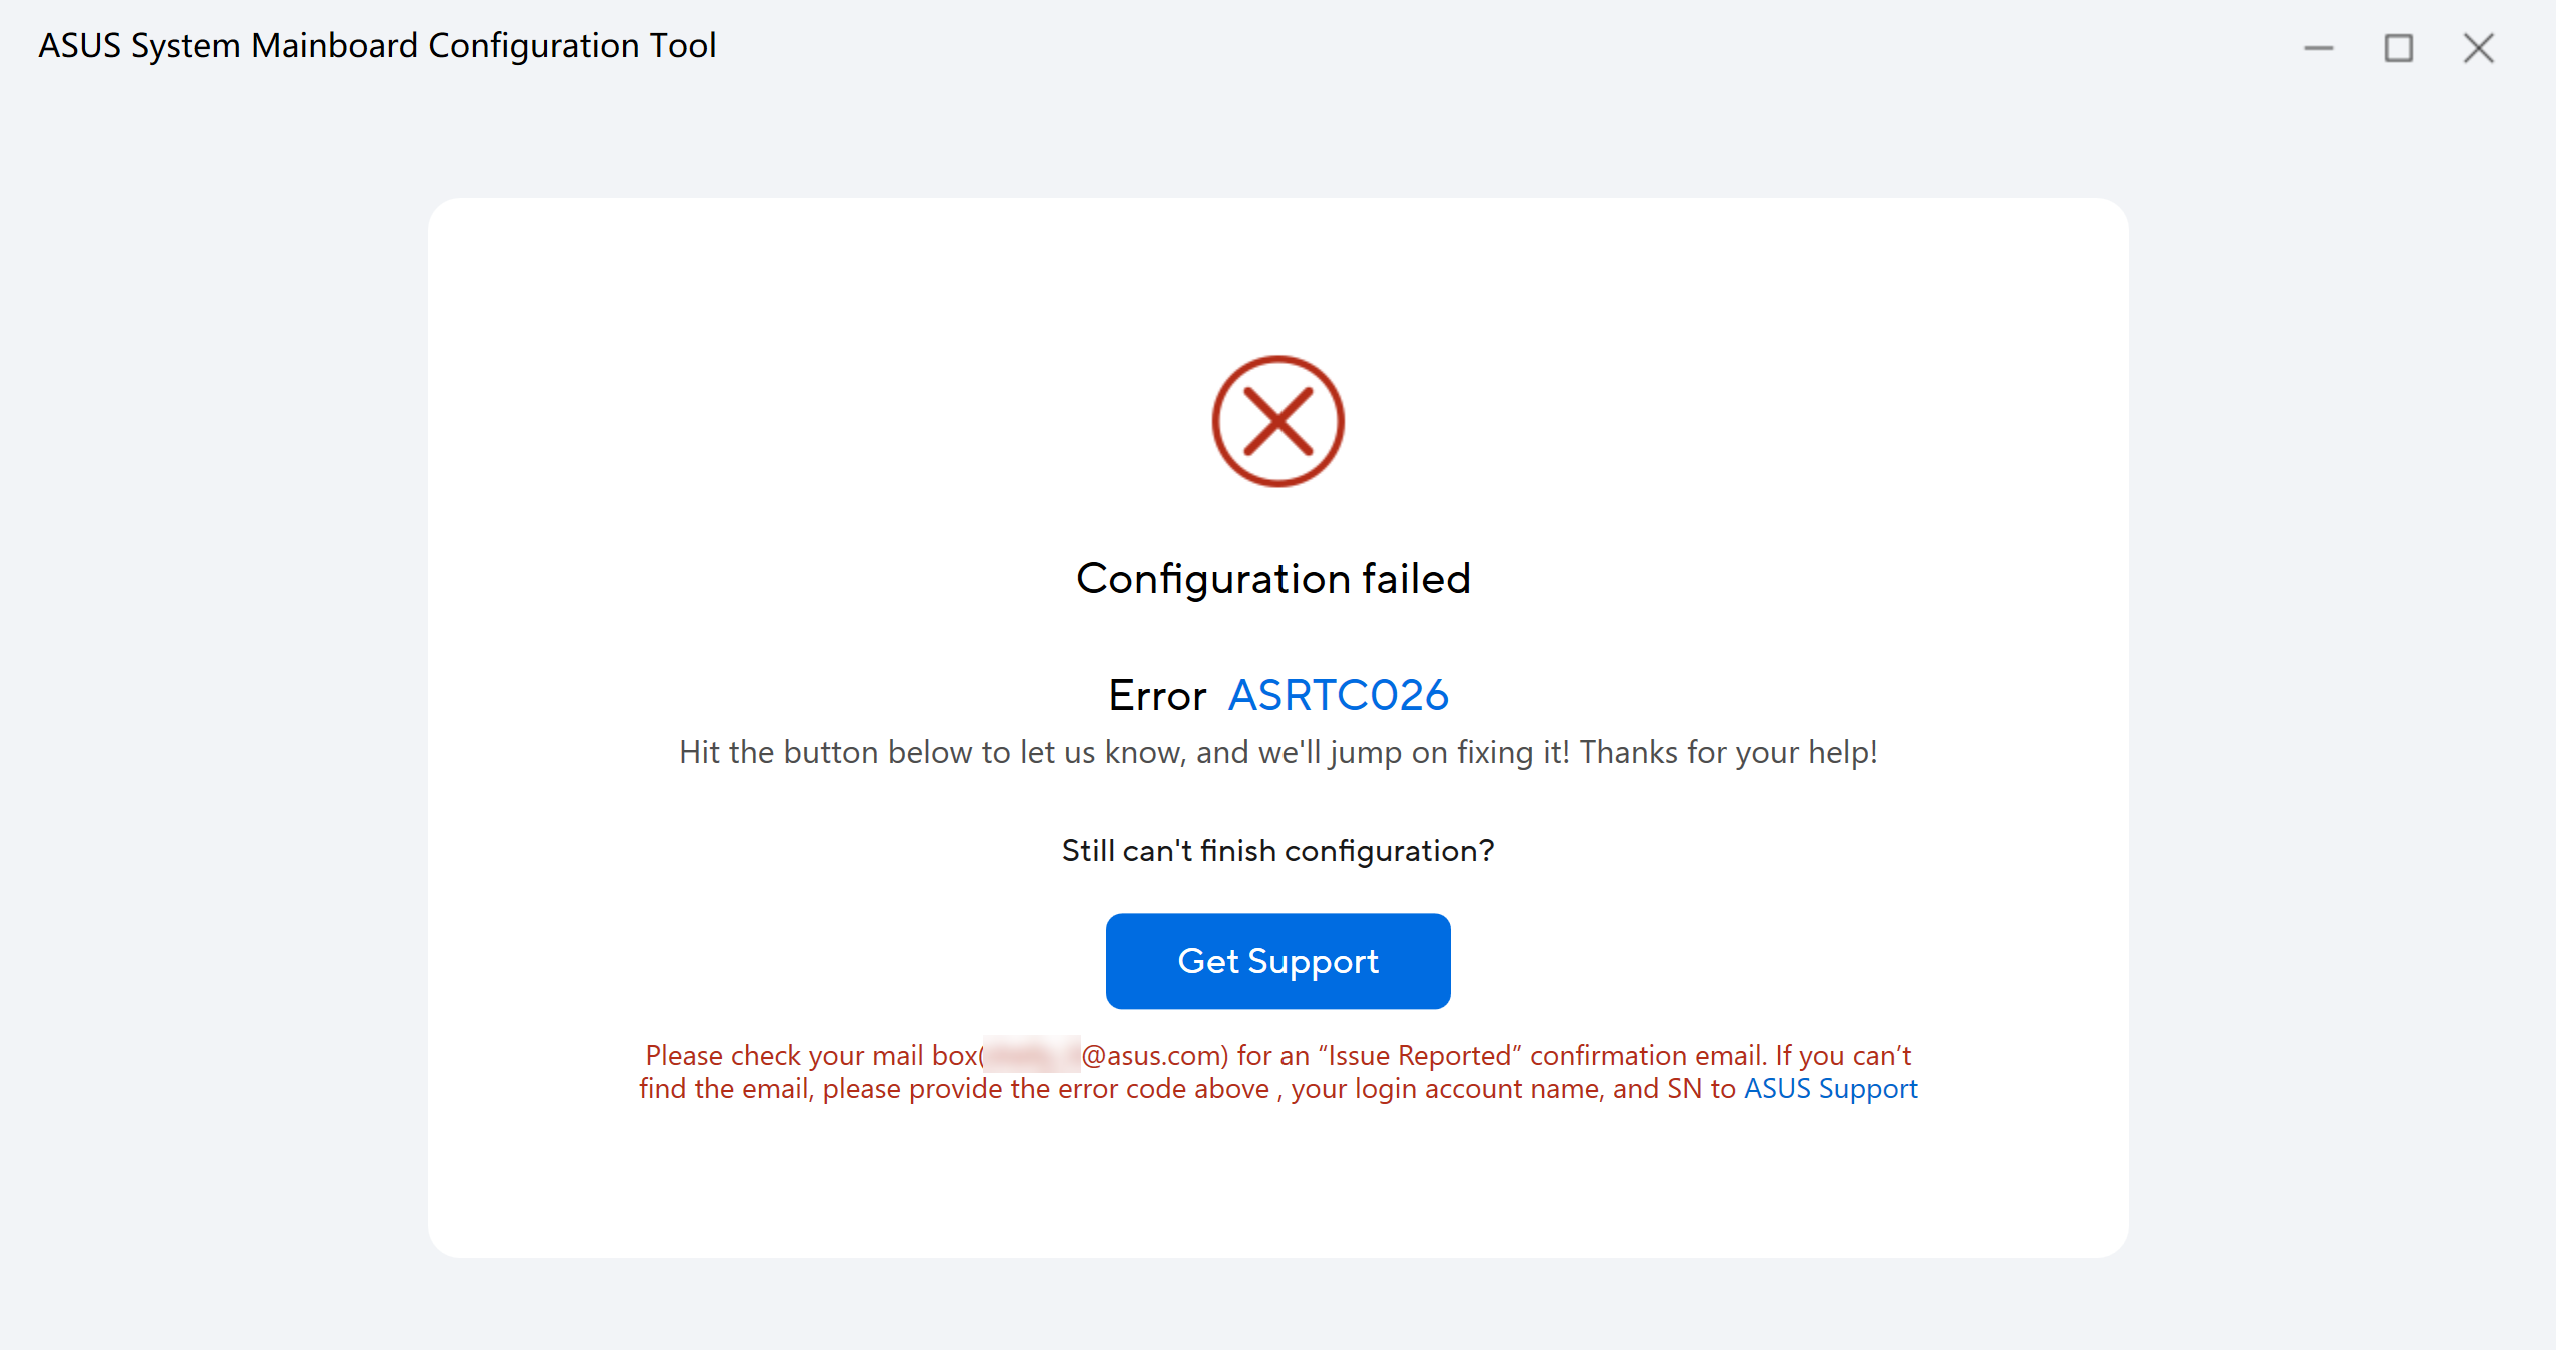
A12: Once tool get configuration fail, you can click [Report to ASUS], and ASUS service center will mail an [Issue Reported] confirmation email to you to assist.
Moreover, you can click [Get Support]. If you can’t receive the email, please provide configuration fail error code, your login account name, and product SN to ASUS Support.
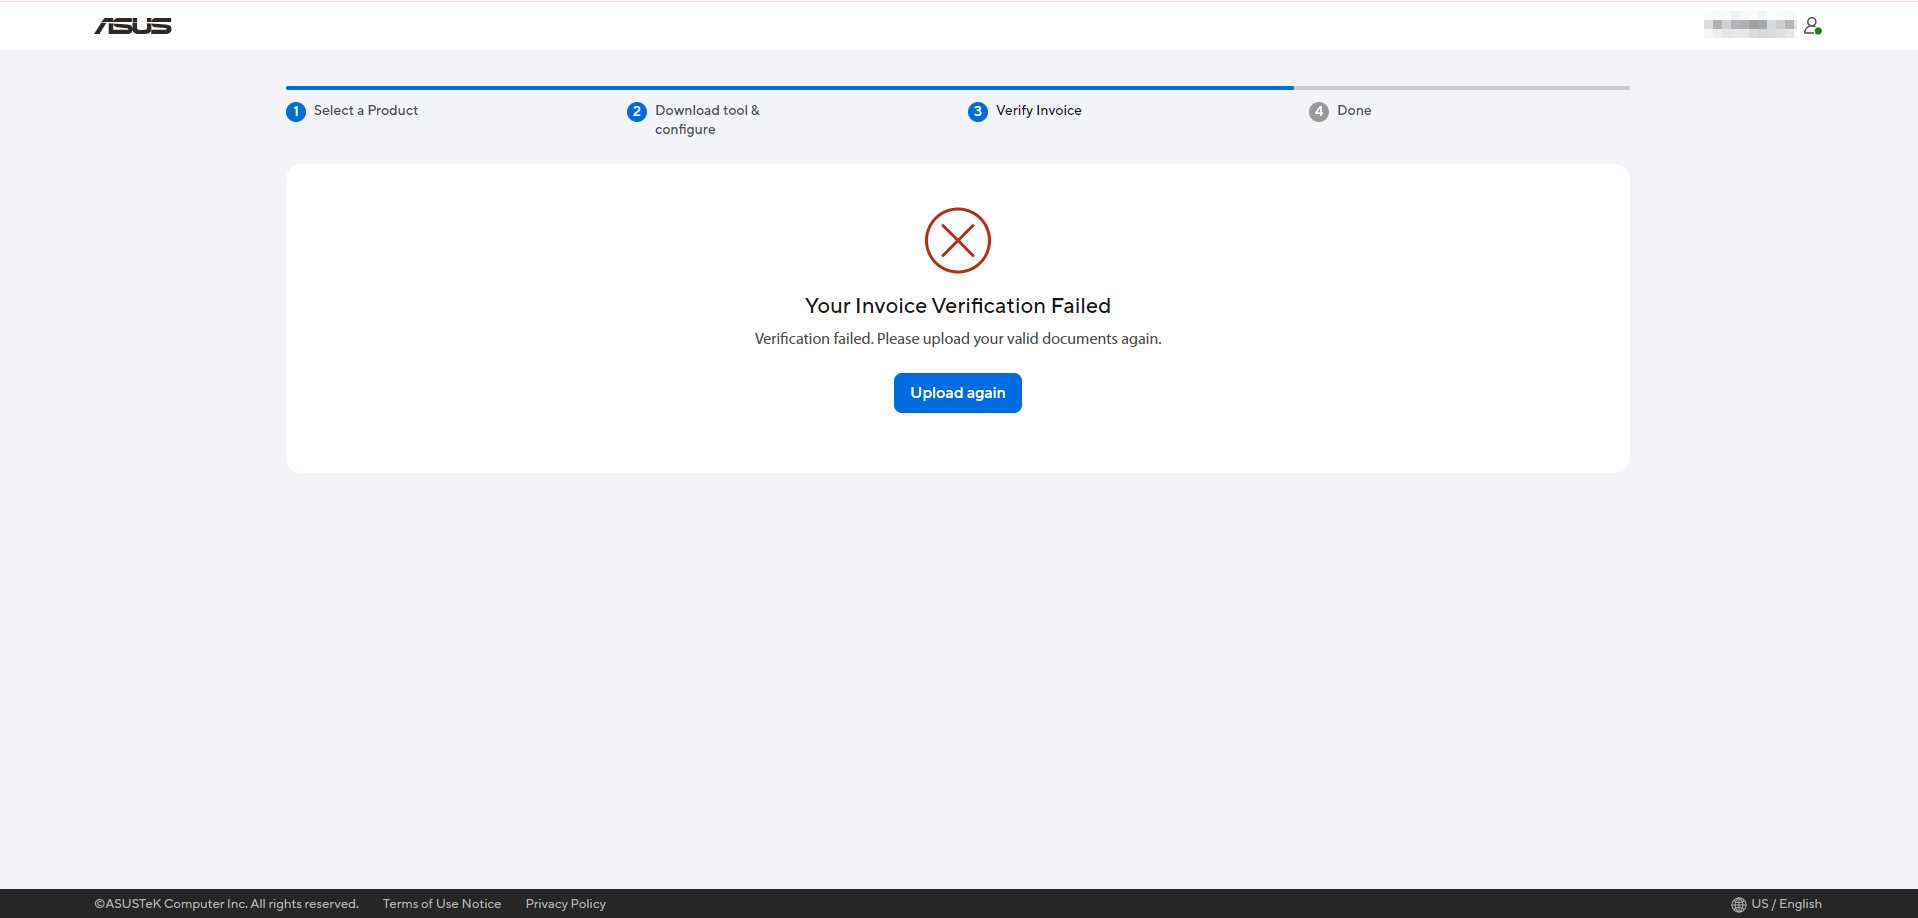
Q13: For personal user, if your invoice verification fails, it need to be upload again, but what is possible reason?
A13:
* Your Invoice doesn't issue in United States.
* The Mainboard quantity in invoice doesn't match with your applied device quantity.
* The Mainboard type in invoice is not matched with your device model.
* Your invoice is fake (Not invoice).
